Multiple authors
Repositories on os.mbed.com are not limited to one author for each repository. Instead, several authors may have the right to publish to the same repository, allowing them to collaborate on a project. Other users, who may be interested in using the project's code but are not concerned with the individual authors, can interact with a single repository.
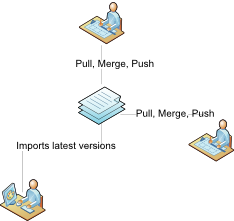 Developers can use code that multiple authors created
Adding a new author to your repository
To grant permission for another author to commit to your repository, use the Repository Administration link in your repository on the Arm Mbed website.
<span class="images"><span>Allowing other users to add to your repository</span></span>
Day to day usage
The key difference between single-author and multiple-author workflows is that multiple-author workflows require that the changes from one author be merged with those of another author when both authors simultaneously commit to a single parent revision.
The following are some common operations you will need to do day to day. You won't necessarily need to do all of them, and not necessarily in the order shown.
Pulling from the public repository
When there are changes that exist on the public repository but not in your workspace repository, we call them "incoming" changes. The Revisions panel tells you when and what incoming changes are available.
To bring the changes into your own workspace repository, click the Update button in the Revisions panel for the relevant program or library:
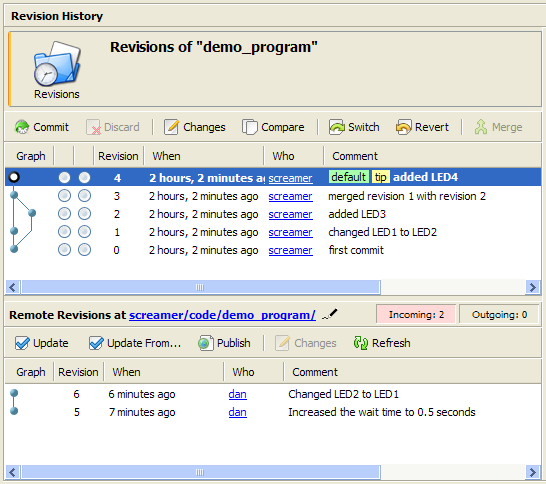 Updating your private workspace with changes from the public repository
Merging your changes (if necessary)
If you have not made any commits or changes while your co-author has been working, then no merging will be necessary.
However, if two people have worked at the same time on a program or library, it will be necessary to merge or combine the changes.
When you pull the changes into your workspace, you will see something like this:
 Viewing branches with merge conflicts
The Revisions panel shows one person's changes diverging from another person's changes. This is called a branch.
To join the two branches, click the Merge button. You may need to resolve conflicts, as explained below.
Resolve merge conflicts (if needed)
The merge function combines the changes from one or more branches into a single branch.
However, if two or more people have edited the same line of the same file, a merge conflict occurs. That means Mercurial does not know whose changes to keep. It's up to you to decide how the file should really look. This is called resolving conflicts.
When a merge conflict occurs, you get a warning. Also, all the files that have conflicts in them are highlighted:
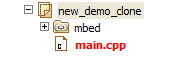 A highlighted file has a merge conflict
Open the file(s) in conflict and look for something like this:
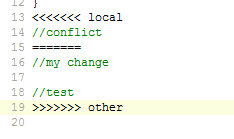 Identifying the lines in the source code that have conflicts
Wherever there is a conflict, Mercurial annotates the source code with markings showing your changes and other people's changes. You then have to choose one person's version, or blend the two. When you have finished, remove the <<<<, >>> and === marks, and save the file.
The first save of a file after being opened in a conflicted state marks it as resolved and removes the red highlight.
Commit the merge
After you merge the code, you have to commit it. This makes the joining of the two branches permanent. Once you commit, your Revisions pane looks something like this:
 Viewing merged branches in the Revisions pane
You can see the two branches coming back together at "merged revision 1 with revision 2".
Pushing back to the repository
Once all branches and conflicts are resolved and joined back into one, you would typically retest your program or library. When all tests pass, you can push your changes and the merged result back to the public repository.
To push your changes, click the Publish button.