Dual CANbus monitor and instrumentation cluster. Presently tuned for the Nissan Leaf EV.

Dependencies:   SPI_TFTx2_ILI9341 TFT_fonts TOUCH_TFTx2_ILI9341 mbed

Fork of CANary_corrupt by Tick Tock

After adding the LPC1768 platform, import as a program and do not select the "update to latest revision" box

User Guide

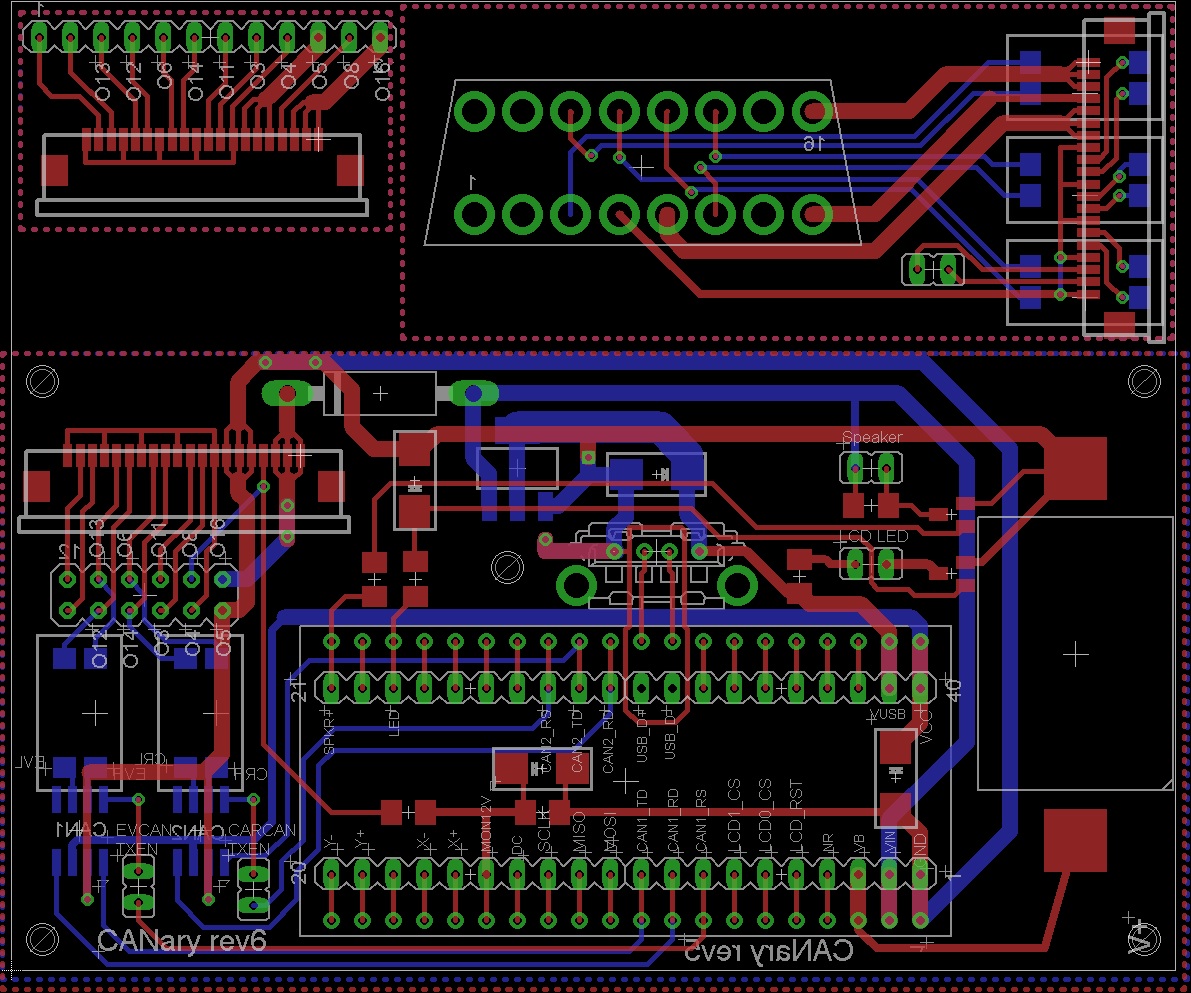
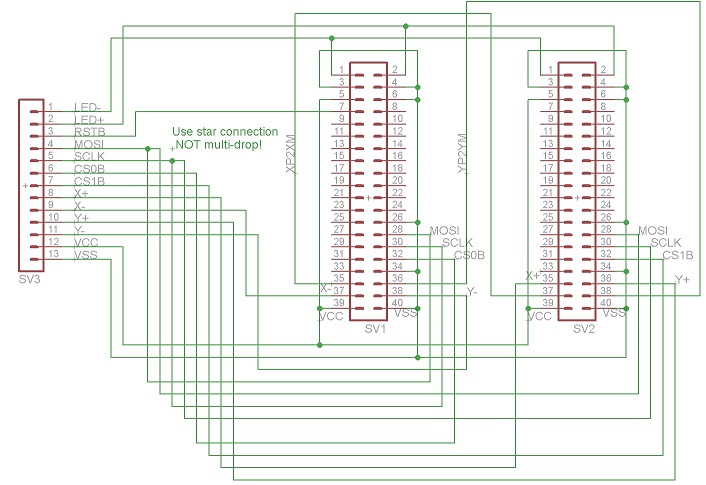
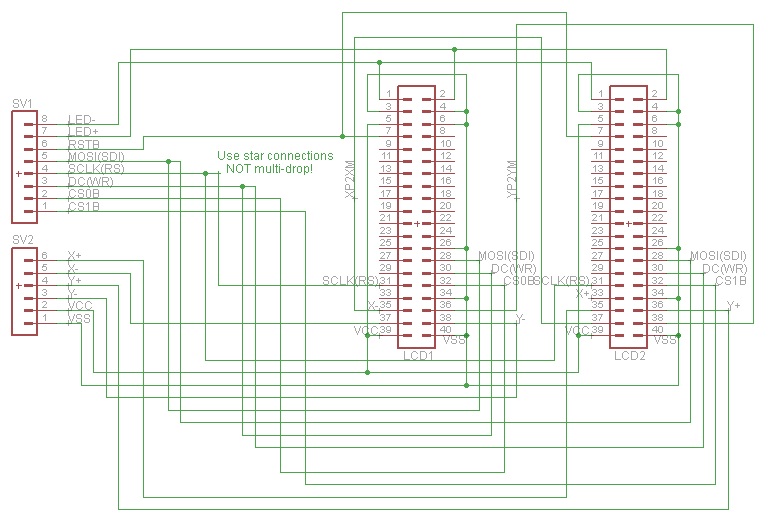
Eagle Schematic and Board design

/media/uploads/TickTock/canaryr6.zip
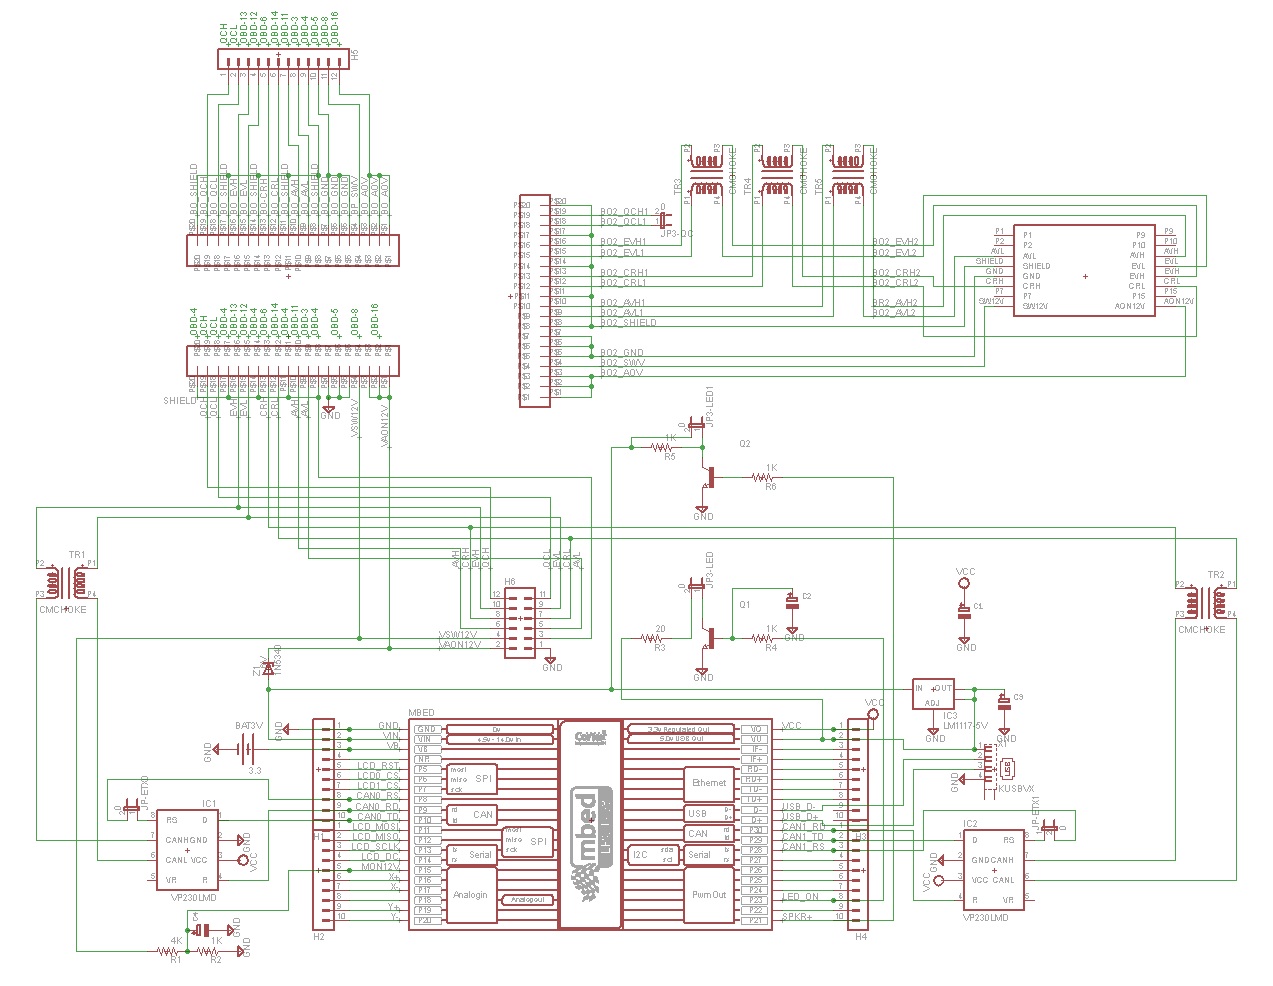
/media/uploads/TickTock/canary_sch.jpg

/media/uploads/TickTock/canaryr6brd.jpg

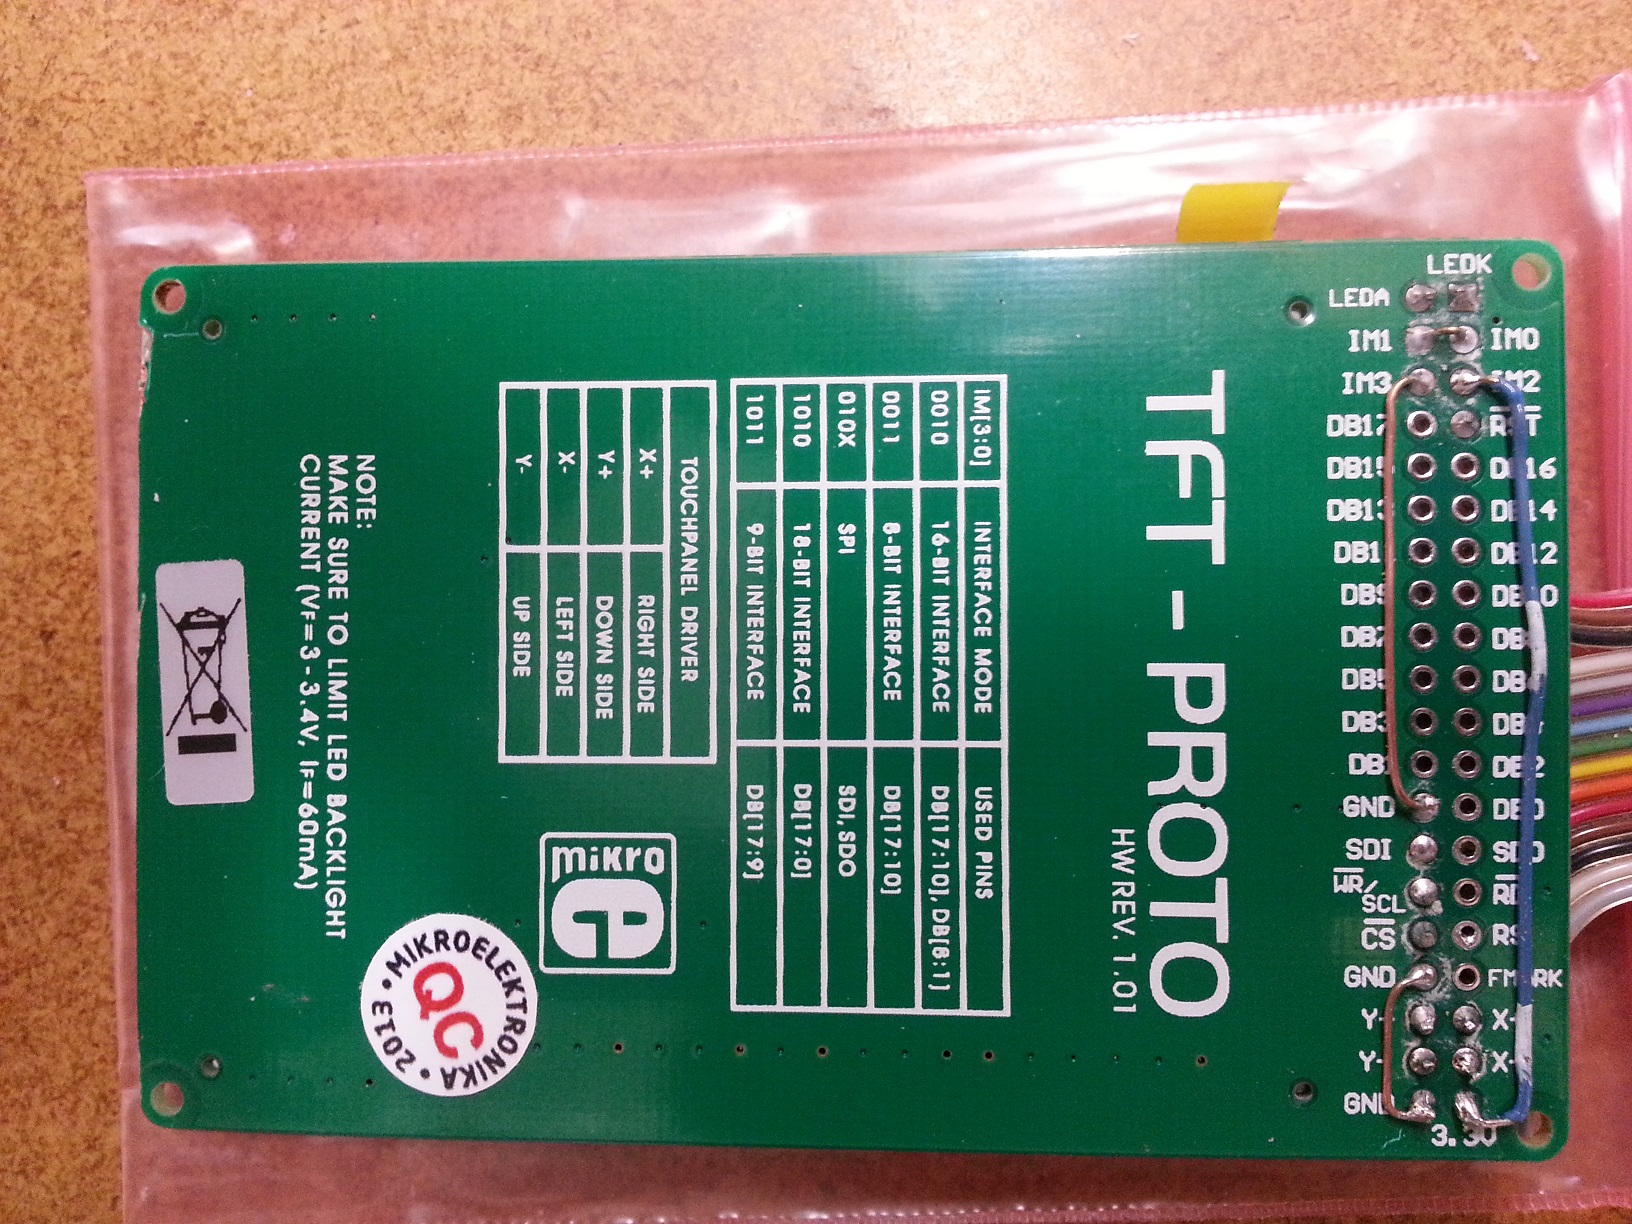
For LCD Rev 1.01:

/media/uploads/TickTock/lcdsch.jpg

For VCD Rev 2.00:

/media/uploads/TickTock/lcdr2.jpg

Parts List

qtyinstancepart #packagesupplierDescription
1BAT3Vhttp://www.ebay.com/itm/10x-CR2032-SMD-Battery-Holder-for-CR2032-Battery-/180938057979?pt=LH_DefaultDomain_0&hash=item2a20bfa8fbLithium 2032 coin battery holder
4C1-C4ECST1DC106R6032Tantalium capacitor 10uF
3FC1-FC3ZF1-20-01-T-WThttp://www.samtec.com/cable-systems/idc-ffc/ffc/zero-insertion.aspx20 conductor 1mm pitch flex cable connector (optional)
1FJ-20-R-08.00-4http://www.samtec.com/cable-systems/idc-ffc/ffc/zero-insertion.aspx8\" 20 conductor 1mm pitch flex connector, end reversed (optional)
2H1-H4(DON'T populate H1-H4 headers - solder mbed directly)
1H5http://www.ebay.com/itm/221186042943?ssPageName=STRK:MEWNX:IT&_trksid=p3984.m1497.l26491x12 .1\" pitch header (optional)
1H62x6 .1\" pitch header (optional)
2IC1,IC2VP230LMDSOP8http://www.ebay.com/itm/130488665247?ssPageName=STRK:MEWNX:IT&_trksid=p3984.m1497.l2649canbus transciever
1IC3LM1117-5VSOT2235V regulator
5JP*2 pin .1\" jumper header
1mbedLPC1768http://www.ebay.com/itm/200830573509?ssPageName=STRK:MEWNX:IT&_trksid=p3984.m1497.l2649mbed uC
2Q1,Q22N2222SOT23General purpose NPN transistor
1R1R393M120639K resistor
1R2R103M120610K resistor
4R4-R6R102M12061K resistor
1R3R500M120650 Ohm resistor
2TR1-TR5ZJYS81R5-2PL51TG01http://www.digikey.com/product-detail/en/ZJYS81R5-2PL51T-G01/445-2223-1-ND/765232CM Choke
1Z11N5340BGC1702-15http://www.ebay.com/itm/150878122425?ssPageName=STRK:MEWNX:IT&_trksid=p3984.m1497.l26496V, 5W Zener Diode
1Z1DC-DC conveterhttp://www.ebay.com/itm/251142727849?ssPageName=STRK:MEWNX:IT&_trksid=p3984.m1497.l264912V-7V, 3W DC-DC converter
1X1USBhttp://www.ebay.com/itm/New-Vertical-USB-2-0-A-pcb-connector-socket-USB-A-Type-/300553895292?pt=LH_DefaultDomain_0&hash=item45fa687d7cvertical USB connector
2LCD0,LCD1TFThttp://www.mikroe.com/add-on-boards/display/tft-proto/320x240 LCD with touch screen
1E0Enclosurehttp://www.shapeways.com/model/1077799/canary.html?li=user-profile&materialId=63d printed enclosure

Assembly

1) LCD Displays

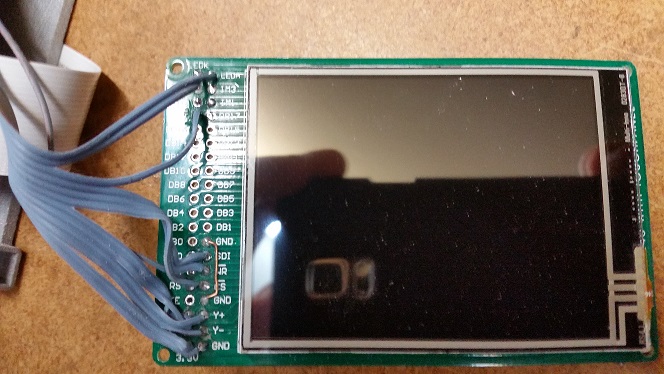
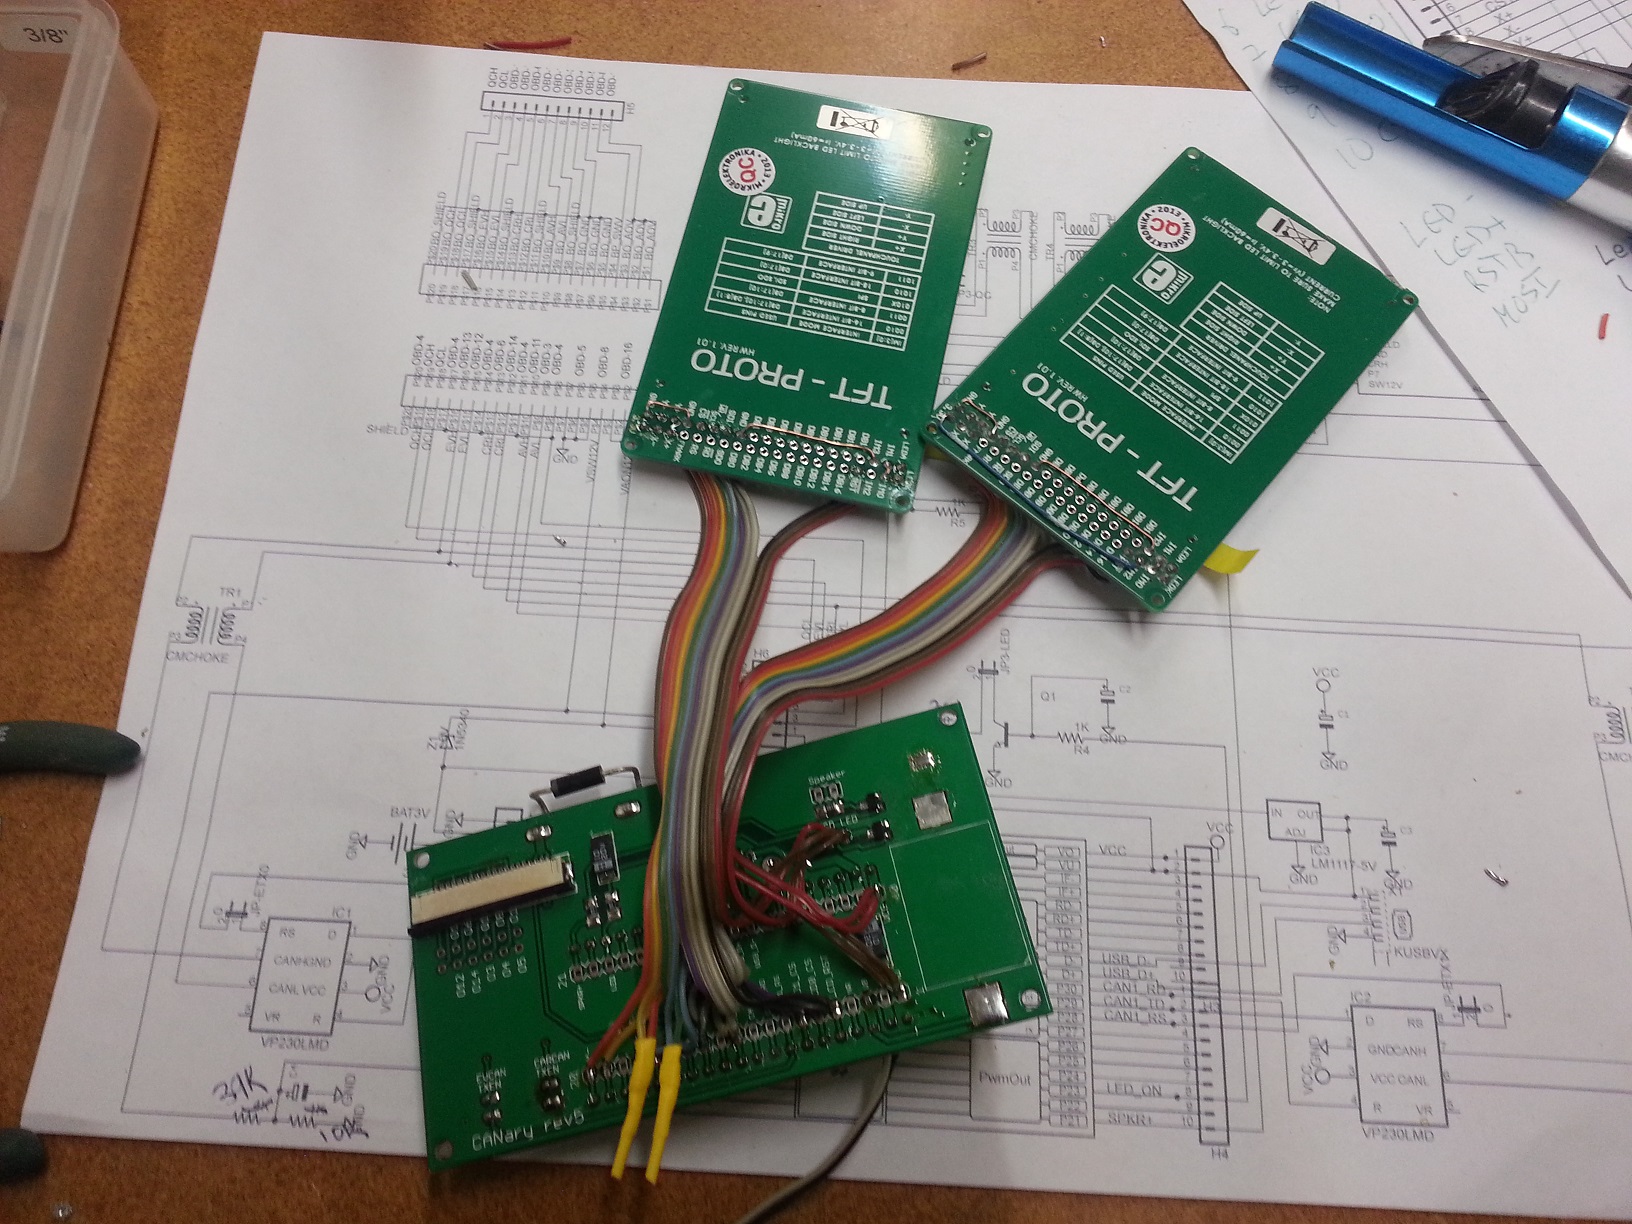
I found ribbon cable is a nice way to organize the wires to the displays. There are two versions of the display and each must be wired differently. The original project used HW REV. 1.01. For that version, you'll need 12 conductors and I connected them in the following order:

1LED+
2LED-
3RST
4SDI
5WR/SCLK
6CS
7X+
8X-
9Y+
10Y-
11VDD
12GND

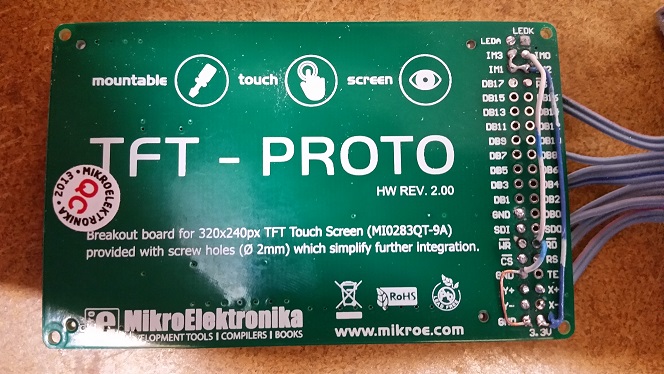
If, instead, you have HW REV 2.0, you will need 13 conductors with the following order:

1LED+
2LED-
3RST
4SDI
5RS (SCLK)
6WR (DC)
7CS
8X+
9X-
10Y+
11Y-
12VDD
13GND

First I connected all the GND connections (2 GND & IM0, IM1, IM3 for REV1.01 or 2 GND, RD, & IM0 for REV2.00). Do not connect the bottom GND until you have the ribbon cable connected. After making all the ribbon cable connections (connecting the GND of the ribbon cable to the bottom GND pad), solder the GND bar from the previous step to the back of the bottom GND connection. Finally, make a connection from the back side 3.3V pin to IM2 for REV1.01 or to IM1,IM2,&IM3 for REV2.00. Take a break and repeat for the second display.

Examples of REV1.01 boards:
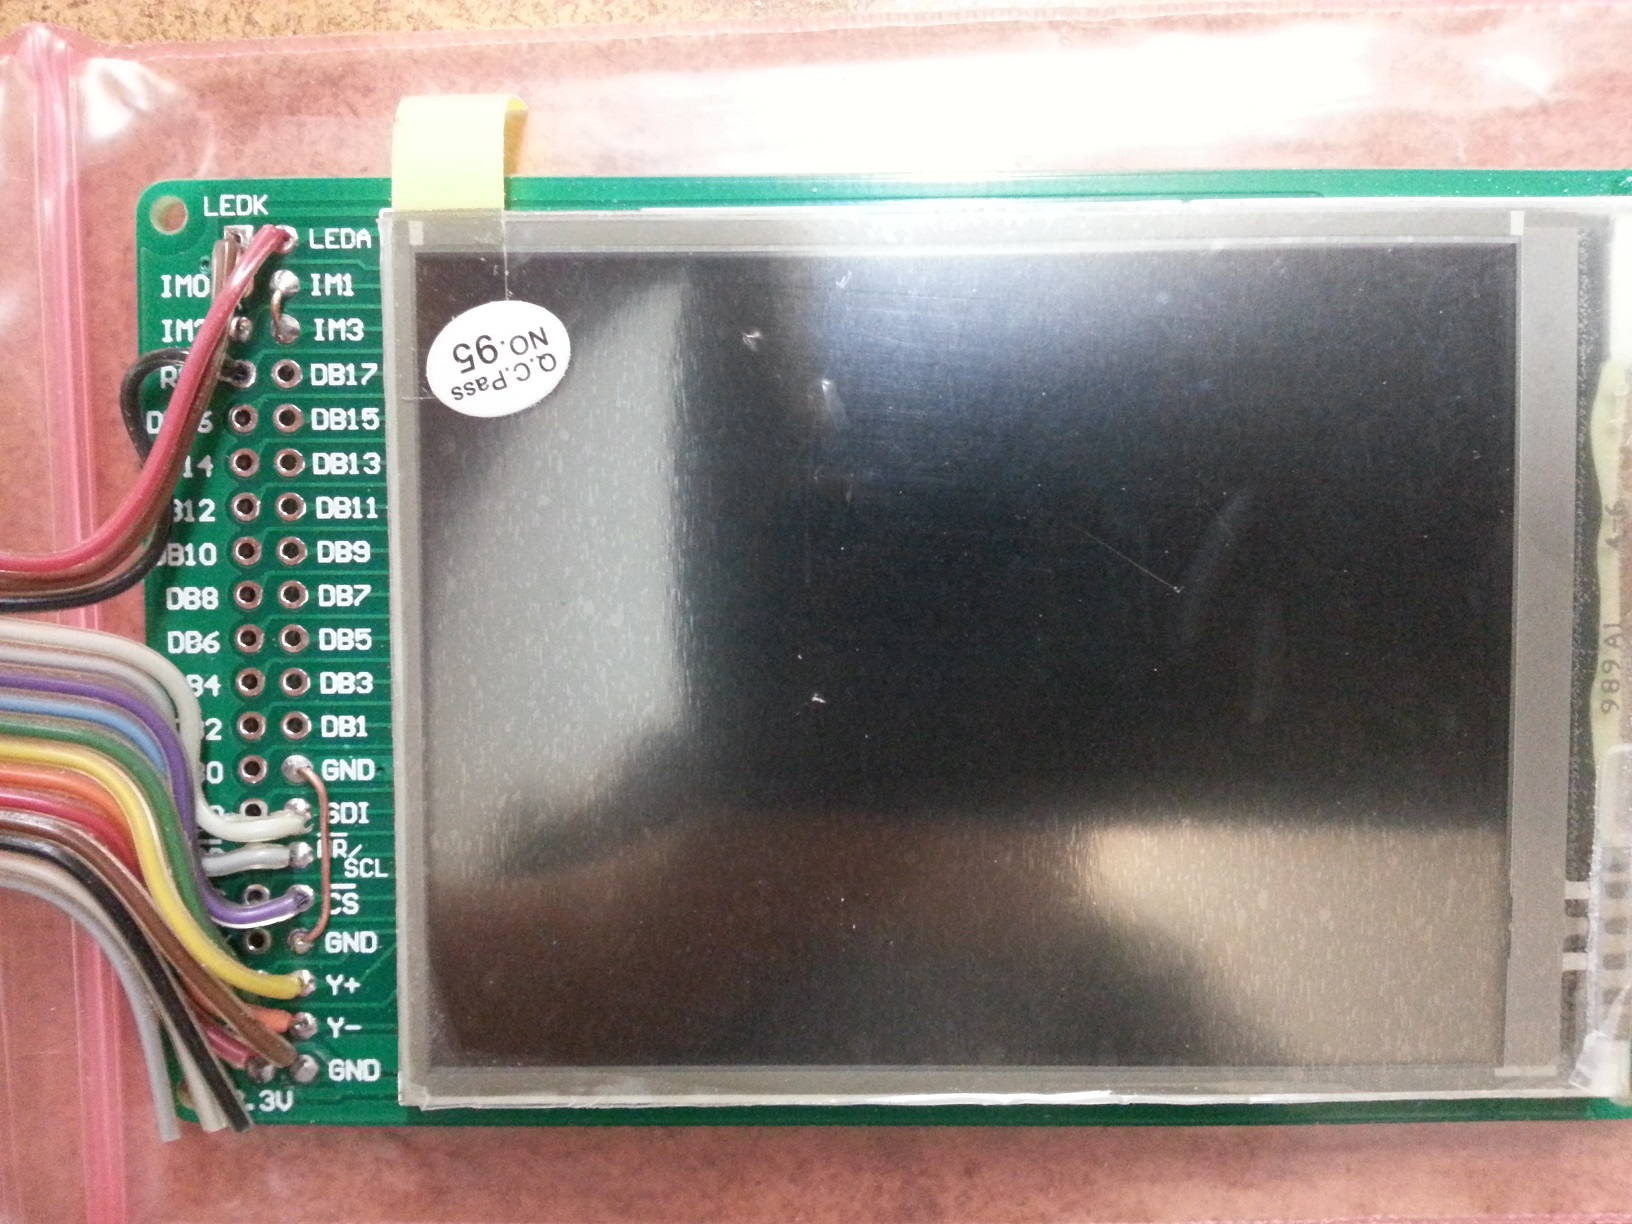
/media/uploads/TickTock/lcdtop.jpg /media/uploads/TickTock/lcdbot.jpg

Examples of REV2.00:

/media/uploads/TickTock/rev2front.jpg /media/uploads/TickTock/rev2back.jpg

Once the two displays are complete combine all wires except CS0, CS1, X+, X-, Y+, and Y-. Connect X- of the left display to X+ of the right. Similarly connect Y- of the left display to Y+ of the right. Insulate any exposed wires.

2) PCB

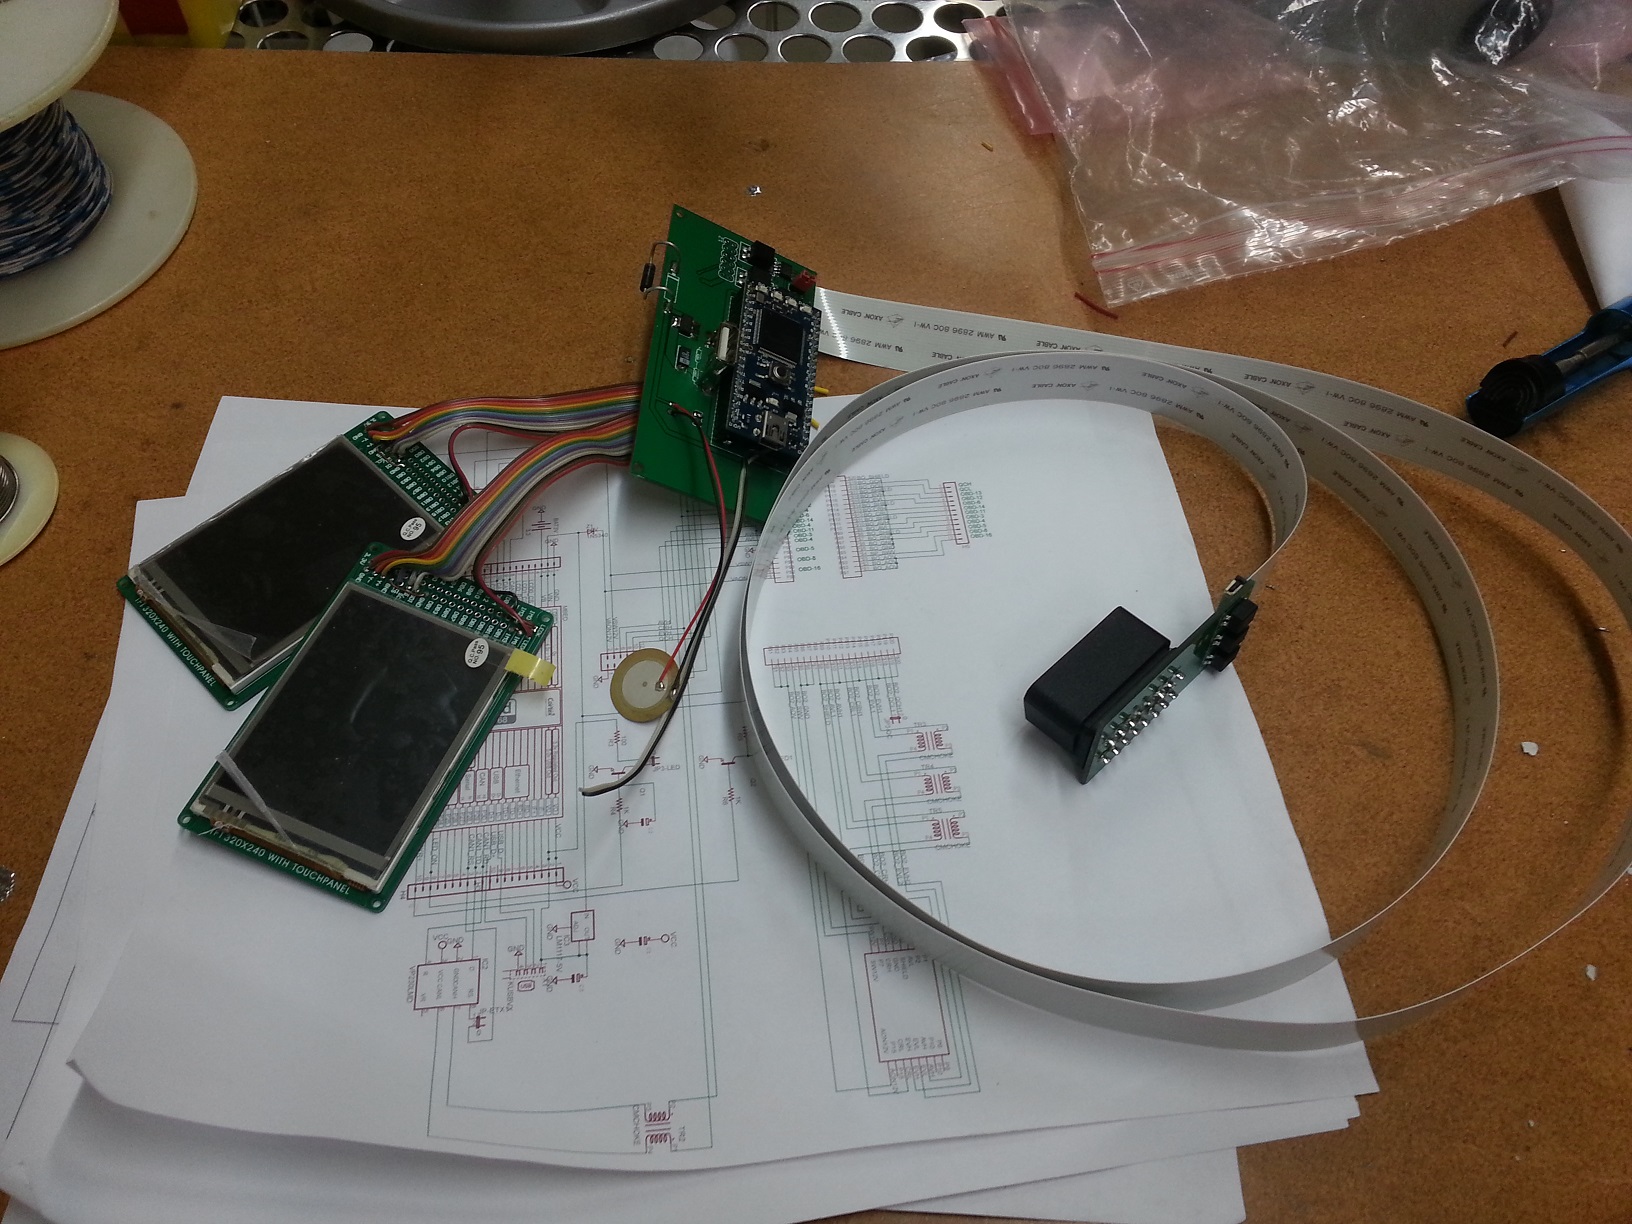
Refer to the schematics to place all the components on the board. If you plan to install into the CANary 3D enclosure, DO NOT install the battery holder or the socket for the mbed and, instead, connect two wires to the VB and GND pads nearby. You will have to install the battery holder against the back wall to avoid interfering with the right-hand display and the mbed will have to be directly soldered. I have not found a socket with a low enough profile to fit in the space provided (depth of enclosure is limited by the space behind the center console). Also, I recommend keeping as much lead as possible on the Zener diode (bending it as shown to clear the back wall). Although it is operating well within parameters, the Zener gets quite hot during extended operation and the leads help dissipate the heat and keep it away from the PCB and other components.Update: Several Zeners have failed resulting in damage to some users boards so I recommend using a DC-DC converter instead to bring the 12V down to 7V.
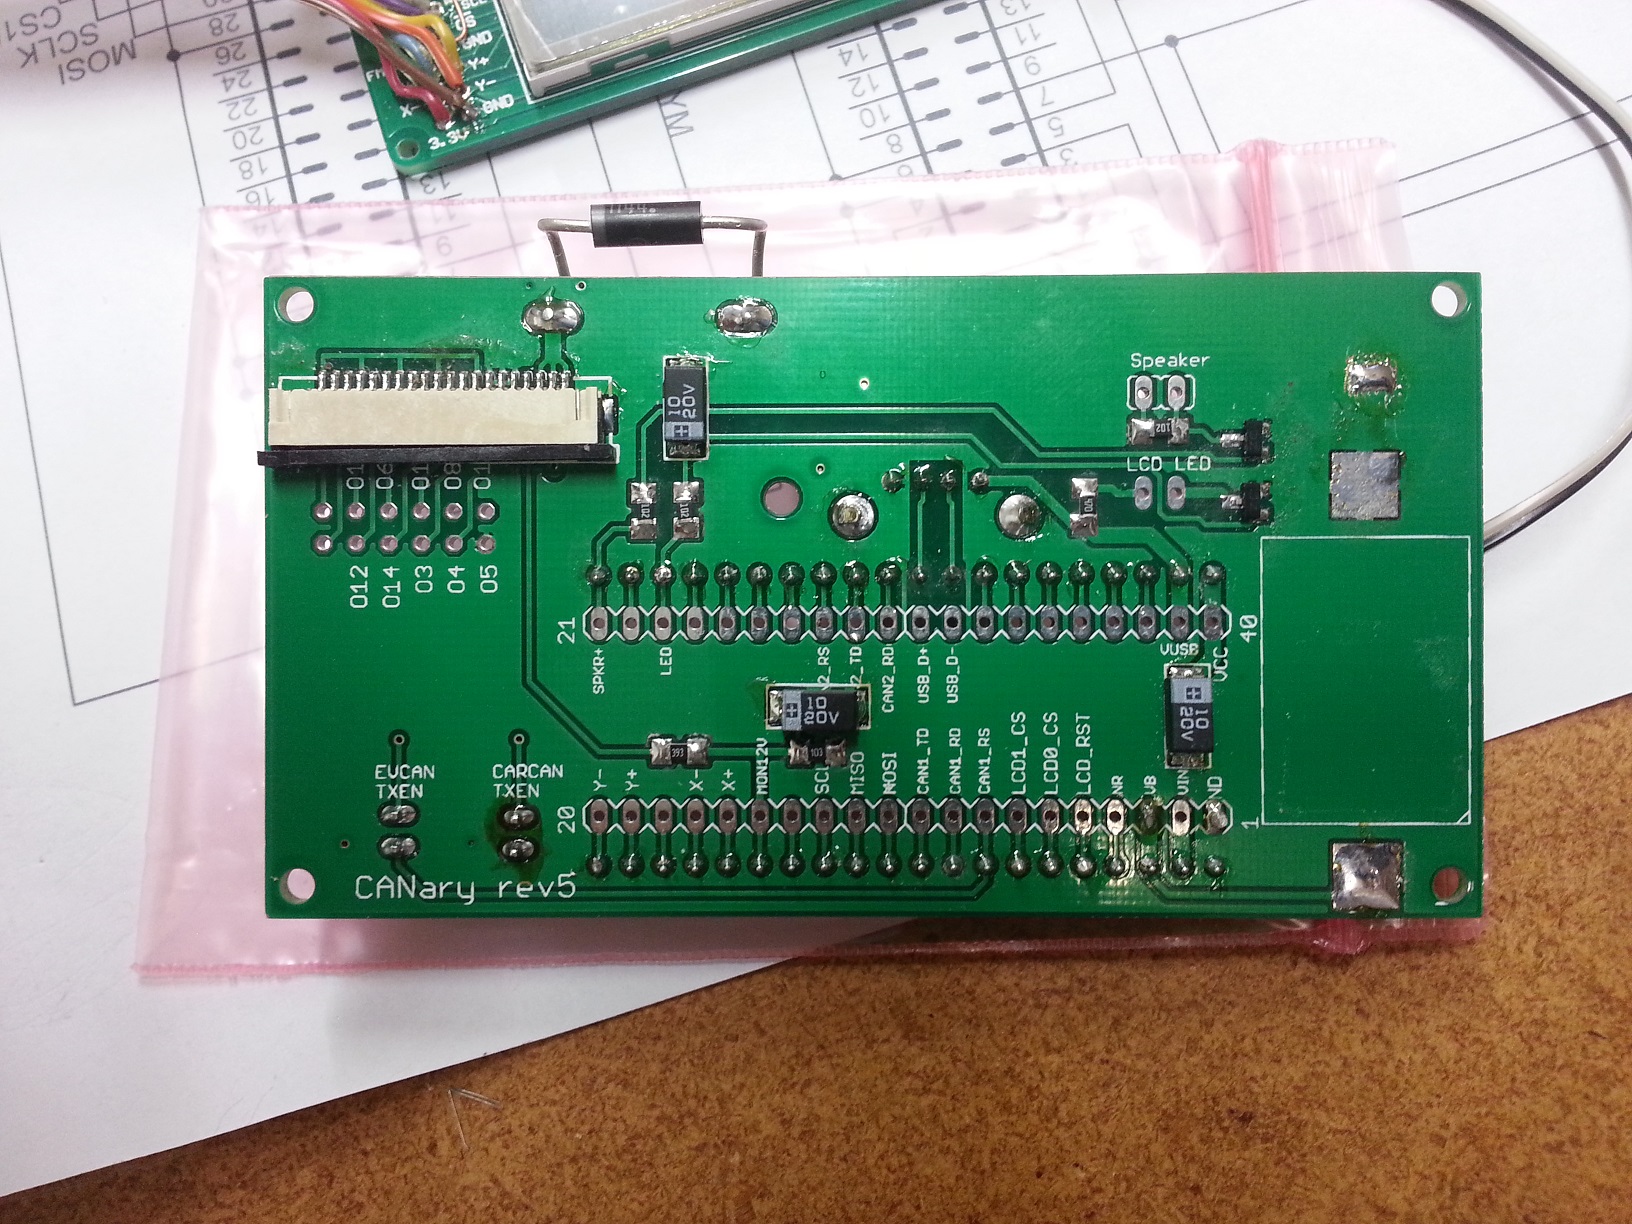
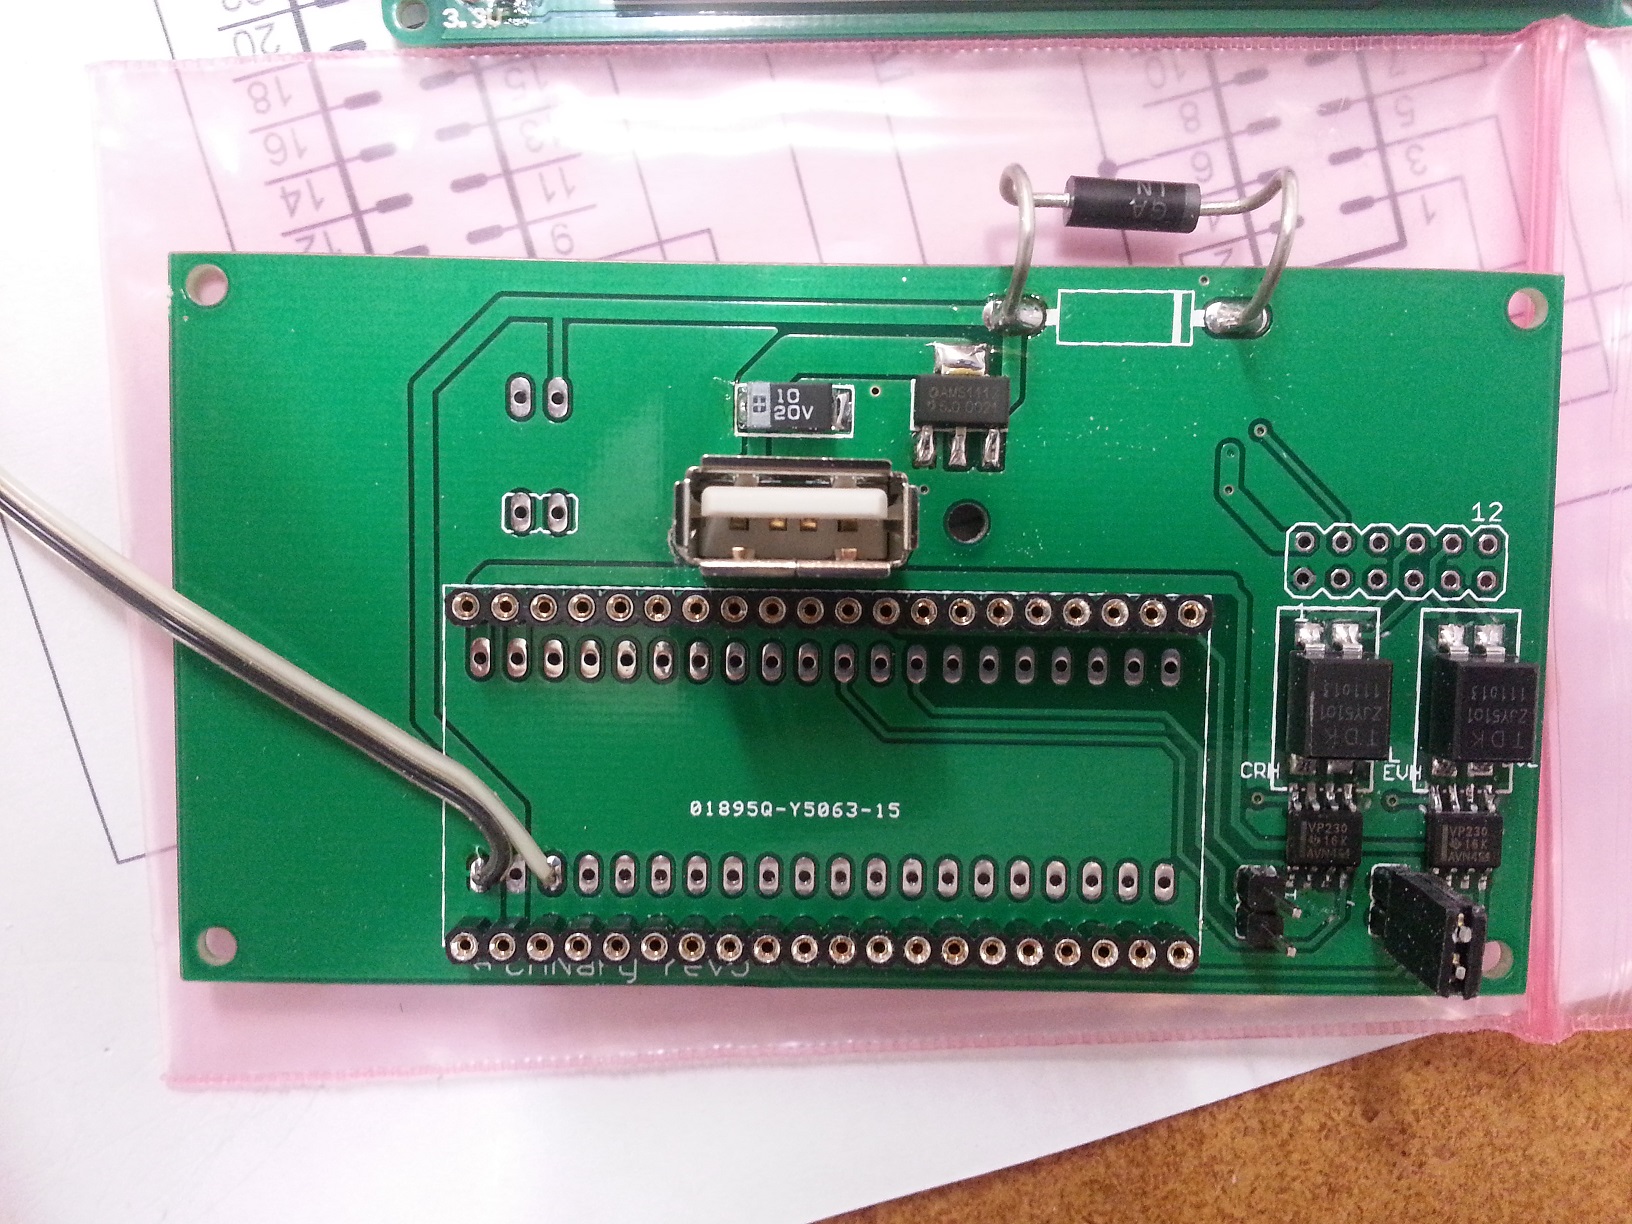
/media/uploads/TickTock/pcbtop.jpg /media/uploads/TickTock/pcbbot.jpg

Once the PCB is populated, solder the LCDs to the PCB. CS0 connects to the right display and CS1 connects to the left. /media/uploads/TickTock/brddis.jpg
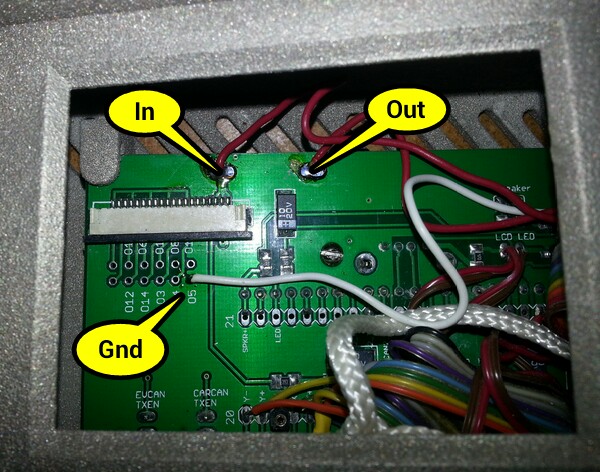
Update: The Zener diodes tended to fail after a few months so I am recommending removing them and replacing with a DC-DC converter. This will run cooler and waste less energy, too. To install, remove the left display panel to gain access to the Zener. From there, the Zener can be removed and it's pads used to connect to the DC-DC converter. I recommend setting the output voltage on the bench before installing since the trim pot is tricky to reach once installed. Set it to 7V. The input can be connected to the left pad previously occupied by the zener and the output can connect to the right. GND(-) can be connected to the bottom right pad on the 2x6 header below the flex cable connector. Make sure the GND wire lies flat so it doesn't interfere with the connection of the flex cable. /media/uploads/TickTock/dcdcinst2.jpg
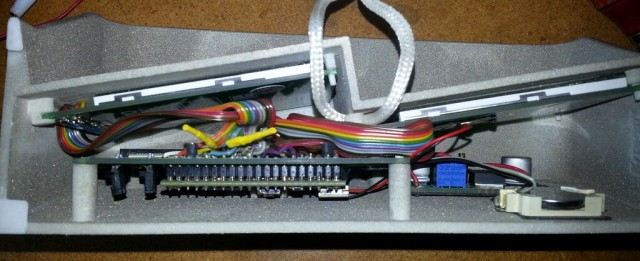
Once soldered in place, the DC-DC converter can easily be mounted to the back wall with double sided tape above the battery holder. /media/uploads/TickTock/dcdcinst3.jpg
3) Testing

1)First step is to buzz out all connections from the LCDs to the pins in the main board
2)Next check the touch screen connections. On the main board, place an Ohm meter across X+ and X-. You should read 700 Ohms. Repeat for Y+ and Y-. Then test the resistance from X+ to Y+. With nothing touching the screens, it should read >100K Ohms and <1K when touching either screen.
3)When all connections are checked, solder in the mbed. Download and install the touch2 program http://mbed.org/users/TickTock/code/touch2/ to test the basic operation of the mbed and touch screens.
tips:
Touch screen is sensitive - excess flux on X+,X-,Y+,Y- connection on mbed can result in flakey operation
If touch is not working, double-check the LCD0_CS and LCD1_CS are not swapped. LCD0_CS must connect to the CS of the LCD that has X- & Y- connected to the mbed. LCD1_CS must connect to the CS of the LCD that has X+ & Y+ connected to the mbed.
4)Once touch2 works, it is time to connect to the OBD connector. I highly recommend double checking all connections from the OBD to the PCB with the cable in place before connecting to the Leaf. Buzz out all the pins in the OBS to make sure none are shorting to each other, Check that the 12V goes to the Zener (and nothing else) and the switched 12V to the resistor divider (and nothing else). Test the ground connection properly connects to ground and nothing else.
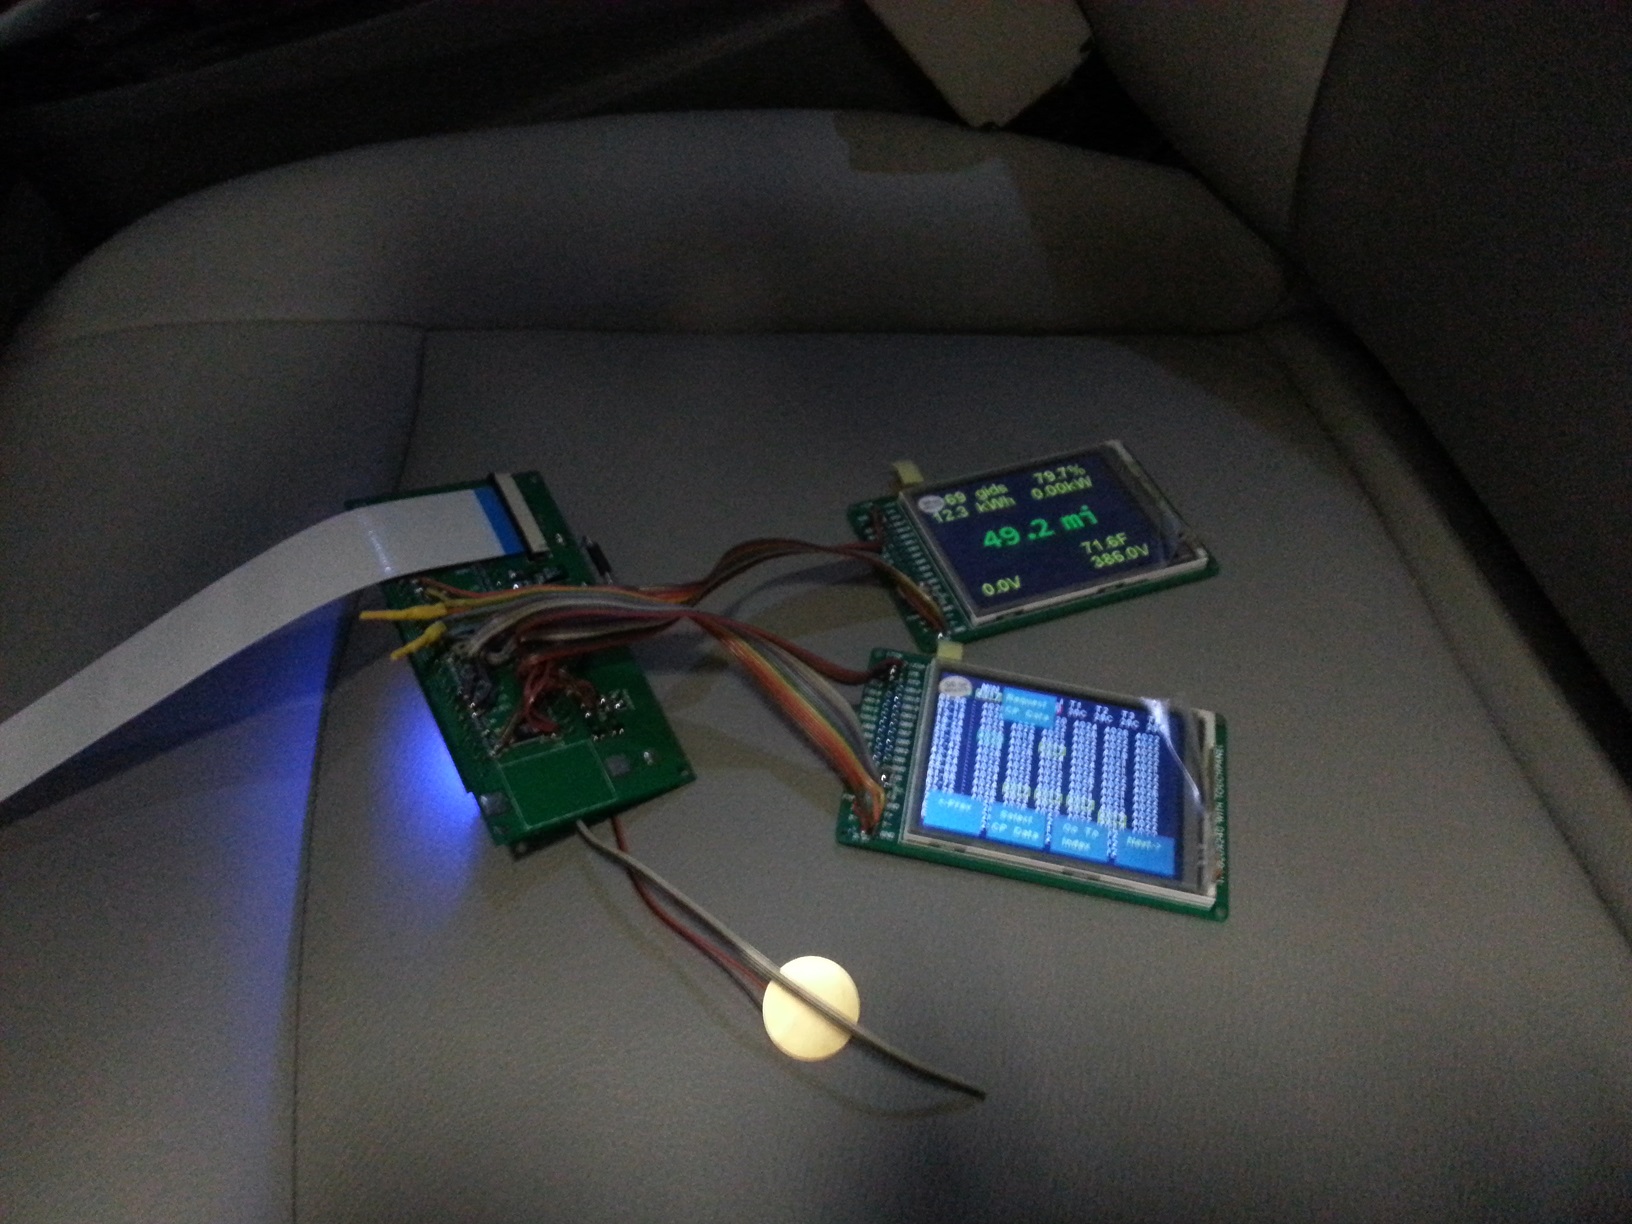
5)Once you are confident there are no shorts or wrong connections from the OBD connector, take a deep breath and plug it into your leaf. Touch2 program should come up and function. Unplug and install the latest CANary firmware. If you have the REV2.00 LCD boards, you will need to edit the precompile.h file in the TOUCH_TFTx2_w9341 library and set USE_ILI9341 to 1. Test all features before installing into the enclosure (gids, cellpair, menu system, logging) since installing and removing from the enclosure is a PITA.

/media/uploads/TickTock/pcbdone.jpg /media/uploads/TickTock/functioning.jpg

4) Enclosure

The 3D printer leaves a lot of powder behind - I used a strong spray of water to get it out of all the cracks. The enclosure comes with a rather rough finish. I recommend convincing yourself you like it, then simply lightly sand then paint before assembly. Sanding is very difficult - the nylon is very nicely fused and doesn't want to sand. I tried sandblasting and that didn't work either. I had some limited success with filler and then sanding, but only on the outside - it is too difficult to sand the face. /media/uploads/TickTock/enclosure.jpg

5) Final Assembly

Make sure you are well rested with lots of patience before attempting assembly. It is a puzzle figuring out how to get both displays and the PCB in place. Enclosure was too expensive for me to keep iterating to optimize for assembly. I ended up snipping the thin display posts shorter and using various tools to push the displays into place. Also, some USB connectors are taller than others. If you have one of the taller ones, you will have to deflect the back wall a bit while inserting the PCB (being careful not to bend the housing) to get it to it's opening in the back wall. Do use a screw in the provided post to secure the PCB as USB insertion will otherwise dislodge it.

I added an additional safety line which wraps around the center post to prevent the enclosure from becoming a projectile in the event of an accident. /media/uploads/TickTock/safety.jpg Installed: /media/uploads/TickTock/installed.jpg

Revisions of utility.cpp

Revision Date Message Actions
115:549410af477d 2013-07-04 Added delay to powerup ping (apparently BMS needs some time). Made all logging enabled by default File  Diff  Annotate
114:3f8c59a8a2b9 2013-07-02 fixed bug in battery log files (pointing to wrong cellpair locations) File  Diff  Annotate
112:b41b35401eb6 2013-07-01 Fixed lockup bug when USB already present File  Diff  Annotate
111:d1559bb25c43 2013-06-30 Added USB insertion detect. Logging will start once usb drive is inserted. File  Diff  Annotate
110:ffddff3ad2f2 2013-06-30 Got battery and trip logs working. Fixed canlog to append (was overwriting previous data). File  Diff  Annotate
109:3e6f0e8fca0d 2013-06-30 Change filesystem library. Got logging and playback working. File  Diff  Annotate
108:29b5a760adc2 2013-06-30 Fixed temperature bug but USB logging is disabled File  Diff  Annotate
107:e9be732c1ad4 2013-06-29 Added trip meter File  Diff  Annotate
106:f016912a03db 2013-06-28 added logging indicator on main screen File  Diff  Annotate
104:5a19101aaac5 2013-06-28 Fixed 000 msgId logging bug File  Diff  Annotate
102:fd19f777a0b4 2013-06-20 Added Ah, SOH, and more precise temperature measurement. File  Diff  Annotate
100:63a7456fc972 2013-06-15 reset display when fw update fails File  Diff  Annotate
99:c05abf8e1cdc 2013-06-15 Merged and moved check for firmware.bin *before* deleting old *.bin. File  Diff  Annotate
98:9f8bab96edff 2013-06-10 Metric Initial Commit File  Diff  Annotate
97:a25940fd7b5b 2013-06-15 . File  Diff  Annotate
95:248b3c25a7df 2013-05-03 Stop auto-polling when asleep; added battery temp to main display File  Diff  Annotate
94:c3a14b3975d6 2013-05-03 Cleaned up dte miles remaining display (right justified and clear old values better) File  Diff  Annotate
93:c2402e8cd0e2 2013-05-01 Merged in tested logCan reentry fix File  Diff  Annotate
92:935adef49ea4 2013-04-22 Reverting to keep latest as last know *tested* revision. logCan interrupt fix work moved to CANaryTest fork. File  Diff  Annotate
91:33ab084a184f 2013-04-22 changed interrupt priorities (RTC,CAN,Ticker) File  Diff  Annotate
89:2263d349b484 2013-04-20 Moved headlight detection out of logCan. File  Diff  Annotate
88:45185a5f1c9b 2013-04-20 Made logCan reentry safe so logTS & logEven can be safely interrupted by logCan. File  Diff  Annotate
87:46ac3f2519d6 2013-04-19 Toggle Debug on Config Screen, Store all 5 Groups of Requested data. File  Diff  Annotate
86:d1c9e8ac1c4b 2013-04-17 Fixed introduced ts bug File  Diff  Annotate
85:5c27e88b3fbe 2013-04-17 Merged with Gary's lost message counter File  Diff  Annotate
83:52b1f330a62d 2013-04-17 Fixed DTE drawing bug where grid drew over graph File  Diff  Annotate
81:cf009a64eedd 2013-04-16 Merge with v78 File  Diff  Annotate
80:24f1793171e7 2013-04-16 logCan counts overflow Lost Messages, and others File  Diff  Annotate
79:68f0dd8d1f19 2013-04-16 Just turn on the message-send ticker when actually sending (instead of continuously triggering). File  Diff  Annotate
78:a383971fe02f 2013-04-16 Moved message request to ticker instead of wait_ms delay to stop buffer overrun caused by wait_ms blocking usb write. Also requests other four frames so raw data can be logged for analysis. File  Diff  Annotate
77:7c136766466c 2013-04-16 Fixed various bugs. Added proper overrun test. File  Diff  Annotate
75:77bd26829dca 2013-04-15 Fixed overrun reporting bug but has problem with mbed41 library File  Diff  Annotate
69:6bfdfc002036 2013-04-14 Log Date-Time once per minute, and Log the firmware Version. File  Diff  Annotate
58:4d06288d75a2 2013-04-09 Button-Highlight Experiment - GG from v57 File  Diff  Annotate
51:6187c5264a73 2013-04-07 Fixed power accounting bug when in reverse (need to use absolute value of speed - dropping sign). File  Diff  Annotate
50:83d5864c64a0 2013-04-07 Removed DTE flicker. Added efficiency screen. Added configurable DTE interval. Allowed CP update even if CP logging disabled. File  Diff  Annotate
48:d1ce92104a1f 2013-04-06 Merged in gg's edits. Fixed config load (problem with floats) File  Diff  Annotate
43:e7f6f80590e3 2013-04-02 Fixed bench button display bugs File  Diff  Annotate
41:8d4609ea7259 2013-03-31 Added mpkWh display File  Diff  Annotate
40:0e6e71a7323f 2013-03-31 eliminated flicker on 12V display; File  Diff  Annotate
39:eef8beac7411 2013-03-25 Fixed minor bug using tick to trigger refresh (changed to using change on accV) File  Diff  Annotate
38:155ec32c5e91 2013-03-24 Fixed kW update routine File  Diff  Annotate
37:fea2c1d52c5f 2013-03-24 Got kW computation working File  Diff  Annotate
36:dbd39c315258 2013-03-23 Added playback option File  Diff  Annotate
35:5acbd8a64a89 2013-03-21 Added 12V monitor; configurable 12V adjustment & dled brightness (via config file); new config file format 2; fixed reset on select bug File  Diff  Annotate
34:4751a8259b18 2013-03-20 Added auto-dim File  Diff  Annotate
33:a277743ebdeb 2013-03-19 Added auto dim based on daylight sensor File  Diff  Annotate
32:c9d9b6cb5de1 2013-03-19 removed wait_ms commands in CP request File  Diff  Annotate
31:082372c83f68 2013-03-17 Removed wait_ms() on cellpair request so prevent blocking in log File  Diff  Annotate
26:462ccb580472 2013-03-16 Got brake screen working except doesn't clear File  Diff  Annotate
25:ddf0ec209f03 2013-03-15 Added date/time entry, fixed braking display, added reset File  Diff  Annotate
23:cd03f9c3395e 2013-03-14 Added logging enable/disable, touch calibration, reset, config save File  Diff  Annotate
22:a43df3905863 2013-03-11 Fixed display LED connection. Parameterized the Touch screen controls and added routines to simplify menu creation. File  Diff  Annotate
20:3bf176d14b14 2013-03-08 Fixed bug with sleep timers File  Diff  Annotate
13:62e0f7f39ff5 2013-03-03 More partitioning File  Diff  Annotate