Renesas
Renesas Electronics Corporation (TSE: 6723), the world's number one supplier of microcontrollers, is a premier supplier of advanced semiconductor solutions including microcontrollers, SoC solutions and a broad range of analog and power devices.
GR PEACH Getting Started
Information
This page is for GR-PEACH rev.E and GR-PEACH rev.C.
If your GR-PEACH is rev.B, go to Information of GR-PEACH rev.B.
To identify GR-PEACH revision, see here.
Reference information
This page is an introduction to Mbed for one who never touched GR-PEACH and Mbed site.
Setup!
Create an Mbed account
You need to create an Mbed account if you don't have one.
This step is necessary only for the first time.
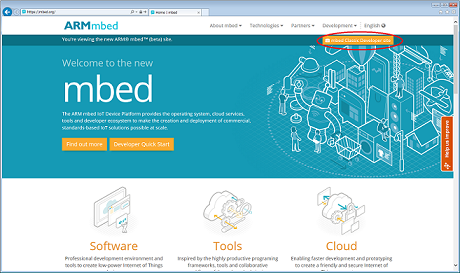
- Move from https://mbed.org/ to Mbed Classic Developer site.
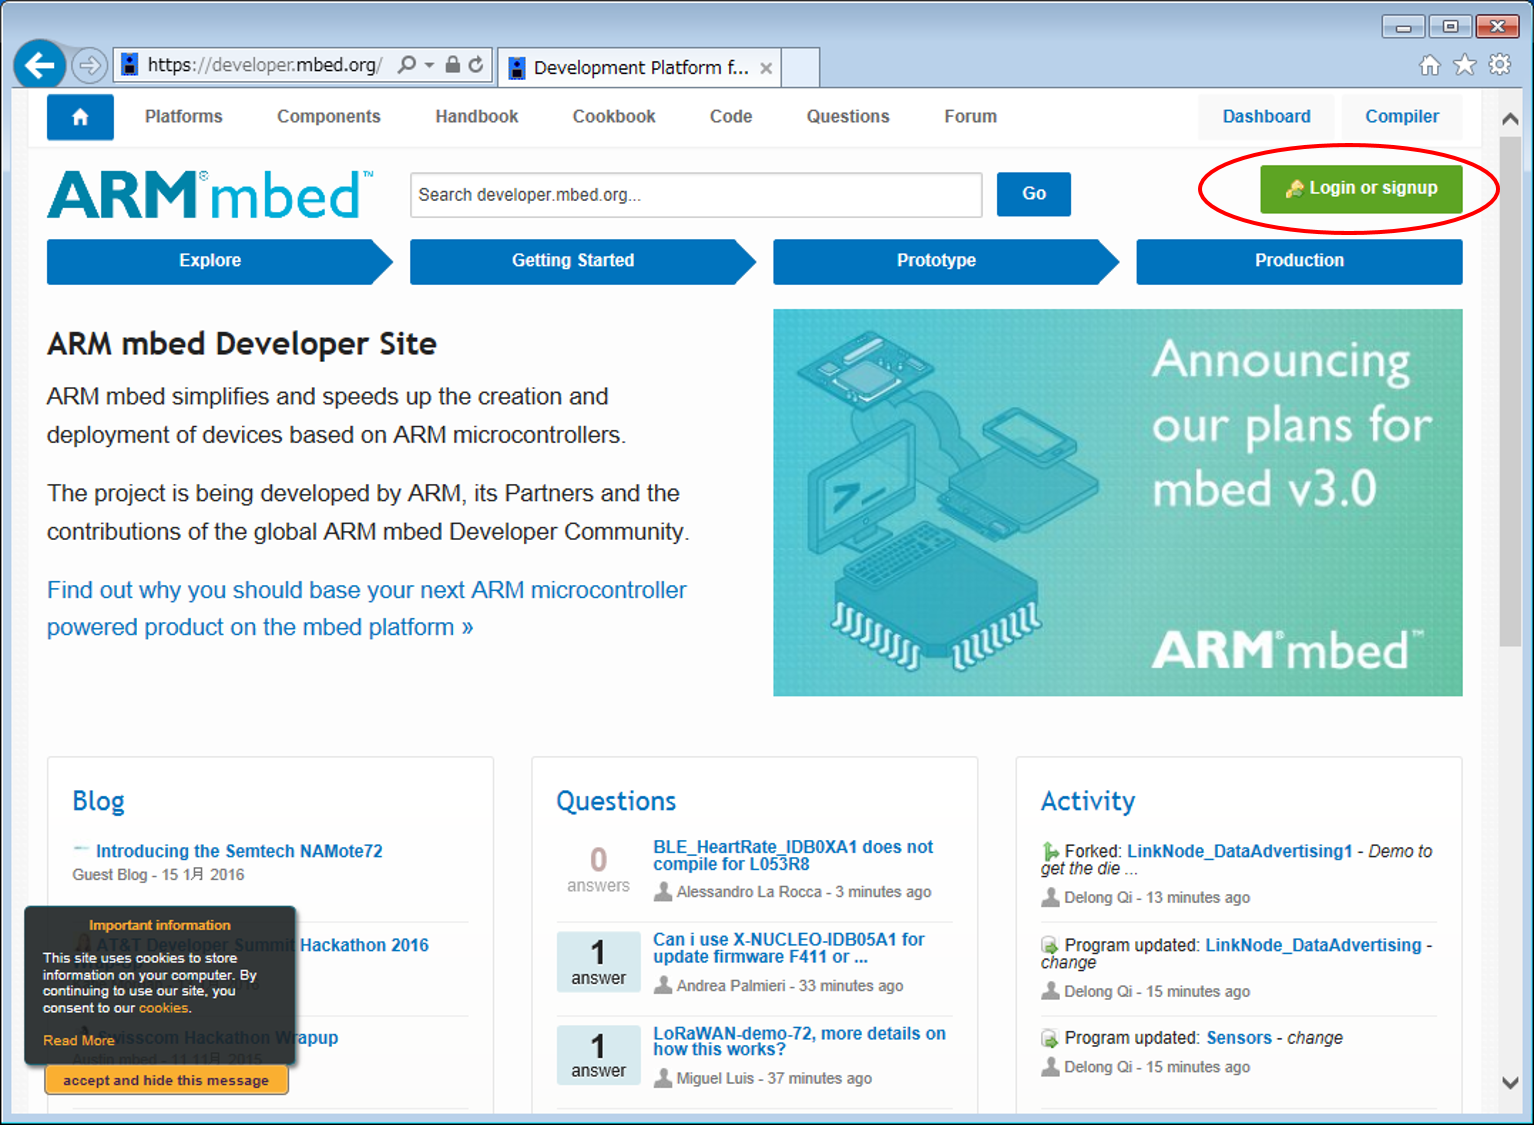
- Click "Login or signup".
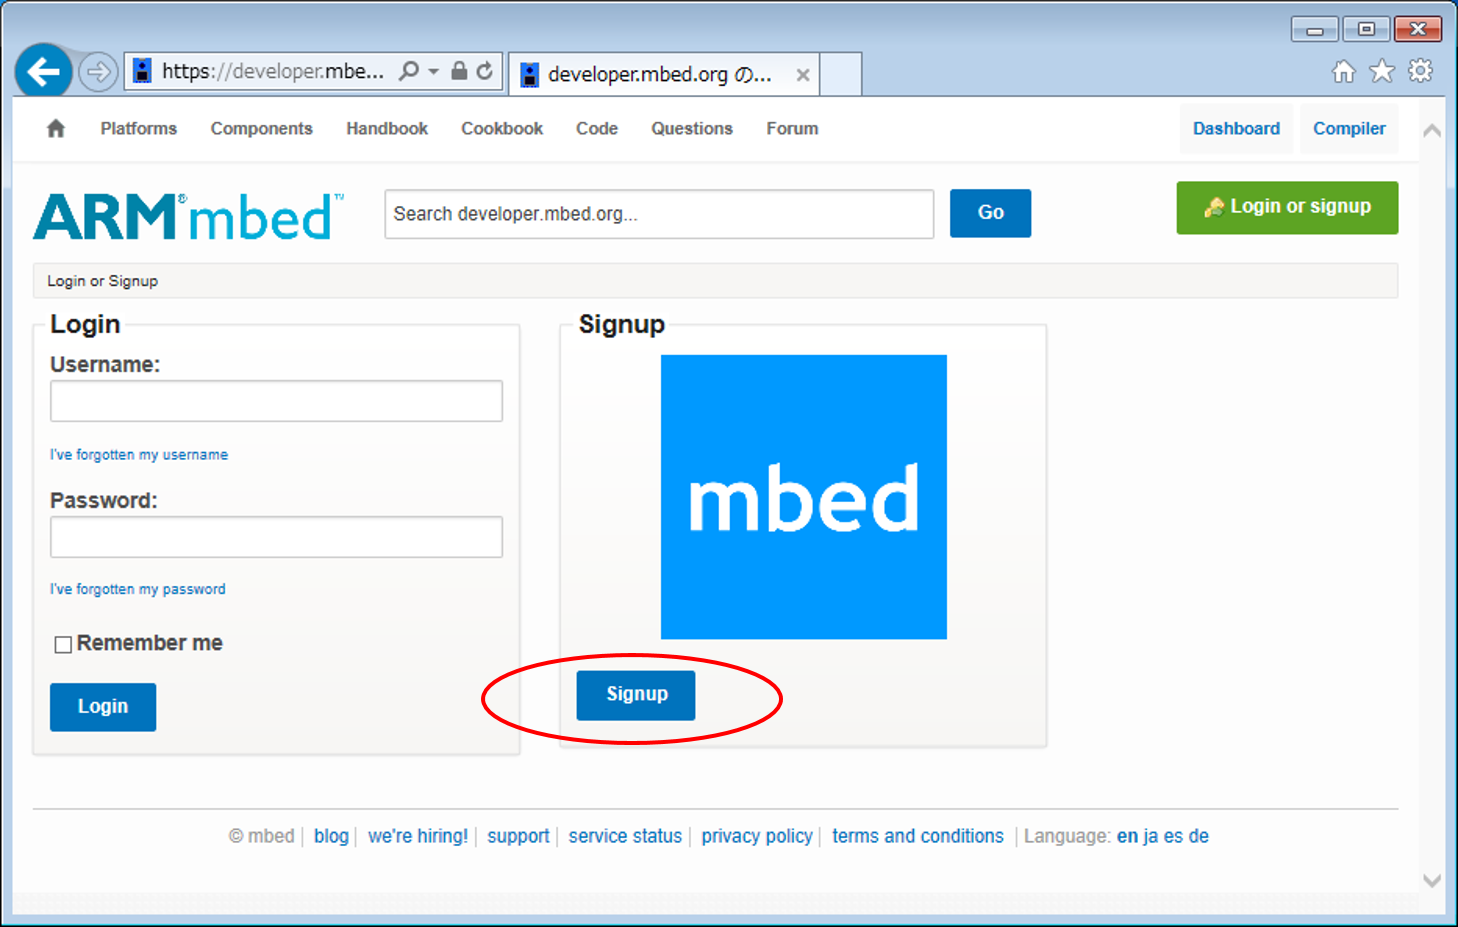
- Click "Signup".
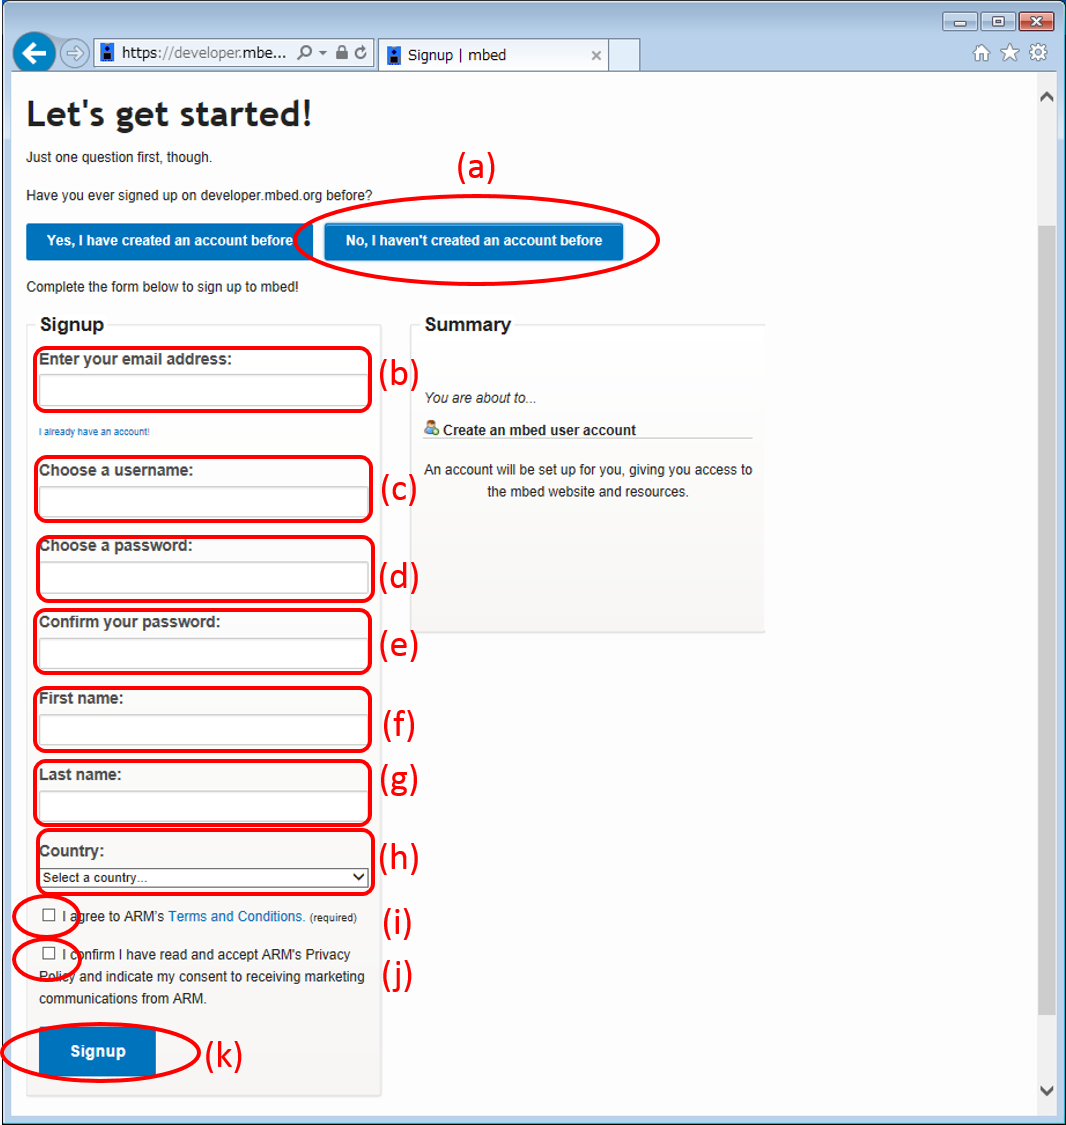
- Click "No, I haven’t created an account before".
- Enter your user name and password, check the "agree" and "confirm" check boxs, then click "Signup".
How to log in
You may already be logged in by your browser depending on the cookie setting.
- Move to Mbed Classic Developer Site from https://mbed.org/.
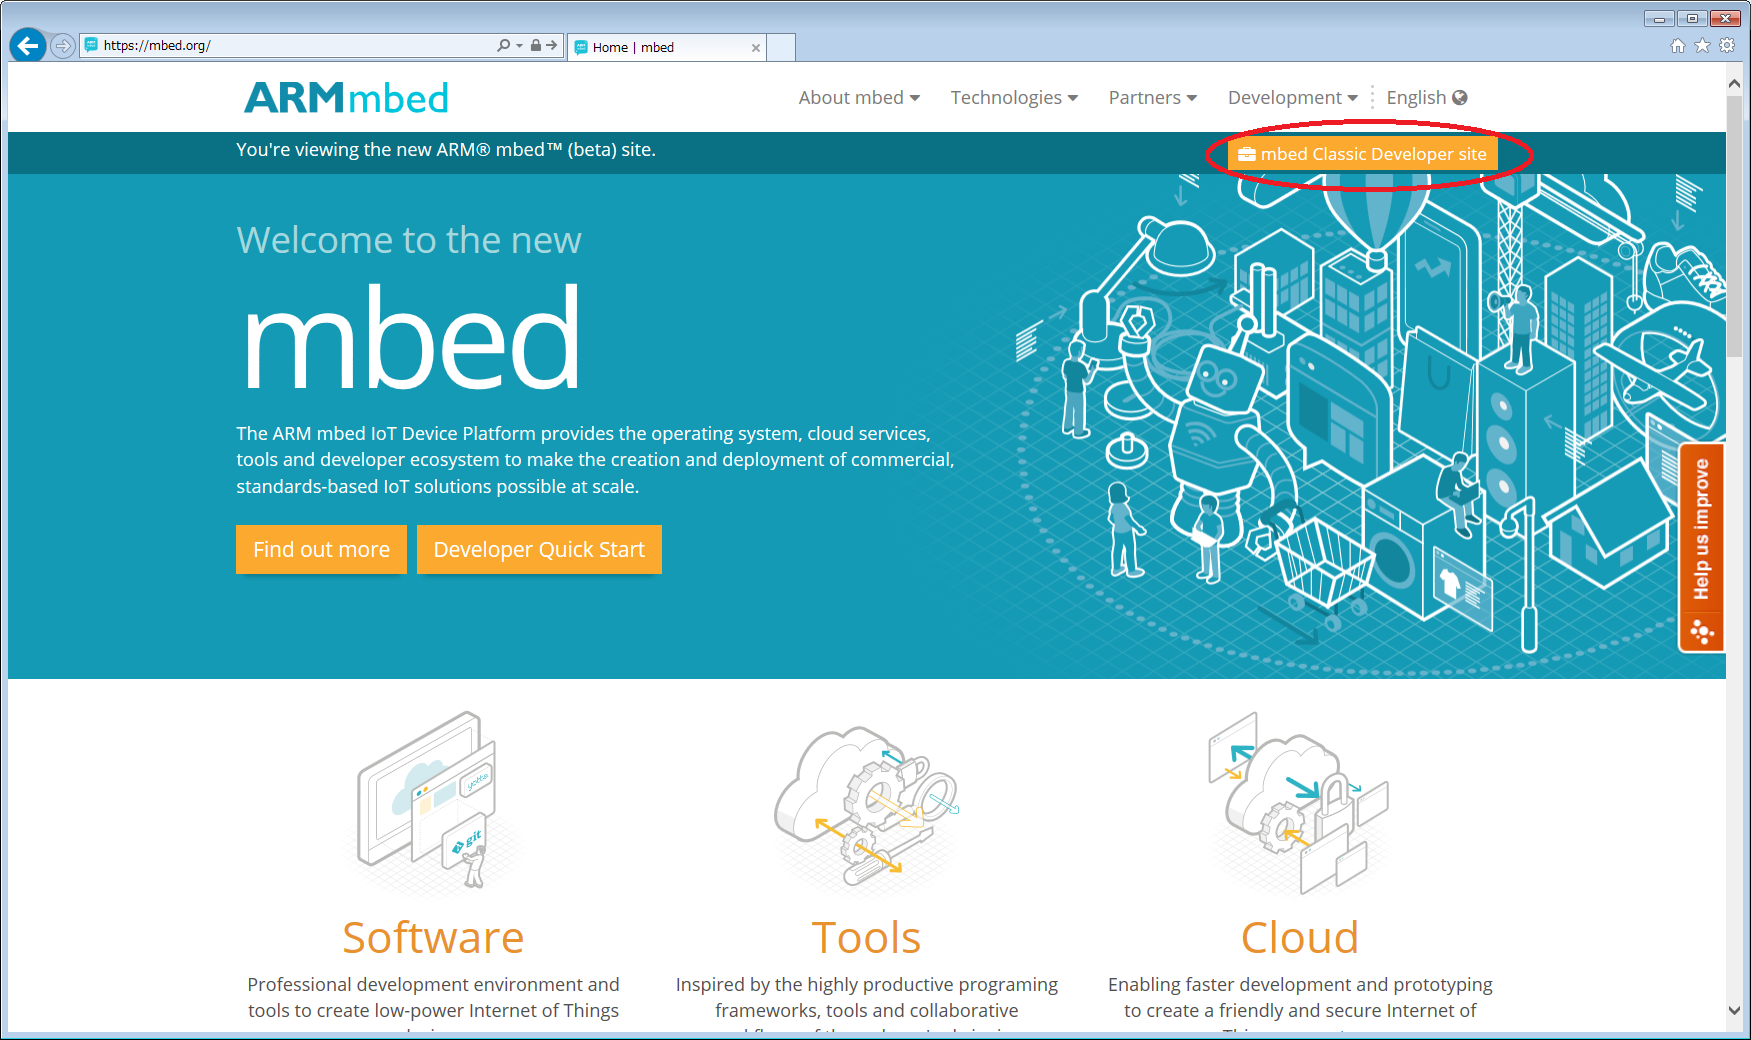
- Click "Login or signup."

- Fill the following fields and click "Login".
- user name (mail address)
- password
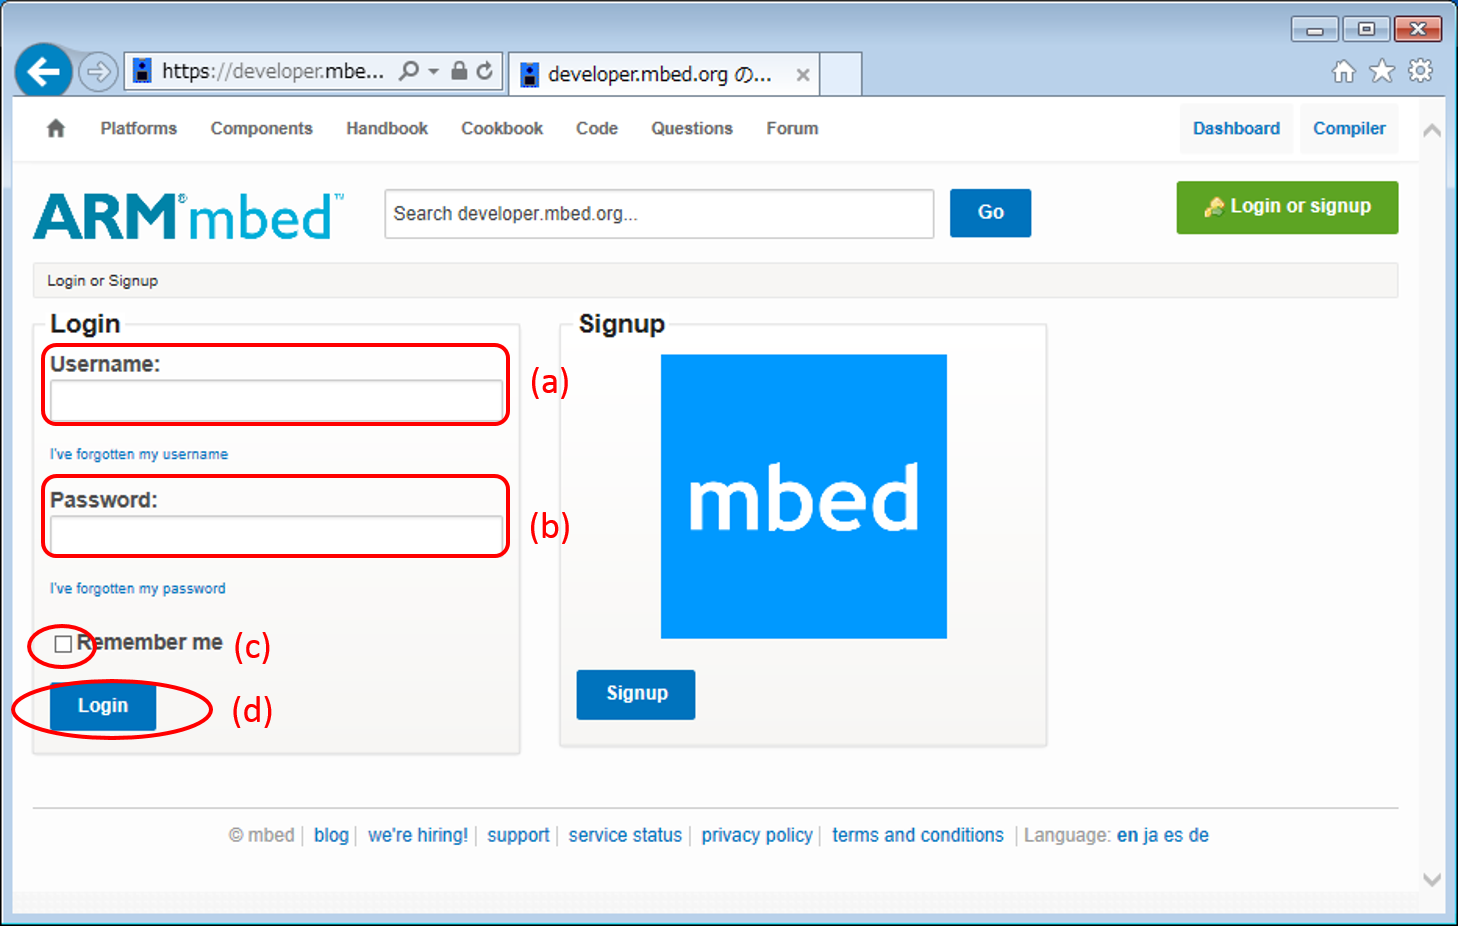
- user name (mail address)
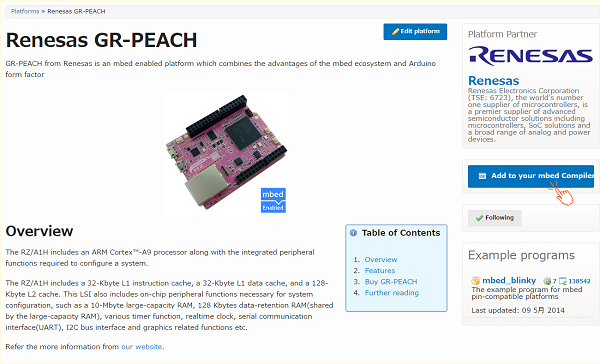
Add "Renesas GR-PEACH" to your Mbed compiler
You can build programs for GR-PEACH by adding "Renesas GR-PEACH" platform to your Mbed compiler.
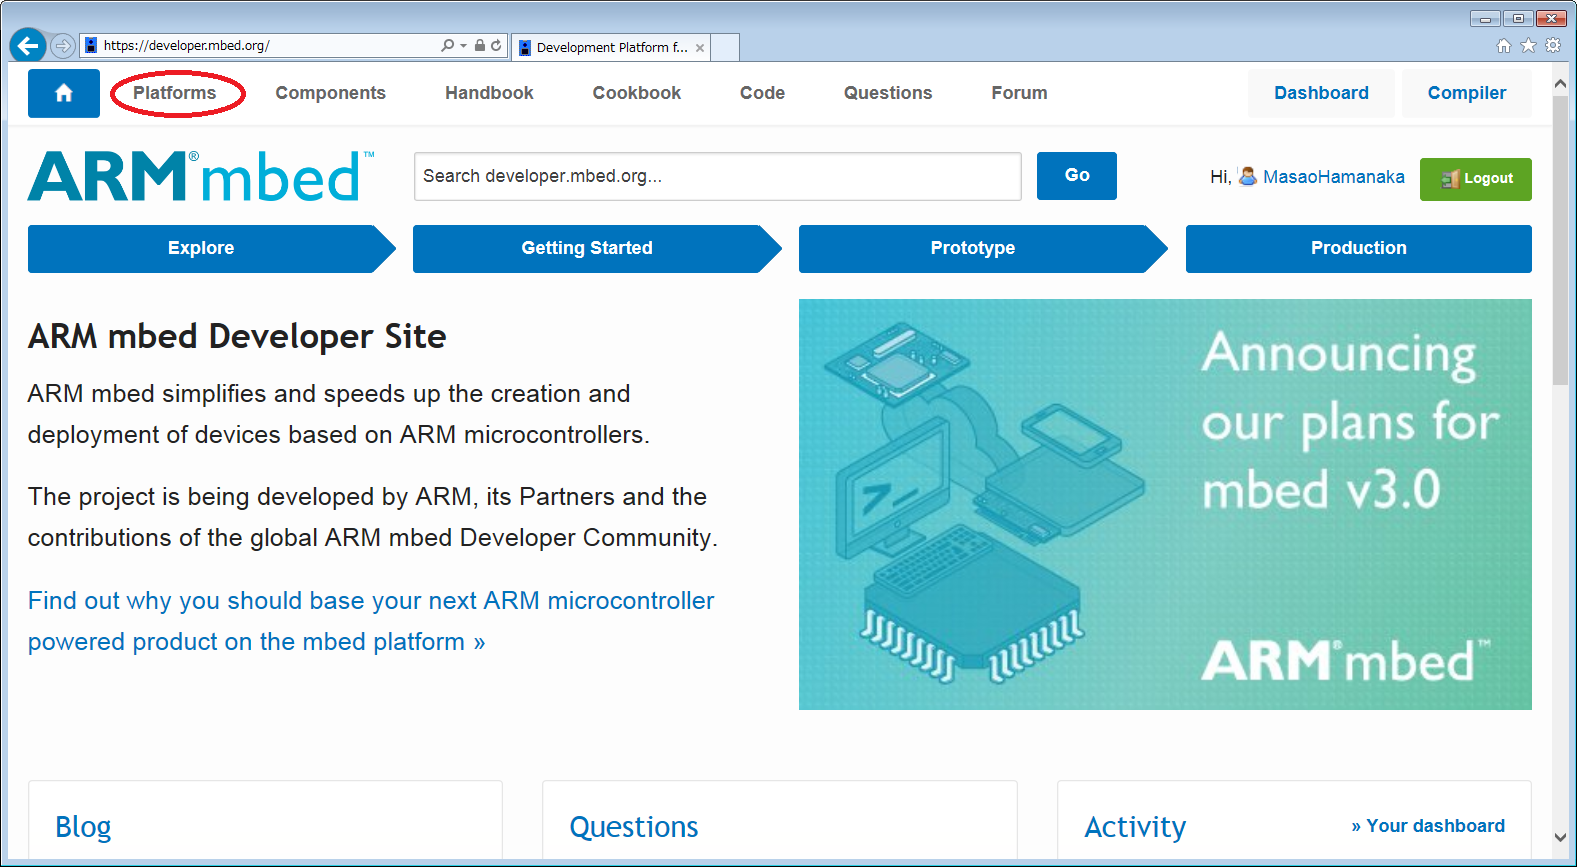
- Move to Platforms page from Developer Site.
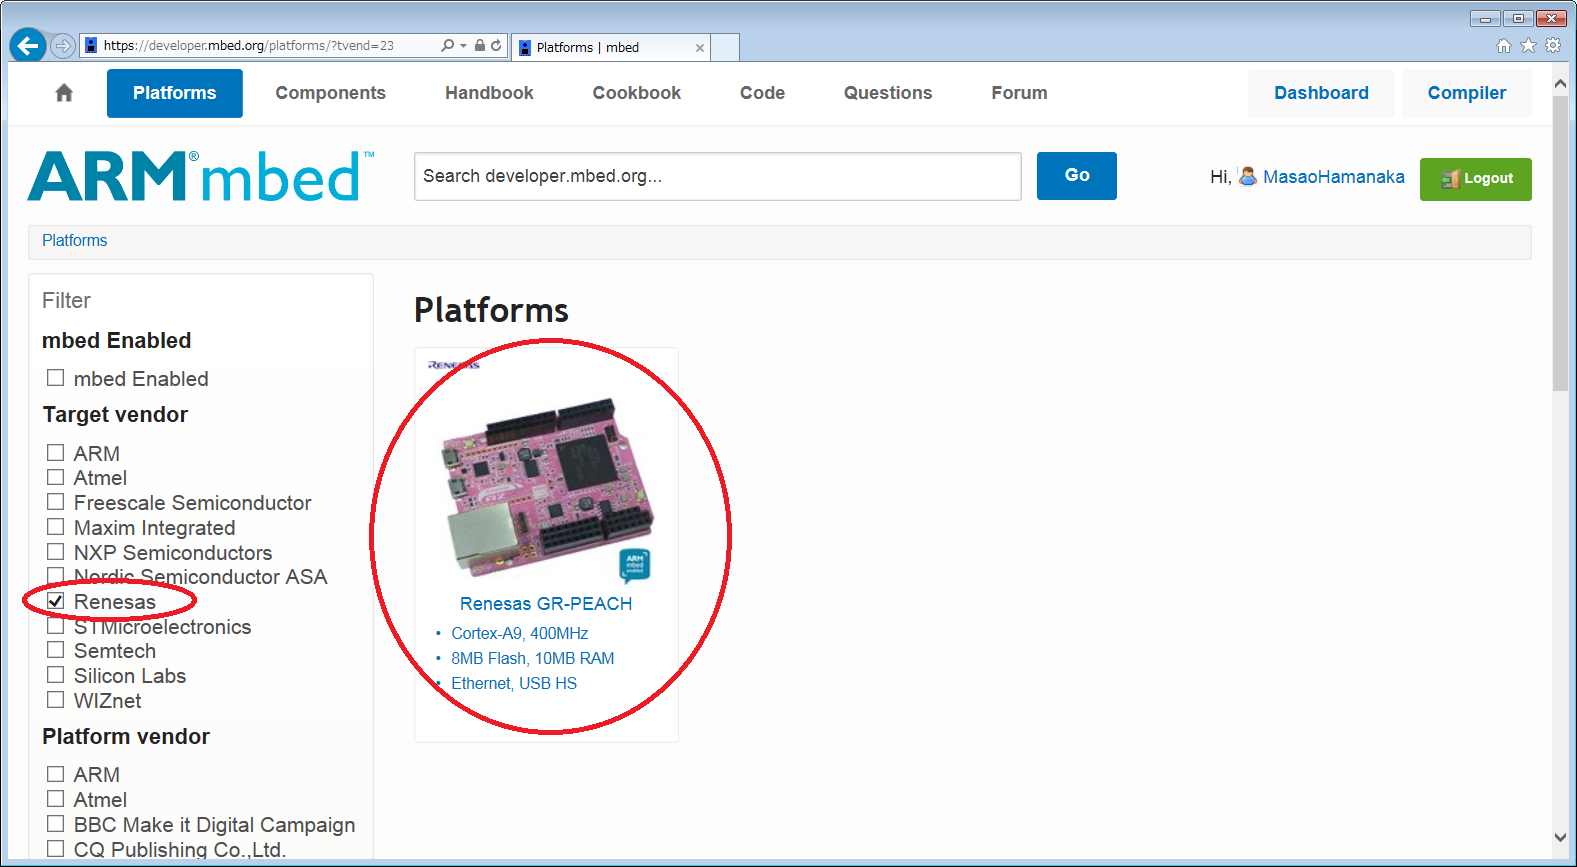
- Check "Renesas" of Target Vender on the left side, and click "Renesas GR-PEACH" platform.
- Click "Add to your Mbed compiler" on the right side.
Install the USB Serial communication driver to your PC
Only for Windows(R) user:
You will be able to print debug by install USB Serial communication driver.
Please refer to this page for details of Seriarl Communication with a PC.
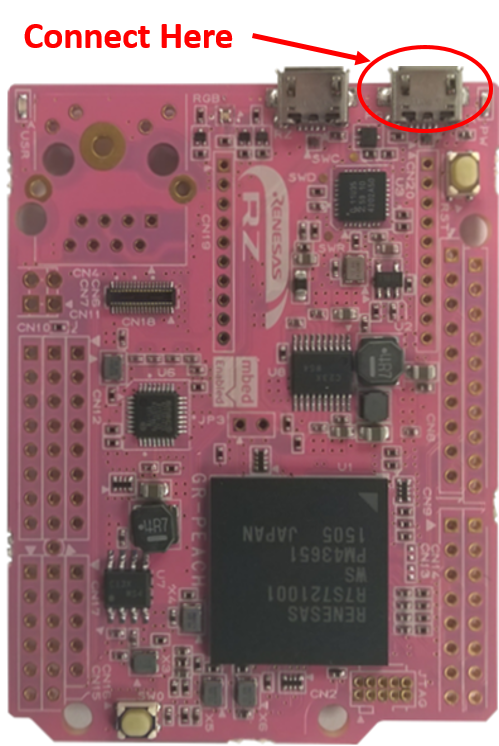
Please prepare a USB cable(A-MicroB) to connect between your PC and GR-PEACH, before starting steps as below.
- Connect GR-PEACH and PC with USB cable.
GR-PEACH side conecttor is showen as below.
- After the mount GR-PEACH as "MBED" volume label, install this driver.
"Download latest driver" at the destination link is the target driver.
- As Mbed default setting of Serial is as below.
Set Terminal of your PC to Mbed default setting.
If you want to modify the setting, refer SerialPC page of Handbook.
| Baudrate | 9600 |
| Data bits | 8bits |
| Parity bit | none |
| Stop bit | 1bit |
| Flow Control | none |
How to build at Mbed Online Compiler
You can open the Mbed online compiler window by pressing the "Compiler" button at the upper right corner of the page when you are logged in at the site.

programs and libraries
Program and library are defined in Mbed as follows:
| A collection of code that can make up an executable program including main.cpp. | |
| A code that can be cut off as a unit function in the folder for the program. Its contents may be a collection of code or stored in a library format (*.ar). |
Import a "program"
You may import a program either by importing it from the Compiler window or by expanding the program at the Mbed site.
Within the Mbed Compiler
Take the following actions in the Mbed Compiler window:
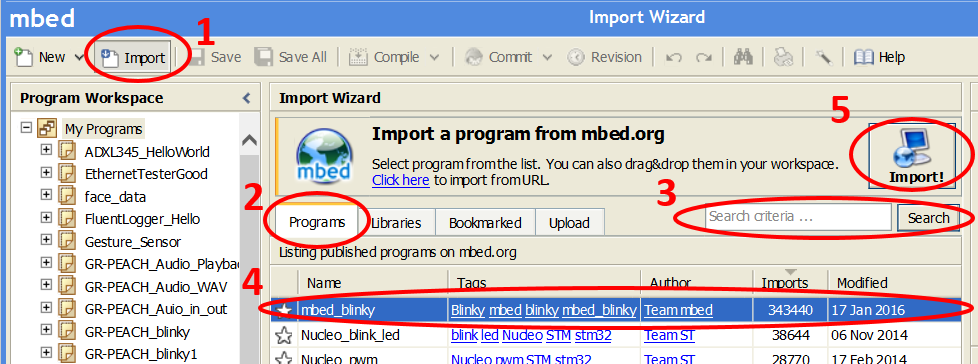
- Press the Import button.
- Select the "`Programs" tag.
- Search program you need.
If you click "Search" button when input box is empty, all programs will apair. - Select the program you want to import.
- Press the "Import!" button
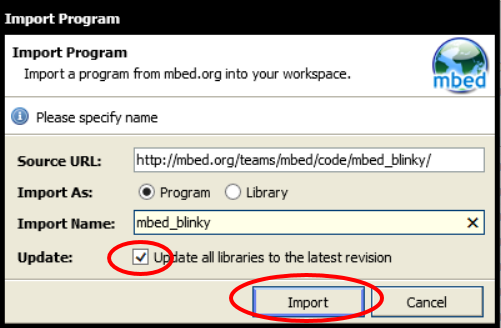
- Do not check "Update all libraries to the latest version" if you want to import the program in the environment in which the writer of the program published it. To use the latest version of the libraries, check "Update all libraries to the latest version."
At last, click "Import" button.
At the Mbed site
- Move to the page for the target program at the Mbed site.
- Click "Import this program" located on the right side of the window.

- Do not check "Update all libraries to the latest version" if you want to import the program in the environment in which the writer of the program published it.
To use the latest version of libraries, check "Update all libraries to the latest version."
At last, click "Import" button.

Let's blink LED!!
- Connect GR-PEACH to your PC and wait the mount as "MBED" drive.
- Click "Import program" button of "mbed_blinky" below.
Import programmbed_blinky
The example program for mbed pin-compatible platforms
- Check "Update all libraries to the latest version".
- Get the source code by clicking "Import" button.
- Create binary file by clicking the "Compile" button.

- When compile is finished, binary file is downloaded using browser function.
Copy this file to Mbed drive.
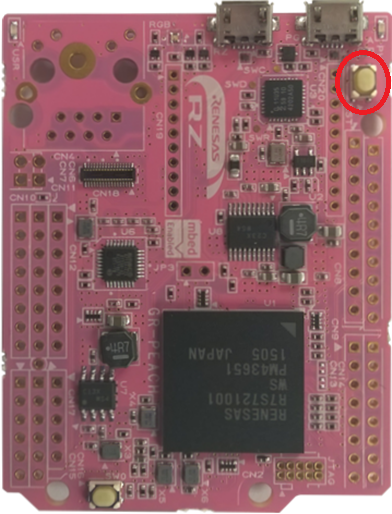
- When GR-PEACH's reset button as below is pushed or reconnect USB cable, the program runs.
How to modify sample code
Change Blink LED
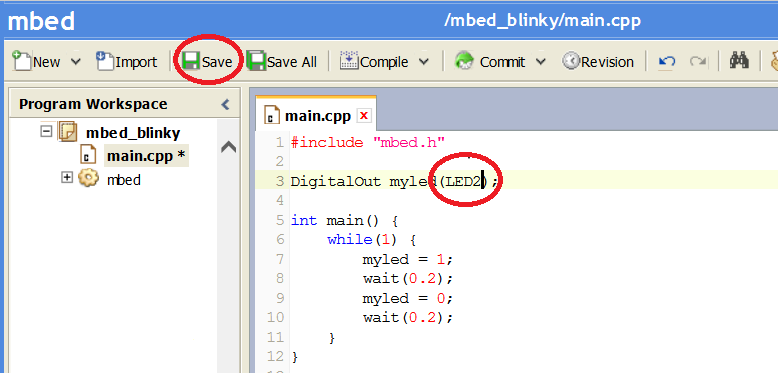
You can change blink LED by changing LED name.
Below table shows defined name of LED and the colors.
| LED name | Color |
|---|---|
| LED1 | RED |
| LED2 | GREEN |
| LED3 | BLUE |
| LED4 | RED |
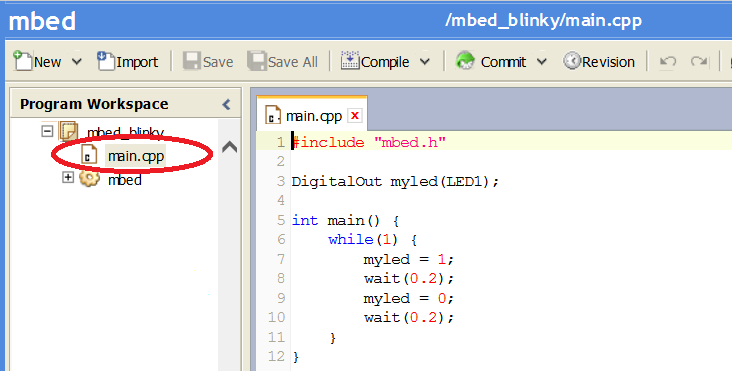
- Double-click "main.cpp" and main.cpp will be displayed.
- Modify LED name and Save Code.
- Create binary file by clicking the "Compile" button.
- After you get the binary file, copy the file to Mbed drive and check LED coloer by pushing reset button.
Add Blink LED
If you want to add blink LED, add "DigitalOut" difine in yout code as below.
Add Blink LED
DigitalOut addled_1(LED2);
DigitalOut addled_2(LED3);
Change Blink Timing
If you want to change timing of blink, modify argument of wait().
The wait() provides function that "Waits for a number of seconds".
Change wait time
#include "mbed.h"

DigitalOut myled(LED1);

int main() {
    while(1) {
        myled = 1;
//        wait(0.2);         //wait 0.2s
        wait(1);              //wait 1s
        myled = 0;
//        wait(0.2);         //wait 0.2s
        wait(1);              //wait 1s
    }
}
USE Other samples
At this point, you become to be able to import some sample code that you want, and you can modify the code as you want.
Let's import various sample code and try to execute.
Use A/D converter
Follow the procedure of "Let's blink LED". The program to import is below.
Import programAnalogIn-HelloWorld
Hello world program for mbed SDK AnalogIn API
Use Serial Peripheral Interface(SPI)
- Follow the procedure of "Let's blink LED". The program to import is below.
Import programSPI_HelloWorld_Mbed
SPI Hello World
- Before compile, edit main.cpp as below.
A part of main.cpp to delete
SPI spi(p5, p6, p7); // mosi, miso, sclk
DigitalOut cs(p8);
A part of main.cpp to add
SPI spi(D11, D12, D13);   // mosi, miso, sclk
DigitalOut cs(D10);
Use microSD
- Follow the procedure of "Let's blink LED". The program to import is below.
During importing, the dialog appears.**DO NOT CHECK the "Update all libraries to the latest version".**
Because the current version of SDFileSystem, will issue an error when you compile.Import programSDFileSystem_HelloWorld
SD File System Hello World
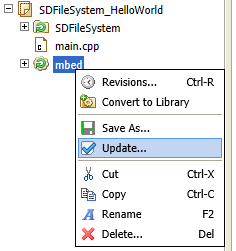
- Update Mbed library or Mbed library sources(mbed-dev or mbed-src).
- Before compile, edit main.cpp as below.
A part of main.cpp to delete
SDFileSystem sd(p5, p6, p7, p8, "sd"); // the pinout on the Mbed Cool Components workshop board
A part of main.cpp to add
SDFileSystem sd(P8_5, P8_6, P8_3, P8_4, "sd");
Use Ethernet
- Follow the procedure of "Let's blink LED". The program to import is below.
Import programTCPSocket_HelloWorld
TCP Socket Hello World with Ethernet
- To specify MAC address, add fllowing function to main.cpp.
Specify MAC address
// set mac address
void mbed_mac_address(char *mac) {
    mac[0] = 0x00;
    mac[1] = 0x02;
    mac[2] = 0xF7;
    mac[3] = 0xF0;
    mac[4] = 0x00;
    mac[5] = 0x00;
}
Use GR-PEACH as USB Device
- Follow the procedure of "Let's blink LED". The program to import is below.
If you want to use a function other a mouse, please see USBDevice page.
Import programUSBMouse_HelloWorld
USBMouse Hello World
- Reference information
Use USB Host
- To supply VBUS, please close JP3.
- Follow the procedure of "Let's blink LED". The program to import is below.
If you want to use a function other a mouse, please see USBHost page.
Import programUSBHostMouse_HelloWorld
USBHostMouse Hello World
- Reference information
Use I2C
- To pull up I2C signals, please close jumpers. Platform page shows which jumper is need to close.
- Follow the procedure of "Let's blink LED". The program to import is below.
Import programI2C_HelloWorld_Mbed
Hello World for I2C
- Before compile, edit main.cpp as below.
A part of main.cpp to delete
I2C i2c(p28, p27);
A part of main.cpp to add
I2C i2c(I2C_SDA, I2C_SCL);
Challenge!!
Let's take a look at the video of the camera by "GR-PEACH_WebCamera "!!
GR-PEACH can connect with GR-PEACH AUDIO CAMERA Shield .
GR-PEACH AUDIO CAMERA Shield provides CAMERA-IN, NTSC-IN, Line-OUT/IN, and more.
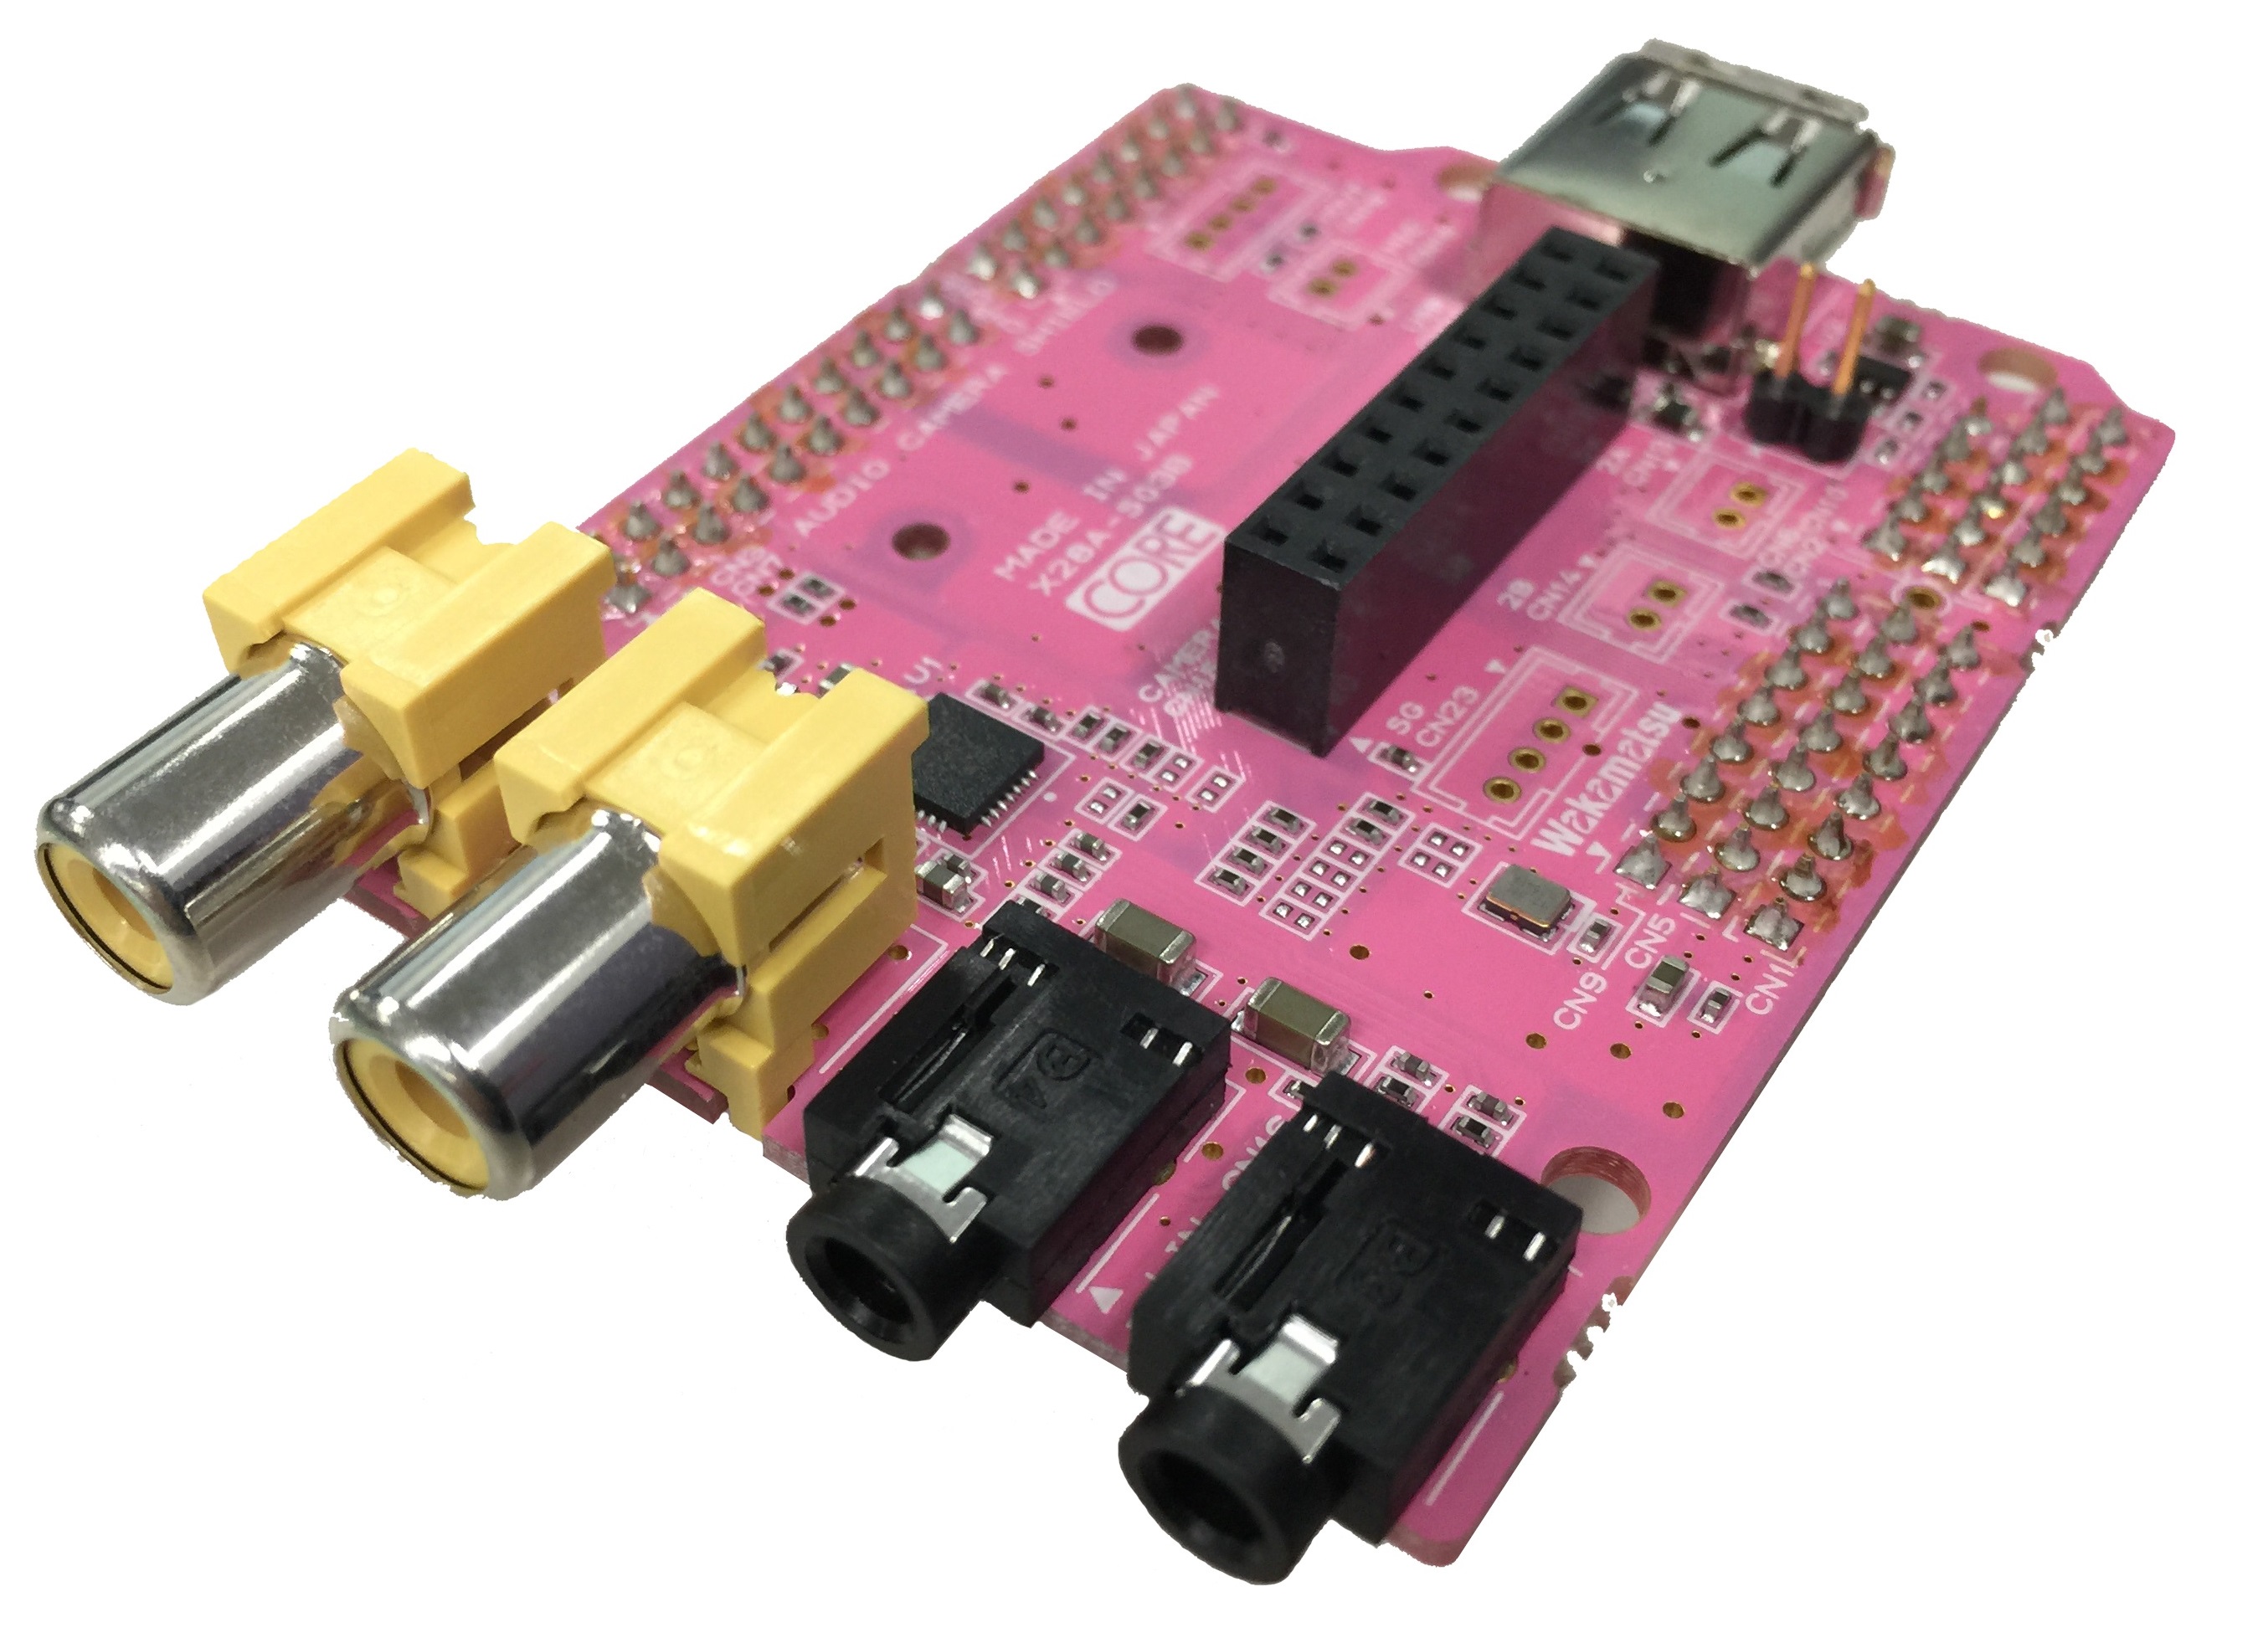 Let's challenge to monitoring of the camera image by using GR-PEACH AUDIO CAMERA Shield and GR-PEACH_WebCamera sample.
GR-PEACH_WebCamera sample needs the following H/W.
- Needed H/W
- GR-PEACH
- Audio/Camera Shield
- CMOS Camera Module(MT9V111) or Analog Camera(NTSC)
- Your PC
- GR-PEACH
Appendix
Code debug
If you want to do code debugging, please refer following page.
Code debug by IDE DS 5

