Renesas
Renesas Electronics Corporation (TSE: 6723), the world's number one supplier of microcontrollers, is a premier supplier of advanced semiconductor solutions including microcontrollers, SoC solutions and a broad range of analog and power devices.
Exporting to e2studio with J_Link debug
Environment
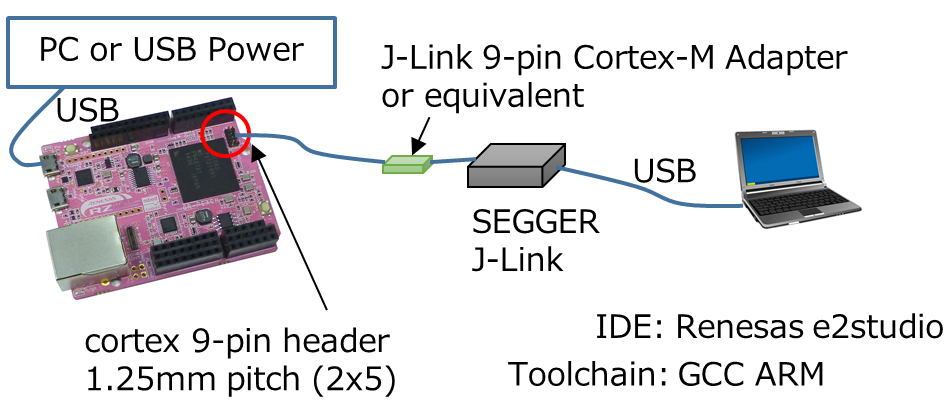
You need following components:
- GR-PEACH
- USB micro-B cable
- J-Link series
- J-Link 9-pin Cortex-M Adapter or equivalent
- Cortex 9-pin header (1.25mm pitch 2x5)
If you do not have them, goto Exporting to e2studio (CMSIS-DAP debug).
Setup
Mount Cortex 9-pin header to GR-PEACH
Mount Cortex 9-pin header to "JTAG" of GR-PEACH.
Note: 7th pin is not used (without header).
Install Windows serial driver
Install latest Windows Serial Port Driver to setup CMSIS-DAP from the link below:
https://mbed.org/handbook/Windows-serial-configuration
Install e2studio
Download e2studio 5.0.0 or lator, and install
Build of e2studio environment
Exporting to e2studio
- Go to Mbed compiler.
- Right click at the program you want to export.
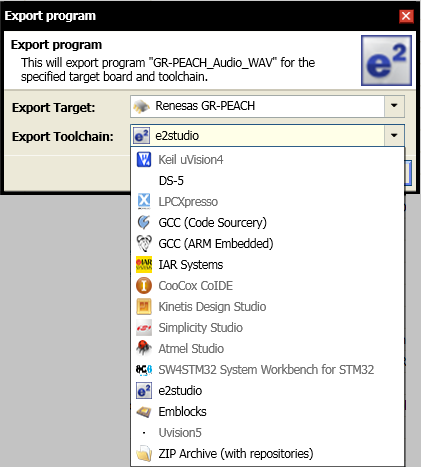
- Select "Export Program"

- Select "Renesas GR-PEACH" for Export Target
Select "e2studio" for Export Toolchain
Push "Export"
- Expand zip file.
import project to e2studio
- Launch e2studio.
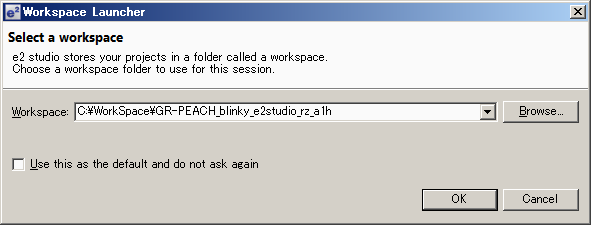
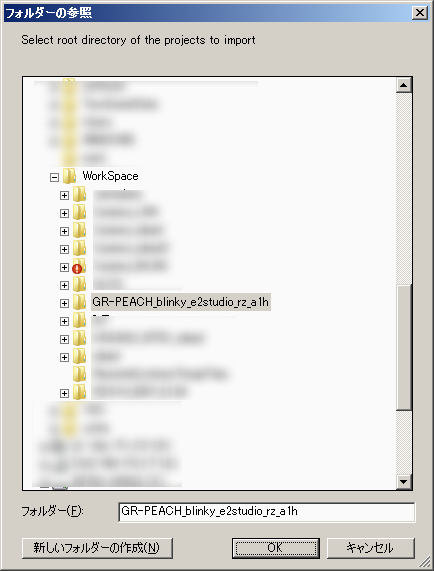
- Specify workspace directory. Workspace directory must be placed in the upper directory of the directory that includes .project file.
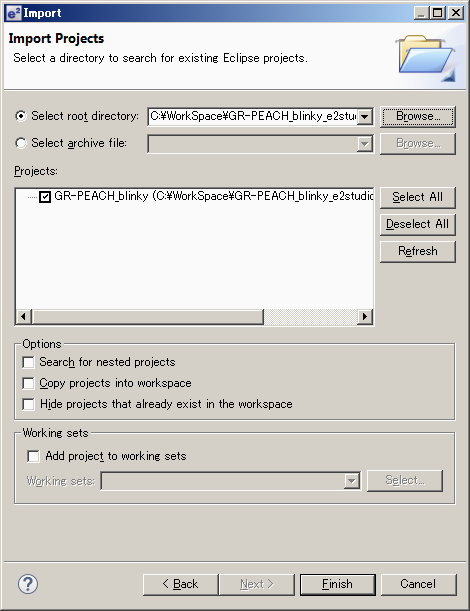
In this document, project file is placed in C:\WorkSpace\GR-PEACH_blinky_e2studio_rz_a1h\GR-PEACH_blinky, and the workspace is placed in C:\WorkSpace\GR-PEACH_blinky_e2studio_rz_a1h.
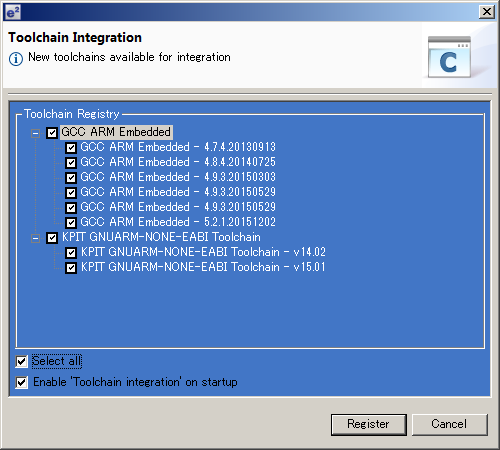
- If Toolchain Integration dialog appared, select [GCC Arm embedded version 4.9.3.20150529] and click [Register].
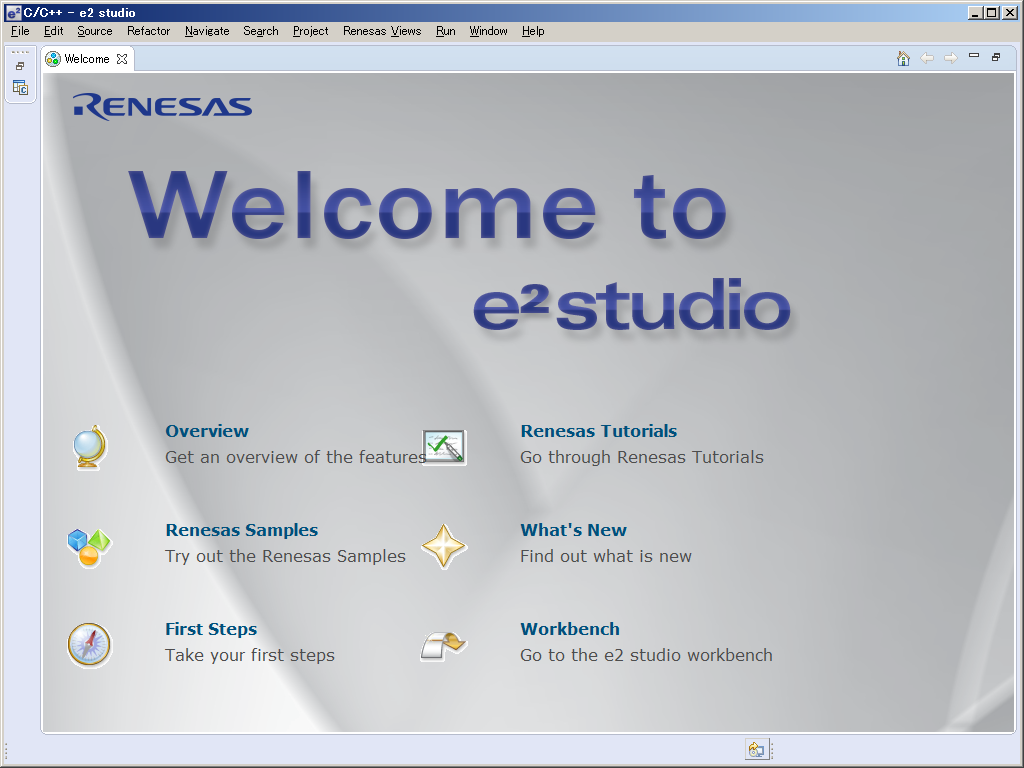
- After e2studio window opens, click [go to workbench].
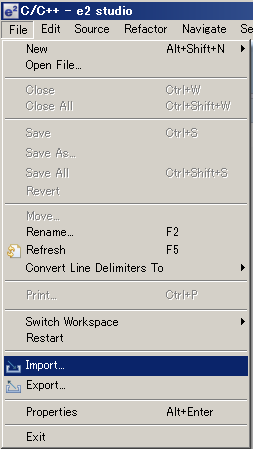
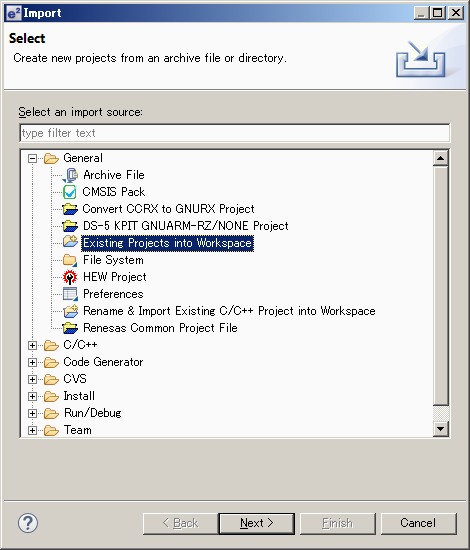
- Select [File]menu-[import].
- Select [General]-[Existing Projects into Workspace], and click [Next>]
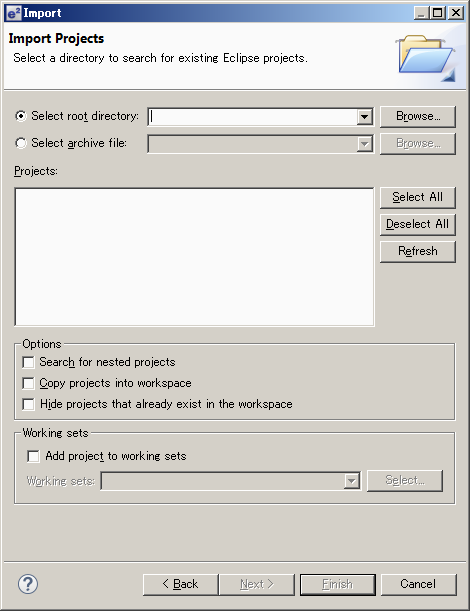
- Click [Browse].
- Click [OK].
- Click [Finish].
Build Process
- Launch e2studio.
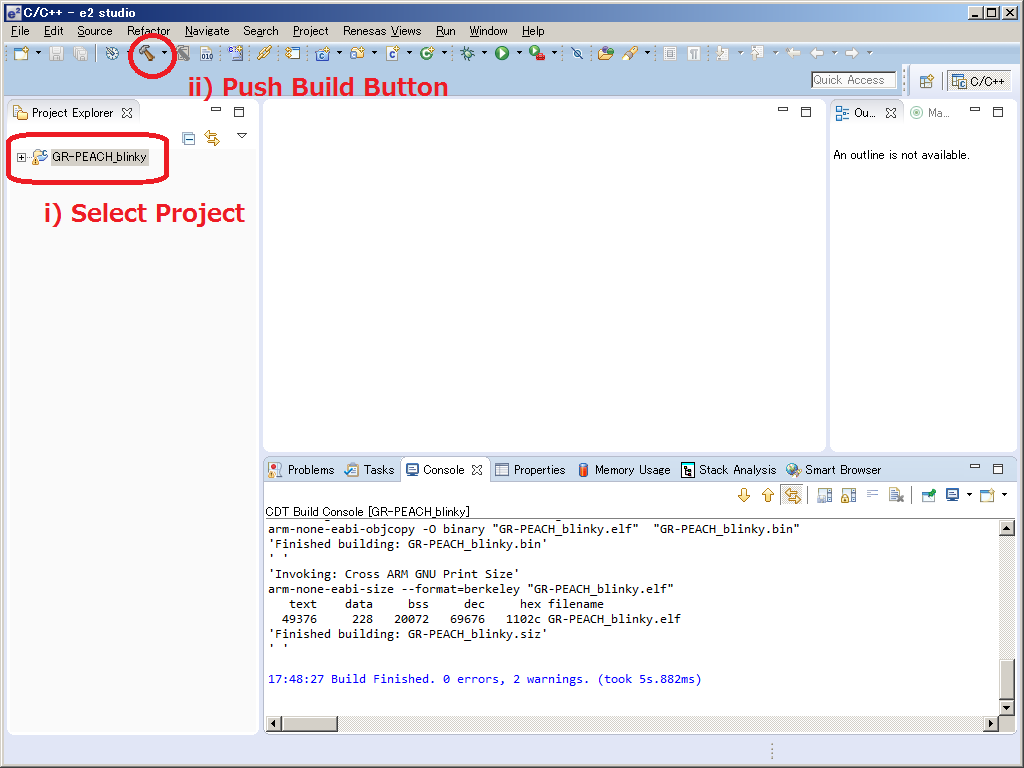
- Select the [Window] menu -> [Show View] -> [Project Explorer].
- Select the project to build.
- Click build icon.
  e.g.) The folder structure when making the work folder "C:\Workspase". Export project is GR-PEACH_blinky.
    C:
    +-- Workspace
        +-- GR-PEACH_blinky_e2studio_rz_a1h
            +-- .metadata
            +-- GR-PEACH_blinky
                |   .cproject
                |   .gdbinit
                |   .hgignore
                |   .project
                |   exporter.yaml
                |   GettingStarted.htm
                |   GR-PEACH_blinky OpenOCD.launch
                |   main.cpp
                |   mbed.bld
                |   SoftPWM.lib
                +-- .hg
                +-- .settings
                +-- Debug <- When clicking [Build Project], ".bin" and ".elf" file will be created here.
                +-- mbed
                +-- SoftPWM
The way to debug
- Connect your PC and GR-PEACH via J-Link.
- Turn on GR-PEACH (by connecting USB cable).
- Select project to debug.
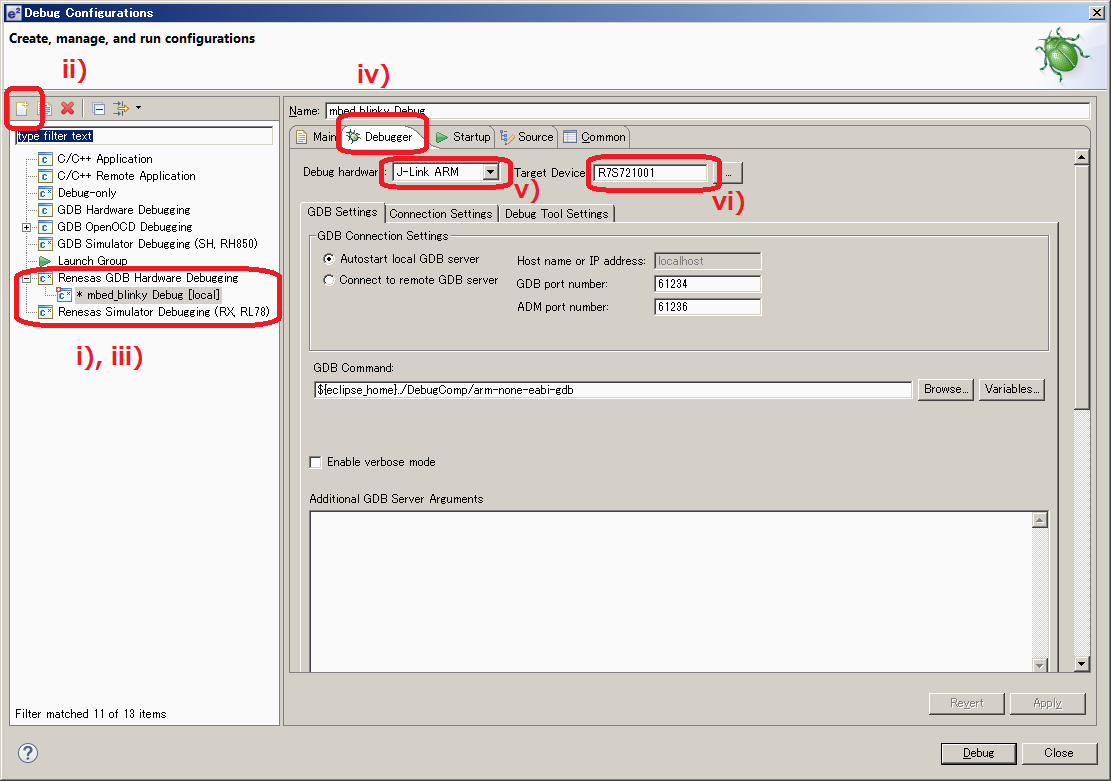
- From menu in C/C++ perspective or DS-5 debug perspective , select [Run] [Debug Configurations...]
- Select [Renesas GDB Hardware Debugging]<i>
- Click <New> icon <ii>
- Confirm a new configuration of your project has been generated.<iii>
- Click Debugger tab.<iv>
- Select [J-Link ARM] of [Debug hardware]. <v>
- Select [...] - [RZ] - [RZ/A1] - [R7S721001] of [Target Device]. <vi>
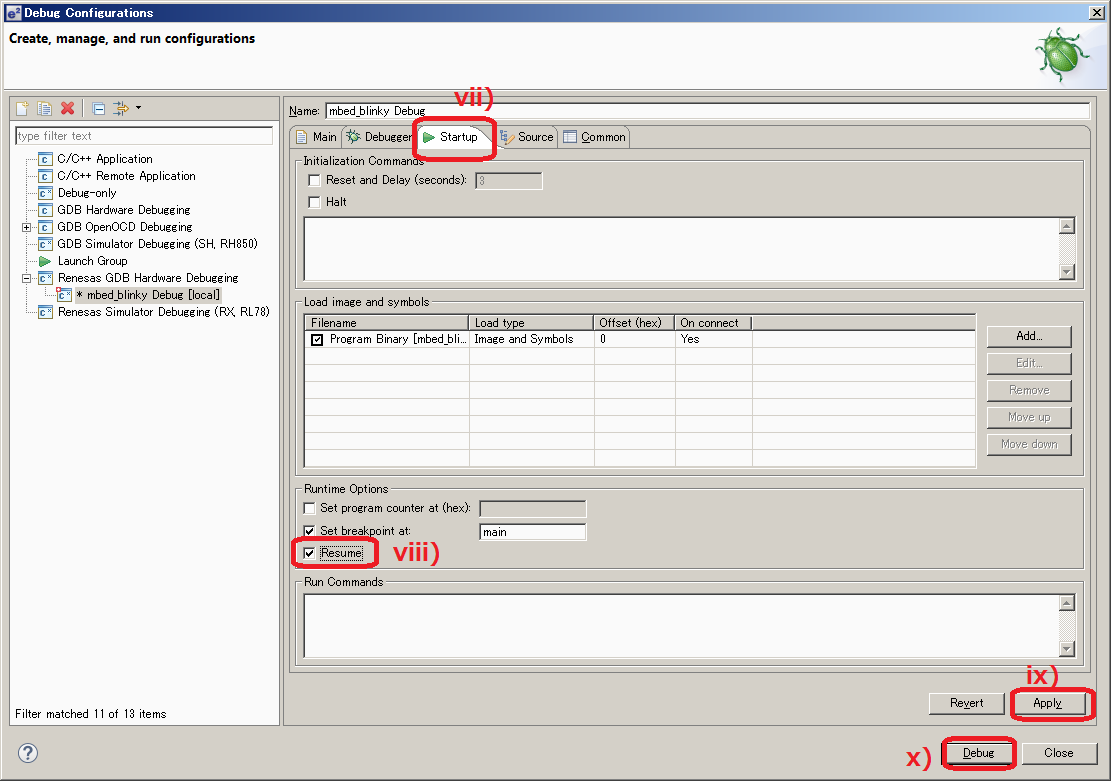
- Click [Startup] tab. <vii>
- Check [Resume] box <viii>.
- Click [Apply] button. <ix>
- Click [Debug] button <x>.
