Renesas
Renesas Electronics Corporation (TSE: 6723), the world's number one supplier of microcontrollers, is a premier supplier of advanced semiconductor solutions including microcontrollers, SoC solutions and a broad range of analog and power devices.
Exporting to e2studio with CMSIS_DAP DBG
Environment
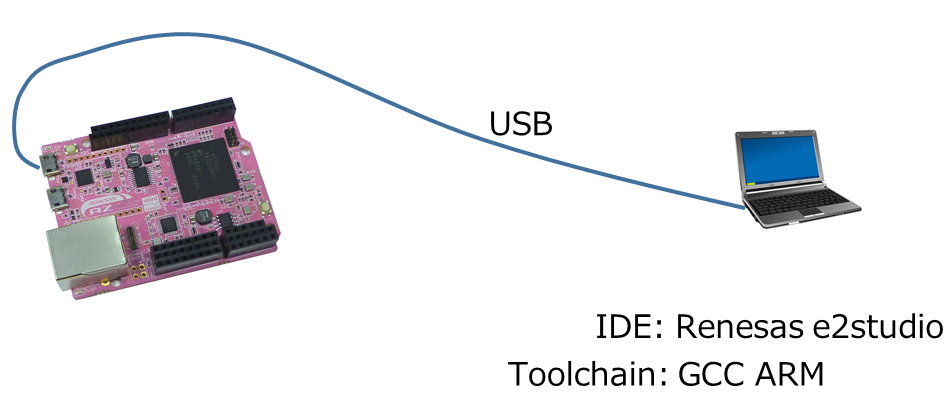
If you would like to use J-Link for debugging, please refer to Exporting to e2studio (J-Link debug).
Setup Procedure
Install Windows serial driver
Install latest Windows Serial Port Driver to setup CMSIS-DAP from the link below:
https://mbed.org/handbook/Windows-serial-configuration
Install e2studio
Please download e2studio 5.0.0 or lator, and install
Install OpenOCD
Please download exe file of OpenOCD v0.10.0-201601101000-dev, and install.
Associate GR-PEACH config with OpenOCD
Please copy renesas_gr-peach.cfg to scripts\board directory included in the OpenOCD installed location. By default, it should be located as follows:
- In case of using 32-bit windows:
C:\Program Files\GNU ARM Eclipse\OpenOCD\0.10.0-201601101000-dev\scripts\board - In case of using 64-bit windows:
C:\Program Files (x86)\GNU ARM Eclipse\OpenOCD\0.10.0-201601101000-dev\scripts\board
Install OpenOCD add-in to e2studio
Information
This procedure can be skipped when you use e2studio version 5.2 or later since the add-in is incorporated in e2studio.
- Launch e2studio.
- Select[Help]menu→[Install new software...]
- Input
http://gnuarmeclipse.sourceforge.net/updatesto [work with] box, and push [Add] button.
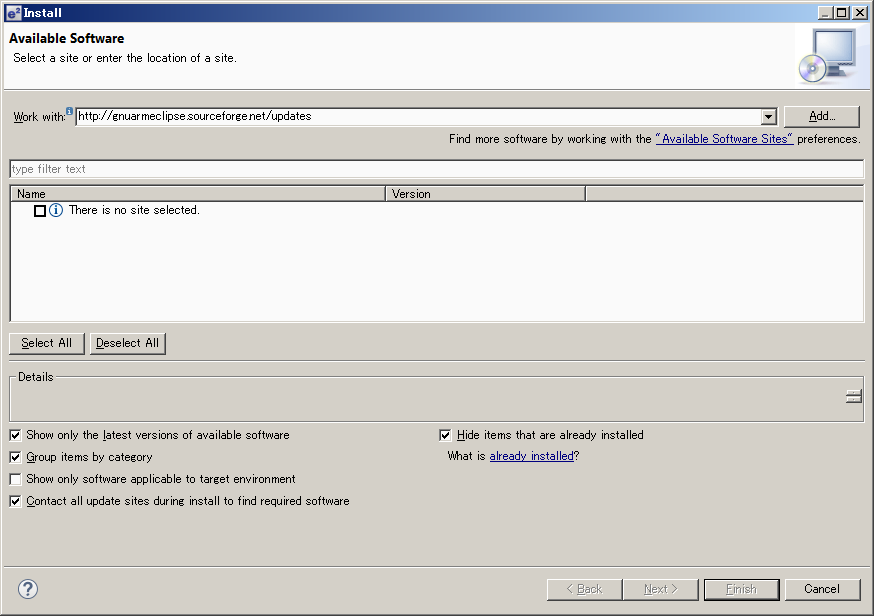
- Check [GNU ARM C/C++ OpenOCD Debugging] and push [Next >] button.
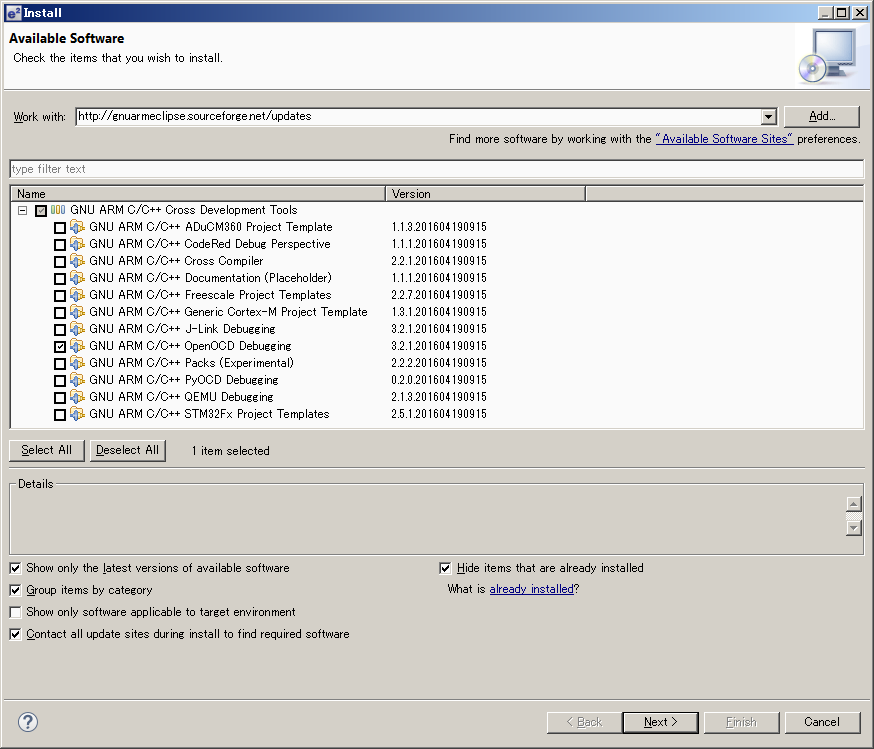
- Install and restart e2studio.
Configure OpenOCD on e2studio
- Select [Window] -> [Preferences].
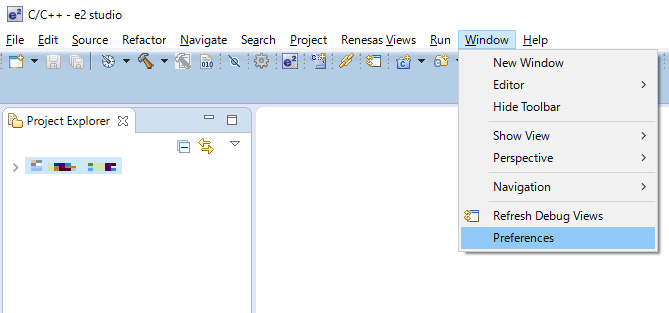
- Select [Run/Debug] - [OpenOCD].
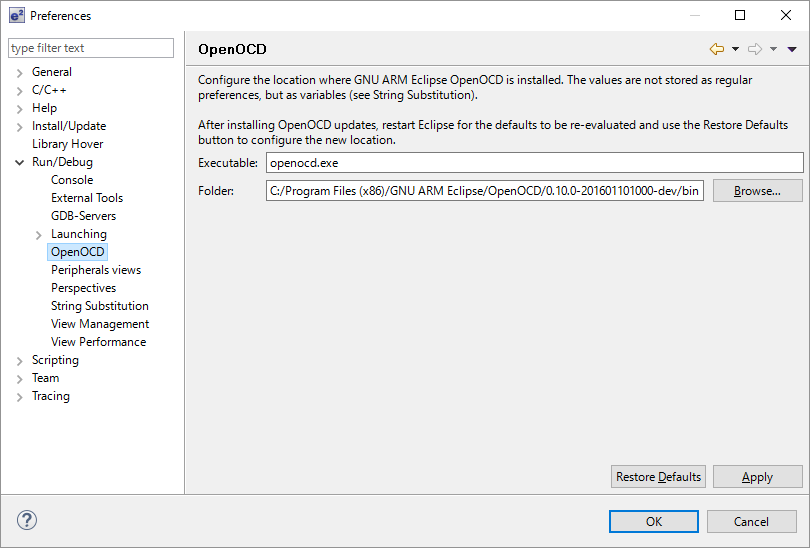
- Check if the directory and executable are filled with OpenOCD installation folder and openocd.ex respectively. If not, please input OpenOCD installation folder and openocd.exe there and click [OK]. Note that the default OpenOCD installation folder should be as follows:
- In case of using 32-bit windows:
C:/Program Files/GNU ARM Eclipse/OpenOCD/0.10.0-201601101000-dev/bin - In case of using 64-bit windows:
C:/Program Files (x86)/GNU ARM Eclipse/OpenOCD/0.10.0-201601101000-dev/bin
Build of e2studio environment
Exporting to e2studio
- Go to Mbed compiler.
- Right click at the program you want to export.
- Select "Export Program"

- Select "Renesas GR-PEACH" for Export Target
Select "e2studio" for Export Toolchain
Push "Export"
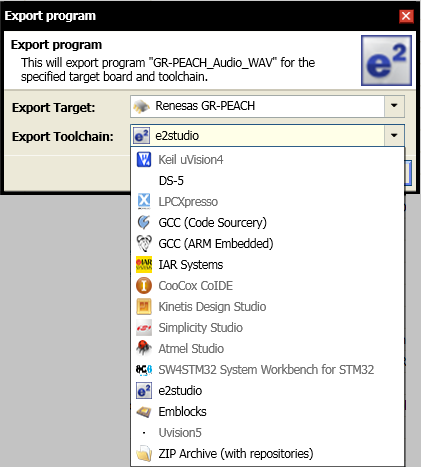
- Expand zip file.
import project to e2studio
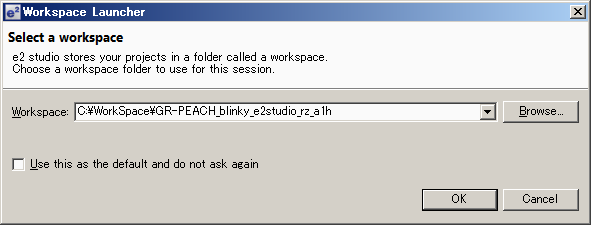
- Launch e2studio.
- Specify workspace directory. Workspace directory must be placed in the upper directory of the directory that includes .project file.
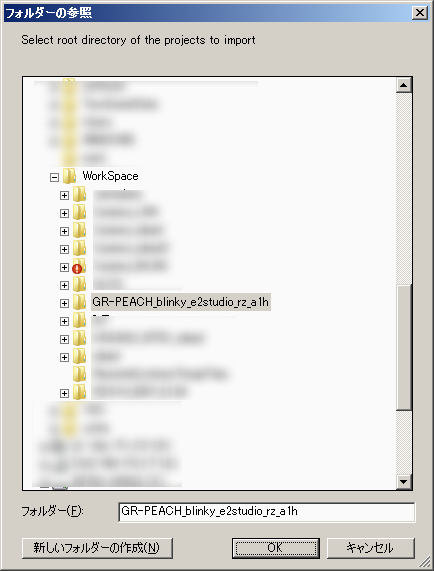
In this document, project file is placed in C:\WorkSpace\GR-PEACH_blinky_e2studio_rz_a1h\GR-PEACH_blinky, and the workspace is placed in C:\WorkSpace\GR-PEACH_blinky_e2studio_rz_a1h.
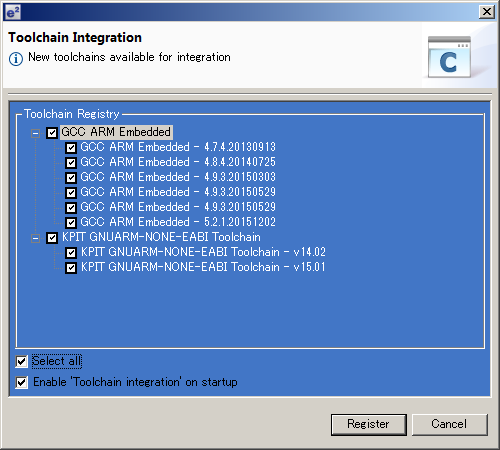
- If Toolchain Integration dialog appared, select [GCC ARM embedded version 4.9.3.20150529] and click [Register].
- After e2studio window opens, click [go to workbench].
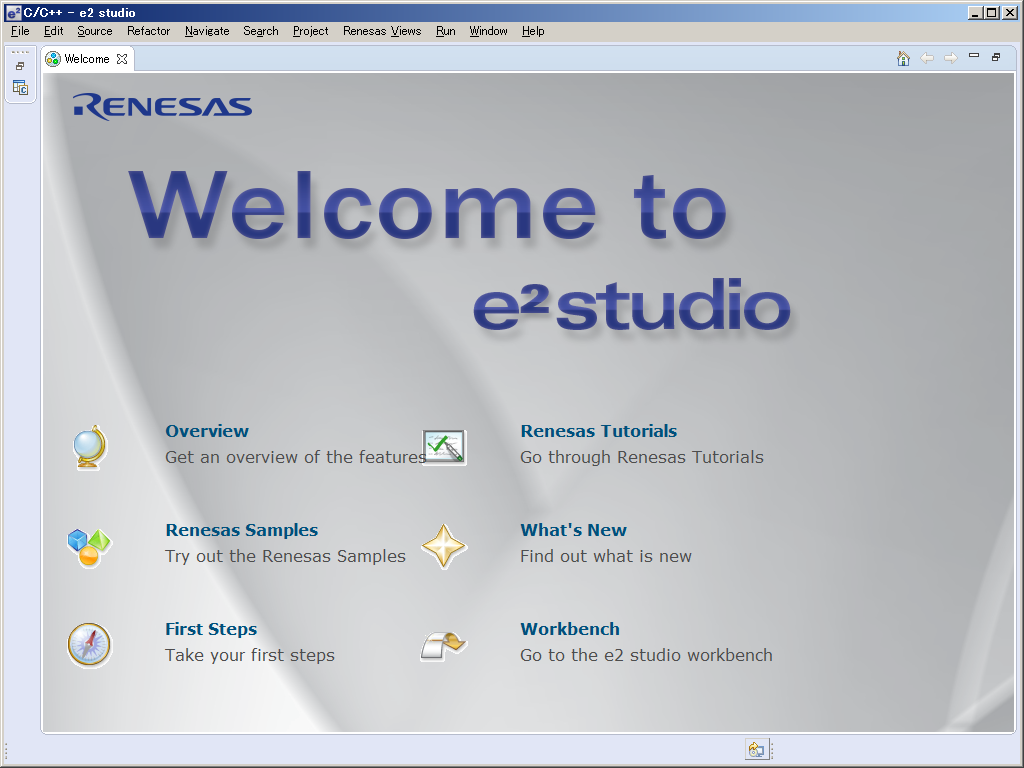
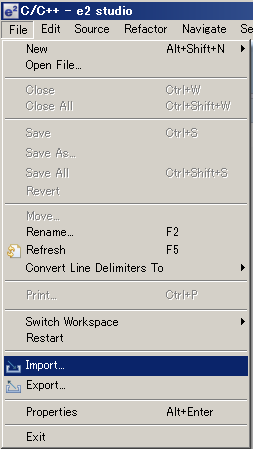
- Select [File]menu-[import].
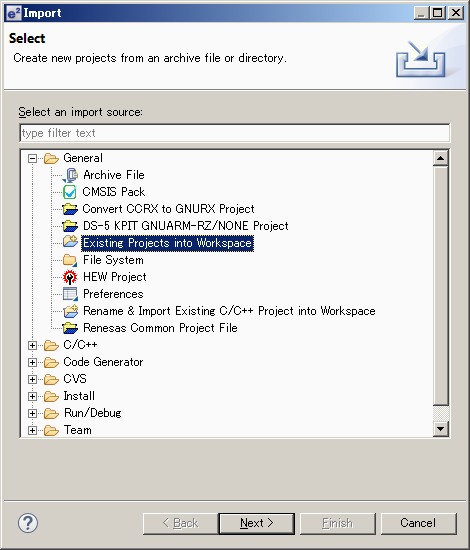
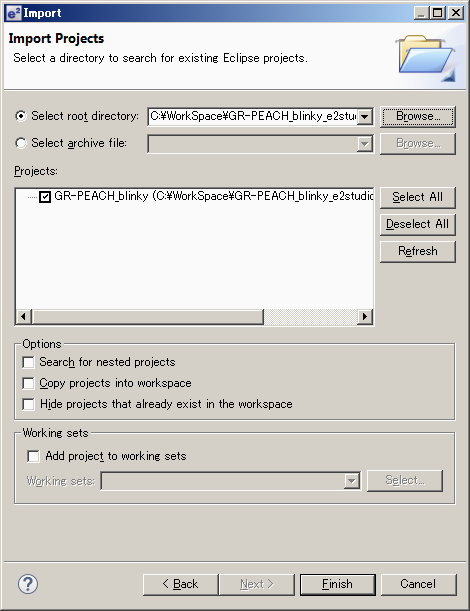
- Select [General]-[Existing Projects into Workspace], and click [Next>]
- Click [Browse].
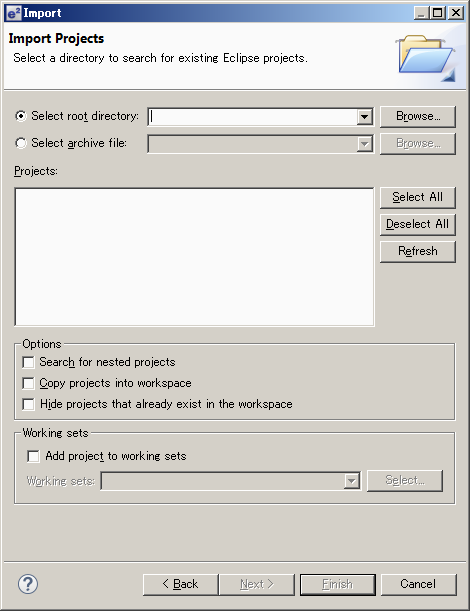
- Click [OK].
- Click [Finish].
Build Process
- Launch e2studio.
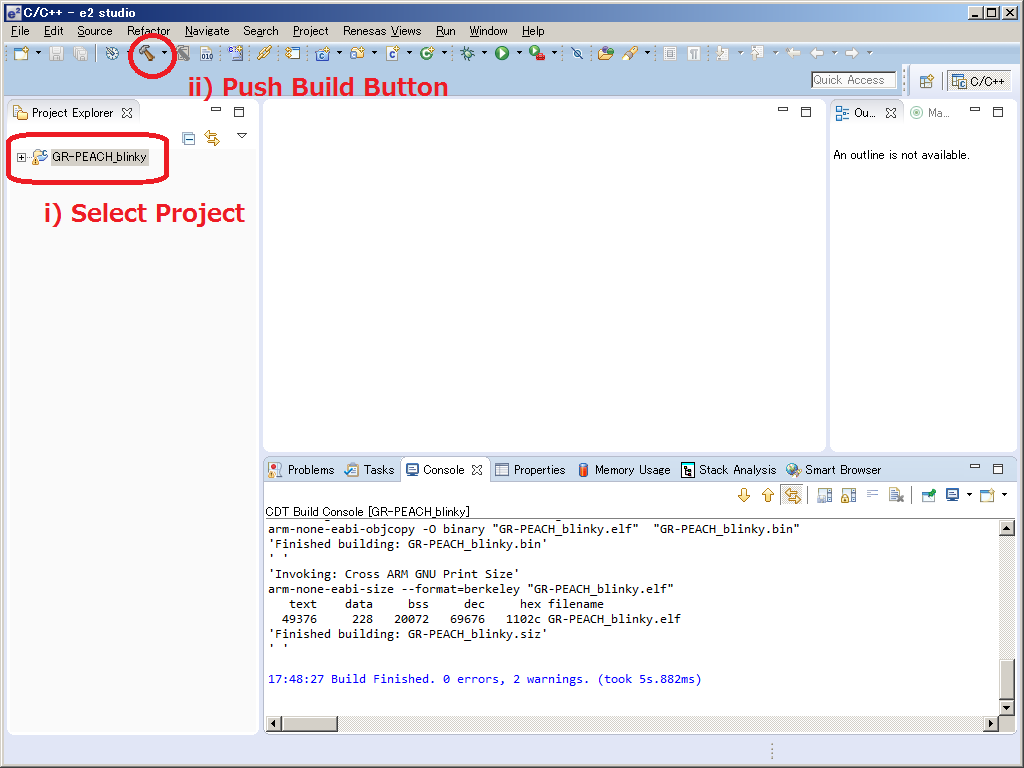
- Select the [Window] menu -> [Show View] -> [Project Explorer].
- Select the project to build.
- Click build icon.
  e.g.) The folder structure when making the work folder "C:\Workspase". Export project is GR-PEACH_blinky.
    C:
    +-- Workspace
        +-- GR-PEACH_blinky_e2studio_rz_a1h
            +-- .metadata
            +-- GR-PEACH_blinky
                |   .cproject
                |   .gdbinit
                |   .hgignore
                |   .project
                |   exporter.yaml
                |   GettingStarted.htm
                |   GR-PEACH_blinky OpenOCD.launch
                |   main.cpp
                |   mbed.bld
                |   SoftPWM.lib
                +-- .hg
                +-- .settings
                +-- Debug <- When clicking [Build Project], ".bin" and ".elf" file will be created here.
                +-- mbed
                +-- SoftPWM
The way to debug
Debug
- Connect USB cable
- Copy ".bin" file to Mbed drive
- Reconnect USB cable
- Select project to debug.
- From menu in C/C++ perspective or debug perspective , select [Run] [Debug Configurations...]
- Select [<project-name> OpenOCD] in [GDB OpenOCD Debugging]
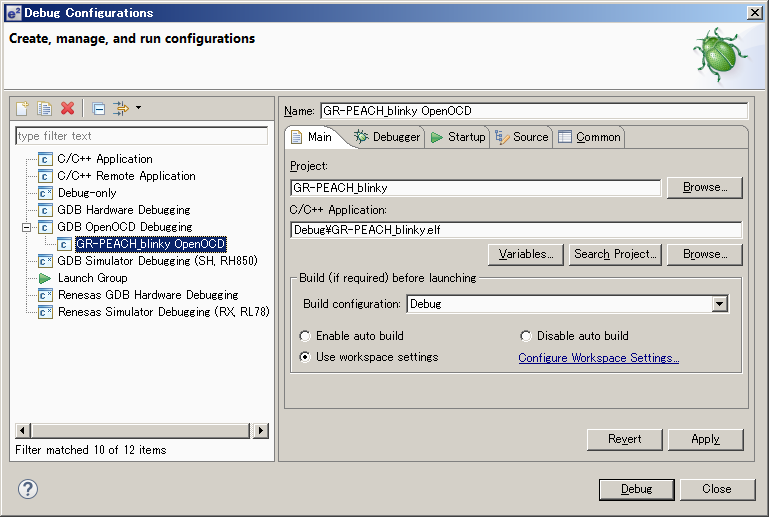
- Click "Debug".
- If you want to reset :
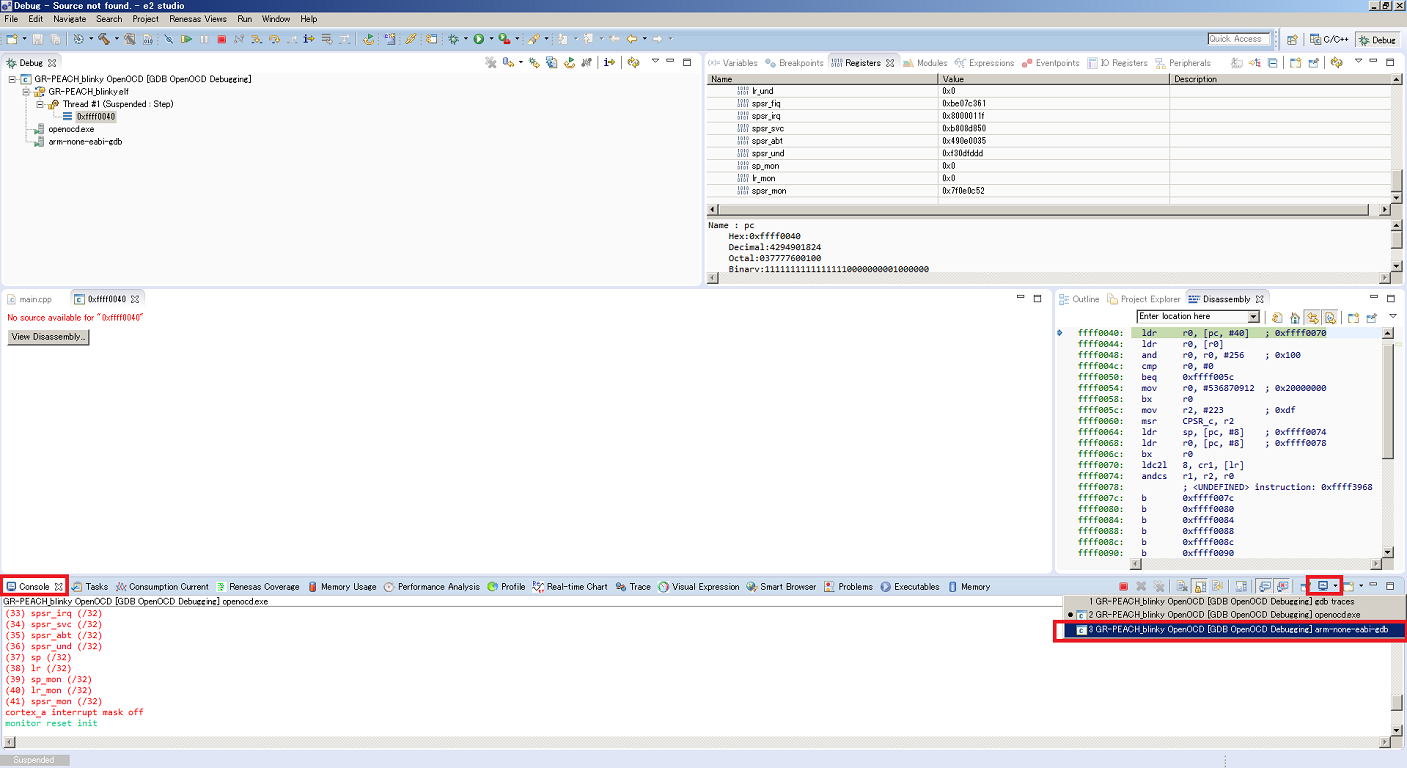
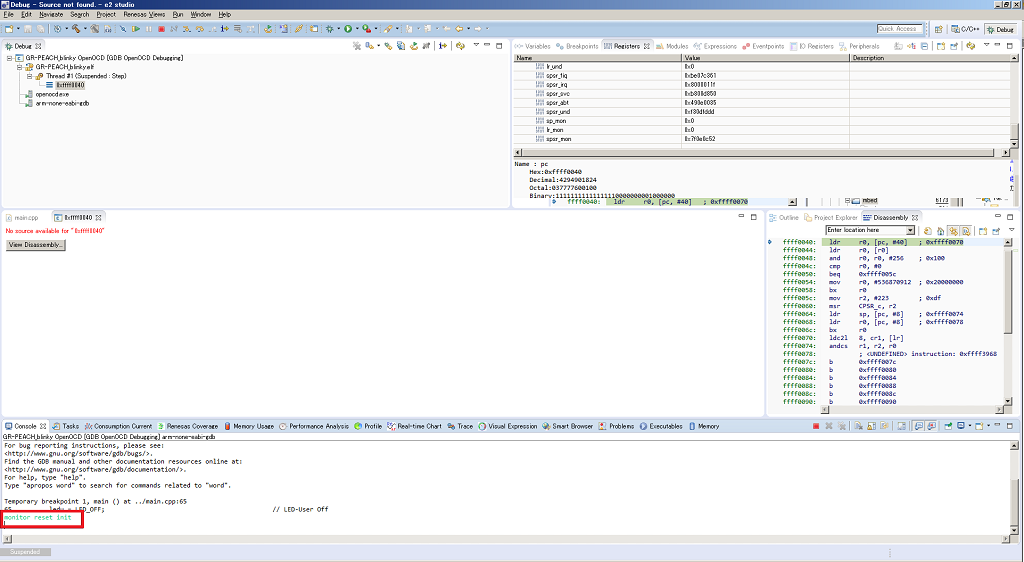
please enter the following command to "arm-none-eabi-gdb.exe" screen in "console" view.
When you drop down from the console view toolbar buttons, you can switch the screen.
monitor reset init
Support features
These features are supported. Generic views which uses the features below would be useable.
| Debugging feature | Resume | Suspend | Step in | Step over | Step return | Reset | Memory R/W | Download | CPU register R/W | Software breakpoint | Hardware breakpoint | Watchpoint |
| CMSIS-DAP | ✔ | ✔ | 4. | 4. | 4. | 5. | 3. | 2. | ✔ | 1. | 1. | - |
| J-Link | ✔ | ✔ | ✔ | ✔ | ✔ | ✔ | ✔ | ✔ | ✔ | ✔ | ✔ | ✔ |
- Software breakpoint will be replaced with Hardware breakpoint. 6 points are available in total.
- Downloading from e2 studio to serial flash memory is not supported. But you can download the program by copying the bin file to the drive which is generated when you connect the board to PC, because GR-PEACH is Mbed device. Before you download the program by the manner of Mbed, please disconnect the debugger from the board.
- Reading or writing memory while program is running are not supported. And writing is supported only for RAM.
- .gdbinit is required to stepping the program which uses interrupt.
- The button for reset in Debug View doesn't work, but the command to reset is available. Please enter "monitor reset init" to reset the program in the console for GDB (arm-none-eabi-gdb).
Although the display is not changed, but the program would be reset. The button for restart will work once. Please don't use it.
e2 studio has the special views for Renesas. The supported status are below.
| Renesas debug view | I/O registers | Event point | Trace | Performance Analysis | Profile | Coverage | Realtime memory | Realtime Expression | Realtime chart | Virtual console | Wave/Image | Viaual Expression | Consumption current | Memory usage |
| OpenOCD | - | - | - | - | - | - | - | - | - | - | ✔ | - | - | - |
| J-Link | ✔ | ✔ | ✔ | - | - | - | ✔ | ✔ | ✔ | - | ✔ | ✔ | - | - |