Renesas
Renesas Electronics Corporation (TSE: 6723), the world's number one supplier of microcontrollers, is a premier supplier of advanced semiconductor solutions including microcontrollers, SoC solutions and a broad range of analog and power devices.
Exporting to DS 5
Information
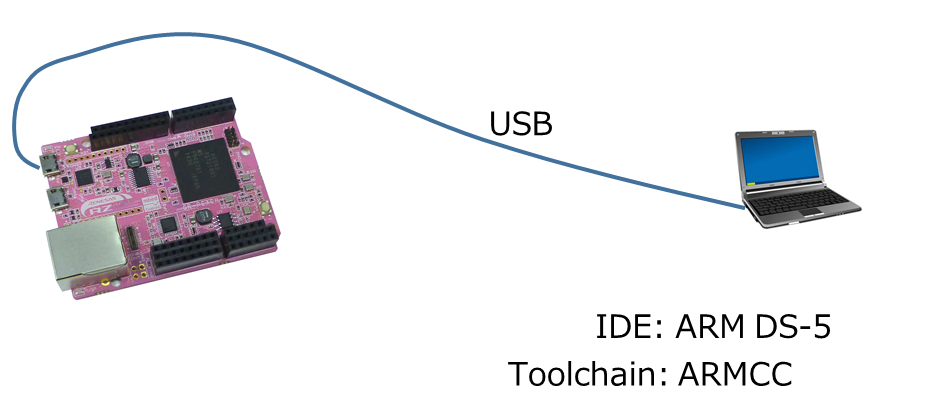
In this method, you will need a license of ARMCC for compilation.
Environment
Install Windows serial driver
Install latest Windows Serial Port Driver to setup CMSIS-DAP from the link below:
https://mbed.org/handbook/Windows-serial-configuration
Download DS-5
Download DS-5 v5.19, and install. (You need an Arm account for donwloading.)
・Windows 32bit
・Windows 64bit
・Linux 32bit
・Linux 64bit
Build of DS-5 environment
Exporting to DS-5
- Goto Mbed compiler.
- Right click at the program you want to export.
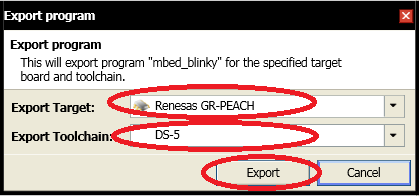
- Select "Export Program"

- Select "Renesas GR-PEACH" for Export Target
Select "DS-5" for Export Toolchain
Push "Export"
- Expand zip file.
Build Process
- Create a new DS-5 workspace.
A) Create a work folder in an arbitrary position.(You can decide the folder name freely)
B) Copy the source files to the folder created in step A).
C) Start DS-5.
D) Select the [File] menu -> [Switch Workspace] -> [Other...].
E) Click [Browse...] in the [Workspace Launcher] dialog box.
F) Select the folder created in step A). Then, click [OK].
G) DS-5 automatically restarts and the [Welcome to DS-5] screen appears.
H) Close the [Welcome to DS-5] screen.
- Select the [Window] menu -> [Show View] -> [Project Explorer].
- Right-click the [Project Explorer] view and select [Import...]
- In the [Select an import source] of [Import] dialog box, select [General] -> [Existing Projects into Workspace]. Then, click the [Next] button.
- In the [Import] dialog box, check [Select root directory] and then click [Browse...].
- In the [Reference Folder] dialog box, select the source-file copy destination (folder name created in step 1-A)) and then click [OK].
- Check your Mbed project is selected in the [Projects] list and then click [OK] in the [Import] dialog box.
- Remove the check mark from [Copy projects into workspace] in the [Import] dialog box.
- Click [Finish] in the [Import] dialog box.
- Right-click Mbed project displayed in the [Project Explorer] view. Then, select [Clean Project]
- Right-click like previous step and then click [Build Project].
  e.g.) The folder structure when making the work folder "C:¥Workspase". Export project is mbed_blinky.
    C:
    +-- Workspace
        +-- mbed_blinky
            |   .cproject
            |   .hgignore
            |   .project
            |   ds5_rz_a1h.launch
            |   GettingStarted.htm
            |   main.cpp
            |   mbed.bld
            |   mbed_blinky.bin    <- When clicking [Build Project], ".bin" file will be created here.
            +-- .hg
            +-- Build              <- When clicking [Build Project], ".axf" file will be created here.
            +-- mbed
Troubleshooting!
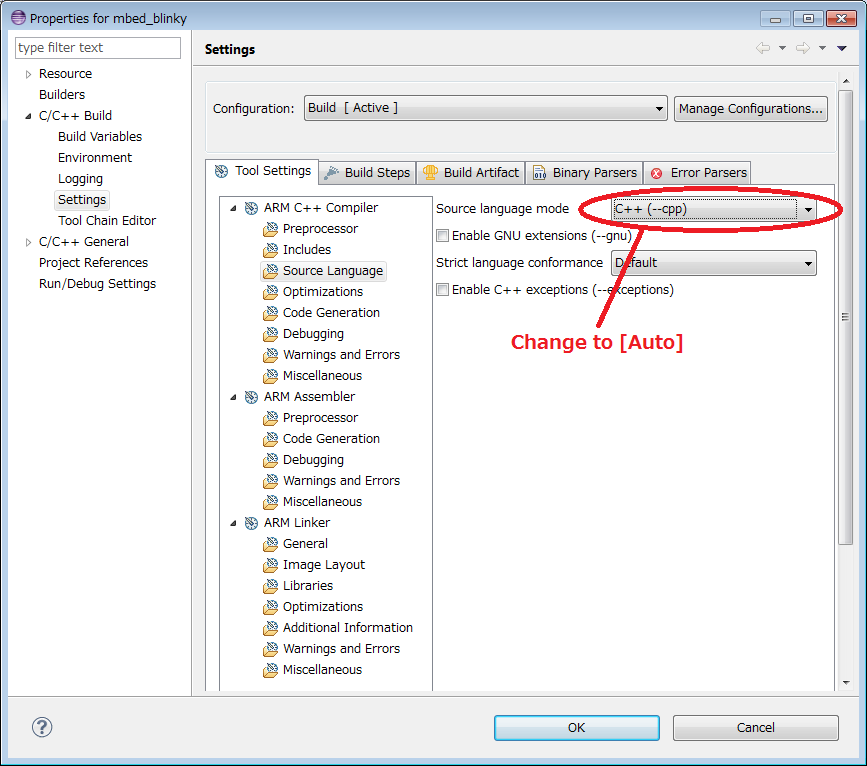
If the build fails, please change the following.
Right-click Mbed project displayed in the [Project Explorer] view. Then, select [Properties].
[C/C++ Build] -> [Settings] -> [Source Language] -> [Source Language mode]
Troubleshooting!
There is a problem with Exporter currently, the compile can not success if you export with DS-5.
However, you can avoid build errors by doing the following procedure.
- Right-click on the project name and select "Property".
- Select "C / C ++ Build" - "Settings".
- Select "Tool Settings" tab.
- Select "ARM C++ Compiler" - "Includes".
- Add ""${workspace_loc: / $ {ProjName} /mbed_config.h}"" to the "Pre-include" column.
- Press "OK" button at the bottom of "Property".
Add DS-5 configuration for the target
Add Mbed RZ/A1H configuration into DS-5.
configdb_v519-20150327.zip
- Download above zip file and extract it
- Start DS-5
- From menu, select [Window] [Preference] and [DS-5] [Configuration Database] press [Add] button

- Browse the configdb folder which you extracted and set configuration name e.g. mbed

- Press [Rebuild database] button
- Press [OK] button to close the dialog
Create debug configuration
1. Connection tab
- From menu in C/C++ perspective or DS-5 debug perspective , select [Run] [Debug Configurations...]
- Create new configuration from [DS-5 Debugger]
- Select target: Renesas - RZ/A1H R7S721001 - Bare Metal Debug - Debug Cortex-A9
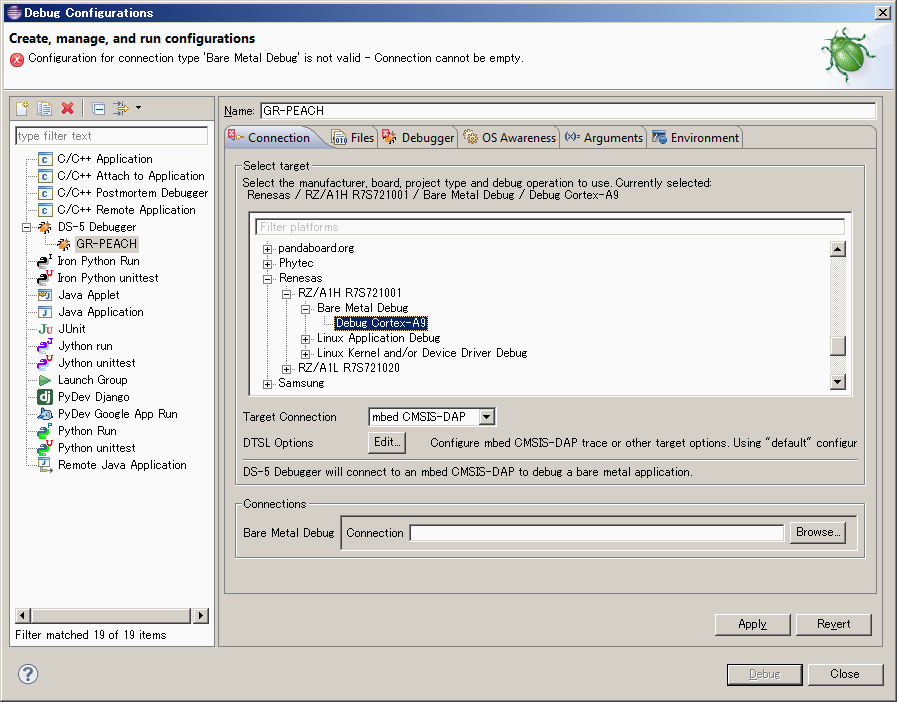
- Set Target Connection to Mbed CMSIS-DAP
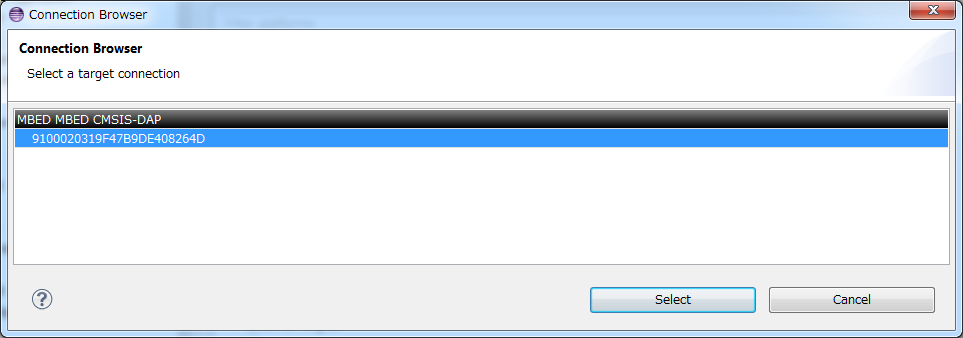
- Select CMSIS-DAP device from [Browse...] of the Connections
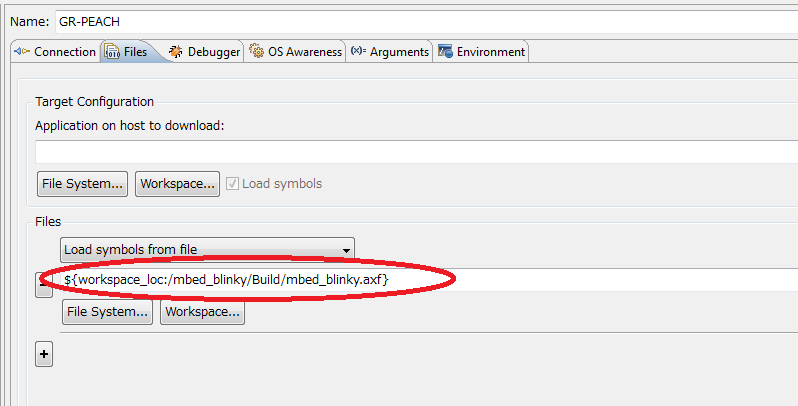
2. File tab
- Select .axf file of the test program in the Files
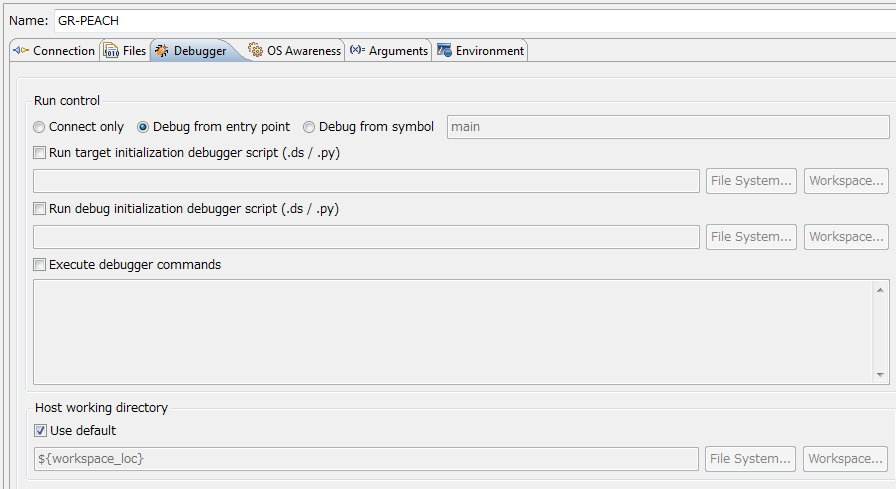
3. Debugger tab
- Run Control : Debug from entry point
4. Debug
- Copy ".bin" file to Mbed drive
- Push GR-PEACH's reset button or reconnect USB cable
- Press [Apply] and [Debug] button to start debug session
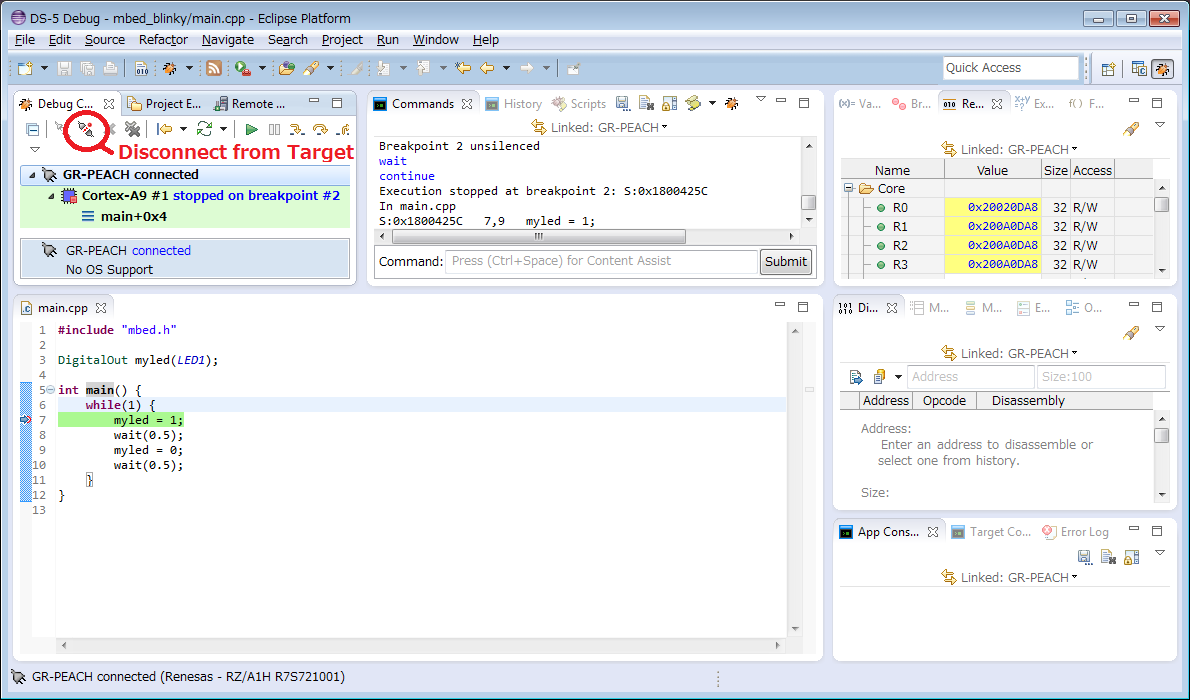
- When rebuilding it and debugging again, press "Disconnect from Target" button and reconnect USB cable
Troubleshooting!
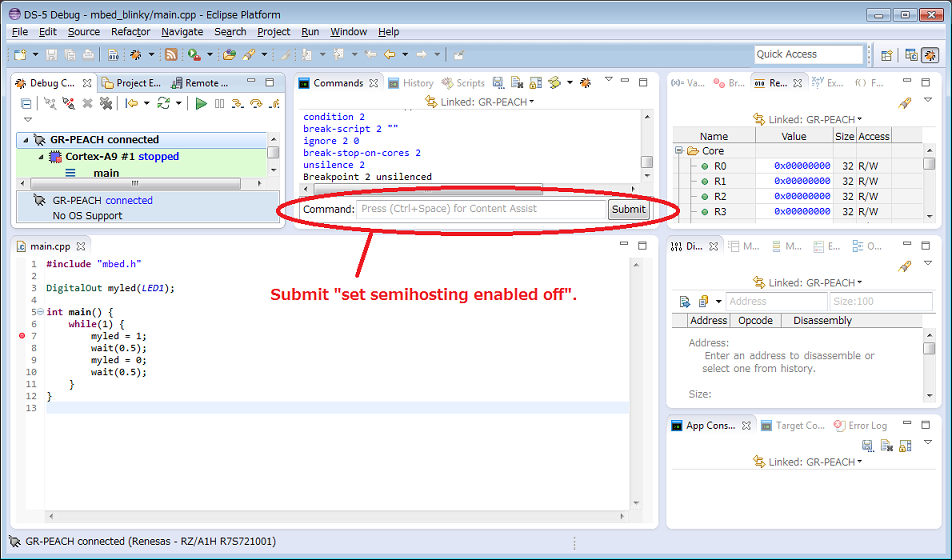
If you want to use the printf(), please disables all semihosting operations.
http://infocenter.arm.com/help/index.jsp?topic=/com.arm.doc.dui0452b/CHDBCCFA.html
