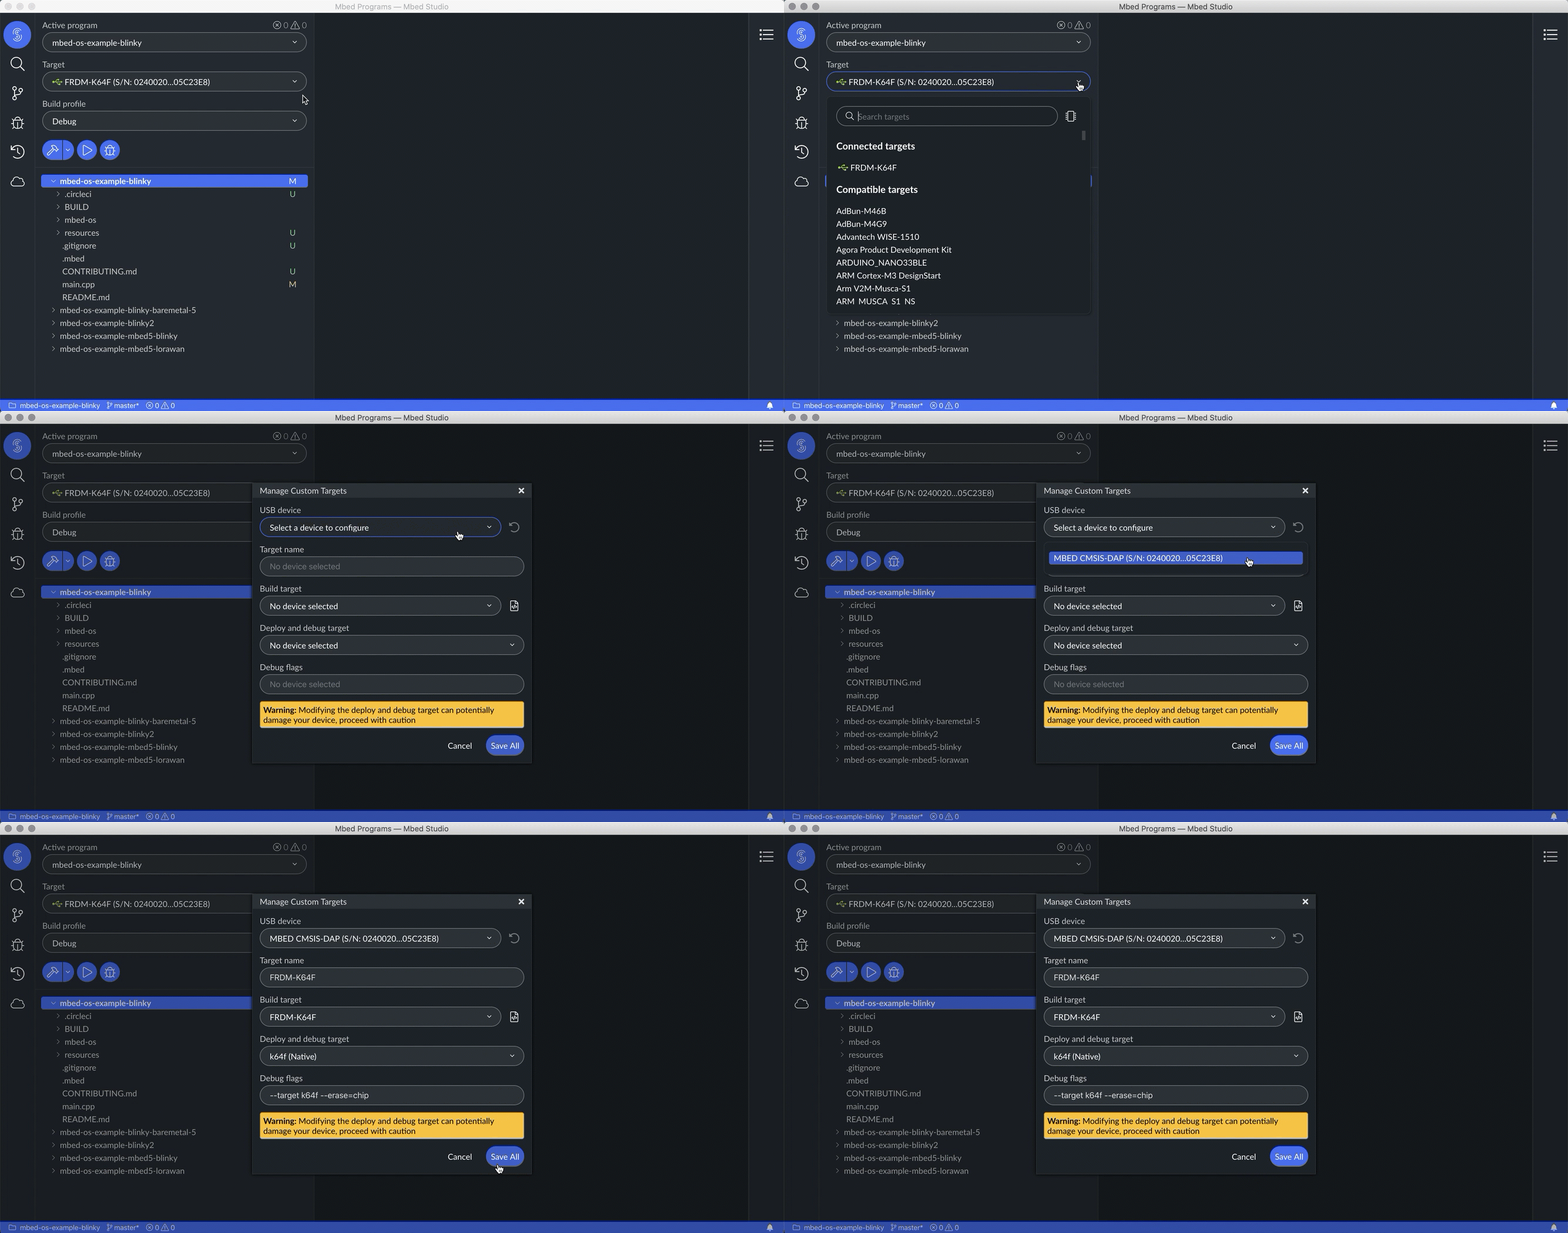
Custom targets
In Mbed OS, a build target is a destination for a software build, for example an MCU, development board or custom board. A build is always done for a specific target.
Mbed Studio has a list of build targets for all Mbed Enabled development boards (filtered to match your program's version of Mbed OS). In some cases, you may want to create a custom target. For example, you may:
- Have a debug probe connected to a board that doesn't have an integrated interface chip. When you plug in a debug probe, Mbed Studio will need to know the target to build and debug for, so you need to specify it.
- Use a debugger configuration that isn't the default for your board, such as one found in a CMSIS-Pack. The software debugger will need to know what pack and debug target to use.
- Use a derived build target (inheriting its description from another target) or may have added hardware components to your development boards, and want a build target that works with the additional components. You need to edit the file
custom_target.json.
A custom target is tied to an individual board or debug probe (based on its USB Serial Number); every time you plug it in, Mbed Studio automatically chooses the custom target you set up for it.
Warning: Flashing and debugging in an incompatible way (for example, if you select an incorrect build target or deploy and debug target) can damage your board and make it unusable.
Setting up a custom target
-
Connect your hardware over USB. Mbed Studio detects the device.
If your device is a debug probe, or if your board is not supported by your program's version of Mbed OS, the Manage Custom Targets dialog box opens automatically.
If your device is a development board, open the Target drop-down list and click the Manage custom targets button
 :
: Selecting a device to configure.
 -
The Manage Custom Targets dialog box shows all USB-connected devices in the USB device drop-down list. Select the one you want to create a custom target for.
All fields are populated with the default values for the custom target.
-
In the Build target drop-down list, you can:
-
Select a different build target. A build target is the target hardware (device) you build the program for.
Selecting a build target populates the Target name, Deploy and debug target and Debug flags fields with matching values, unless you've already manually edited them.
-
Click the Modify Mbed custom targets button
 to create a
 custom_target.jsonfile in the root folder of your program.You may want to do this if your custom target is inheriting its description from another target, or if you're creating a new custom target because you have additional hardware components on your board.
To learn how to use the
custom_target.jsonfile, see the Mbed OS documentation.
-
-
In the Deploy and debug target drop-down list, leave the values populated by default or select a different target. Selecting a different target will update the Debug flags field. A deploy and debug target is how Mbed Studio communicates with the device in order to flash the program or debug it.
 Changing the default build target.
 -
In the Debug flags field, check the debug flags set for your custom target. Debug flags are command-line switches sent to PyOCD when flashing and debugging. Leave the values populated by default or update the flags. See the pyOCD documentation for more information. See also pyOCD's built-in help from the terminal:
pyocd --help -
Click the Save All button.
Resetting a target
To reset a target, open the Manage Custom Targets dialog box again and click the Reset button ![]() .
.