Managing libraries
When you import a program to Mbed Studio from os.mbed.com, a Git hosting service or one of the built-in example programs, you also import all of the libraries on which it is dependent, including Mbed OS which is delivered as mbed-os. You can import additional libraries to your program in order to make use of their functionality.
- When you create an example Mbed OS program, including an empty example, Mbed Studio adds the version of Mbed OS that Mbed Studio is shipped with.
- When you import an existing program, Mbed Studio adds the version of Mbed OS the imported program's
mbed-os.libfile points to.
Note that the Mbed OS bare metal profile is not a separate library; it is the full Mbed OS library, which is stripped down at build time. For more information, see the Mbed OS bare metal profile page.
Your program may require additional libraries, for example ones that support hardware you've added to your development board. If you import a program already using these libraries, they will be imported with your program. If you need to add additional libraries, see the Importing a library section below.
For programs with Mbed OS 5 and above: You can use a shared instance of Mbed OS to save hard disk space. See Using a shared instance of Mbed OS below. See also: Creating or importing a program.
Opening the Libraries view
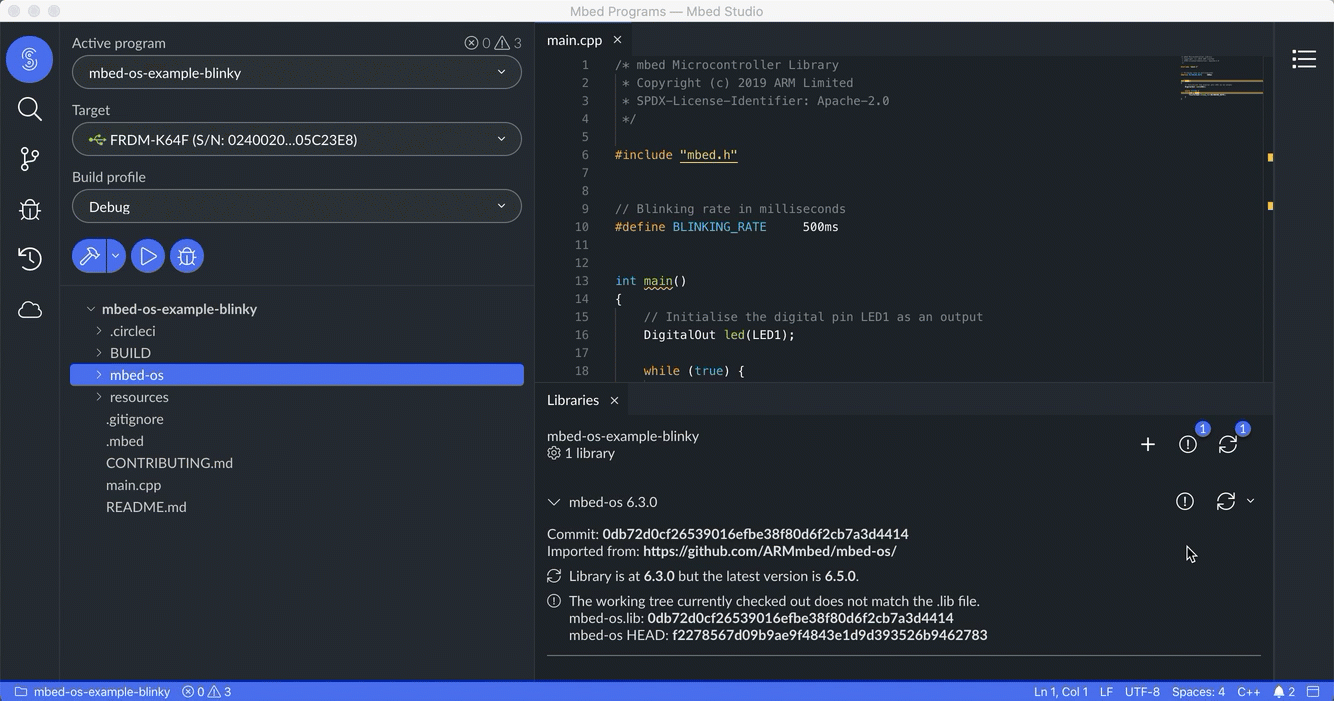
The Libraries view lists all of the libraries in an active program (indicated with the cogwheel icon on the file list). From this view you can see library details - such as the library version and where it was imported from - and import, remove, and update a library, or check out a specific library version.
You can also see if the program is using a shared instance of Mbed OS.
To open the Libraries view:
-
Right-click the program name in the Explorer view and select Set Active Program.
-
Select Libraries from the View menu.
The Libraries view opens in the bottom panel.
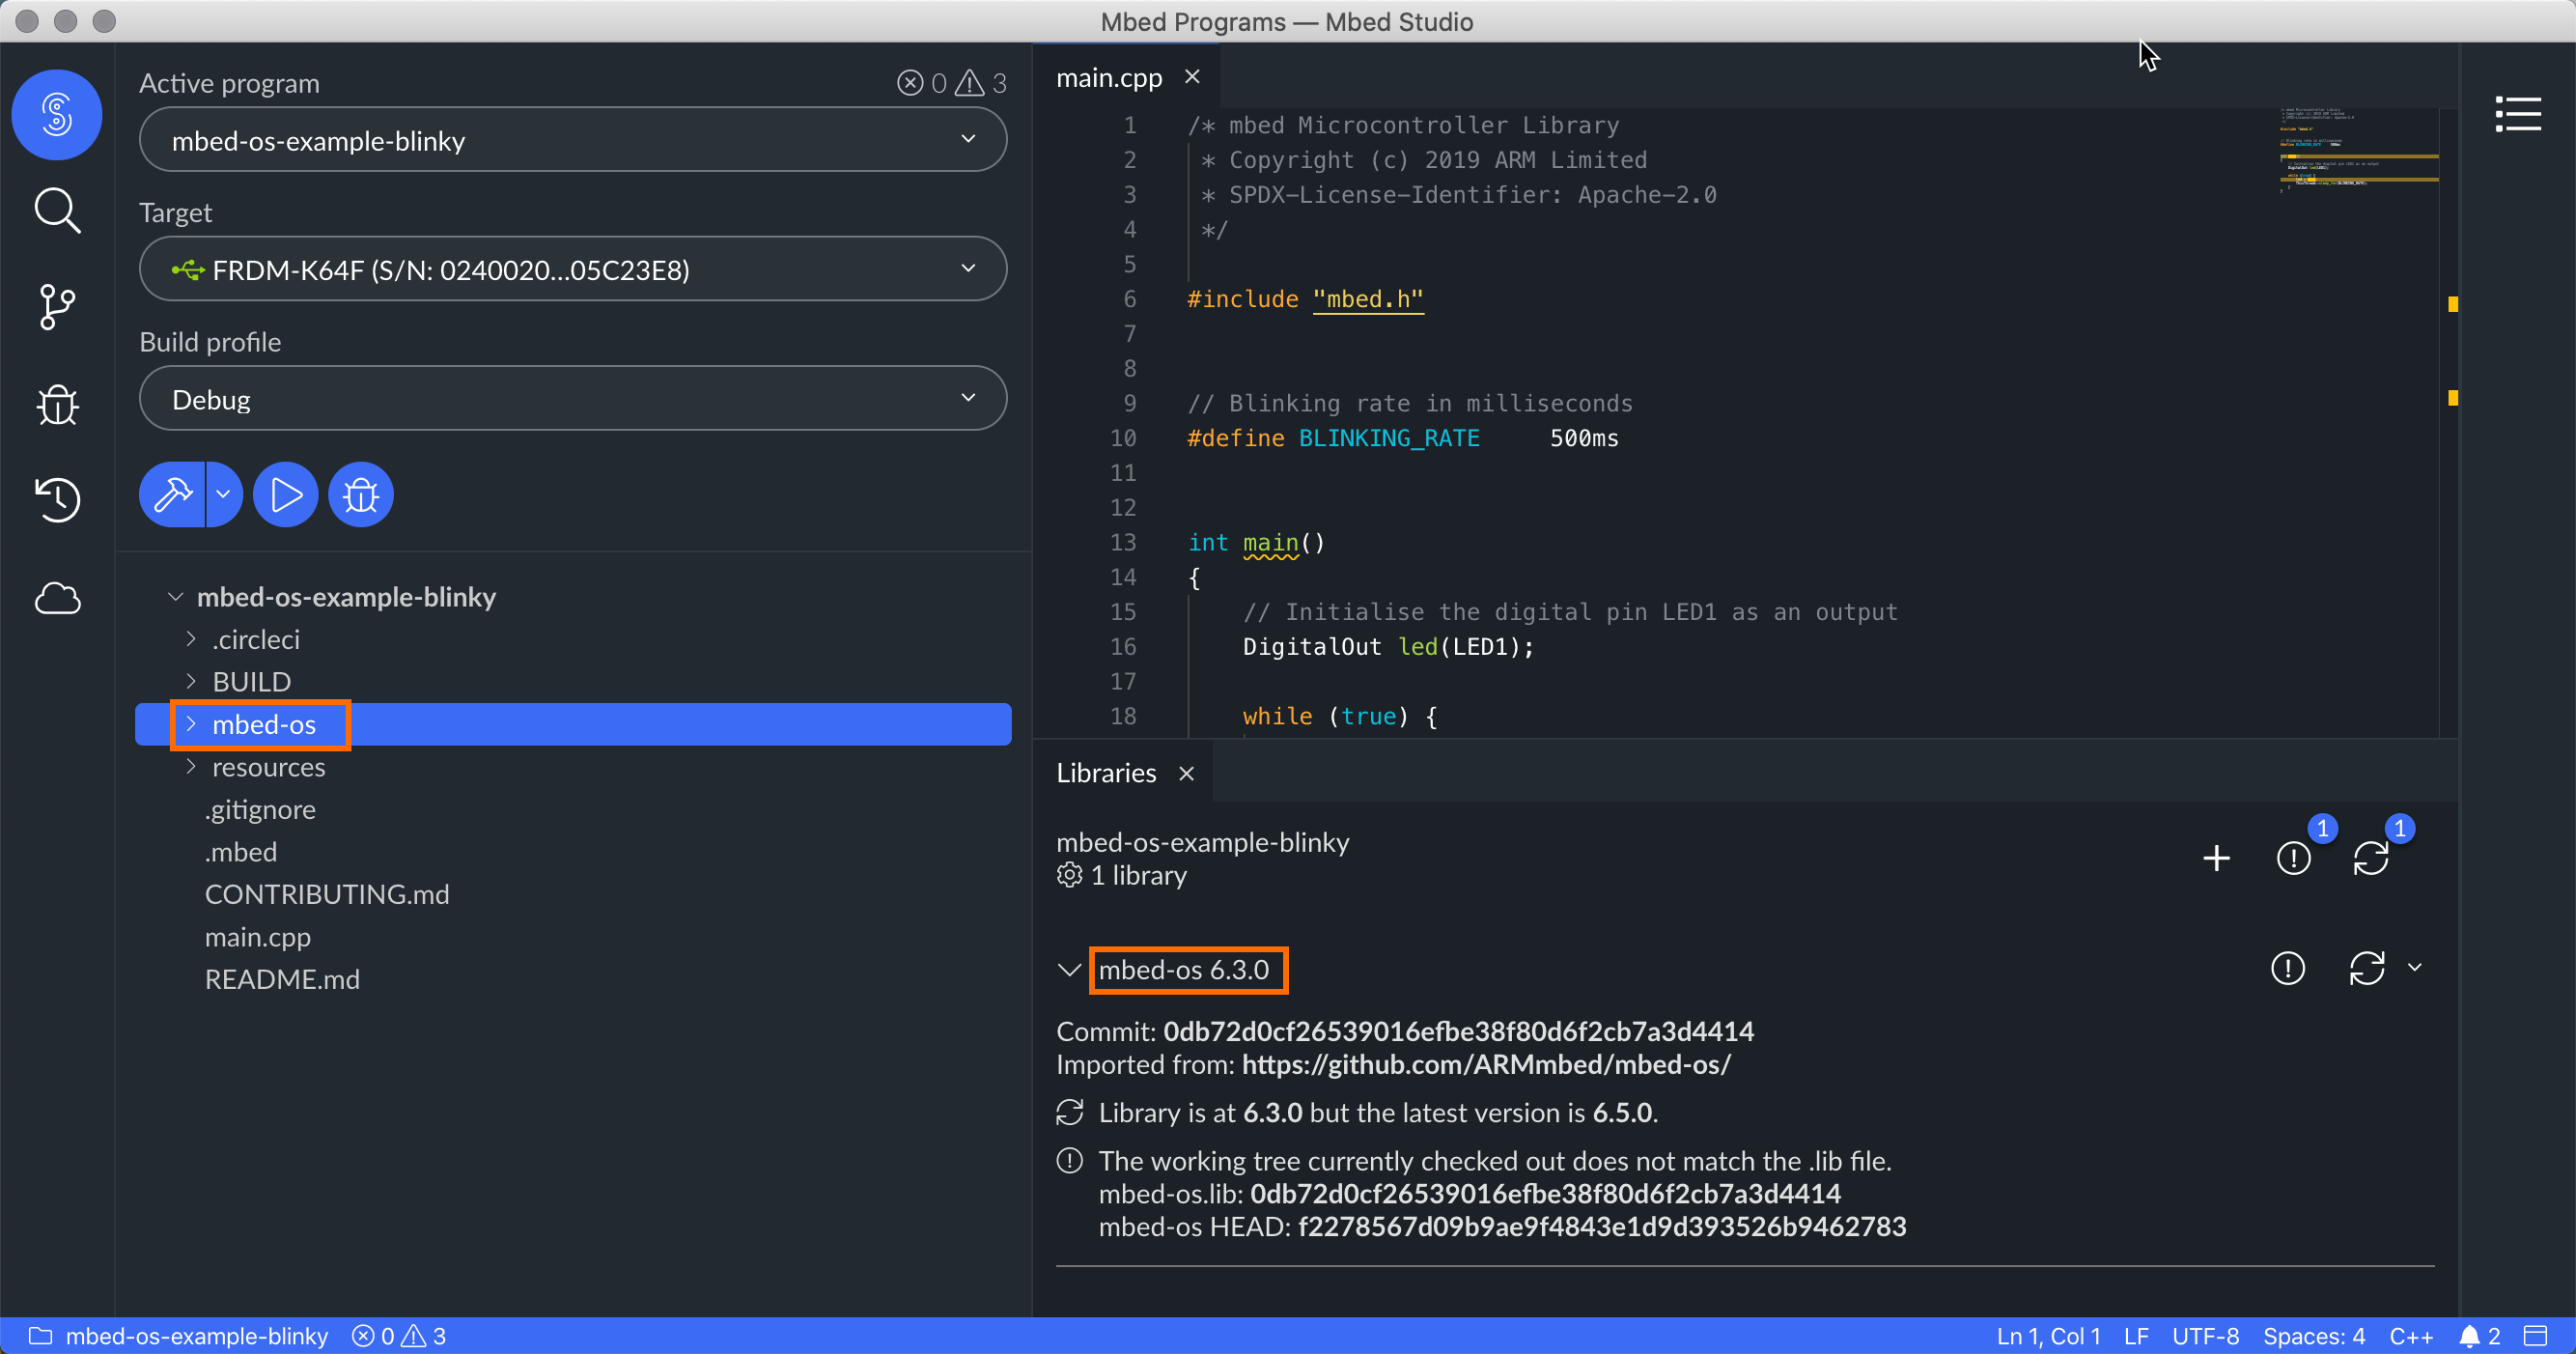 When a library is dependent on another library, the Libraries view presents the dependency indented under the dependent library.
Using a shared instance of Mbed OS
You can decide at any time to switch to a shared instance of Mbed OS for your program, or to switch to a copy of Mbed OS stored with your program if you were already using a shared instance.
Switching to a shared instance
To switch to a shared instance of Mbed OS for your program:
- From the Libraries view, hover over
mbed-os. The Switch to shared button is displayed. - Click the button. The Switch to shared library dialog box is displayed.
- Use the default shared instance if one has been set already or click the folder icon to point to the mbed-os repository on your file system and then click Select. The path to the shared instance is added or updated in the Switch to shared library dialog box.
- Click Switch. This adds a link to the shared instance.
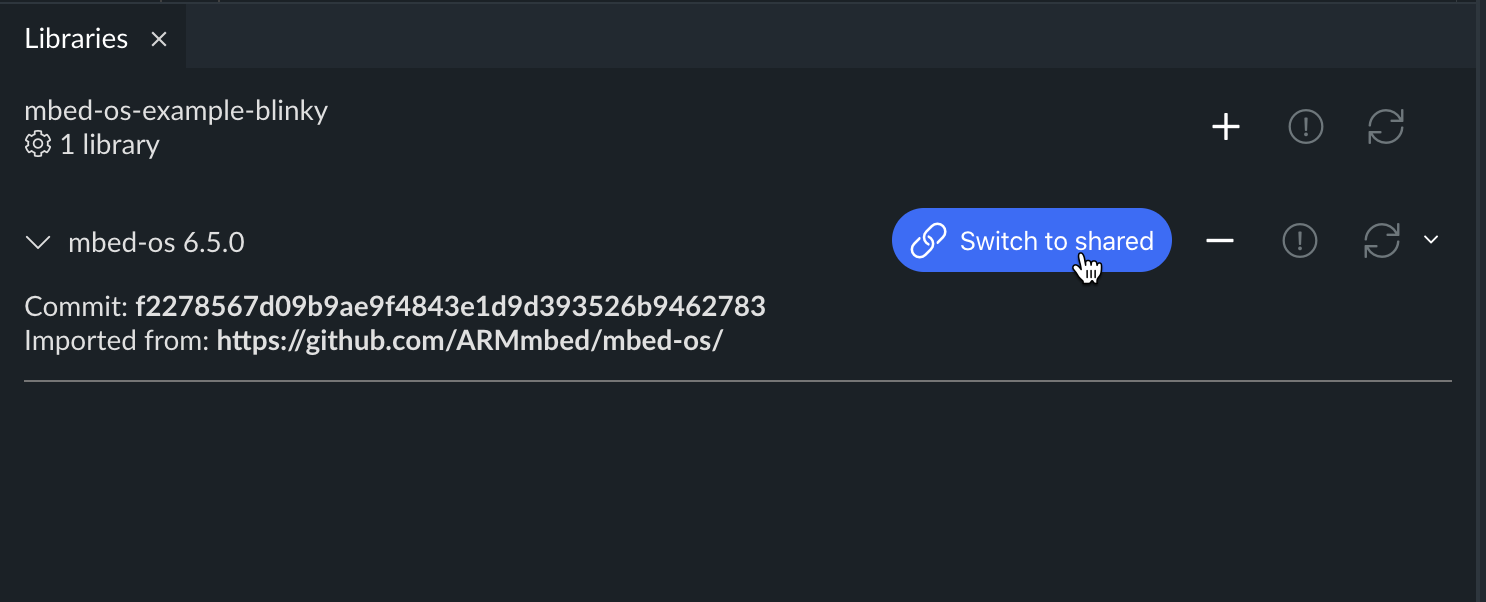 Switching to a shared instance.
Switching to a copy of Mbed OS stored with your program
To switch to a copy of Mbed OS stored with your program:
- From the Libraries view, hover over
mbed-os. The Switch to local copy button is displayed. - Click the button. The Switch to local copy of library dialog box is displayed.
- Click Switch.
This removes the link to the shared instance and imports the version of Mbed OS the program's
mbed-os.libfile points to.
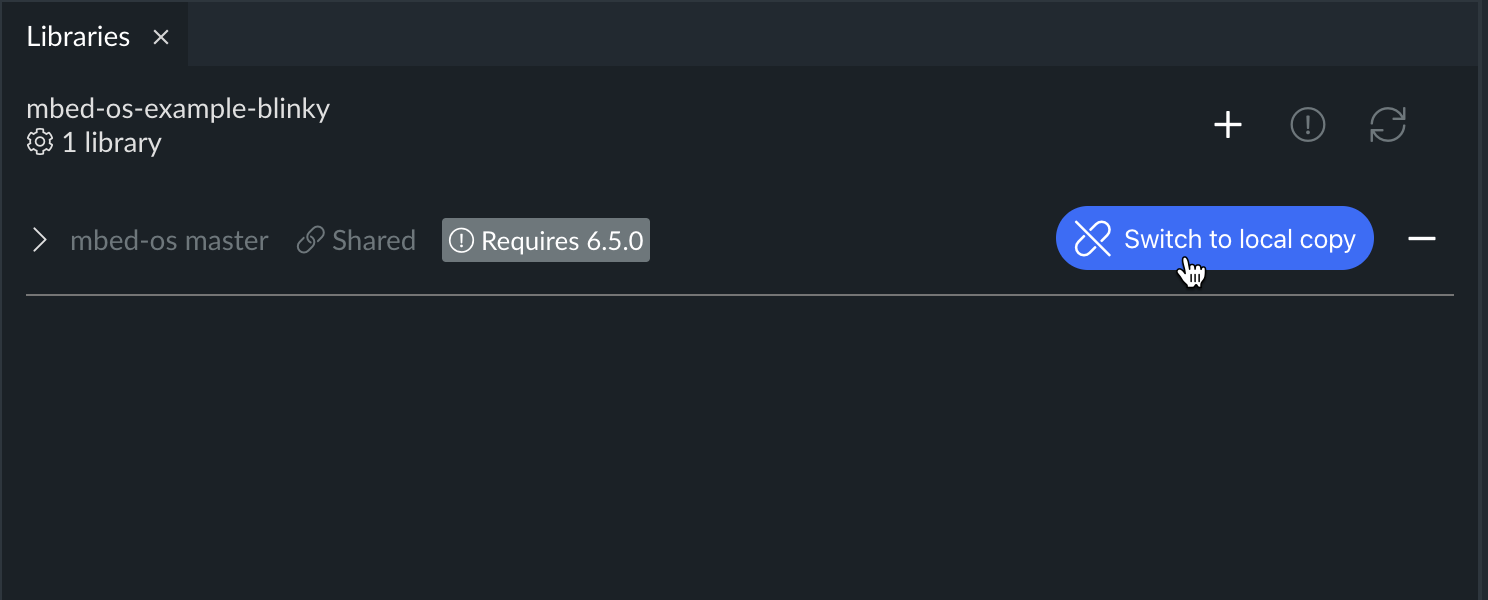 Switching to a copy stored with your program.
Importing a library
You can import libraries to an existing program from os.mbed.com or from a Git hosting service. Each library that you add to a program is identified by a .lib file.
Note: The Mbed Studio Explorer view hides .lib files.
To import a library:
-
Click the Add new library button
 in the Libraries view.
This opens the Add Mbed library dialog box.
-
Choose whether you want to import the library from os.mbed.com or from a Git hosting service and paste the full remote URL.
-
Modify the library name as required, and click Next.
-
Specify the branch or tag you want to import.
-
Click Finish.
You can view the progress of the import on the Background Tasks progress indicator, which appears at the bottom right corner of the screen. When the import is complete, the library appears in the Libraries view and in the Explorer view.
Removing a library
To remove a library:
-
Click the Remove library button
 , which appears on the right when you hover the mouse pointer over the library's name in the Libraries view.
The Remove library dialog box is displayed.
-
Click Remove.
Updating a library
When you import a library to Mbed Studio from os.mbed.com or from a Git hosting service (either manually, as described above, or as a dependency for an imported program), you clone the library to your workspace.
A library is associated with a specific program in your workspace. If you have multiple programs that use a particular library, you will have multiple copies of the same library; one per program (for mbed-os.lib, you can alternatively use a shared instance of Mbed OS). Each copy of the library can be at a different commit, and updating a library for one program does not update other copies of that library.
When there are updates to libraries in an active program, the Update all button at the top right corner of the Libraries view indicates the number of updates available. Click the Update all button to view details about the available updates.
You can update all of the top-level libraries in the active program in one click, or update or check out a specific version of each library individually (next section).
Note: Updating all top-level libraries does not automatically update all library dependencies.
To update all top-level libraries in a program:
-
Click the Update all button
 at the top right corner of the Libraries view.
The Update all libraries dialog box opens with details about all of the libraries for which updates are available.
-
Click Update all.
 Updating the mbed-os library.
Checking out a specific library version
To update to the latest version of a specific library, click the Update to latest button ![]() to the right of the library's name in the Libraries view.
to the right of the library's name in the Libraries view.
To check out a specific library version:
-
Click the chevron next to the Update to latest button to the right of the library's name in the Libraries view.
-
Click Check out to version.
The Update <library_name> to version... dialog box opens.
-
Select a branch or tag. Note that checking out to a tag puts the library in detached head state.
-
Click Update Library. The library is checked out to the tip of the selected branch and the .lib file is updated.
Fixing library problems
When there are problems with any of the libraries in an active program - for example, if you do not have a library's source downloaded, or if you check out a new commit of a program that refers to a library commit you do not have checked out - the Fix all problems button at the top right corner of the Libraries view indicates the number of fixes required.
Click the Fix all problems button to view details about the required fixes.
You can fix all of the libraries in the active program in one click, or you can fix each library individually.
To fix all library problems in a program:
-
Click the Fix all problems button
 at the top right corner of the Libraries view.
The Fix all problems dialog box opens with details about all the required fixes.
-
Click Fix all.
To fix a specific library, click the Fix problems button to the right of the library name in the Libraries view.
Source-controlling library updates
.lib files describe the libraries in your program. To share library changes with collaborators, commit .lib file changes to your program's source control repository. Do not add the library directory and its contents to your program repository. Note: The .lib file only identifies the commit that you are using; it does not include branch information. In Mbed Studio, you can check out a library to the tip of a specific branch, but this information will not be included if you open your program repository in another application, or if you push changes to a remote repository.