You are viewing an older revision! See the latest version
m3pi Development
After playing the the 3pi, I had a list of things I want to achieve and add to the 3pi. The ideas below are just driven by my objectvies and irritations
- An "m3pi" library class that abstracts all the features and functions of the basic 3pi to simple method calls. (controlling motors, LCD, speaker, line following sensors)
- An eagle library for the expansion card template, and a refernce design to be publushed and reused. Alex has kindly shared his work on this.
- A battery charger on the expansion card, to charge NiMH cells fitted into the 3pi. My idea here was to have the batteries charged by USB (or some other DC source) whenever is is plugged
- Footprints for common, low cost wireless modules (Bluetooth, Zigbee, Wifi)
- Use a SPI port on the mbed to reflash the ATMega328 from the mbed LocalFileSystem (drag and drop programming for the ATMEga!). I'll reuse the AVR910 implementation from Aaron Berk
Getting Started
As ever, lots to do for a new platform, but the Pololu site is really well set out.
The tool chain
To start working with the 3pi, you'll need to complete the following steps (or similar). Download and install a toolchain? How quaint ;-)
Seriously though there is plenty of help at the Software resources area on the Pololu site.
- Download and install AVR Studio
- Download and install WinAVR (avr-gcc compiler)
- Download and install the Pololu code examples
- Get a copy of HEX2BIN - the output of AVR Studio is hex files, Aarons AVR910 implementation only works with binary files.
- Build (and convert to binary) the 3pi Slave example.
The hardware
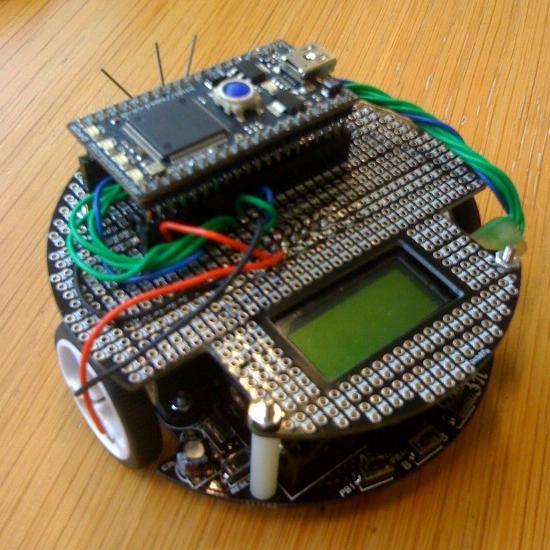
Before I go headlong into making a PCB, I want to prototype it all up, so I bought an expansion card, and built this :

Getting Stuck In
At this point Ioannis got involved in the project, and started to pick off the different hardware features.
Resources
- 3pi schematics
- The 3pi Eagle library - Note, this isnt tested properly yet
- The mbed socket Eagle library
- Some wiring notes from the AVR910 docuement
- The Roving Networks RN42 bluetooth module, which luckily enough has an Eagle symbol and footprint in the Sparkfun Eagle Library
- Data sheet for the PNA4602 38kHz IR sensor