You are viewing an older revision! See the latest version
Websockets
Websocket Tutorial
As explained in this webpage, a Websocket communication allows full-duplex, bi-directional communications between a server and clients.
To have a Websocket communication, we need a server. We chose Tornado Websocket server for the Internet of Things project. In this tutorial, I will present two servers: Tornado and Websocket4j.
This tutorial is divided in two parts:
- An Hello World which uses Tornado
- A streaming example which uses Websocket4j.
1 - Hello World!
1.1 - Server side: Tornado

Warning
Tornado is running on Unix-Like platform. If you are on Windows, choose another server.
Installation
- Download sources
$ tar xvzf tornado-2.0.tar.gz
$ cd tornado-2.0
$ python setup.py build
$ sudo python setup.py install
For more information concerning the installation, you can go here
Code
You can find all the documentation you need here but I will explain the main parts of the following basic Tornado Websocket server program.
The main idea is to define a class inherited from the WebSocketHandler class.
In this class, you can override the following methods:
- open
- on_message
- on_close
It's very simple, when a client and the server have performed the websocket handshake, the open method is called.
When a message is received from a client, the on_message method is called and if the connection is closed, the on_close method is called.
class WSHandler(tornado.websocket.WebSocketHandler):
    def open(self):
    	print 'new connection'
    	self.write_message("Hello World")

    def on_message(self, message):
    	print 'message received %s' % message

    def on_close(self):
      print 'connection closed'
In our case:
- when a connection is opened, the server prints "new connection" and sends to the client "Hello World"
- when a message is received, the server prints this message
- when a connection is closed, the server prints"connection closed"
To finish the server program, we have to start at the beginning of the program an HTTPserver which will listen on a certain port.
application = tornado.web.Application([
    (r'/ws', WSHandler),
])


if __name__ == "__main__":
    http_server = tornado.httpserver.HTTPServer(application)
    http_server.listen(8888)
    tornado.ioloop.IOLoop.instance().start()
An instance of tornado.web.Application is passed to the HTTPServer. When the server receives a request on the form:
var ws = new WebSocket("ws:localhost:8888/ws");, it will instantiate a WSHandler object. Note the "ws" at the end of the url. This will be useful for the client side implementation.
Finally, the whole program is:
import tornado.httpserver
import tornado.websocket
import tornado.ioloop
import tornado.web


class WSHandler(tornado.websocket.WebSocketHandler):
    def open(self):
    	print 'new connection'
    	self.write_message("Hello World")

    def on_message(self, message):
    	print 'message received %s' % message

    def on_close(self):
      print 'connection closed'


application = tornado.web.Application([
    (r'/ws', WSHandler),
])


if __name__ == "__main__":
    http_server = tornado.httpserver.HTTPServer(application)
    http_server.listen(8888)
    tornado.ioloop.IOLoop.instance().start()
1.2 - Client side
Warning
To follow this tutorial, you have to use a browser which supports websockets. Personnally, I use Chrome and there is no problem. You can do a test here to see if your browser supports websockets.
The main part of a simple Hello World can be: (if you are not familiar with jQuery, go here)
        $("#open").click(function(evt) {
          evt.preventDefault();

          var host = $("#host").val();
          var port = $("#port").val();
          var uri = $("#uri").val();

          ws = new WebSocket("ws://" + host + ":" + port + uri);

          ws.onmessage = function(evt) {alert("message received: " + evt.data)};

          ws.onclose = function(evt) { alert("Connection close"); };

          ws.onopen = function(evt) {
            $("#host").css("background", "#00ff00");
            $("#port").css("background", "#00ff00");
            $("#uri").css("background", "#00ff00");
          };
        });
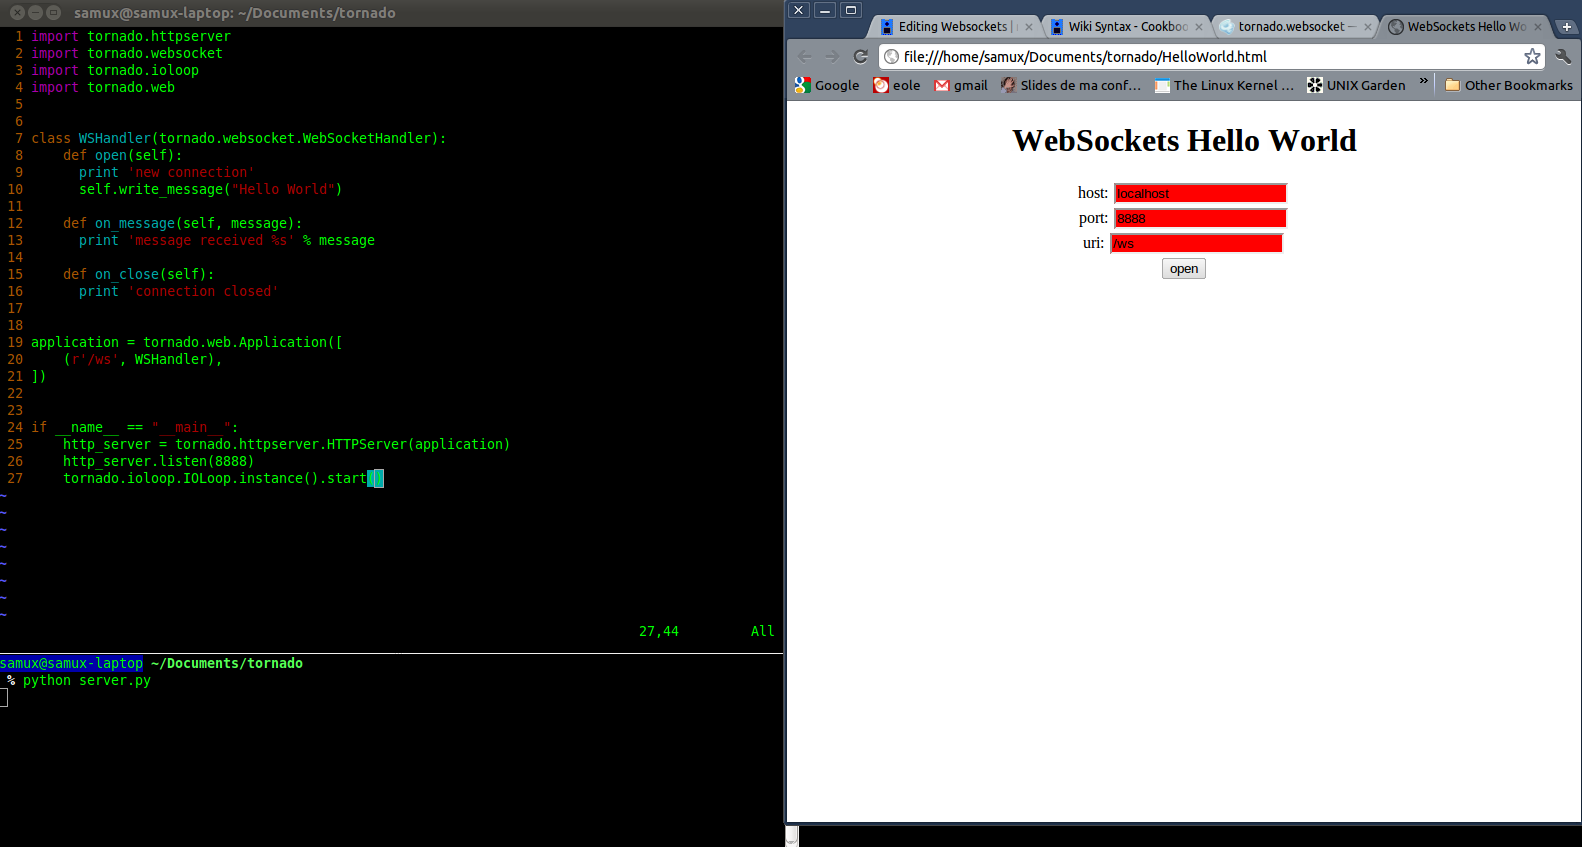
- On this webpage, there are 3 fields: host, port and uri which have a red background at the beginning
- When the user has filled these 3 fields, he can try to open a websocket connection by clicking the open button
As for the server, there are three methods: onopen, onmessage and onclose:
- If the connection is opened, we change the background of the 3 previous fields to green
- When we receive a message, we open a pop-up containing the message received
- When the connection is closed, we open a pop-up containing Connection close
Finally, the whole program for the client is:
<!doctype html>
<html>
  <head>
    <title>WebSockets Hello World</title>
    <meta charset="utf-8" />
    <style type="text/css">
      body {
        text-align: center;
        min-width: 500px;
      }
    </style>
    <script src="http://code.jquery.com/jquery.min.js"></script>
    <script>
      $(document).ready(function () {

        var ws;

        $("#open").click(function(evt) {
          evt.preventDefault();

          var host = $("#host").val();
          var port = $("#port").val();
          var uri = $("#uri").val();

          ws = new WebSocket("ws://" + host + ":" + port + uri);

          ws.onmessage = function(evt) {alert("message received: " + evt.data)};

          ws.onclose = function(evt) { alert("Connection close"); };

          ws.onopen = function(evt) {
            $("#host").css("background", "#00ff00");
            $("#port").css("background", "#00ff00");
            $("#uri").css("background", "#00ff00");
          };
        });

      });
    </script>
  </head>

  <body>
    <h1>WebSockets Hello World</h1>
    <div>
      <label for="host">host:</label>
      <input type="text" id="host" value="localhost" style="background:#ff0000;"/><br />
      <label for="port">port:</label>
      <input type="text" id="port" value="8888" style="background:#ff0000;"/><br />
      <label for="uri">uri:</label>
      <input type="text" id="uri" value="/ws" style="background:#ff0000;"/><br />
      <input type="submit" id="open" value="open" />
    </div>
  </body>
</html>
1.3 - Demo


Et Voila, there is the pop-up on the client side containing Hello World and the backgrounds are green. On the server side, we see that a new connection has been opened.