OLED 128x64 with SSD1308 Driver
Background
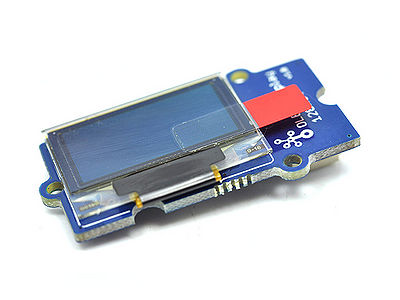
Seeed Studios and mbed made some free modules available. I signed up for the OLED display (128x64 pixels, monochrome black/white) and got it! Thanks! The datasheet for the module and for its displaydriver (Solomon Tech SSD1308) can be found here.

This cookbook page shows how to interface the display to mbed. The hardware interface requires powersupply (5V, GND) and an I2C controlbus.
Code Port to mbed
There are some I2C libraries for the SSD1308 available on the internet. This software was originally developed for arduino. The SSD1308 code is by Andrew Schamp and was submitted as a part of Jeff Rowberg's I2Cdevlib library. Some code from other sources was also integrated. I have ported all that code to mbed and optimised it in several areas. The basic methods to access registers and initialise the controlller have been completed. The displaymemory can be cleared and filled with patterns, bitmaps or strings. Brightness control is supported and write access can be limited to a window. The display can be mirrored left-right and top-bottom or shown in inverse color (black pixels on white background). Some missing features like display scrolling will be added later. A disadvantage of the display is that you can not read back data from the displayed image. Pixels are also not individually addressable, but grouped in one byte for 8 (vertical) pixels. These limitations make graphic routines more difficult to implement since you often need to perform read-modify-write operations when drawing lines etc. There are some work-arounds possible and we will see how far I will go..
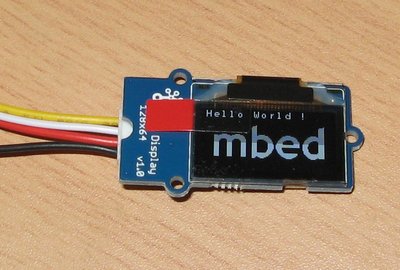
This is an example of what to expect:

The image was made by loading a bitmap with the mbed logo and then writing a string on top of that. The data for a bitmap display can be created with a special softwaretool that converts an image into a 'C' header file containing a constant char array. See LCDAssistant.
Some example code:
/* mbed Seeed 128x64 OLED Test
 *
 */
#include "mbed.h"
#include "mbed_logo.h"
#include "SSD1308.h"

//Pin Defines for I2C Bus
#define D_SDA                  p28
#define D_SCL                  p27
I2C i2c(D_SDA, D_SCL);

// Host PC Communication channels
Serial pc(USBTX, USBRX); // tx, rx

// Instantiate OLED
SSD1308 oled = SSD1308(i2c, SSD1308_SA0);

int main() {
  pc.printf("OLED test start\r");

  oled.writeString(0, 0, "Hello World !");
//  oled.printf("Hello World !");
  wait(3);

  oled.fillDisplay(0xAA);
  wait(3);

  oled.setDisplayOff();
  wait(0.5);

  oled.setDisplayOn();
  wait(0.5);

  oled.clearDisplay();
  wait(0.5);

  oled.setDisplayInverse();
  wait(0.5);

  oled.setDisplayNormal();
  wait(0.5);

  oled.writeBitmap((uint8_t*) mbed_logo);

  pc.printf("OLED test done\r\n");
}
Hardware Hints
The display driver is a 3V3 device. However, the Seeed module has been designed for a 5V supply and 5V I2C controlsignals. I have used a Sparkfun 3V3-5V level converter between mbed's I2C signals (SDA, SCL) and the display. The display comes with a colour coded wire.
- Red = 5V, connect to mbed VO (Pin 39)
- Black = GND, connect to mbed GND (Pin 0)
- Yellow = SCL, connect to mbed SCL (Pin 10 or Pin 27), using level converter
- White = SDA, connect to mbed SDA (Pin 9 or Pin 28), using level converter
Note that the levelconverter has internal pull-up R's for the I2C bus.
The powerconsumption of the display depends on the selected contrastvalue and the number of active pixels. On average expect 10-15mA when all pixels are active.
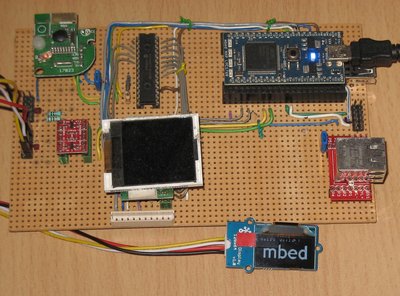
The testsetup is shown here:

Note how small the display really is. It is however surprisingly readable due to the sharp image that OLEDs provide. The levelconverter is the small red pcb on the left.
References
- Sparkfun 3V3-5V level converter (http://www.sparkfun.com/products/8745)
- Software for arduino (https://github.com/jrowberg/i2cdevlib)
The mbed version is here An example programme is here
Have fun !