Internet Controlled Robot
Overview
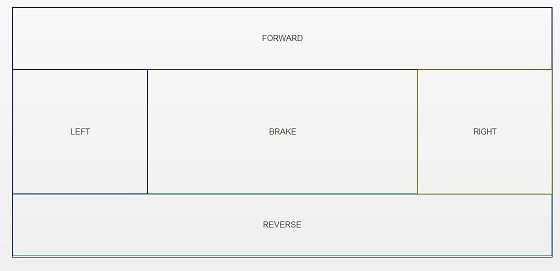
In This Project We have designed a robot which can be controlled over the internet.We have designed the GUI which initiates the control signals required to control the robot on a webpage.

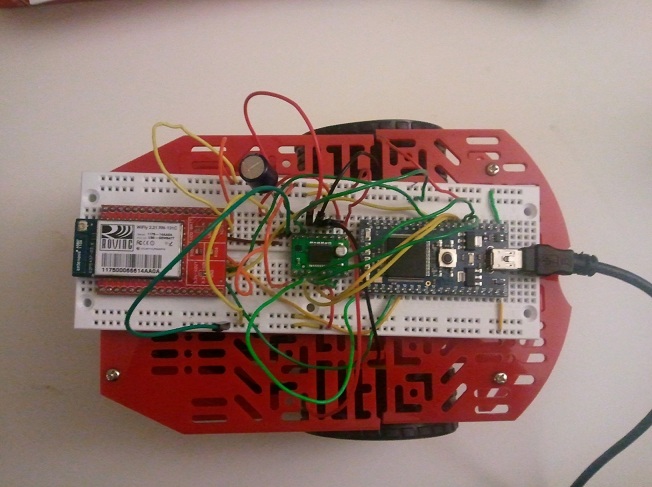
We have used an RN-131C Wifly GSX Module as the wifi chip, which accesses the webpage that has the control signals for the robot.
Components
- Mbed NXP LPC1768
- RN-131C Wifly GSX module on a breakout board sparkfun
- Magician Chassis Robot
- Dual H-Bridge md08a (pololu TB6612FNG) pololu
- Four AA Batteries connected in series (6V)
- BreadBoard
- Jumper Wires
Connections
| RN-131C | |
|---|---|
| wifly pin | Mbed pin |
| 3.3V RIN | GND |
| GND | GND |
| VDD BATT | VOUT |
| VDD IN | VOUT |
| RX | TX |
| TX | RX |
| GPIO 6 | P26 |
| RESET | P25 |
| MBED | Dual H-Bridge Breakout | Robot DC Motors | Battery |
|---|---|---|---|
| Vin | Vmot | + | |
| GND | GND | - | |
| Vout | Vcc | ||
| P21 | PWM B | ||
| P8 | BIN 2 | ||
| P7 | BIN 1 | ||
| P6 | AIN 1 | ||
| P5 | AIN 2 | ||
| P22 | PWM A | ||
| Vout | /STBY | ||
| AO1 | LEFT Motor RED | ||
| AO2 | LEFT Motor BLACK | ||
| BO2 | RIGHT Motor BLACK | ||
| BO1 | RIGHT Motor RED |

#include "mbed.h"
#include "WiflyInterface.h"
#include "motordriver.h"
#include "HTTPClient.h"
Serial pc(USBTX, USBRX);
HTTPClient http;

/* wifly object where:
*     - p9 and p10 are for the serial communication
*     - p25 is for the reset pin
*     - p26 is for the connection status
*     - "mbed" is the ssid of the network
*     - "password" is the password
*     - WPA is the security
*/
WiflyInterface wifly(p9, p10, p25, p26, "enter_the_ssid", "enter_the_password", WPA);


DigitalOut f(LED1);//to indicate forward movement of robot
DigitalOut b(LED2);
DigitalOut l(LED3);
DigitalOut r(LED4);
Motor A(p22, p6, p5, 1); // pwm, fwd, rev, can brake
Motor B(p21, p7, p8, 1); // pwm, fwd, rev, can brake
int main() {
wifly.init(); // use DHCP
while (!wifly.connect());
char buffer[2];
buffer[1]='\0';
char a;
while(1)
{

        http.get("http://develop.jissjohn.com/netbot/command.txt", buffer,2);

        printf("\n%s\n\r", buffer);// for debugging purposes on the usb serialport
a=buffer[0];
if(a=='1')// Forward direction
    {f=1;
        A.speed(0.4);
        B.speed(0.4);
        wait(0.02);
    }
else if(a=='5')//Reverse Direction
    {b=1;
    f=0;
    l=0;
    r=0;
        A.speed(-0.4);
        B.speed(-0.4);
        wait(0.02);
    }
else if(a=='7')//Turn Left Direction
    { l=1;
    f=0;
    r=0;
    b=0;
       A.speed(-0.5);
        B.speed(0.5);
        wait(0.02);
    }
else if(a=='3')//Turn Right Direction
    {r=1;
    f=0;
    l=0;
    b=0;
       A.speed(0.5);
        B.speed(-0.5);
        wait(0.02);
    }
else
    {

    A.stop(1);
    B.stop(1);

   wait(1);
    A.coast();
    B.coast();

    }

}
wifly.disconnect();
}
Import library
Public Member Functions |
|
| WiflyInterface (PinName tx, PinName rx, PinName reset, PinName tcp_status, const char *ssid, const char *phrase, Security sec=NONE) | |
|
Constructor.
|
|
| int | init () |
|
Initialize the interface with DHCP.
|
|
| int | init (const char *ip, const char *mask, const char *gateway) |
|
Initialize the interface with a static IP address.
|
|
| int | connect () |
|
Connect Bring the interface up, start DHCP if needed.
|
|
| int | disconnect () |
|
Disconnect Bring the interface down.
|
|
| char * | getIPAddress () |
|
Get IP address.
|
|
http://mbed.org/cookbook/WiflyInterface
Import library
Public Member Functions |
|
| Motor (PinName pwm, PinName fwd, PinName rev, int brakeable) | |
|
Create a motor control interface.
|
|
| float | speed (float speed) |
|
Set the speed of the motor.
|
|
| void | coast (void) |
|
Set the the motor to coast.
|
|
| float | stop (float duty) |
|
Set the motor to dynamicaly brake.
|
|
| float | state (void) |
|
return the current state of the motor
|
|
http://mbed.org/cookbook/Motor
Import libraryHTTPClient
A HTTP Client for the mbed networking libraries
Troubleshooting!
For some reason, giving username and password as given below didnt work for me,
WiflyInterface wifly(p9, p10, p25, p26, "enter_the_ssid", "enter_the_password", WPA)
so , i had to use the 'configure' program in the wifi interface cookbook page to set the ssid, password, and authentication type, there are a lot of useful commands for the wifi chip, the full list can be found in the reference manual (link given at the top)
Information
In our program, we were accessing a website hosted on a small server, also the wifi on which we tested our project wasnt that good, all these accounted for a big delay(as you can see in the video) between sending the control signals and recieving the control signals at the mbed
