Embedded Artists

We are the leading providers of products and services around prototyping, evaluation and OEM platforms using NXP's ARM-based microcontrollers.
LPC4088DM BIOS
All the display modules come with a BIOS containing among other things the display and touch controller initialization code. The purpose of this is to:
- Separate the hardware specific code from the user code
- Allow the display hardware to be replaced (EOL or new displays) without the user having to recompile the tested binaries
Note
The BIOS only makes sense when the API between the BIOS and the user’s code is fixed. It is in development and may be changed at anytime up until version 1.0 is set.
It is not recommended to base any product on BIOS versions before v1.0.
The BIOS is stored in the Configuration EEPROM.
Using the BIOS
The BIOS is automatically loaded, initialized and used by the init() function in the DMBoard class in the DMSupport library.
Both the Display and the Touch interfaces use the BIOS without the user ever having to worry about it.
Which version is on my board?
There are two ways to find out which version is currently on the display module:
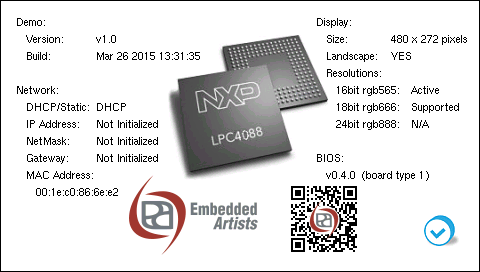
- Download, flash and run lpc4088_displaymodule_shipped_demo. The program has an about App which displays the BIOS version and board type. It can look something like this:

- Use any of the example applications (or your own) and add the following in main.cpp:
main.cpp
...
#include "BiosLoader.h"
...
int main() {
  if (DMBoard::instance().init() != DMBoard::Ok) {
    // handle init error
  }
  uint8_t type,minor,major,revision;
  BiosLoader::instance().getStats(type, major, minor, revision);
  DMBoard::instance().logger()->printf("I'm running BIOS v%u.%u.%u on a type BOARD%u\n",
                                       major, minor, revision, type);
  ...
}
Updating/Restoring BIOS
To update the BIOS:
- Download the bios_flasher application from the Embedded Artists support web.
- Connect the display module to a PC
- Install the application by drag-n-dropping it on the mbed-drive.
- Power cycle the LPC4088 Display Module by pressing the RESET button.
- After a couple of seconds the two blue LEDs above the display will turn on. This means that the BIOS has been updated.
- Power cycle the LPC4088 Display Module by pressing the RESET button.
- After a couple of seconds the two green LEDs above the display will turn on. This means that the BIOS version on the board matches the one in the bios-flasher binary.