You are viewing an older revision! See the latest version
Interfacing with LabVIEW
Here are some building blocks to interface an mbed with LabVIEW, allowing LabVIEW programs to interact with the real world. This could be used for things like:
- data acquisition in LabVIEW via sensors connected to mbed
- controlling actuators connected to mbed from LabVIEW
- LabVIEW programs with hardware-in-the-loop, where sensors and actuators are interfaced with mbed but calculations and control are in LabVIEW
The examples use the mbed USB Serial Port to connect between LabVIEW and mbed.
LabVIEW Setup
To use mbed with LabVIEW, you need to have the NI-VISA drivers installed to give access to the USB serial port.
- http://www.ni.com/trylabview/ - LabVIEW trial version
- http://www.ni.com/visa/ - NI-VISA drivers for the serial port
With LabVIEW and NI-VISA installed, you should be ready to go.
Here are the mbed vi's we've created to communicate between mbed and LabVIEW:
- mbed-ni.zip - mbed read and write VI's, plus Hello World examples
Download these and use them as components in your LabVIEW designs.
The Protocol
To keep things simple, we're assuming the communication between LabVIEW and mbed is a line-based text protocol. That means every "packet" between LabVIEW and mbed is a string followed by a newline character (\n). The mbed-read.vi returns a line read from mbed every time you run it, and the mbed-write.vi writes a string to the mbed every time you run it, so you can use this however you want.
Whilst the line string is the underlying data, there are also some common cases we've added support for such as sending single numbers, or comma separated value (csv) "packets". The inputs and outputs supported are:
- A string (e.g. "hello" is transferred as "hello\n")
- A number (e.g. 1 is transfered as "1.0000\n")
- An array of strings (e.g. ["foo", "bar"] is transferred as "foo,bar\n")
- An array of numbers (e.g. [1, 0.5] is transferred as "1.000,0.5000\n")
These make it easy to work in LabVIEW without having to do lots of packing/unpacking/conversion yourself.
mbed Read Hello World
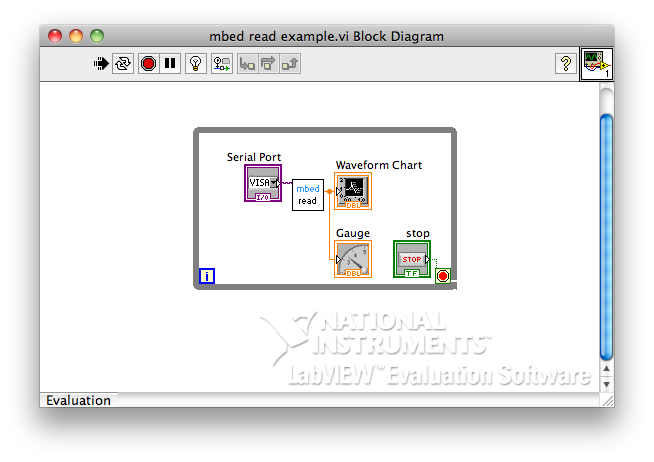
A simple labview example is included that plots the state of an AnalogIn input, which looks like:

And here is an example program to send some data:
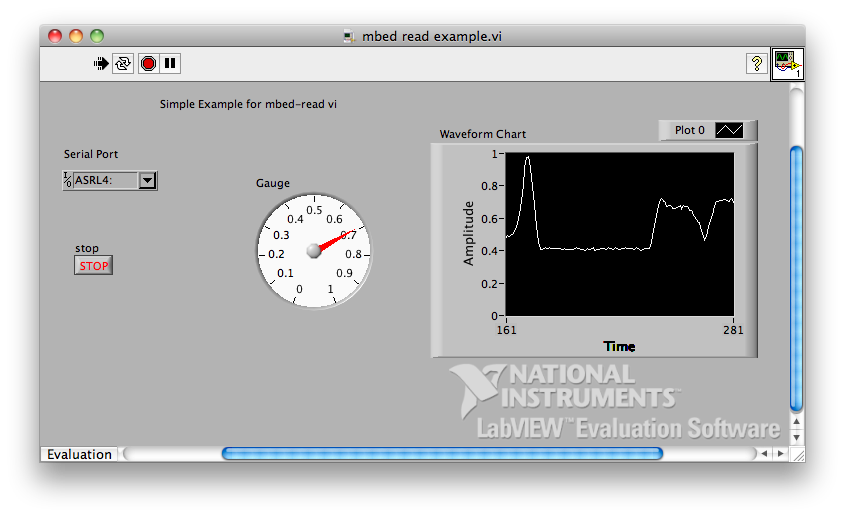
The resulting output once the mbed COM port number has been selected in the VISA control, and when modifying AnalogIn, looks like:

mbed Write Hello World
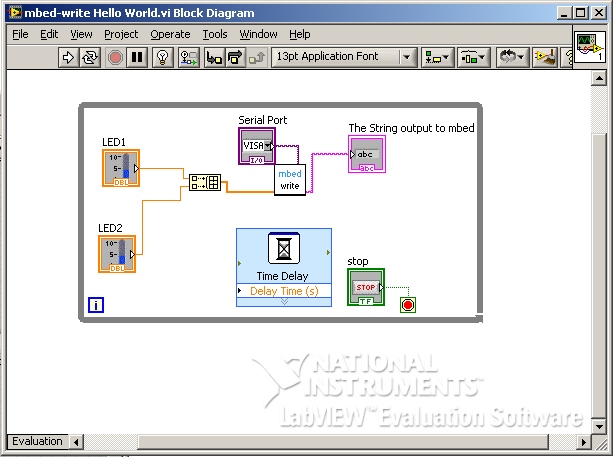
A simple labview example is included that controls the brightness of LED1 and LED2, which looks like:

And here is an example program that responds to the commands:
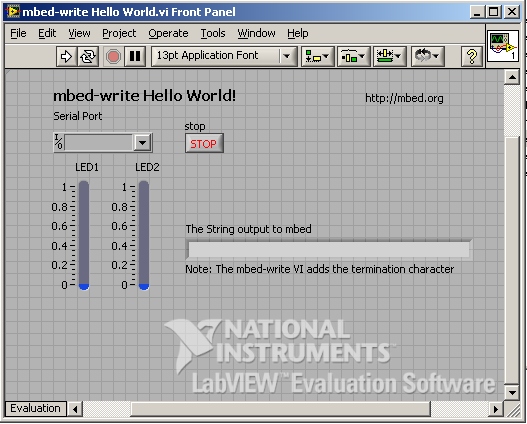
The control panel looks like:
