You are viewing an older revision! See the latest version
Bluetooth Android Controlled MBED
Remote control MBED applications using Bluetooth as wireless protocol
There have been several blogs on how to communicate with MBED using a Bluetooth module (HC-05 ) module. I will try to show to build the complete chain of control from Android to MBED.
Required Components
- 1. Bluetooth HC-05 ( pin description of the same can be referred to https://mbed.org/users/edodm85/notebook/HC-05-bluetooth/
- 2. Android Phone
- 3. Installation of Android development environment using MIT App inventor http://appinventor.mit.edu/explore/get-started.html
Connecting HC05 with MBED
:
1 - Tx P10 - Rx
2 - Rx P9 - Tx
12 - 3.3V Vout - 3.3V
13 - GND GND
31 - PIO8
32 - PIO9
34 - PIO11 GND or 3.3V
Hardware

Building Android App
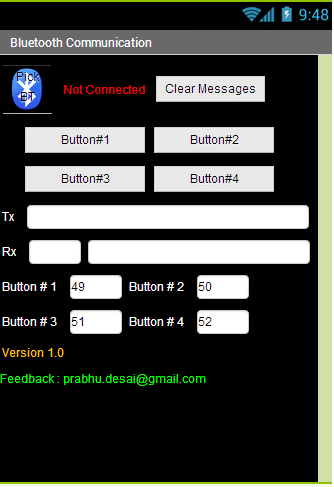
Main Screen

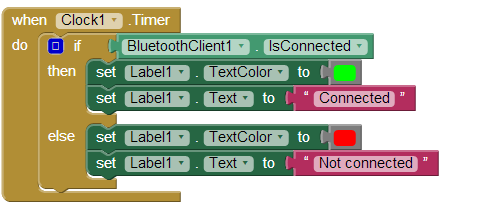
Clock explained

Functionality of clear button

Functionality of Button 1, 2, 3 and 4

Code running on MBEd
include the mbed library with this snippet
#include "mbed.h"

Serial device(p9, p10);


DigitalOut led1(LED1);
DigitalOut led2(LED2);
DigitalOut led3(LED3);
DigitalOut led4(LED4);
unsigned char recivedchar;

void send_bytes(uint8_t len ,uint8_t data)
{
    device.putc(len);
    while(len>0) {
        device.putc(data);
        len--;
    }
}

int main()
{
    unsigned char rx;
    device.baud(9600);
    while(1) {

        if(device.readable()) {
            rx =device.getc();
            pc.printf("\n Received %x \nSending : %x",rx,rx);
            switch (rx) {
                case 49:
                    /* Turn on LED#1 on receiving 49 */
                    led1 = !led1;
                    send_bytes(1,rx);
                    break;
                case 50:
                   /* Turn on LED#2 on receiving 50 and send 2 bytes of acknowledgment */
                    send_bytes(2,rx);
                    led2 = !led2;
                    break;
                case 51:
                   /* Turn on LED#3  on receiving 51 and send 3 bytes of acknowledgment */
                    led3 = !led3;
                    send_bytes(3,rx);
                    break;
                case 52:
                     /* Turn on LED#4  on receiving 53 and send 4 bytes of acknowledgment */
                    led4 = !led4;
                    send_bytes(4,rx);
                    break;
            }

        }
    }
}