Important changes to repositories hosted on mbed.com
Mbed hosted mercurial repositories are deprecated and are due to be permanently deleted in July 2026.
To keep a copy of this software download the repository Zip archive or clone locally using Mercurial.
It is also possible to export all your personal repositories from the account settings page.
Dependents: CSC1300_EduBaseV2_Lab0 mbed_blinky EduBaseV2_Lab0 mbed_blinky ... more
Tutorial 5 Save Commit and Publish
Saving, Committing, and Publishing a Program
Now that you know how to create a program and import libraries, the next few things you need to learn are how to save, commit, and publish your program. If you don't know what does it mean to commit a program, don't worry; we will explain what version control and commits are in the next section of this tutorial.
What is Version Control? What is a Commit?
A Version Control System (VCS) allows you to track changes made to your program, providing you access to previous versions of your files without you having to save individual copies of each version. Version control is very useful, especially when you are writing larger programs and experimenting with different code implementations. For example, if you want to revert back to a previous version of your code, you can easily do that as long as you have committed both versions.
A commit is a snapshot of your code at that particular moment. The Mbed VCS allows you to commit your program at various stages, saving the current state of all of the program's contents into its revision history. You can then view the changes to your program in each commit.
In this tutorial, we will walk through how to save, commit, and publish a program by using my mbed_blinky program as an example.
How to Save a Program
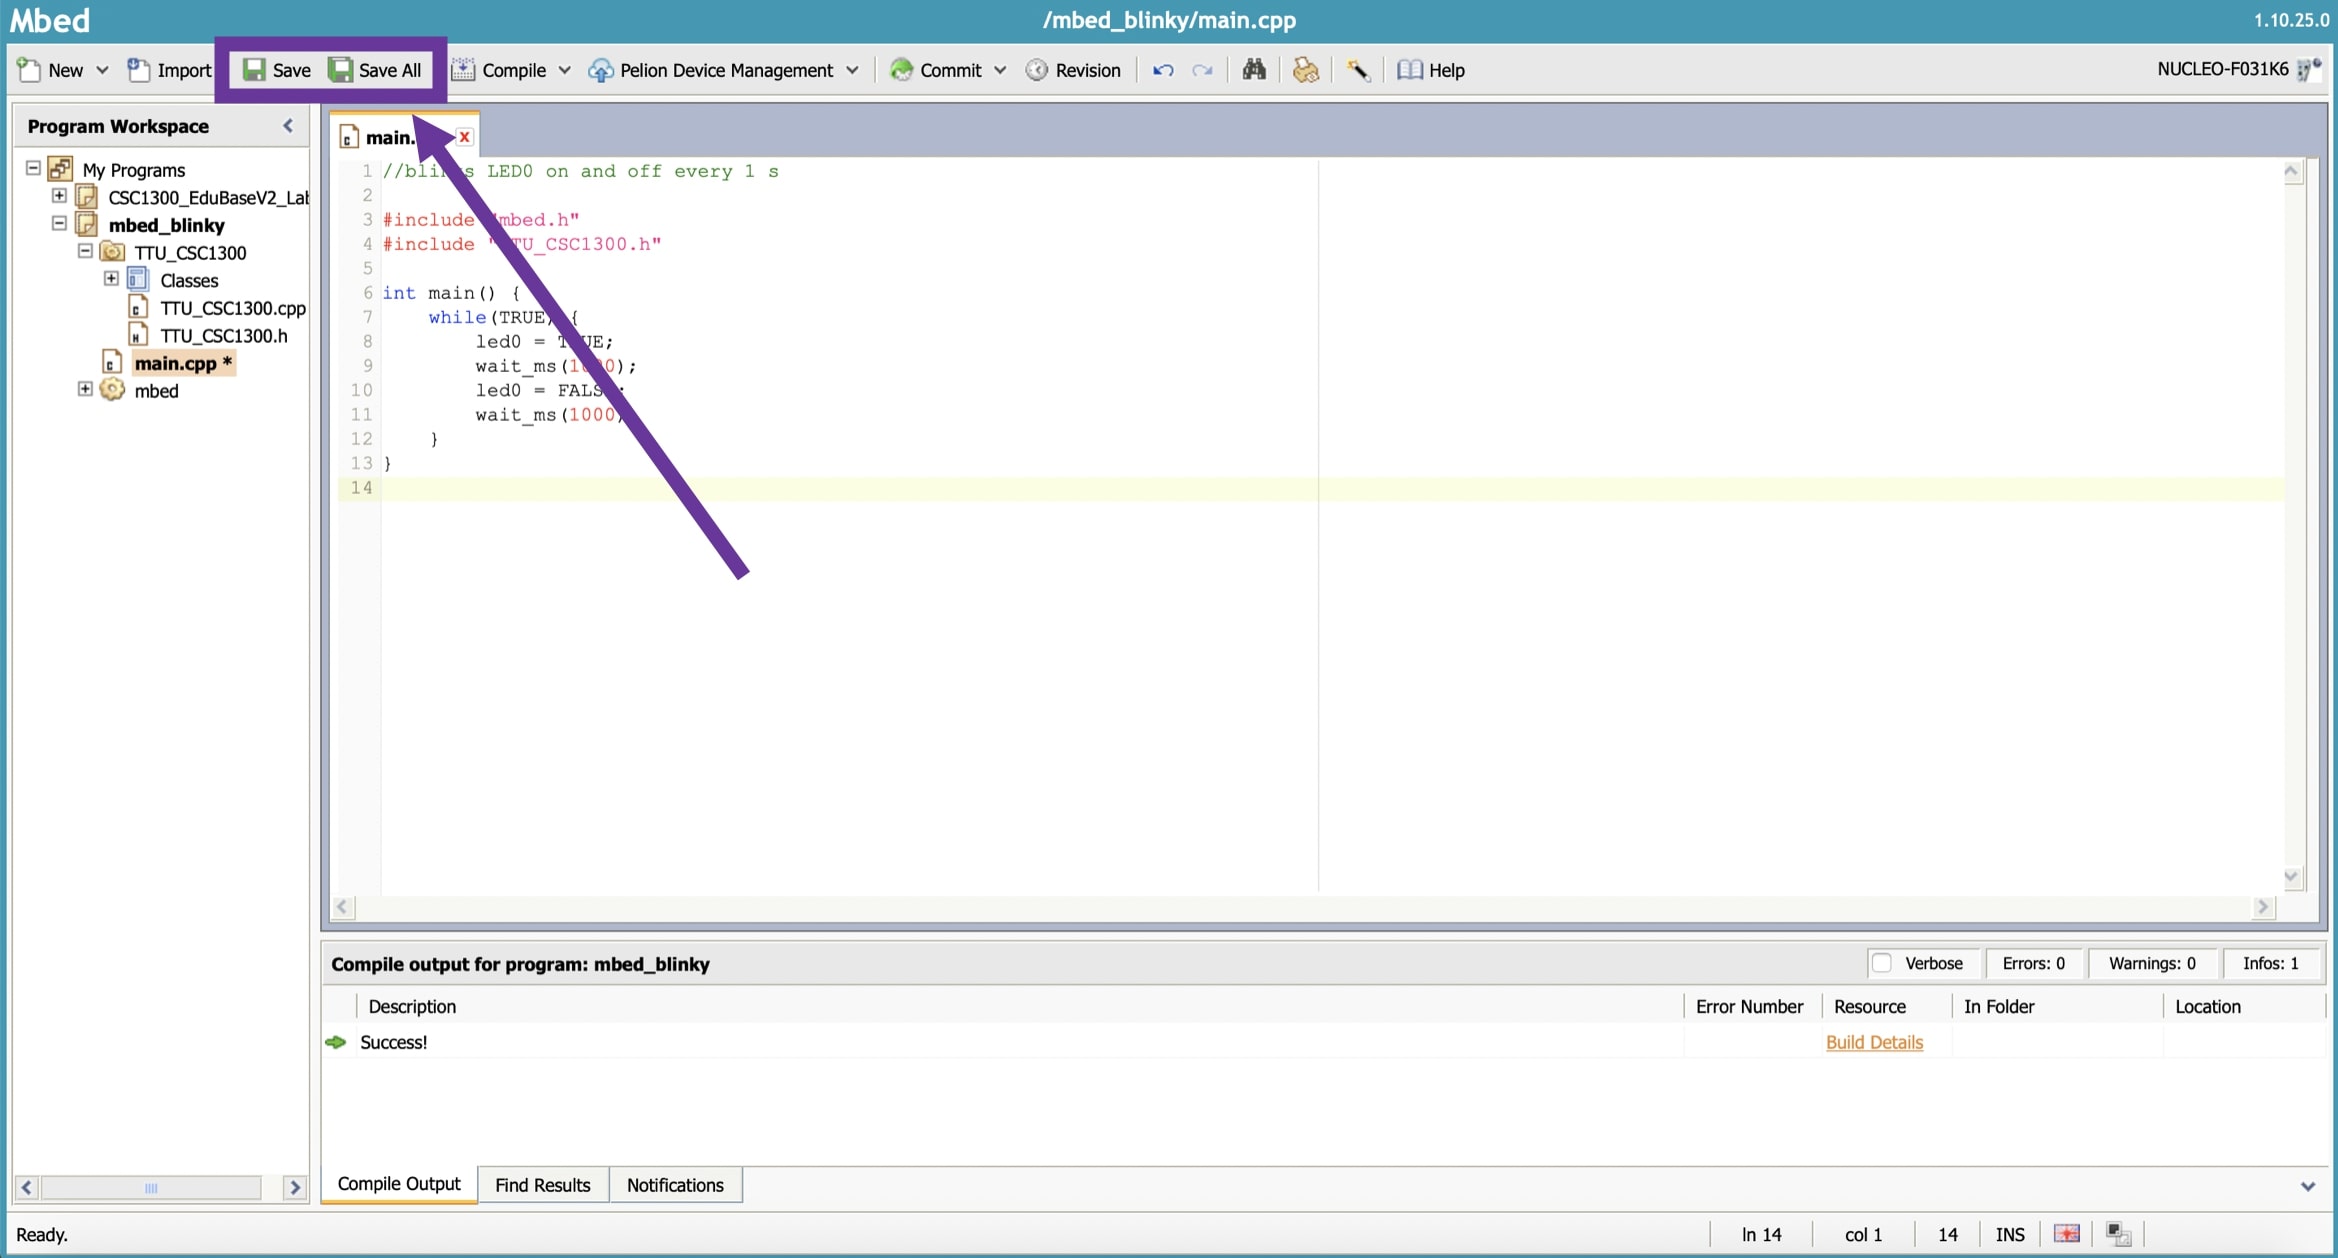
Before you can commit a program, you have to save your program first. Press the Save button in the top left corner to save your current file. If you want to save all of the files you have been working on in your current program, press Save All.
If a file is unsaved, its name along with the program it resides in will be bolded in your Program Workspace and at the top of text editor. Notice how main.cpp and mbed_blinky are bolded before I saved my main.cpp file.
How to Commit a Program
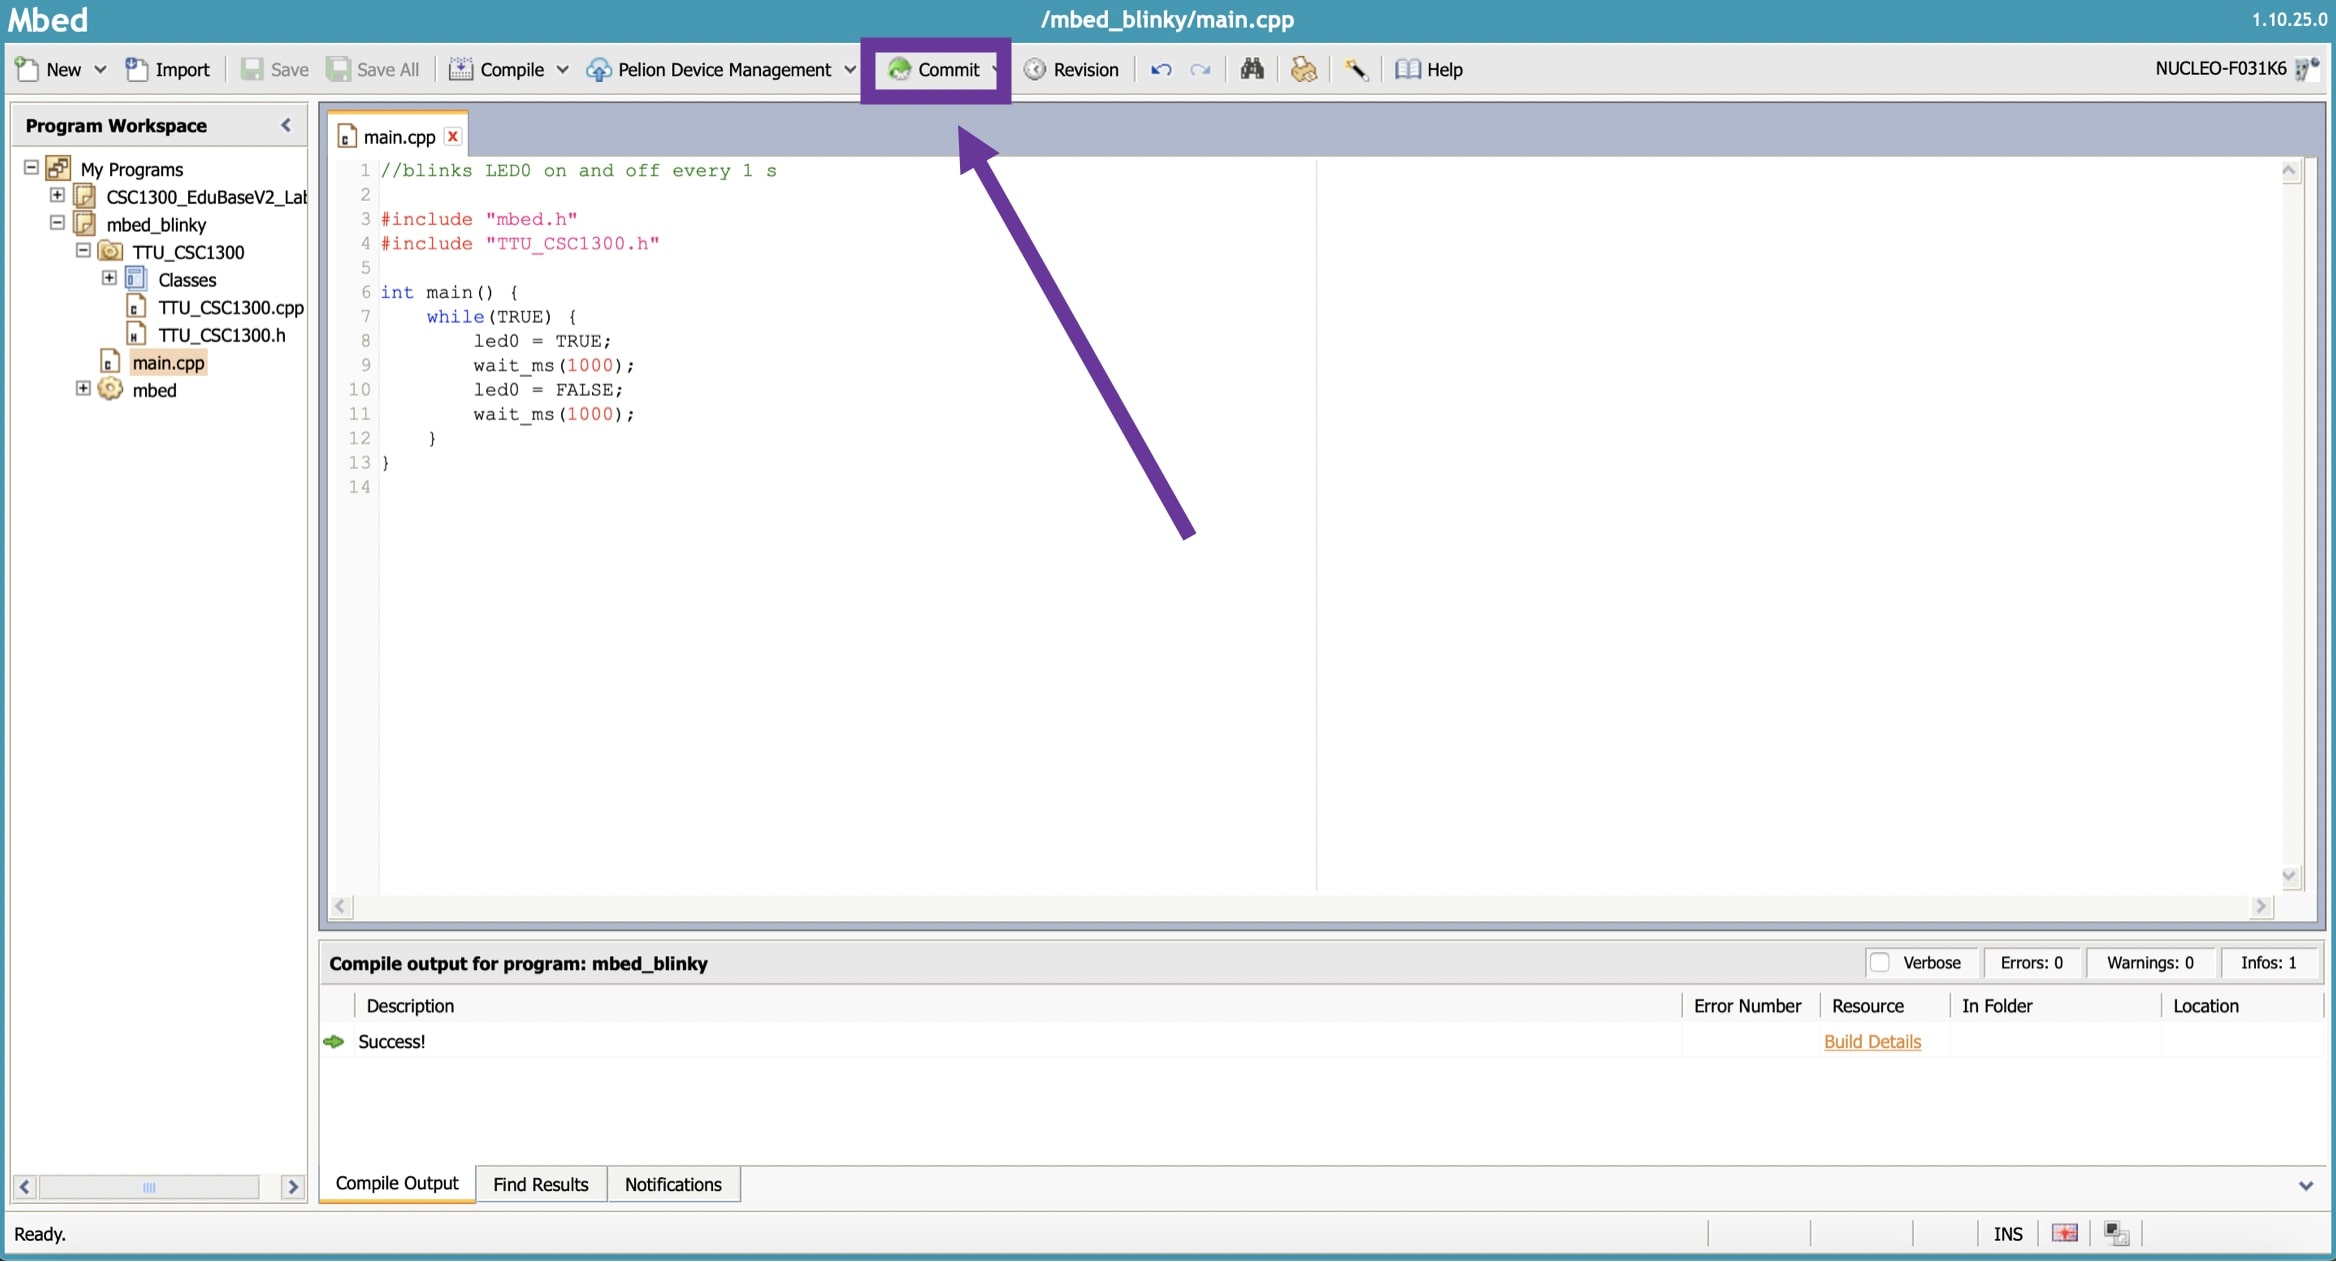
1. After you have saved your program, you can commit it. Press the Commit button in the toolbar at the top of the IDE page.
2. A text box titled "Revision Commit" should pop up on your screen. For your commit message, write one or two short phrases/sentences about the edits you made to your program. Because these commits are for your future reference, so that you could track what you did at each stage/version of your program, make sure your commit message is clear and understandable if you were to read it in the future.

How Often Should I Commit My Program?
Since you are just starting off using version control, it is recommended to commit your program as often as you can. You don't have to commit every single line you write, but you should commit whenever you get a stage of your lab working, especially when you perform a major change to your program. (For example, if you had to write a program that completed five tasks, you should commit your program every time you finish writing code that works for each task.) The more commits you make, the more past versions you will have in your Revision History.
How to Go to Revision History
The Revision History page is where you can look at all of the commits you have made to a program; in other words, you can view all of the previous versions of your current program.
1. Make sure the program that you want to view its Revision History is highlighted in the Program Workspace. Highlighting a file inside that program will also suffice.
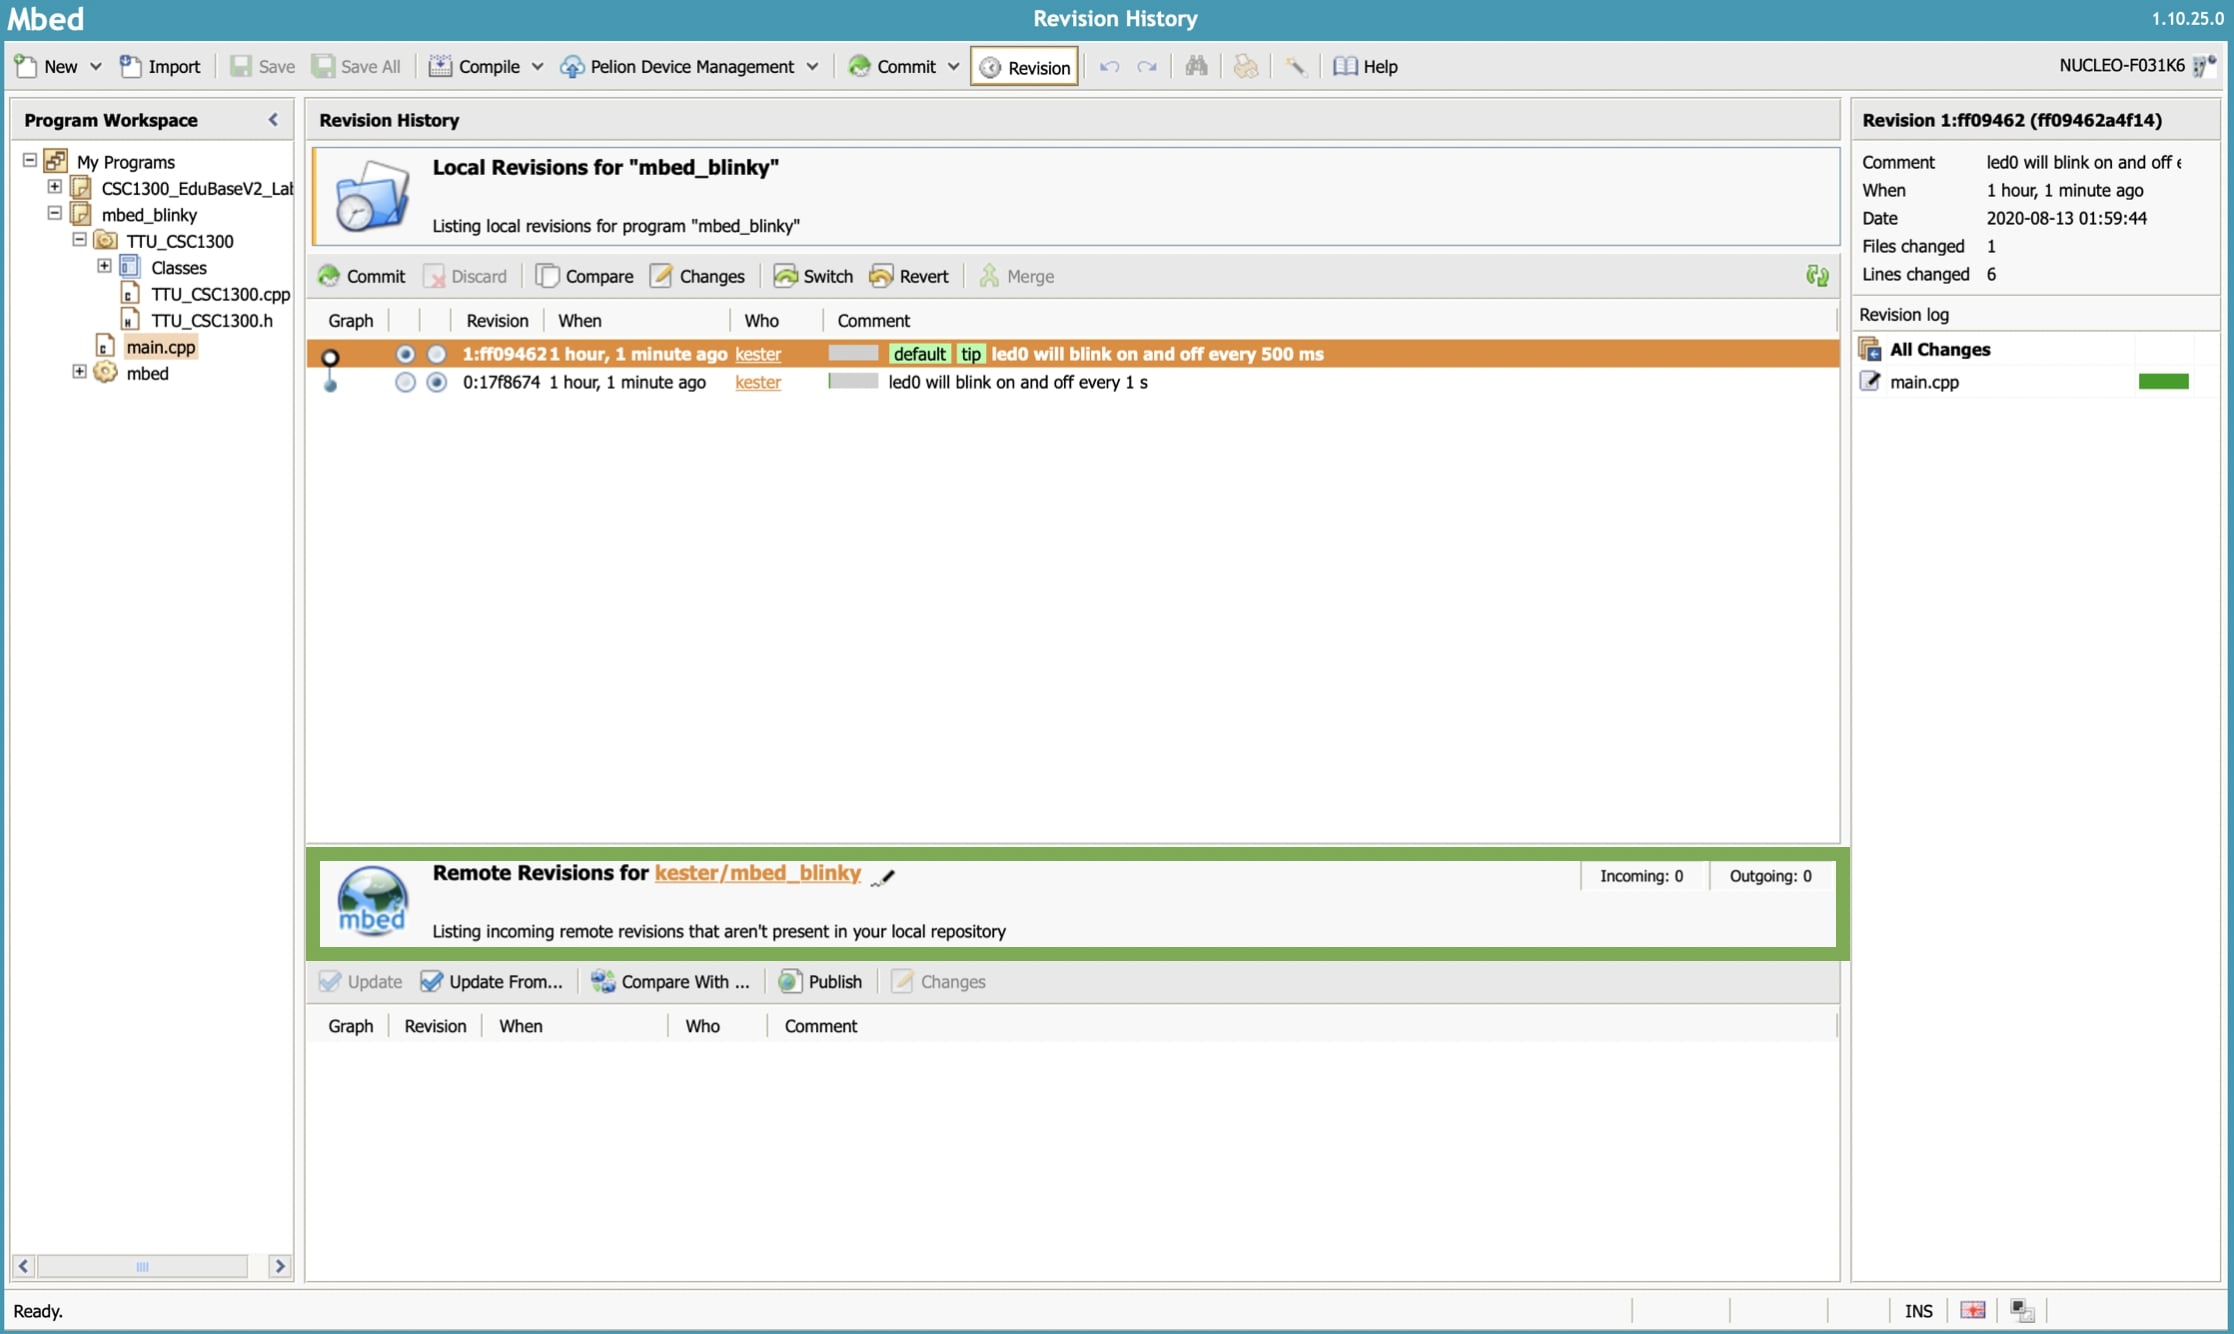
2. Click the Revision button next to the Commit button at the top of the IDE webpage. As you can see below, because the main.cpp file in the mbed_blinky program is highlighted in the Program Workspace, the Revision History for mbed_blinky is displayed.

How to View Changes in a Previous Version
Each line in your Revision History page represents a commit that you have made to your program. As you can see in the example below, there were two commits made to the mbed_blinky program. In each line, you can see when the commit was made, who made the commit, and the comment for that commit. Your most recent commit will be bolded.

To view the changes made to a commit, highlight the commit that you want to view and then click on the Changes button. You could also double-click on the line of the commit that you would like to view.

Now you can see all of the changes that were made in the commit you selected. Lines in red were deleted from your files, and lines in green were added. Lines in white were unaffected by your changes. Files that were not changed in that commit will not be shown.

How to Publish a Program
To submit your solution for your EduBase lab assignment, you will need to publish your program.
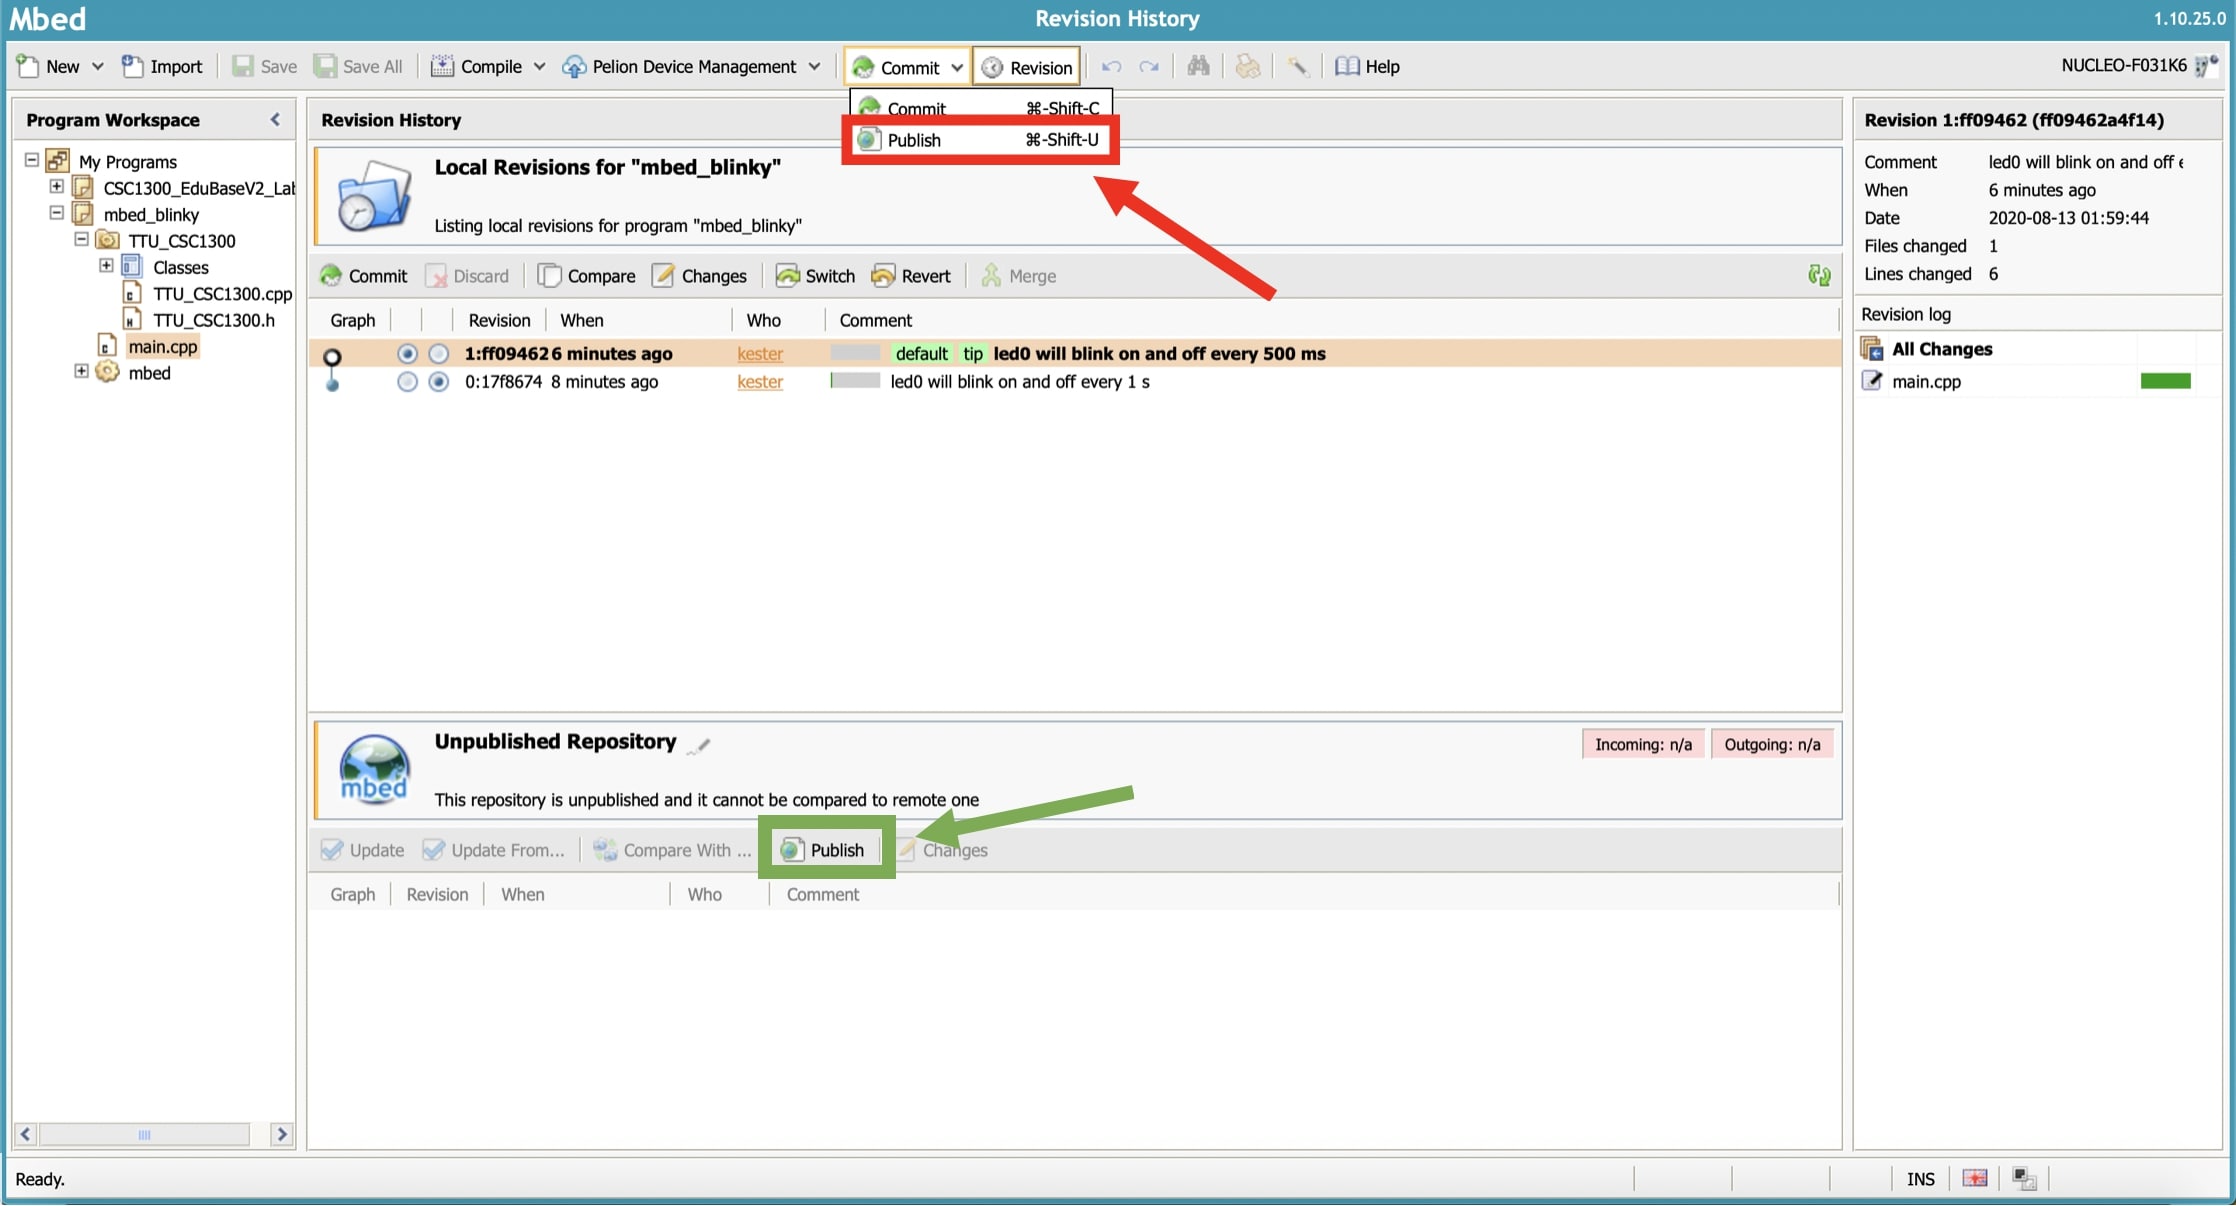
1. Make sure all recent changes to your program have been committed. Click on the Publish button at the bottom of your Revision History page. You can also click on the upside-down carat to the right of the Commit button in the toolbar at the top of your page and then select the Publish option.
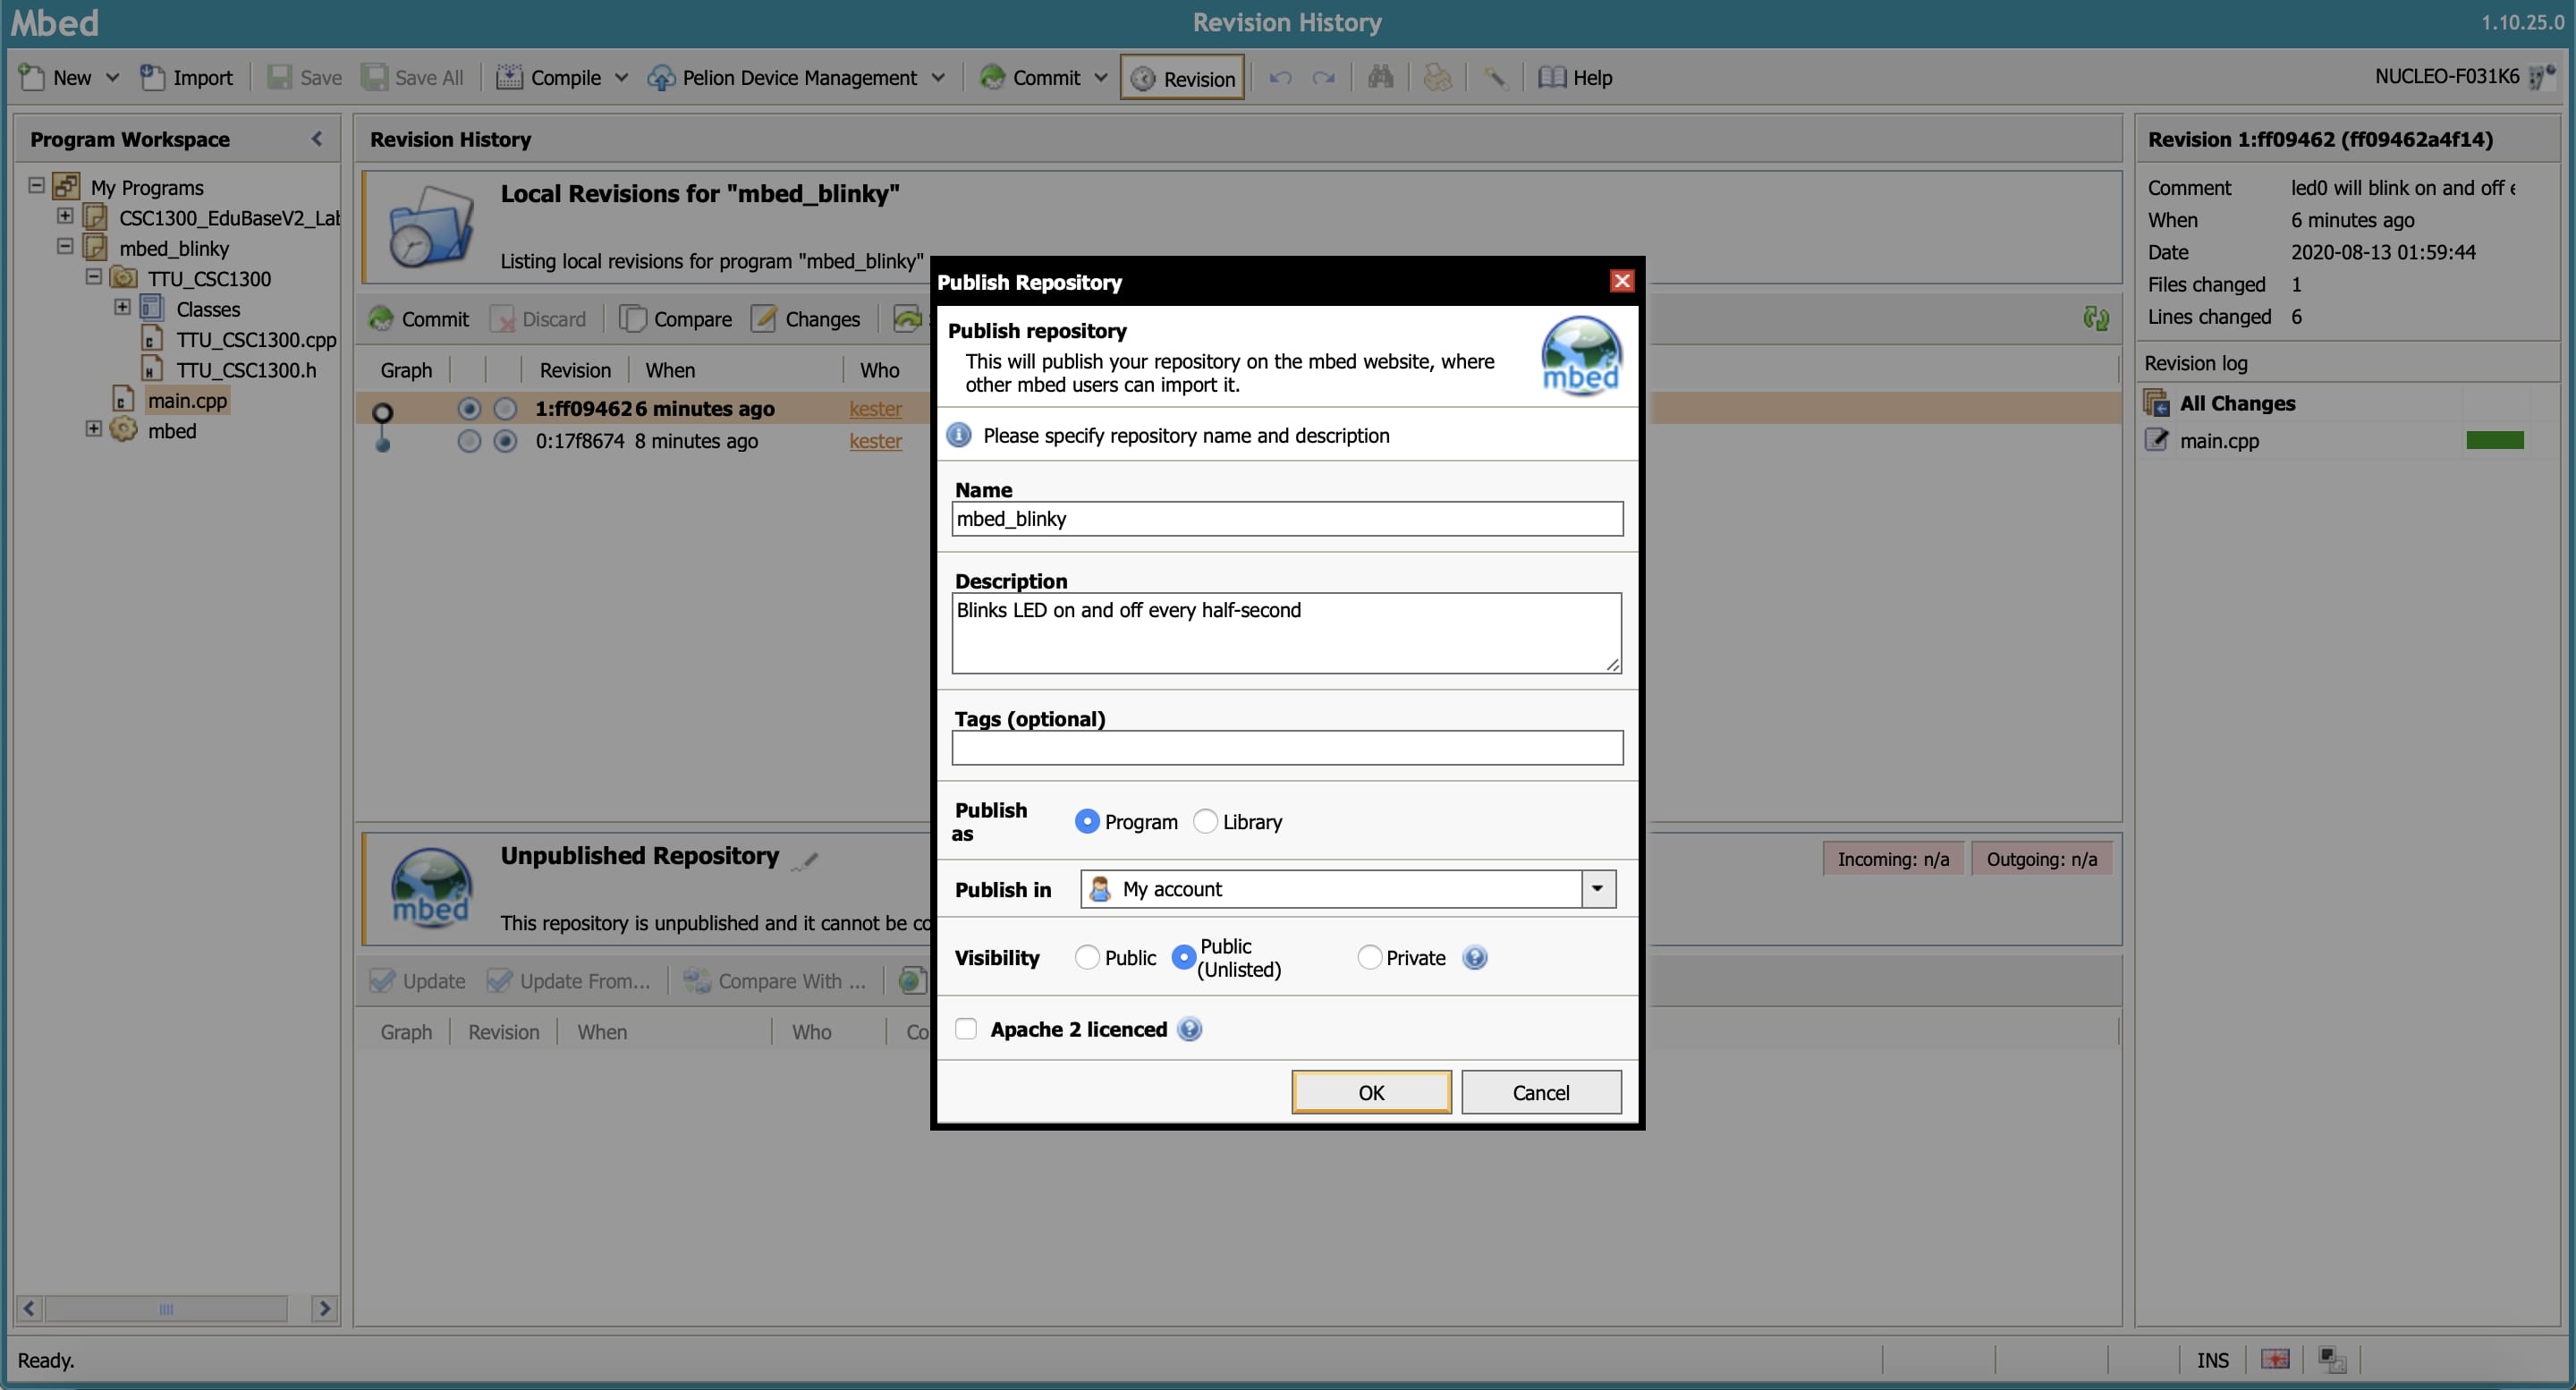
2. A pop-up box titled "Publish Repository" will appear on your screen. Keep the repository name the same as the name of your program. Write a short description that briefly describes what your program does, and make sure you include the names of all of your lab group partners for each of your labs. Make sure you publish your repository as a program, and set its visibility to Public (Unlisted).
Information
A repository, or "repo" for short, is where a software program's files and metadata are stored.
3. You will be given a link to your published program. The Unlisted setting causes your program not to appear on your public profile, but anyone with this link can view your program. You will copy and paste this link in the comment box in the submission page for each lab assignment in iLearn.

4. If you select Open Page, you will be taken to the webpage of your published program. It will look like this:

5. If you go back to the Revision History page, you will notice that the box that used to say "Unpublished Repository" now displays "Remote Revisions for ..." with your program's path in place of the ellipsis (...).
At this point, you can now create a program, import a library, commit any revisions, and publish your repository. Now you just need to know how to run your program onto the Nucleo F031K6 and EduBase boards, which you will learn in your final tutorial Compiling and Uploading a Program.