Important changes to repositories hosted on mbed.com
Mbed hosted mercurial repositories are deprecated and are due to be permanently deleted in July 2026.
To keep a copy of this software download the repository Zip archive or clone locally using Mercurial.
It is also possible to export all your personal repositories from the account settings page.
Dependents: CSC1300_EduBaseV2_Lab0 mbed_blinky EduBaseV2_Lab0 mbed_blinky ... more
Tutorial 1 Setting Up the EduBase V2
Setting Up the EduBase-V2
What is the EduBase-V2?

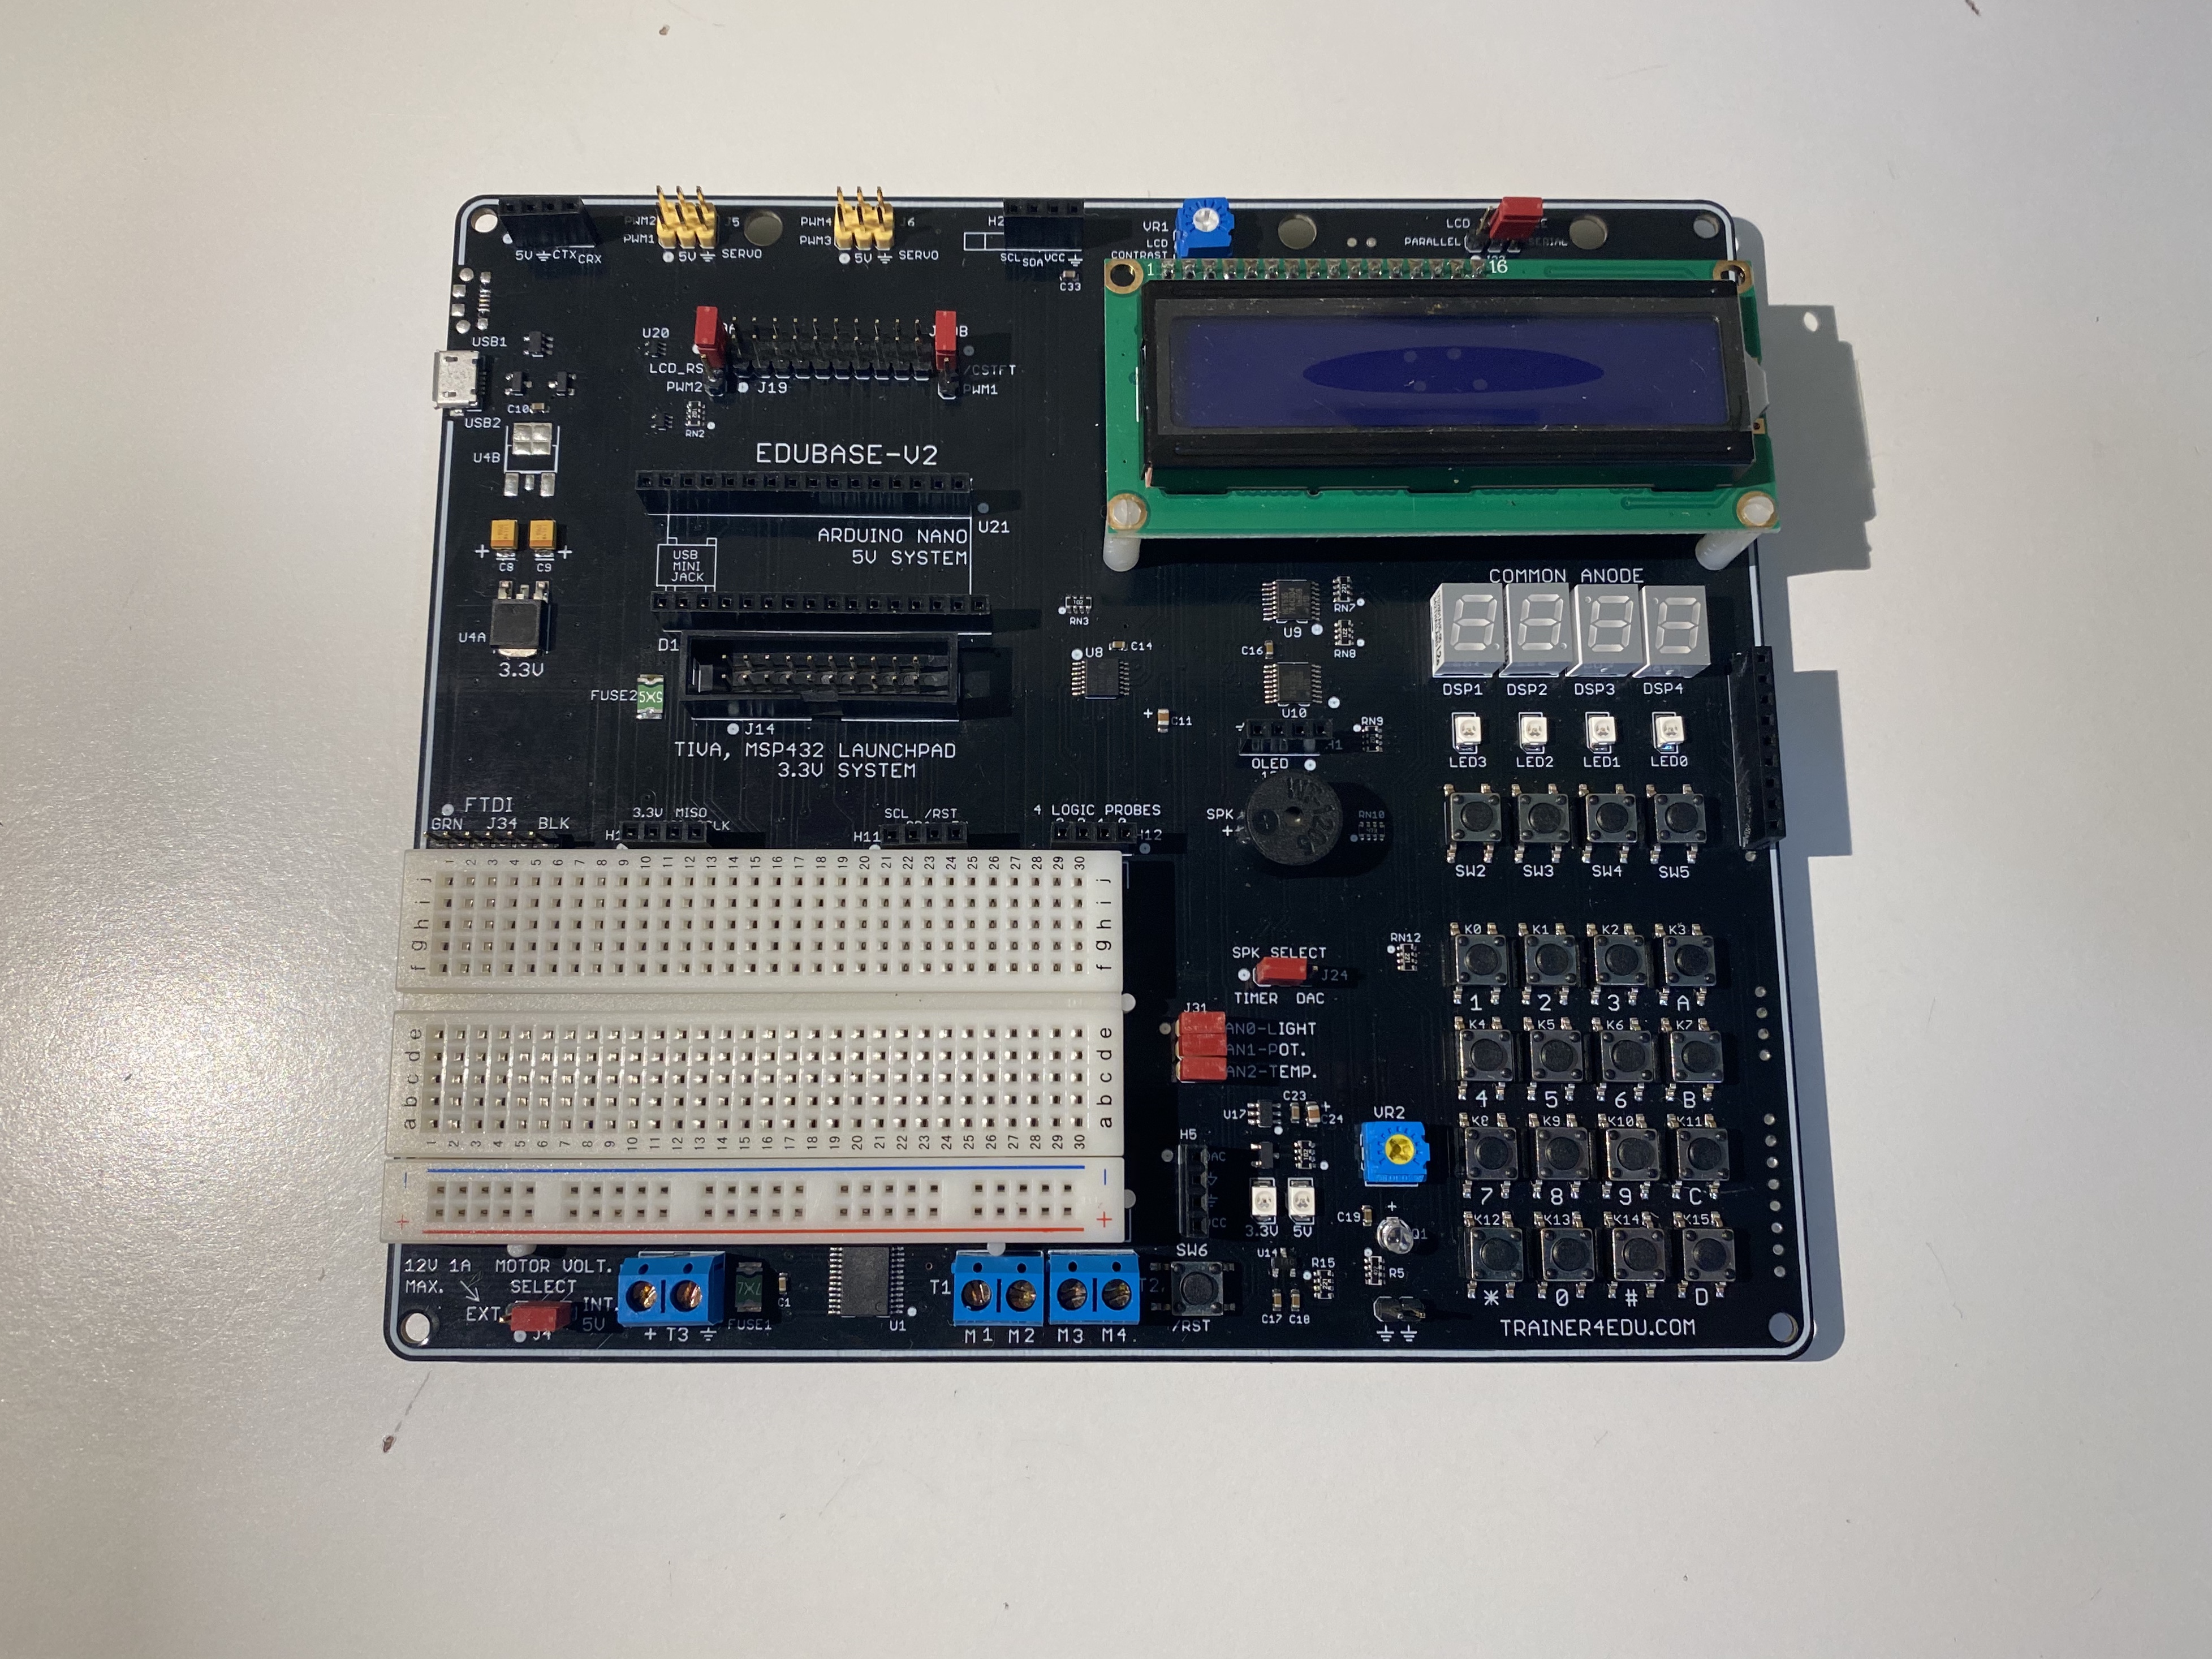
The EduBase-V2 is a peripheral circuit board that can be programmed with a microcontroller board. In these labs, you will learn how to program many of the EduBase's components, including the LEDs, pushbutton switches, LCD display, seven segment display, and analog sensors, using the skills you learn in CSC 1300. These labs will provide you a first glimpse into the workings of digital systems, embedded systems, and electronics.
What is the Nucleo F031K6?

In order to program the EduBase, you will insert a Nucleo F031K6 with an adapter board onto the EduBase. The Nucleo F031K6 is a microcontroller board, which can be programmed to run a specific task on the EduBase board. The Nucleo board has its own CPU, memory, and input/output pins that connect to specific features or perform specific functions on the EduBase.
How Do I Set-Up the EduBase-V2?
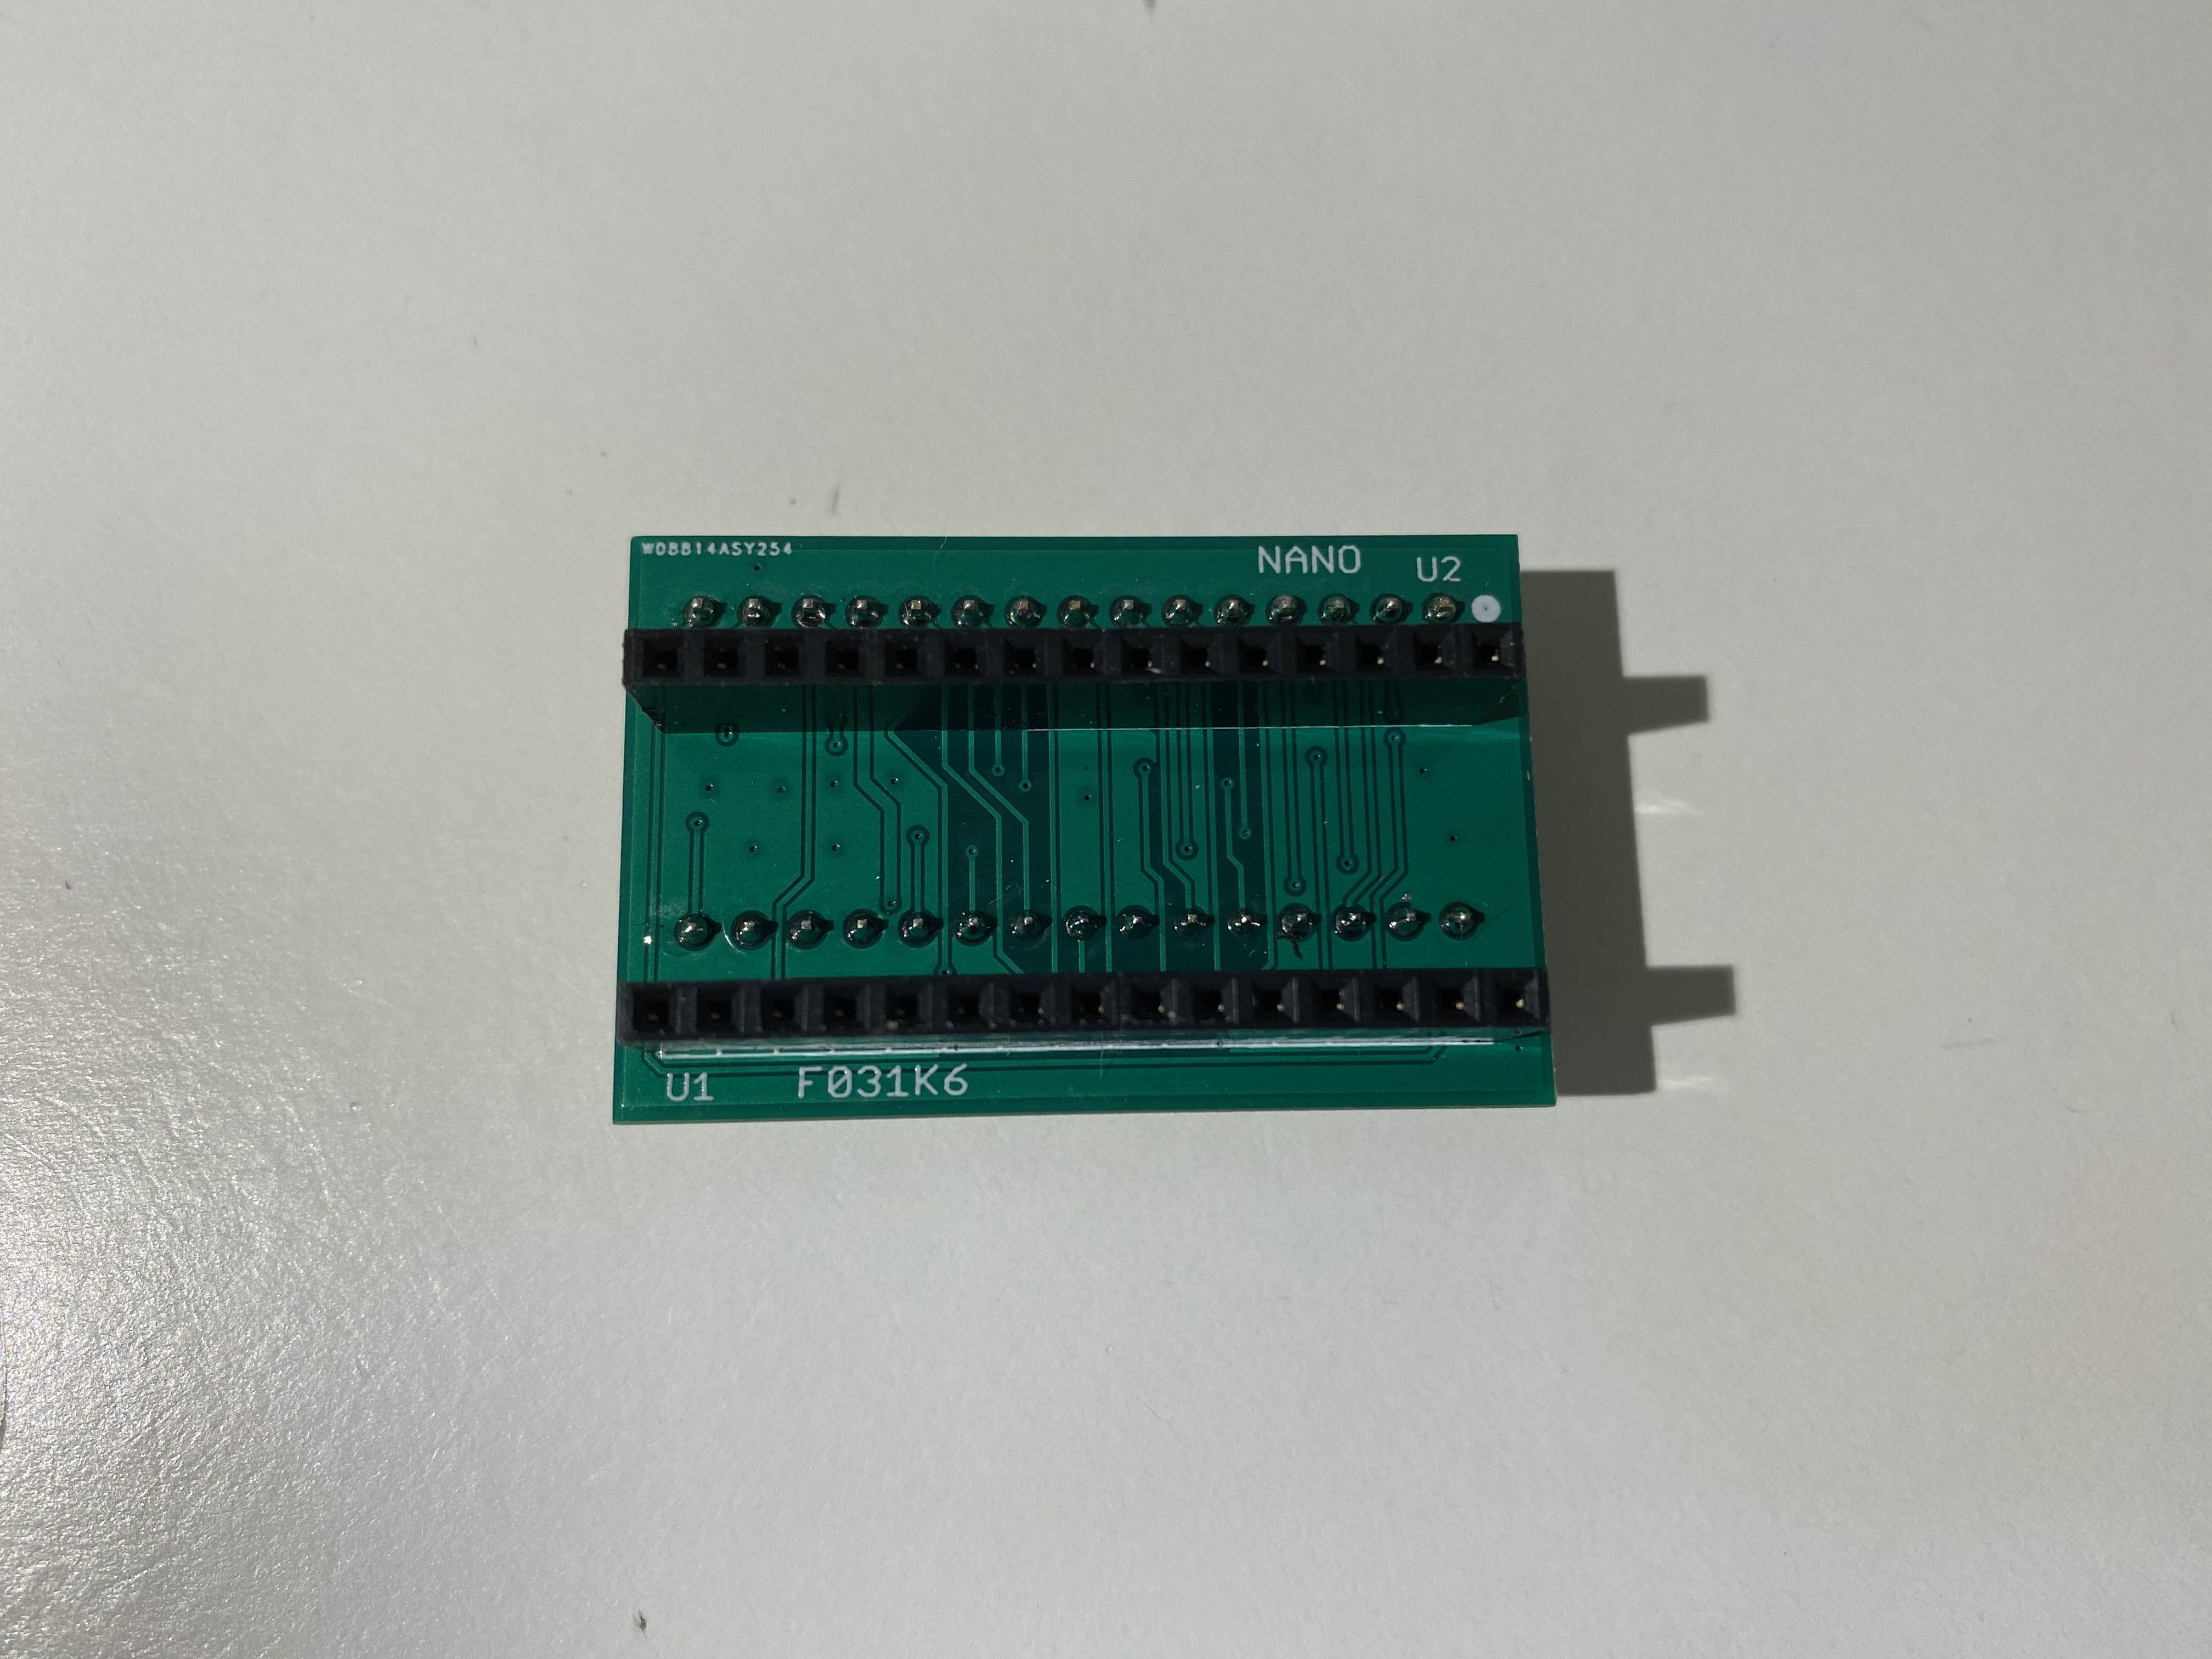
You will be given three pieces of hardware: the EduBase-V2, a Nucleo F031K6, and an adapter board. Since the EduBase was not originally manufactured to use the Nucleo F031K6, the adapter board allows you to use the F031K6 on the EduBase. You will also need a USB Type-A to Micro-B cable in order to connect to your PC.

1. Set down the EduBase with the breadboard towards you and the LCD away from you. All of the text on the board should be right-side up and readable.

2. Insert the adapter board into the pin slots where it says "ARDUINO NANO 5V SYSTEM" on the EduBase. Make sure that the white dot besides "U2" is in the top right corner.


3. Place the Nucleo F031K6 onto the adapter board so that the USB Micro B port is facing left.


4. Remove the jumper on pins D2 and GND off the Nucleo F031K6. (You can leave it hanging off pin D13 as shown.)


5. Plug your USB cable into your PC and the Nucleo F031K6 and watch the boards turn on.

Now that you have learned how to set up your EduBase board, please go to Creating an Mbed Account to learn about Mbed, the Integrated Development Environment (IDE) platform that you will be using to program your Nucleo F031K6 and EduBase boards.