Important changes to repositories hosted on mbed.com
Mbed hosted mercurial repositories are deprecated and are due to be permanently deleted in July 2026.
To keep a copy of this software download the repository Zip archive or clone locally using Mercurial.
It is also possible to export all your personal repositories from the account settings page.
Dependencies: HttpServer_snapshot_mbed-os
Setting of fixed IP address
Information
Japanese version is available in lower part of this page.
このページの後半に日本語版が用意されています.
Setting of fixed IP address
Only for Windows(R) user:
You need to set up IP address of your PC to match GR-PEACH WebCamera sample when you use fixed IP address.
The default settings are as below.
| GR-PEACH | 192.168.0.2 |
| Subnet mask | 255.255.255.0 |
| Default Gate Way | 192.168.0.3 |
Setting steps of IP address is shown as below.
We will set "192.168.0.3" for the IP address of PC in following steps.
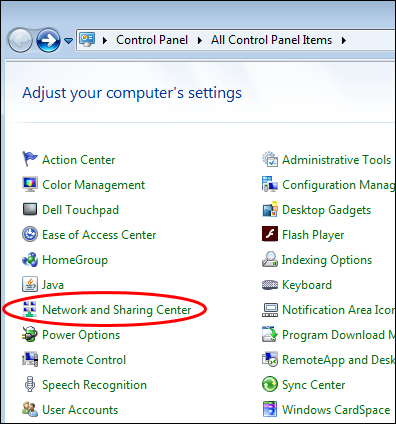
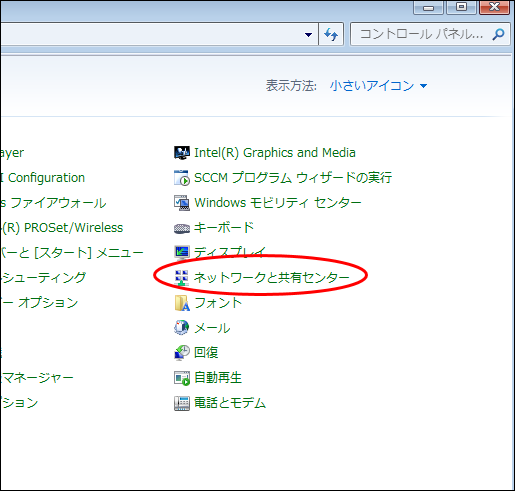
- Open the control panel and click "Network and Sharing Center".
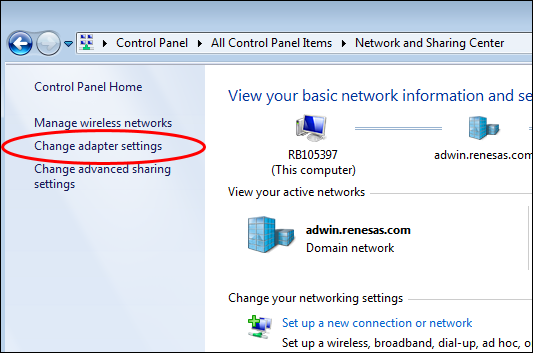
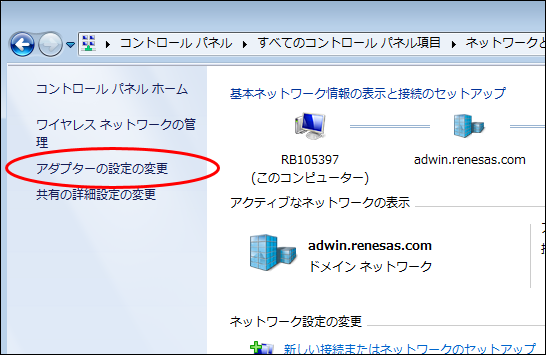
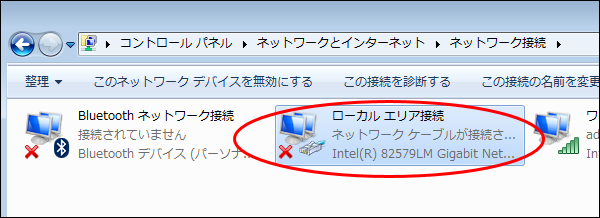
- Click "Change adapter settings".
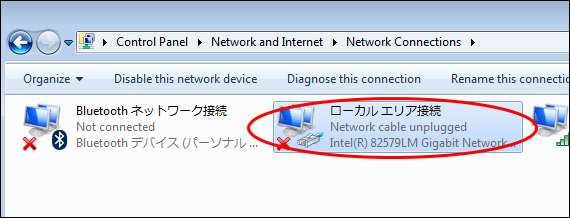
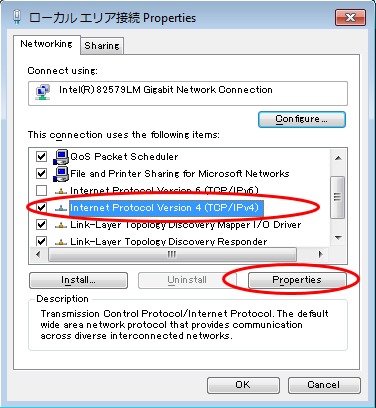
- Right-click "Local Area Connection" to open a property.
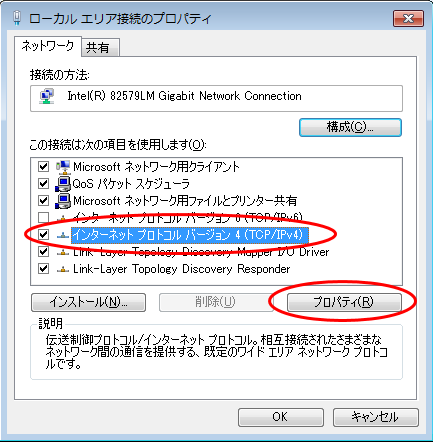
- Select "Internet Protocol Version 4(TCP/IPv4)" and click "Properties".
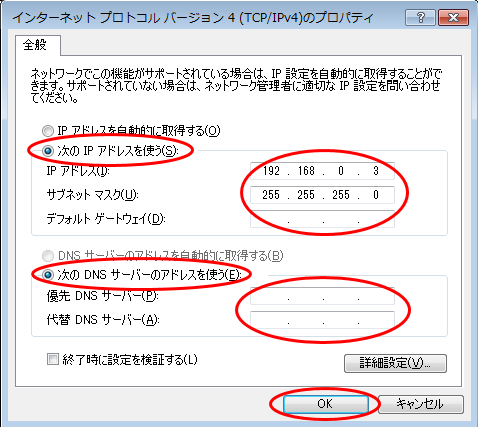
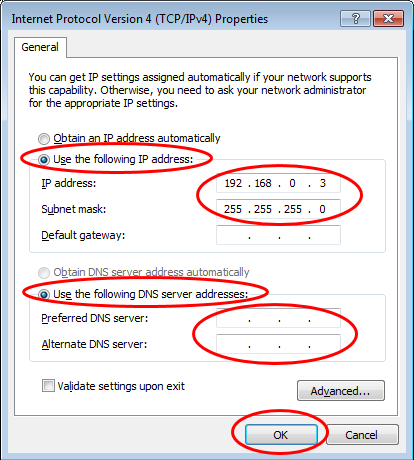
- Check "Use the following IP address:" and "Use the following DNS server addresses:".
- Enter "192.168.0.3" to "IP address:", and enter "255.255.255.0" to "Subnet mask:".
"Default gateway:", "Preferred DNS server:", and "Alternate DNS server:" are empty.
And click "OK".
固定IPアドレスの設定
以降はWindows PCでの固定IPアドレス設定方法を記載します。
GR-PEACH WebCameraサンプルで、固定IPアドレスを使用する場合、
PC側のIPアドレスをプログラムに合うよう変更する必要があります。
デフォルトでは、以下の設定になっています。
| GR-PEACH | 192.168.0.2 |
| Subnet mask | 255.255.255.0 |
| Default Gate Way | 192.168.0.3 |
以下にIPアドレス設定方法を記載します。
PCに設定するIPアドレスは、192.168.0.3を設定します。
- コントロールパネルを開き、「ネットワークと共有センター」をクリックします。
- 「アダプターの設定の変更」をクリックします。
- 「ローカルエリア接続」を右クリックし、プロパティを開きます。
- 「インターネット プロトコル バージョン 4(TCP/IPv4)」を選択し、「プロパティ」をクリックします。
- 「次のIPアドレスを使う」および「次のDNSサーバーのアドレスを使う」をチェックします。
- IPアドレスに192.168.0.3、サブネットマスクに255.255.255.0を入力します。
デフォルトゲートウェイ、優先DNSサーバーおよび代替DNSサーバーを空欄にし、OKをクリックします。
