Important changes to repositories hosted on mbed.com
Mbed hosted mercurial repositories are deprecated and are due to be permanently deleted in July 2026.
To keep a copy of this software download the repository Zip archive or clone locally using Mercurial.
It is also possible to export all your personal repositories from the account settings page.
uvision5
Configure the project with uvision5
We have exported the project with the command mbed export and we have configured it in order to permit you to debug this application. Due to versioning problem with uvision we have listed here the right configuration of the project. Please check the following steps in order to be sure you have the project configurated properly.
1. Download the last version of the project
2. In the root folder of the project there is a file named mbed-os-sensor-node.uvprojectx. Open it with uvision.
3. From the menu click on Project -> Options for Target 'mbed-sensor-node'
4. In the Target tab, check the values marked in the red ellipse:

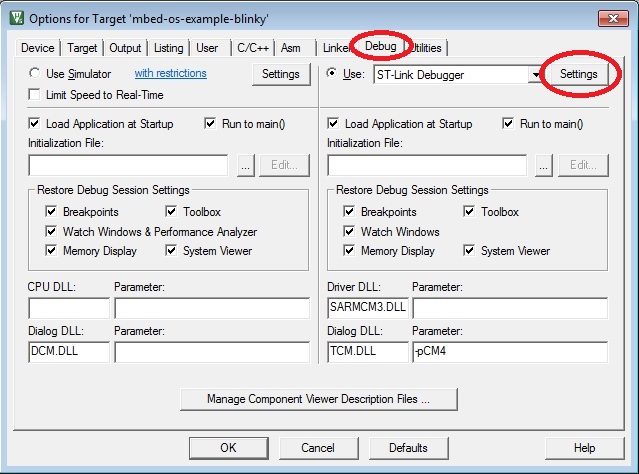
5. In the Debug tab click on Settings button for the ST-Link Debugger:

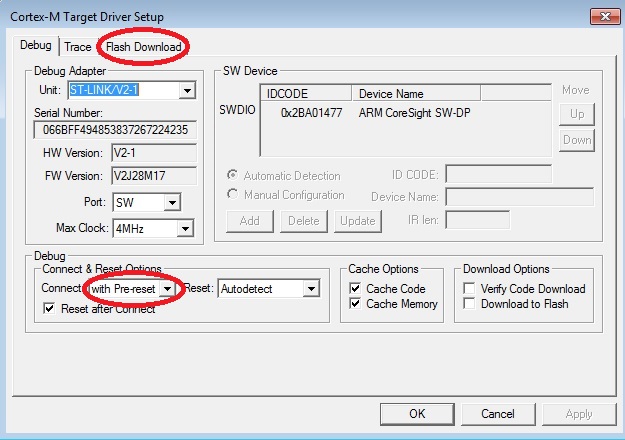
6. Check Connect with Pre-reset and then click on Flash Download

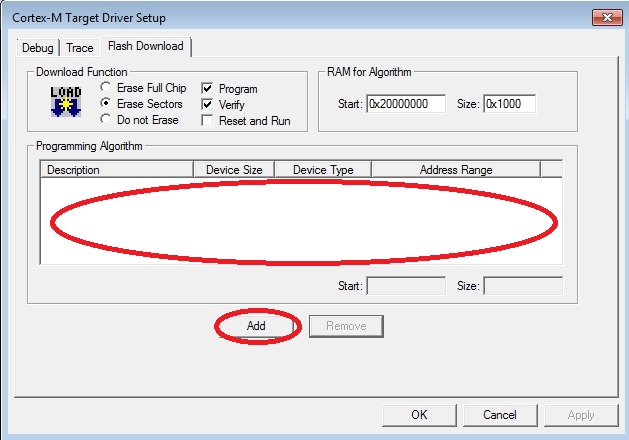
7. If there isn't a programming algorithm click on Add button:

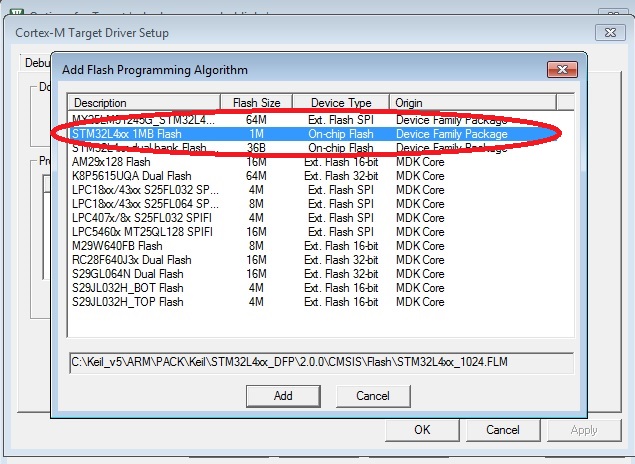
8. Then add the algorithm STM32L4xx 1MB Flash

9. All the settings of the mbed_app.json file are exported in the mbed_config.h file. Open it and insert a valid Spirit1 MAC Address changing MONTH, DAY, YEARS with hex values.

10. Don't forget to change the security.h file as showed in the workshop.
At this point you are ready to debug your application via mini-usb cable.
Warning
use-malloc-for-heap feature doesn't work with uVision5. In mbed_config.h file keep MBED_CONF_MBED_MESH_API_USE_MALLOC_FOR_HEAP define at 0 (false).