Garage Door Monitor and Opener
Dependencies: X_NUCLEO_COMMON ST_INTERFACES
Introduction
This system implements a simple garage door opener and environmental monitor. The hardware connects to the internet using Wi-Fi then on to the Pelion Device Management Platform which provides device monitoring and secure firmware updates over the air (FOTA). Pelion Device Management provides a flexible set of REST APIs which we will use to communicate to a web application running on an EC-2 instance in AWS. The web application will serve a web page where we can monitor and control our garage..
This project is intended to work on the DISCO-L475VG-IOT01A from ST Microelectronics It implements a simple actuator to drive a relay to simulate pushing the "open" button on older style garage doors which do not use a rolling code interface.
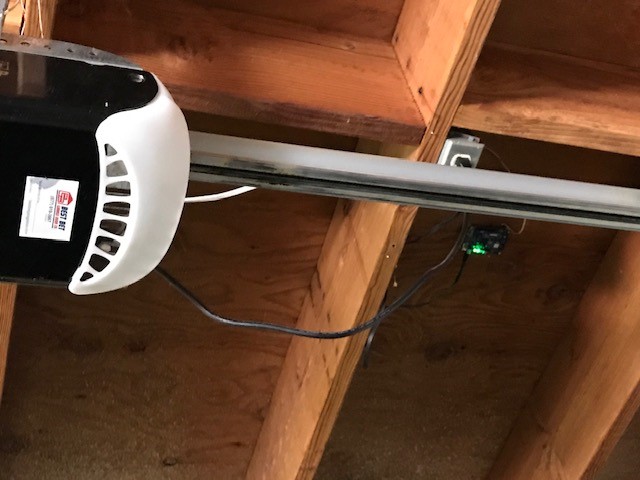
The system is designed to be mounted over the door so that the on board time of flight sensor can be used to detect if the door is open or closed.
The system also monitors temperature, humidity and barometric pressure.
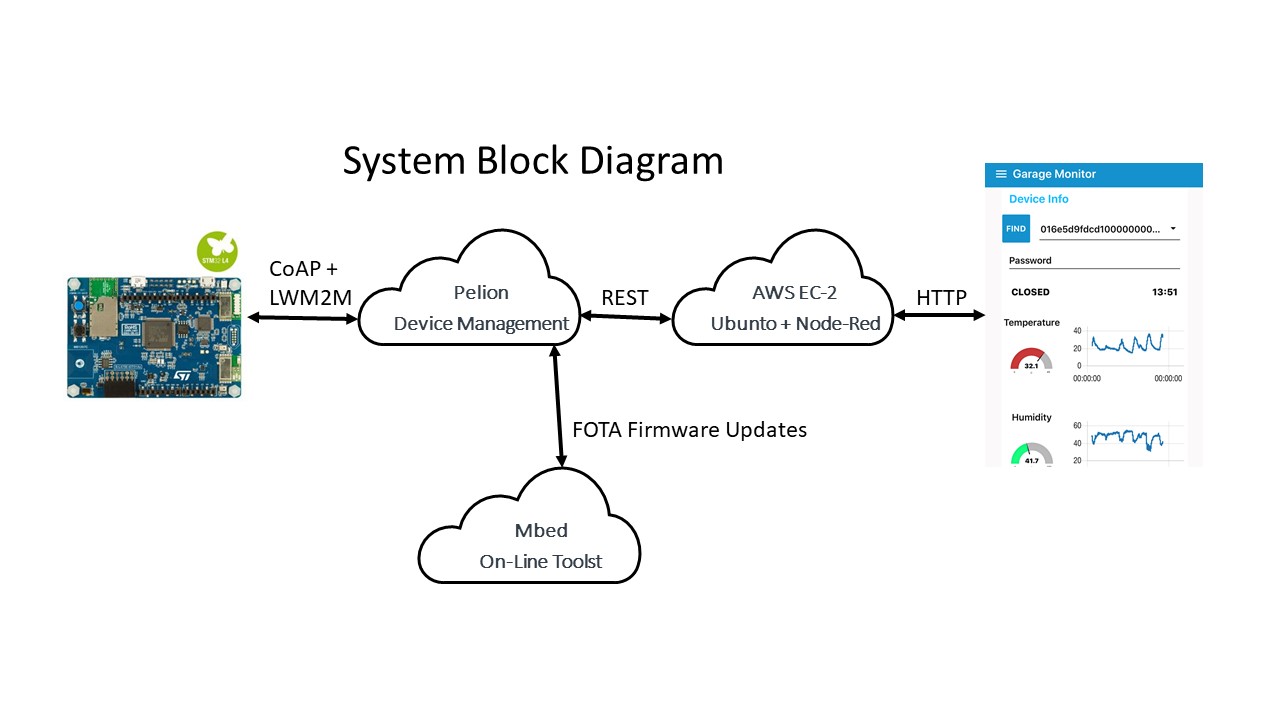
Hardware Requirements:
DISCO-L475G-IOT01A https://os.mbed.com/platforms/ST-Discovery-L475E-IOT01A/
Seeed Studio Grove Relay module https://www.seeedstudio.com/Grove-Relay.html
Seeed Studio Grove cable, I used this one: https://www.seeedstudio.com/Grove-4-pin-Male-Jumper-to-Grove-4-pin-Conversion-Cable-5-PCs-per-Pack.html
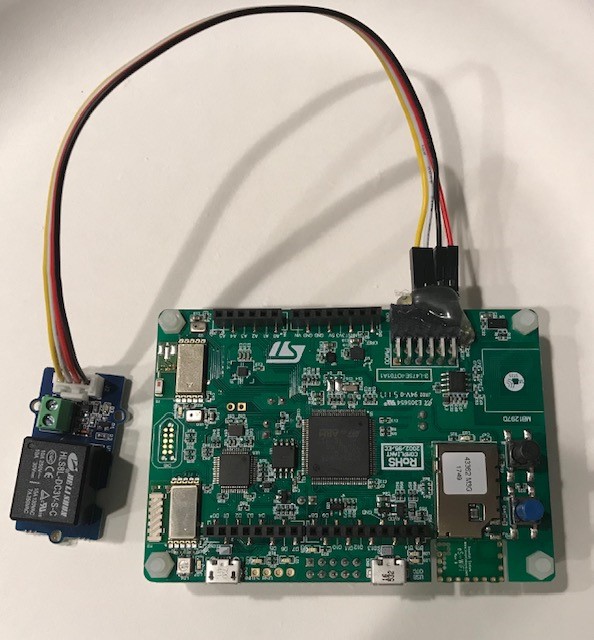
Connect to the PMOD connector like this:
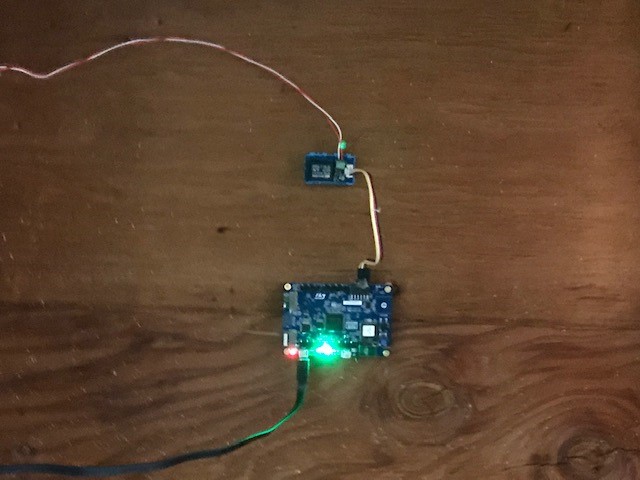
This shows how I installed so that the time of flight sensor can detect when the door is open
To use the project:
You will also need a Pelion developers account.
I suggest you first use the Pelion quick state to become familiar with Pelion Device Management. https://os.mbed.com/guides/connect-device-to-pelion/1/?board=ST-Discovery-L475E-IOT01A
Web Interface
For my web interface I am running node-red under Ubuntu in an EC2 instance on AWS. This can run for 12 month within the constraints of their free tier. Here is a tutorial: https://nodered.org/docs/getting-started/aws
You will also need to install several node-red add ons:
sudo npm install -g node-red-dashboard
sudo npm install -g node-red-contrib-mbed-cloud
sudo npm istall -g node-red-contrib-moment
After starting node-red import the contents of GarageFlow.txt from the project, pin the flow into the page.
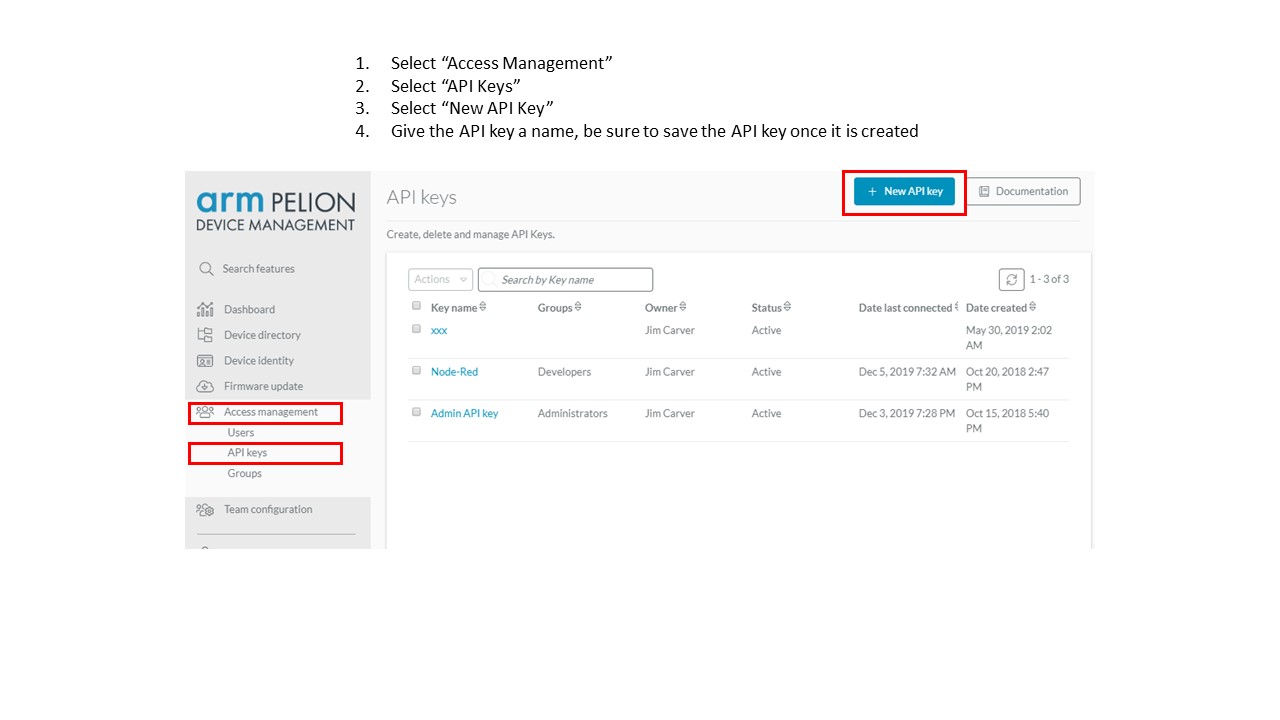
To enable your web app to access your Pelion account you need an API key.
First you will neet to use your Pelion account to create an API key.
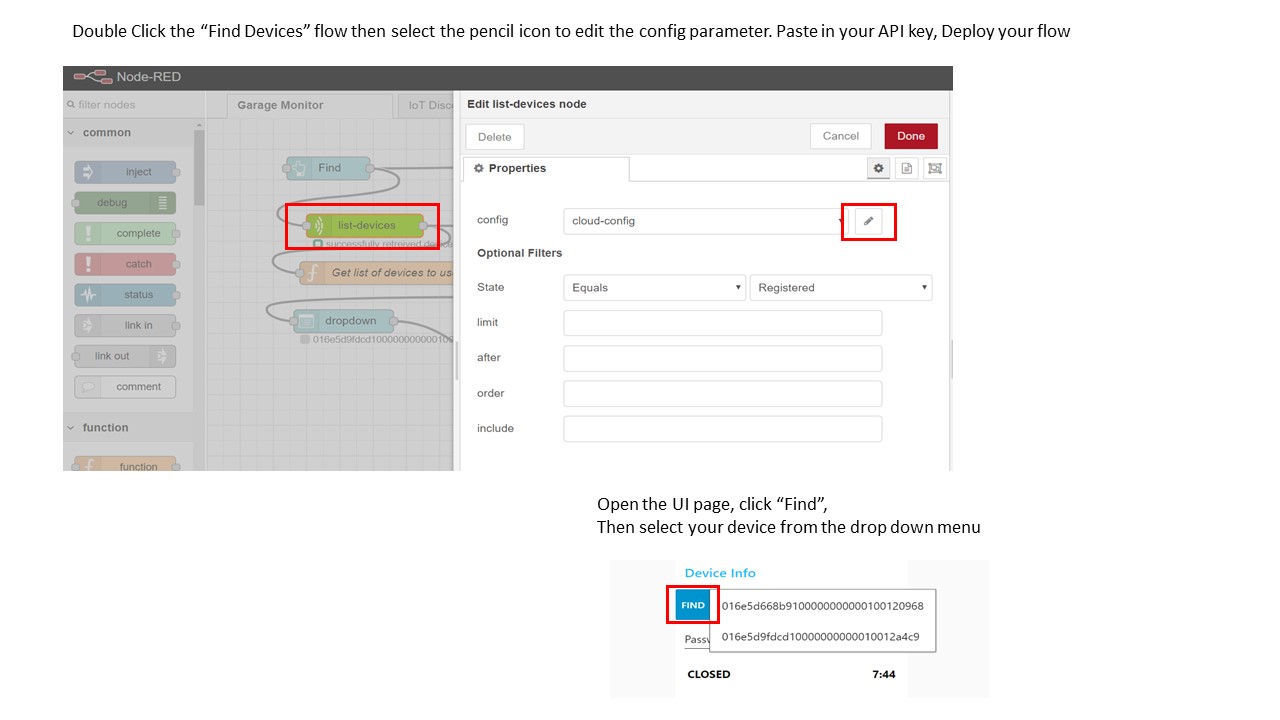
Now we need to apply that API key to your Node-Red flow.
.hgignore@32:2871fbeb627d, 2019-03-26 (annotated)
- Committer:
- screamer
- Date:
- Tue Mar 26 15:56:37 2019 +0000
- Revision:
- 32:2871fbeb627d
Report float values for accelerometer, magnometer and gyroscope
Who changed what in which revision?
| User | Revision | Line number | New contents of line |
|---|---|---|---|
| screamer | 32:2871fbeb627d | 1 | syntax: glob |
| screamer | 32:2871fbeb627d | 2 | BUILD/ |
| screamer | 32:2871fbeb627d | 3 | *.pyc |
| screamer | 32:2871fbeb627d | 4 | .DS_Store |
| screamer | 32:2871fbeb627d | 5 | .env |
| screamer | 32:2871fbeb627d | 6 | .cache/ |
| screamer | 32:2871fbeb627d | 7 | .pytest_cache/ |
| screamer | 32:2871fbeb627d | 8 | .update-certificates/ |
| screamer | 32:2871fbeb627d | 9 | .manifest_tool.json |
| screamer | 32:2871fbeb627d | 10 | .mbed_cloud_config.json |