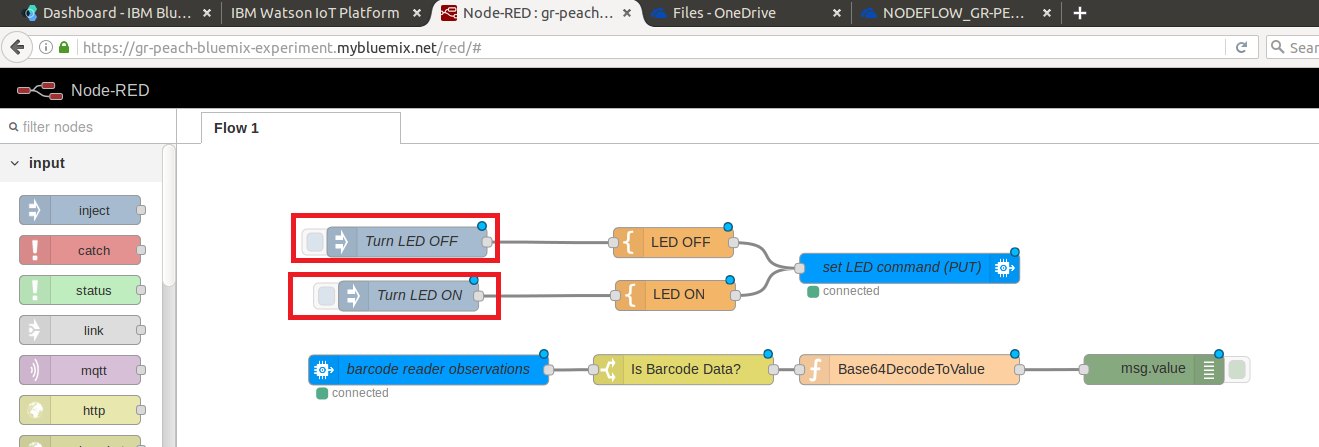
Sample program showing how to connect GR-PEACH into Watson IoT through mbed Connector and Watson's Connector Bridge
Dependencies: AsciiFont DisplayApp GR-PEACH_video LCD_shield_config LWIPBP3595Interface_STA_for_mbed-os USBDevice
Overview
This sample program shows how to connect GR-PEACH into Watson IoT through mbed Connector and Watson's Connector Bridge. Note that this program is derived from https://github.com/ARMmbed/mbed-ethernet-sample-techcon2016.
In this program, at first, the barcode data input from camera is decoded on GR-PEACH using ZXing which is an open-source, multi-format 1D/2D barcode image processing library. Then, the decoded string is sent to Watson IoT via mbed Device Connector and Watson's Connector Bridge. At last, the delivered string is confirmed via NodeRED flow.
Required hardware
- GR-PEACH ( https://developer.mbed.org/platforms/Renesas-GR-PEACH/ )
- Audio Camera Shield ( https://developer.mbed.org/teams/Renesas/wiki/Audio_Camera-shield )
- LCD Shield ( https://developer.mbed.org/teams/Renesas/wiki/LCD-shield )
- BP3595 ( https://developer.mbed.org/components/BP3595-for-GR-PEACH/ )
- Ethernet cable and connection to the internet
Application setup
- Select the connection type. For details, please refer to the following wiki:
https://developer.mbed.org/teams/Renesas/code/mbed-os_Watson-IoT_ZXing_sample/wiki/Connection-type. - Set the client credentials. For details, please refer to the following wiki:
https://developer.mbed.org/teams/Renesas/code/mbed-os_Watson-IoT_ZXing_sample/wiki/Client-credentials. - Change Ethernet settings. For details, please refer to the following wiki:
https://developer.mbed.org/teams/Renesas/code/mbed-os_Watson-IoT_ZXing_sample/wiki/Ethernet-settings. - Change Wifi settings. For details, please refer to the following wiki:
https://developer.mbed.org/teams/Renesas/code/mbed-os_Watson-IoT_ZXing_sample/wiki/Wifi-settings.
Building this sample program
- Import this sample program onto mbed Compiler.
- Configure this sample program in accordance with Application setup.
- Compile the example on mbed Compiler and download the resultant binary file.
- Plug the Ethernet cable into GR-PEACH if you are using Ethernet mode.

- Plug the micro-USB cable into the OpenSDA port with lies on the next to the RESET button.
- Copy the binary previously downloaded to your PC to GR-PEACH to flash this sample program. When the copy is successfully completed, the board is ready to work.
- Press the RESET button on the board to run this sample program.
- For verification, please refer to the following wiki:
https://developer.mbed.org/teams/Renesas/code/mbed-os_Watson-IoT_ZXing_sample/wiki/Monitoring-the-application.
Application resources
This sample program exposes two resources listed below:
- /311/0/5850 : Trigger to toggle LED on GR-PEACH (PUT). When "1" is sent to this resource by PUT method, LED should be turned off. Otherwise, LED should be turned on.
- /888/0/7700: Decode result of barcode data input from camera (GET)
Setup of Watson IoT
- You should create Watson IoT Instance by the following procedure:
- Login IBM Bluemix from https://console.ng.bluemix.net/ and login it.
- Select Services as follows:
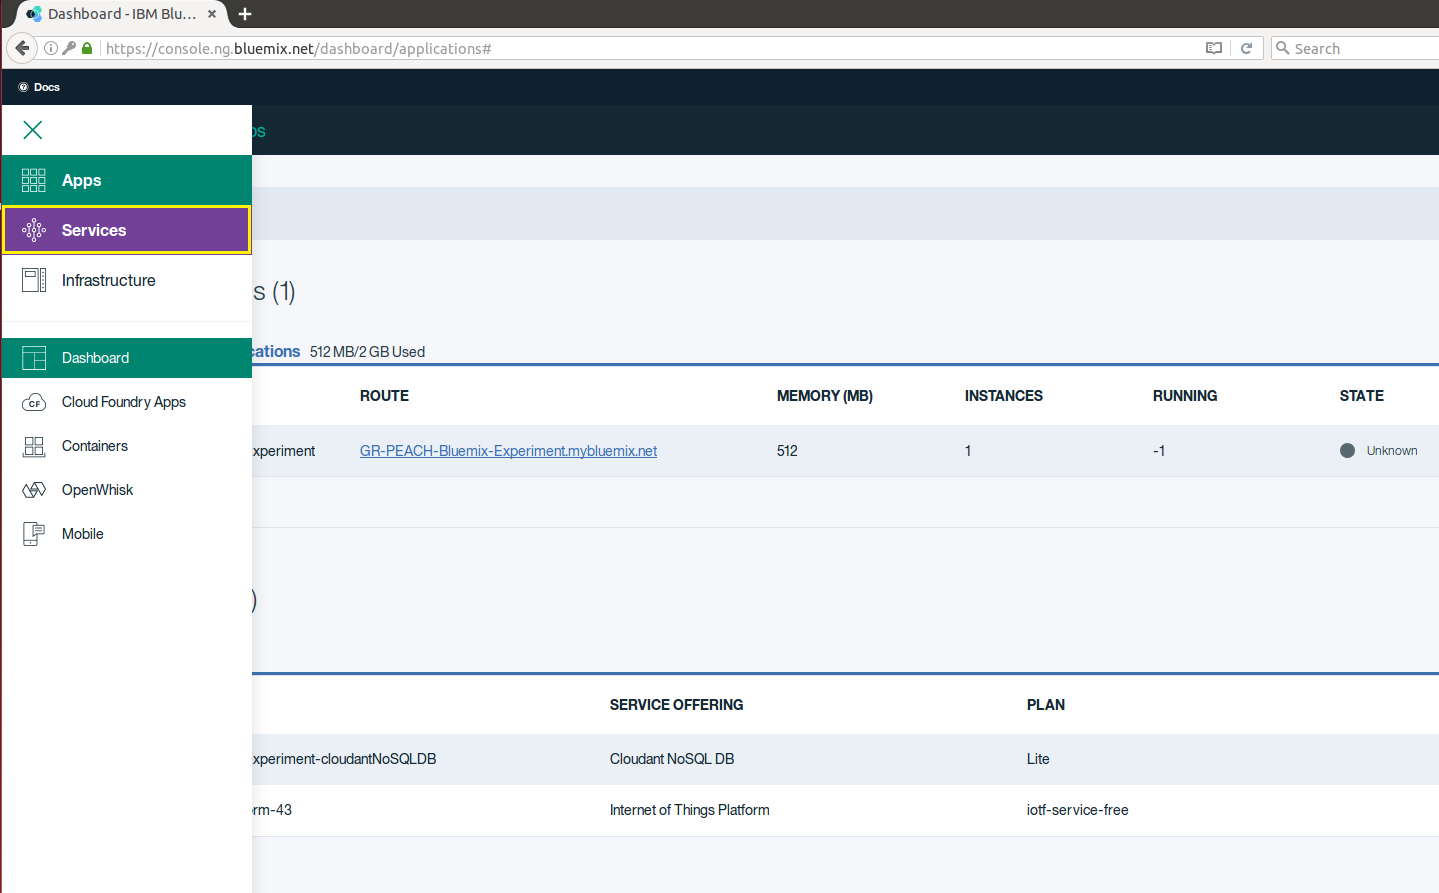
- Select Internet of Things" as follows:
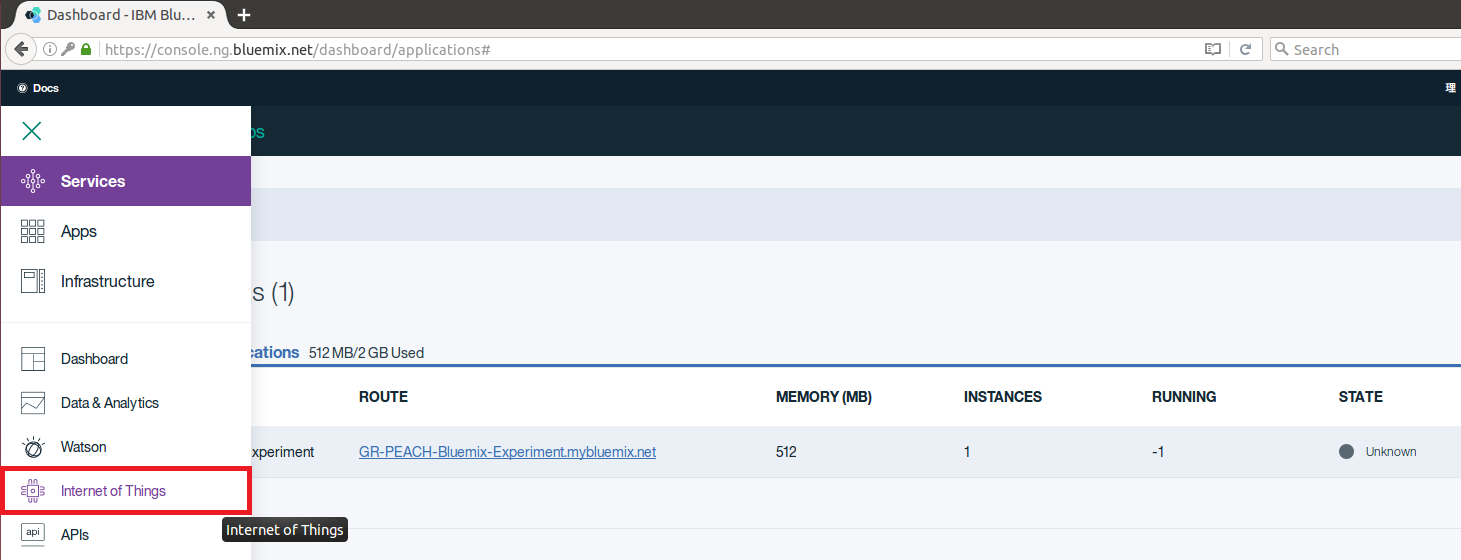
- Press Get Started as follows:
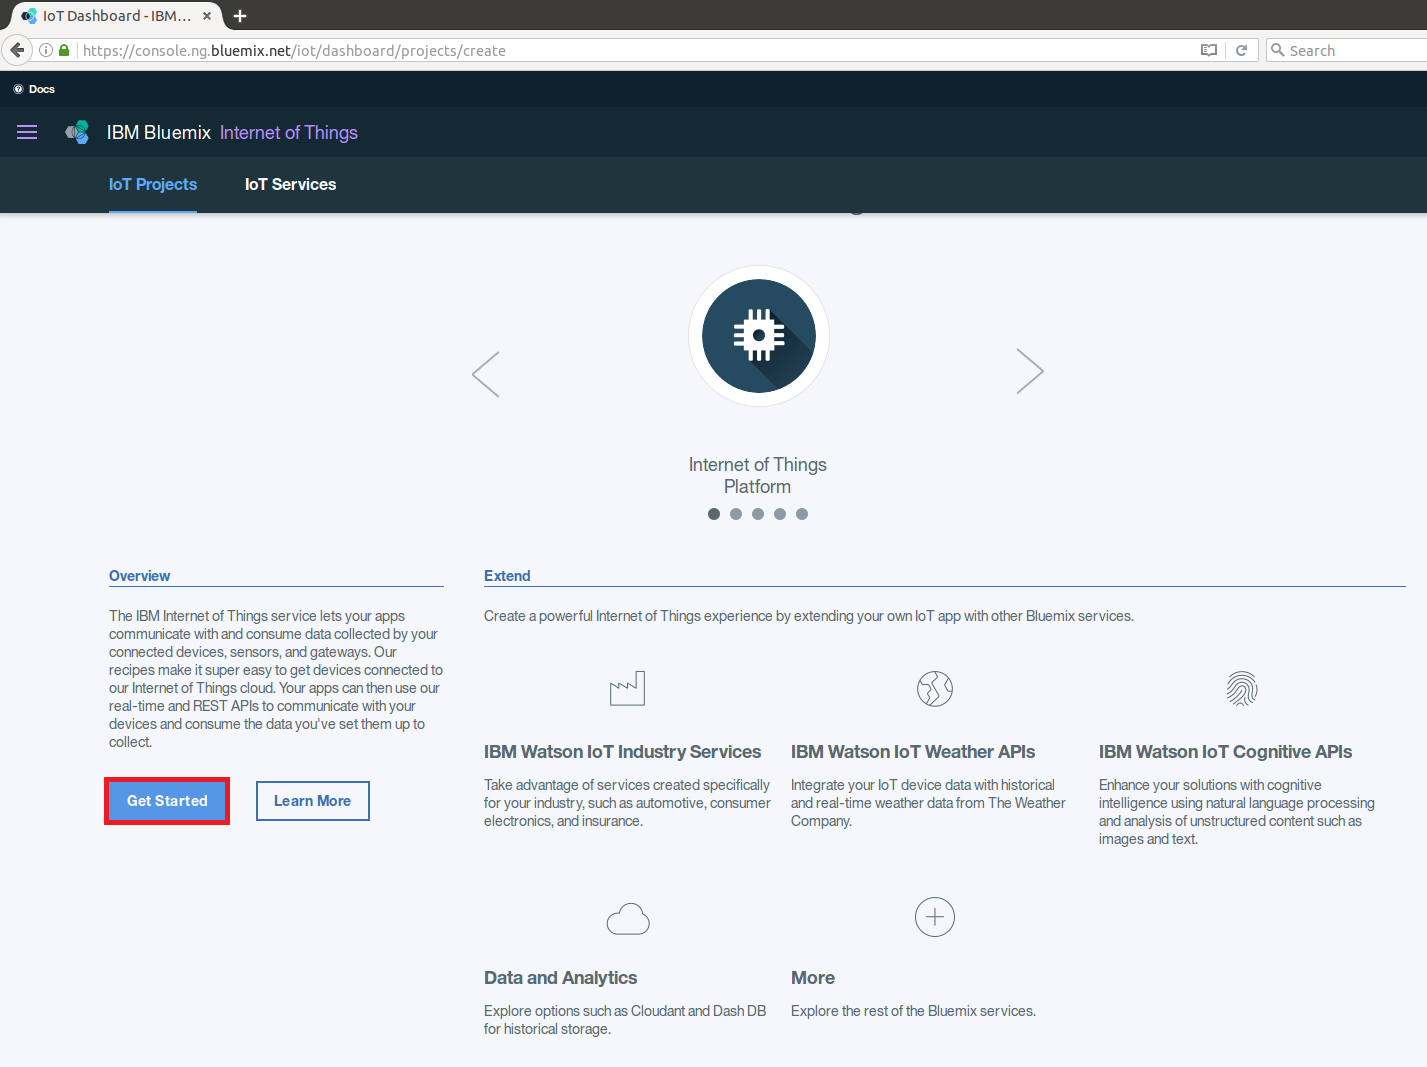
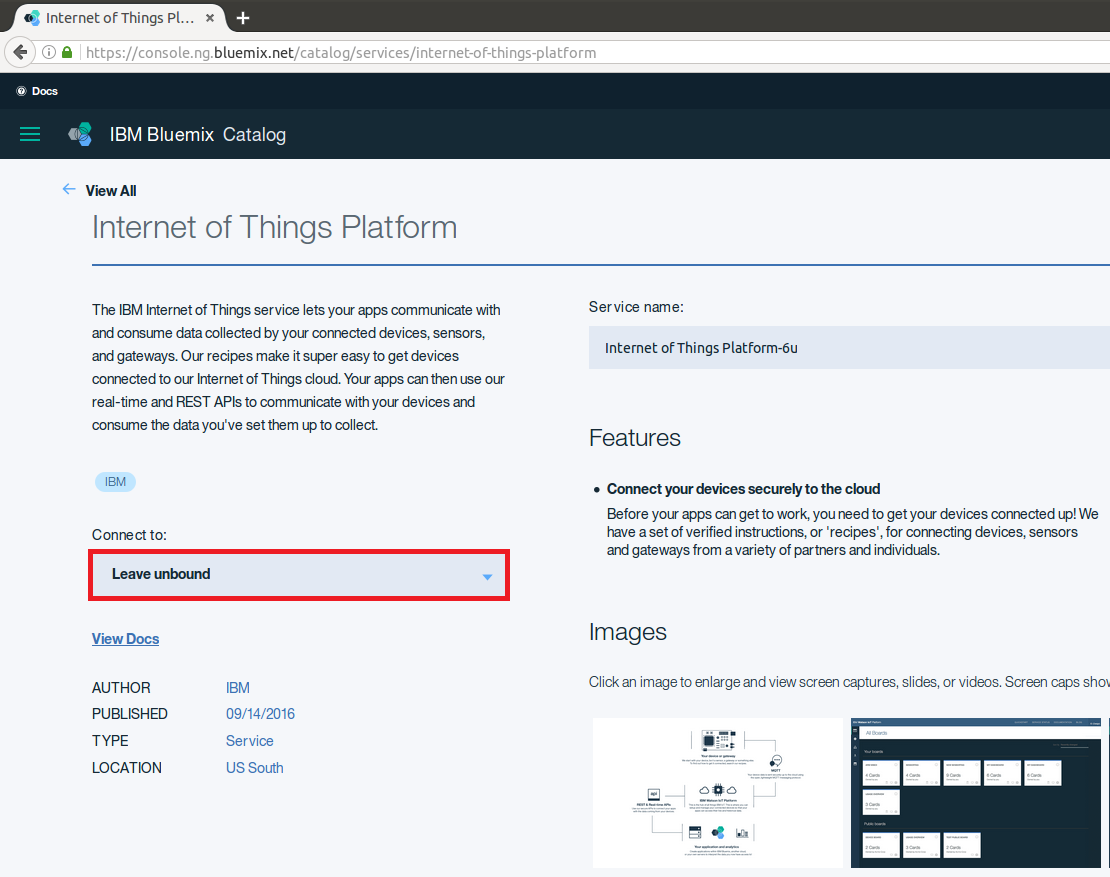
- Configure Watson IoT Instance
- Leave unbound
- Select the Free plan, then click Create
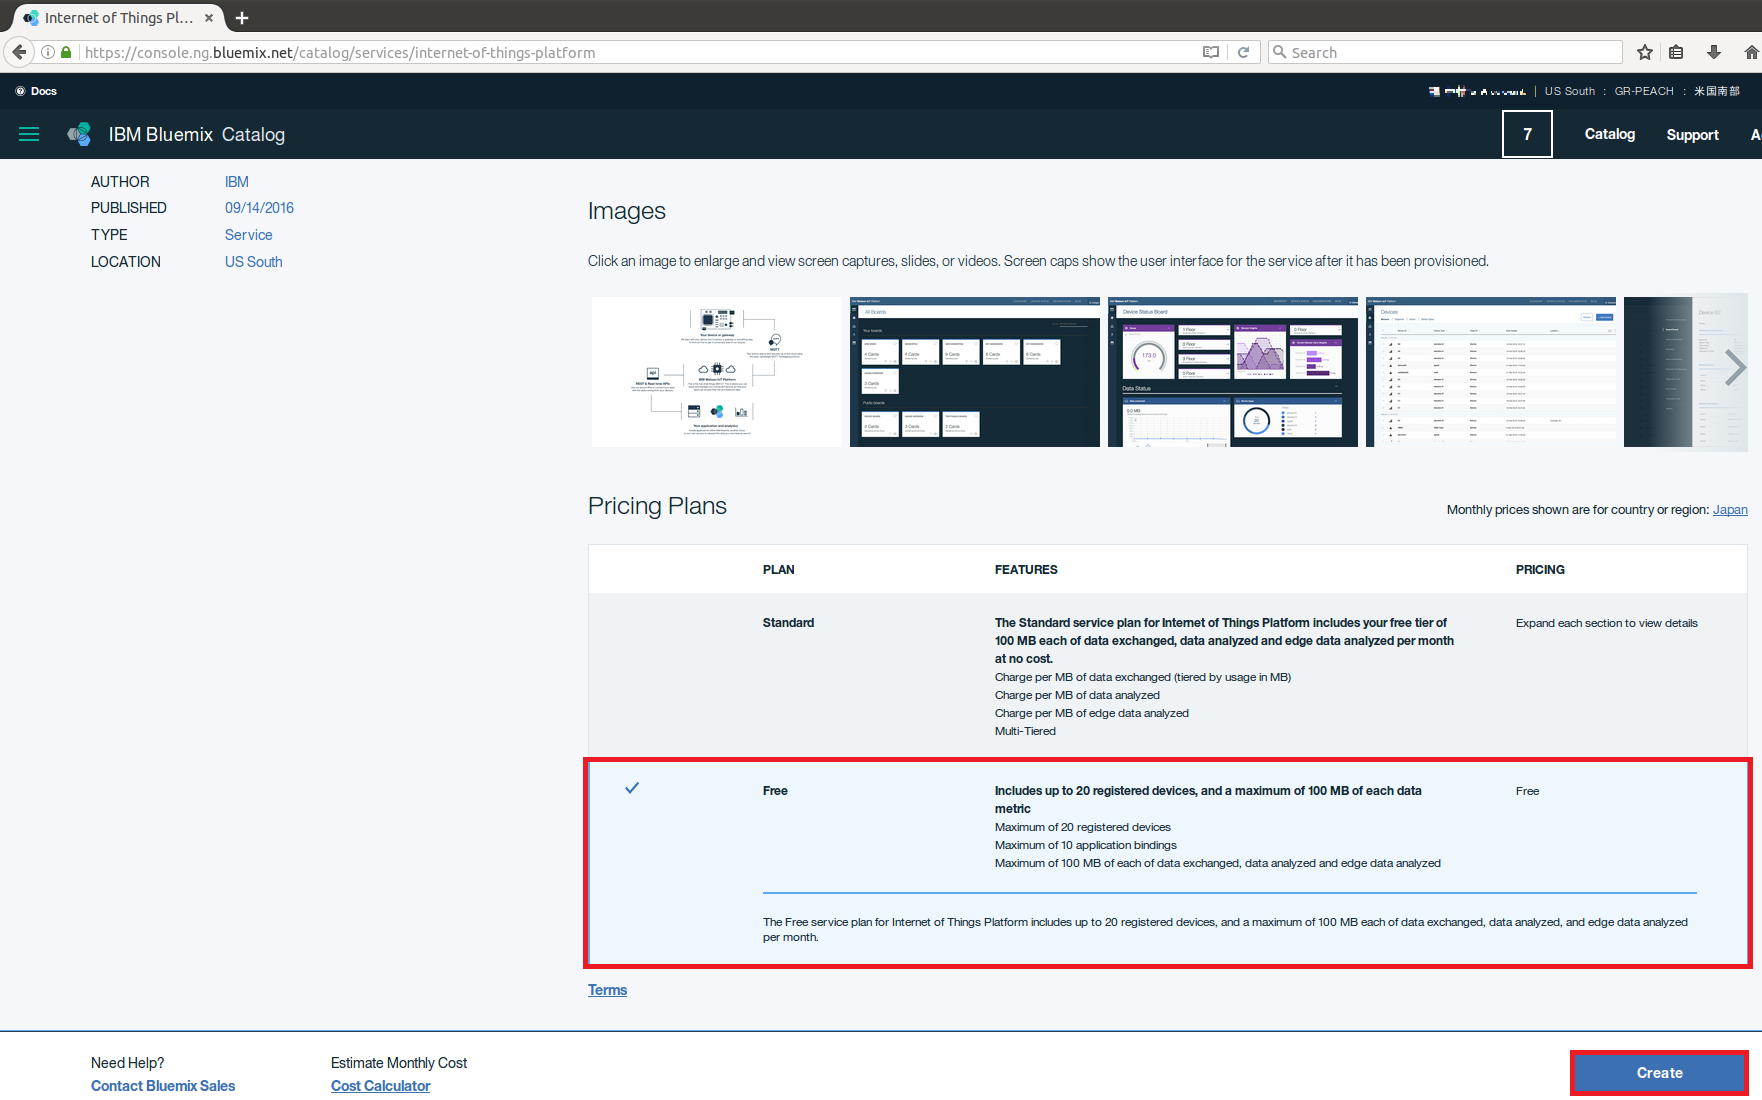
- Leave unbound
- You should create Watson IoT Application Credentials
Once you successfully create Watson IoT Instance, you should see the following Watson IoT dashboard:
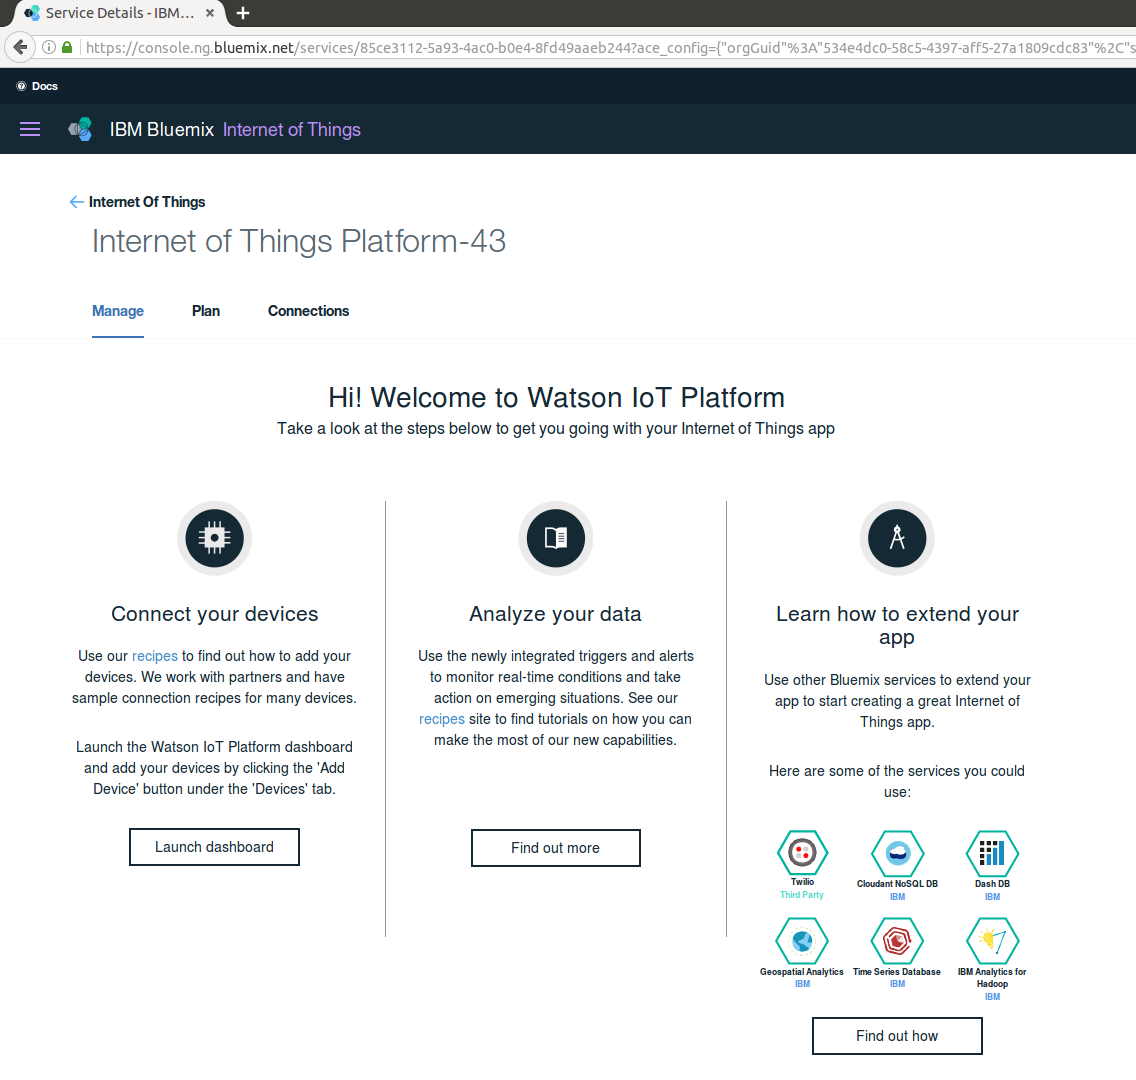
- On dashboard, launch the Connect your devices dashboard
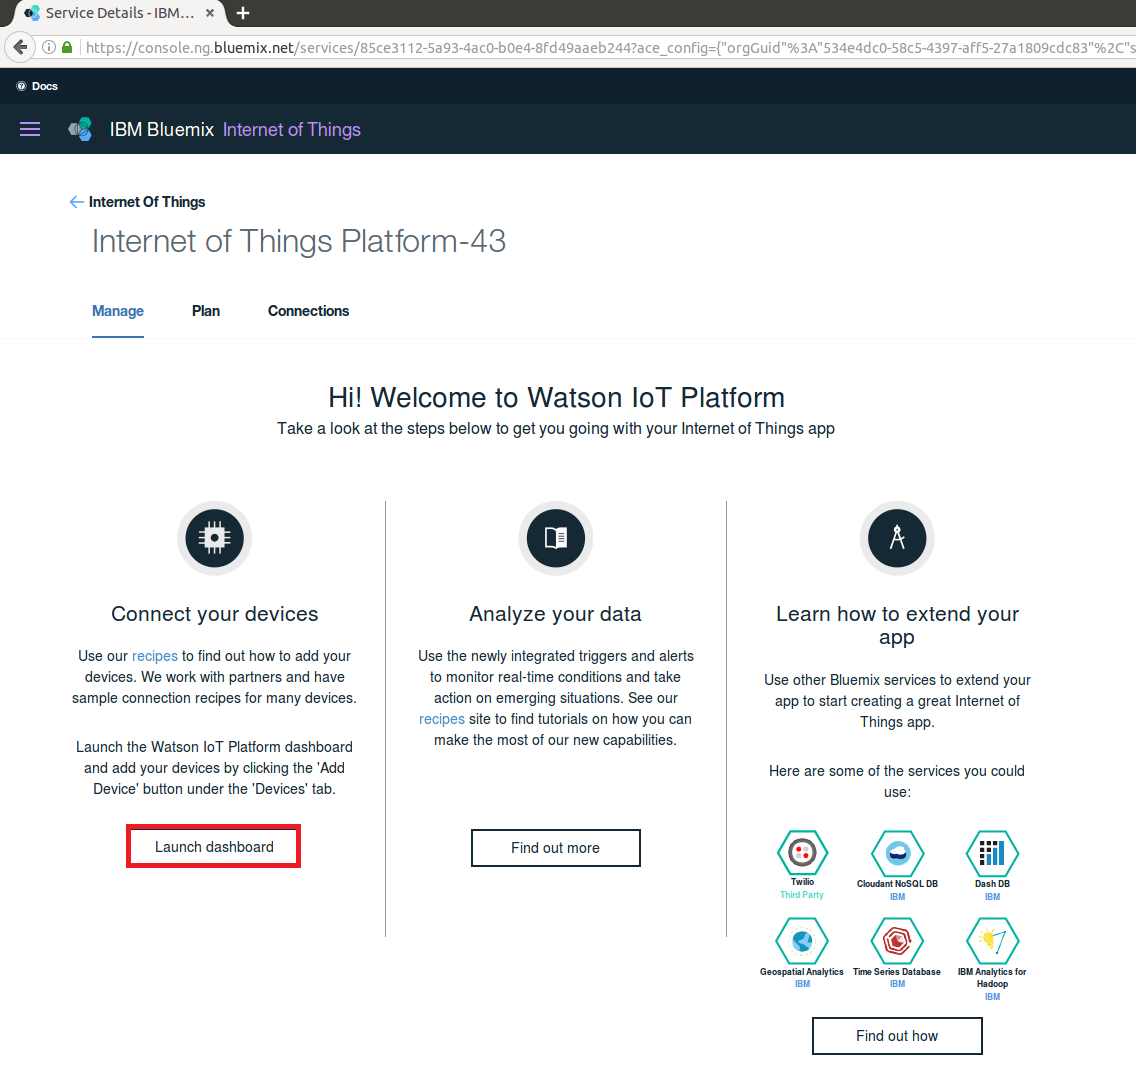
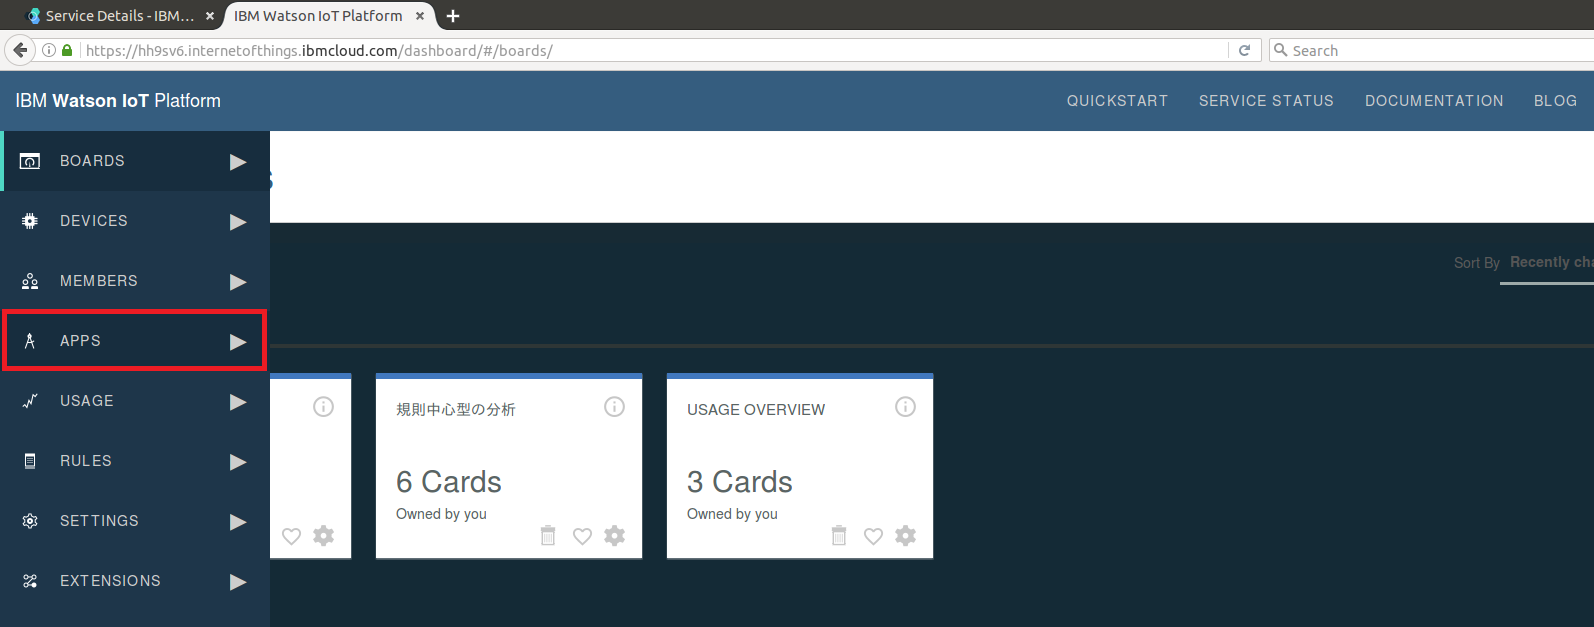
- Click APPS
- Click Generate API Key

- Record the API Key and Authenticatoin Token. Then click Generate after adding a comment
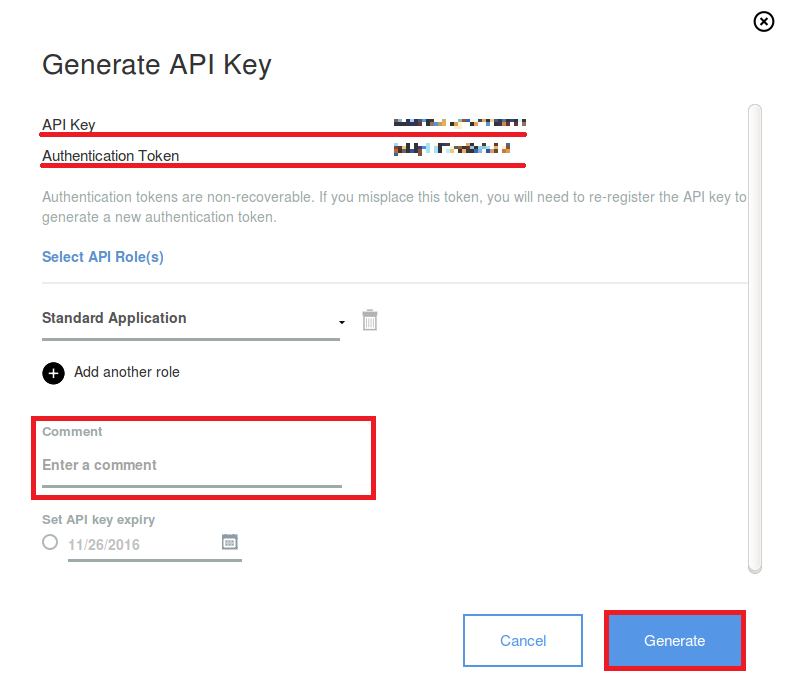 Note that these two values will be needed in the later step.
- On dashboard, launch the Connect your devices dashboard
- Watson IoT NodeRED Application should be created in accordance with the following procedure:
- Go back to your Bluemix Dashboard: https://console.ng.bluemix.net
- Click Create Application

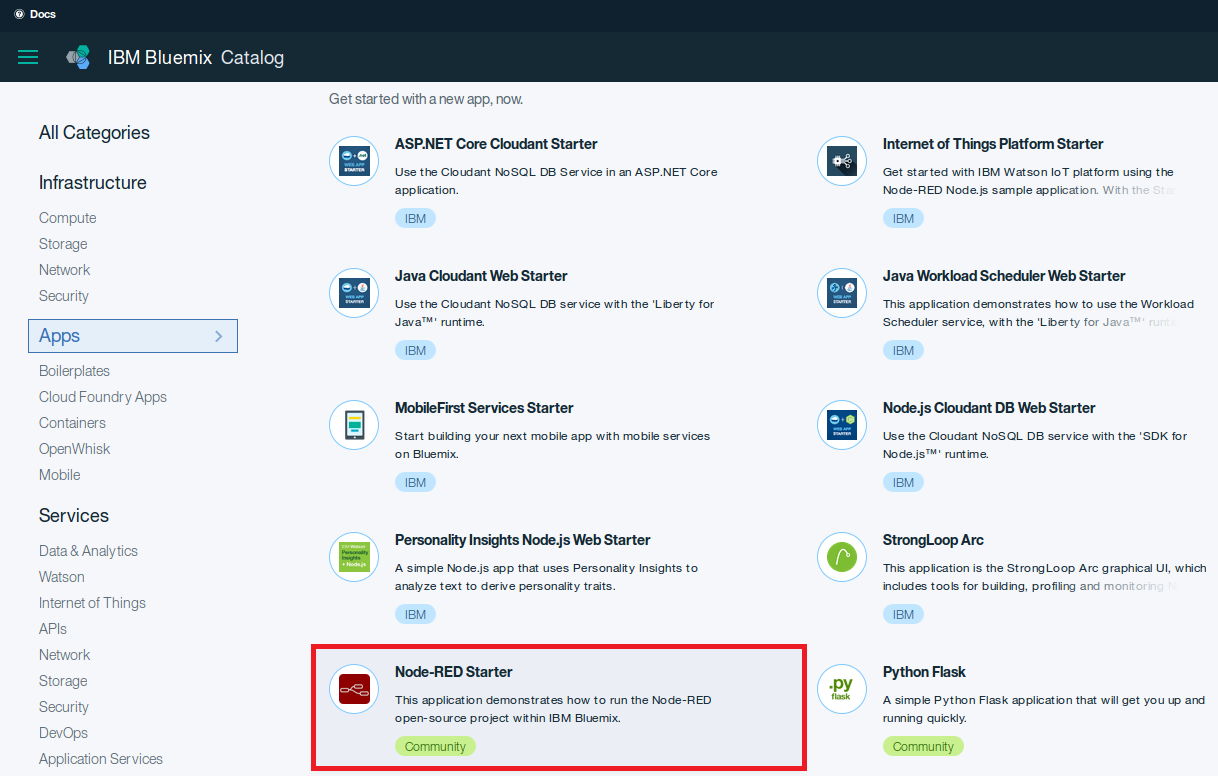
- Select Node-RED Starter
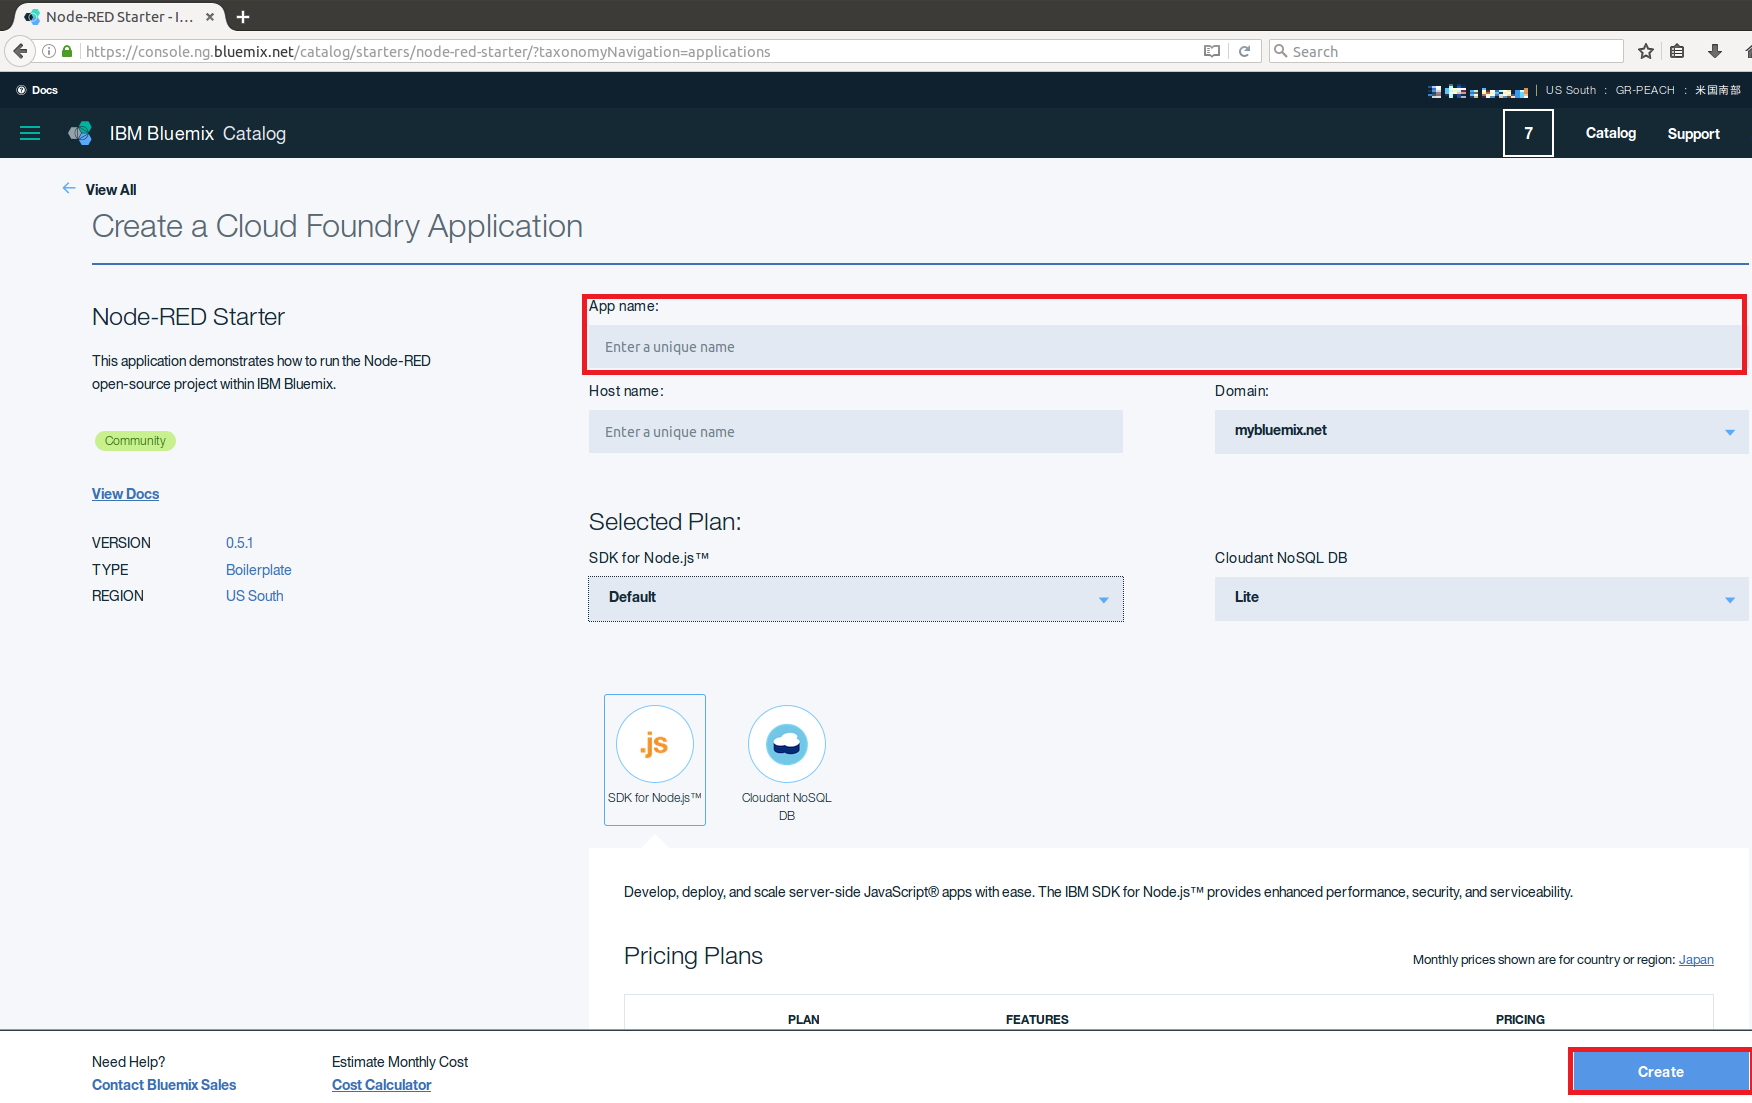
- Enter a unique App name and Click Create
- Application will Stage after a few minutes
- Application will report app is running when the staging has completed
- Watson NodeRED Application should be binded to Watson IoT instance
- You can now see the dashboard below:
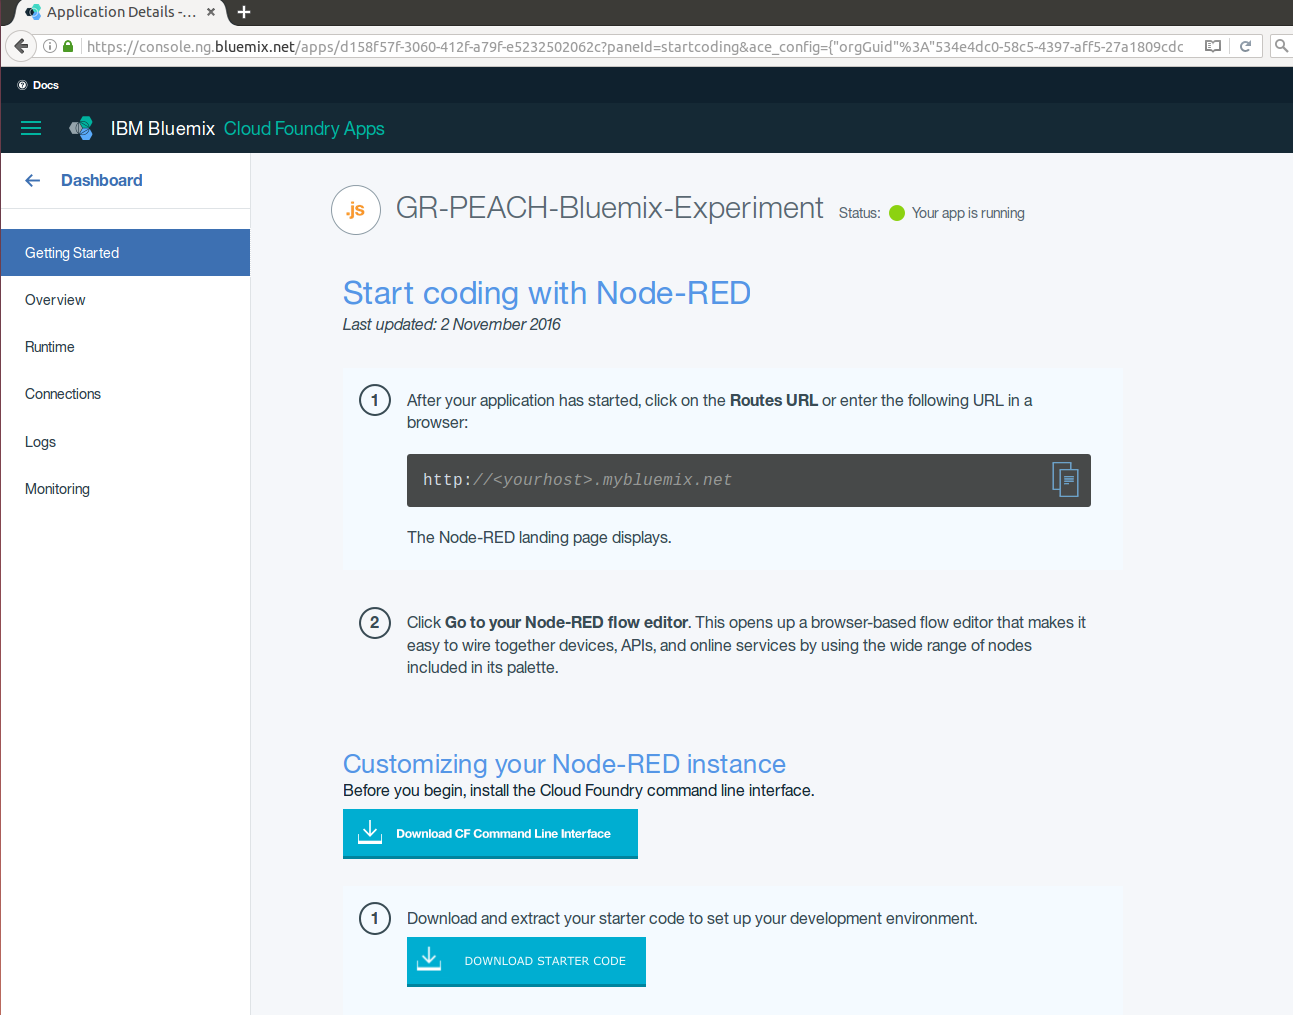
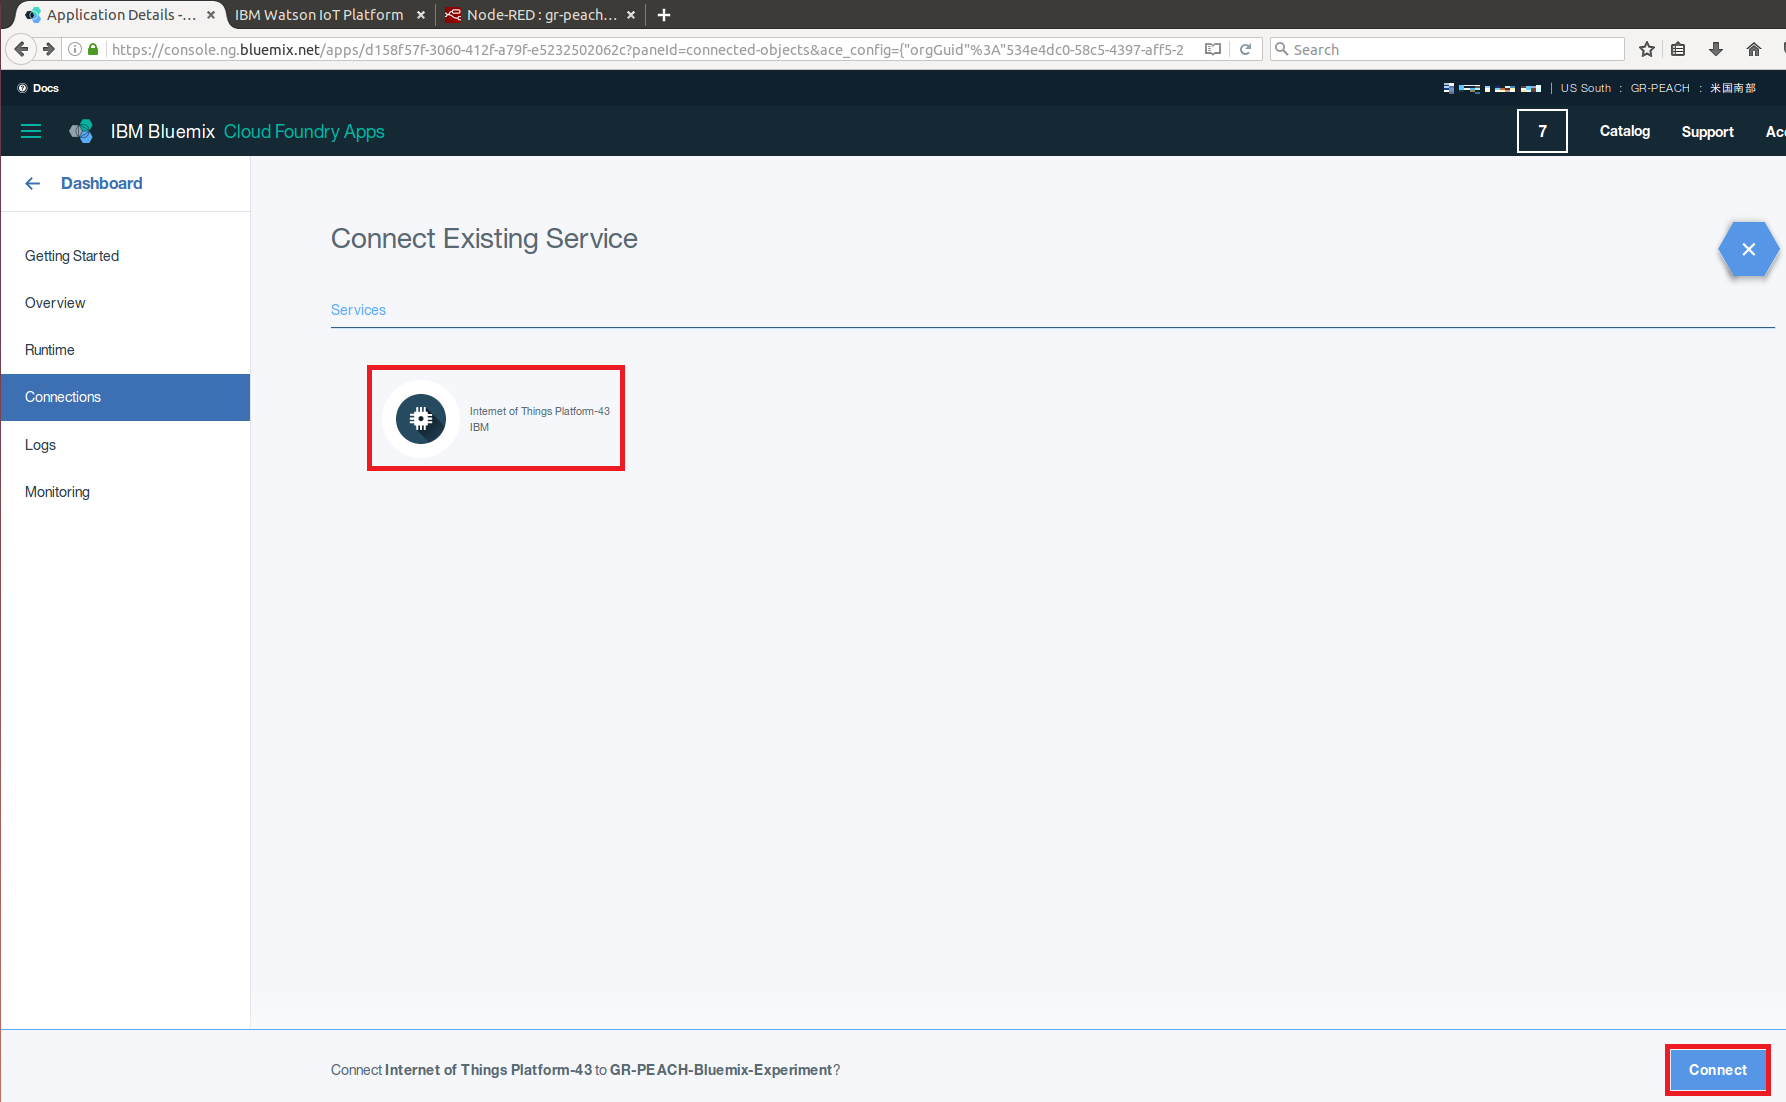
- Click Connections. Then, press Connect Existing

- Click on Watson IoT Instance badge. Then, press Connect
- NodeRED application will restage. This will take a while. Please wait for Your app is running state

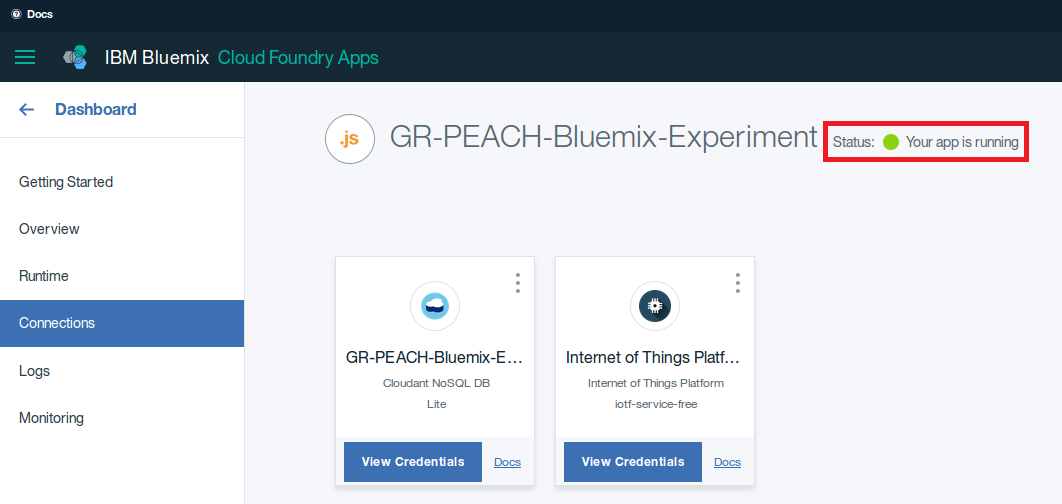
- You can now see the dashboard below:
- You should acquire mbed Device Connector DOMAIN value
- Go to the mbed Device Connector Dashboard: https://connector.mbed.com and log in
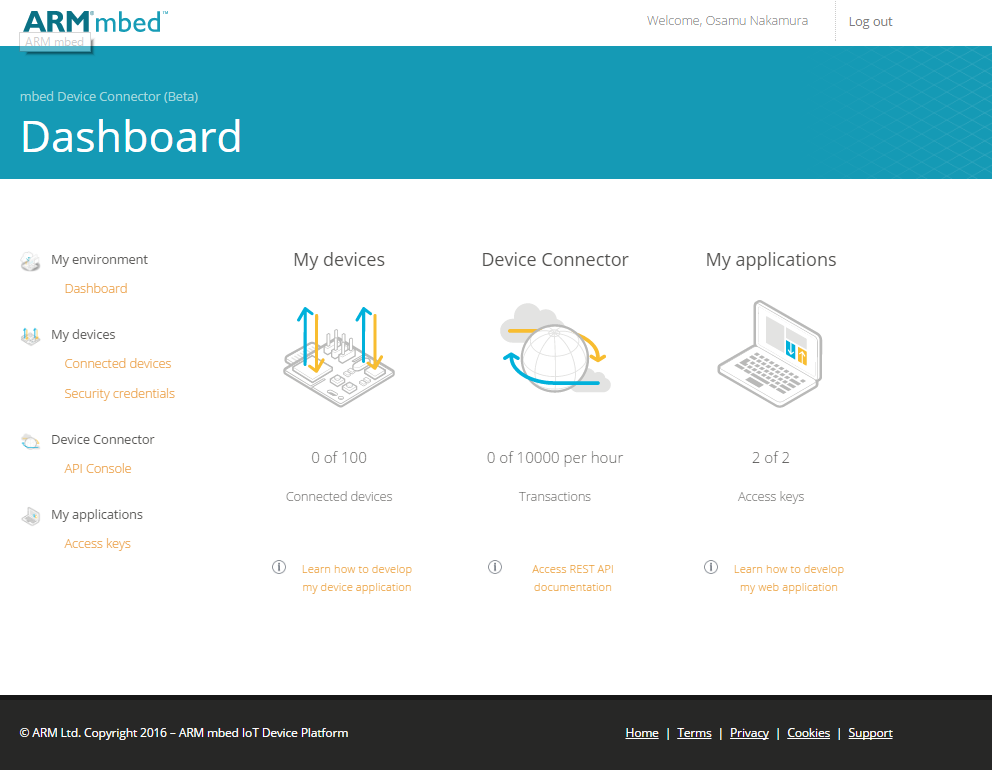
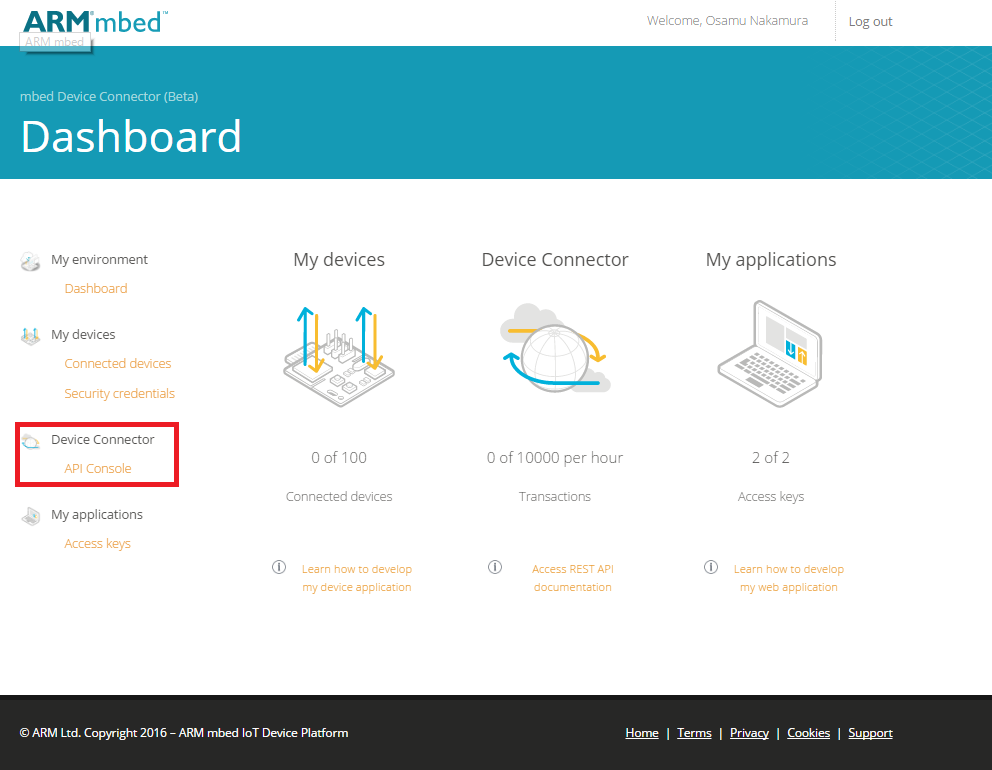
- Select Access Key in order to create a new token
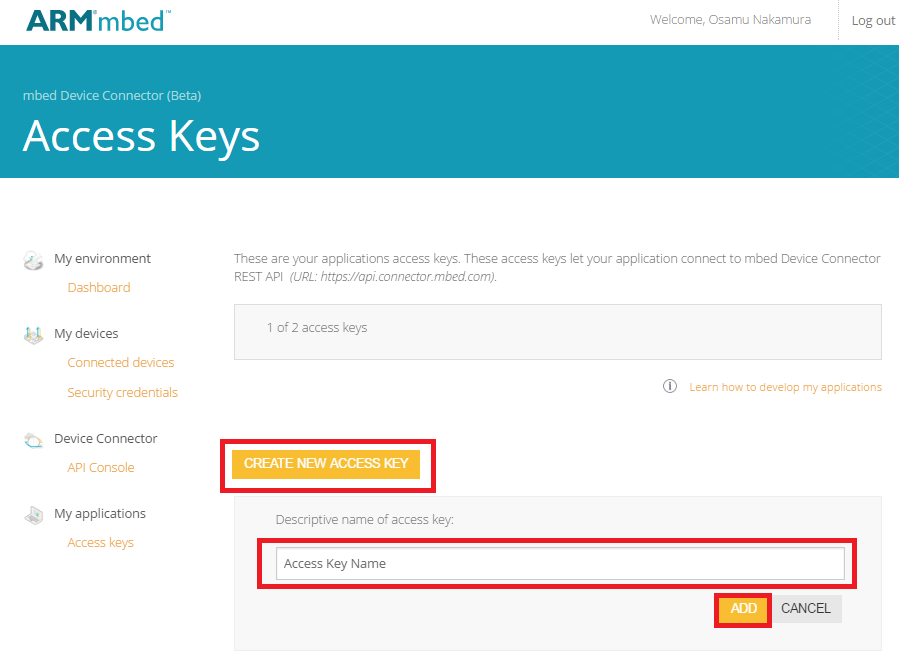
- Click CREATE NEW ACCESS KEY and enter a unique name. Then, push ADD bution
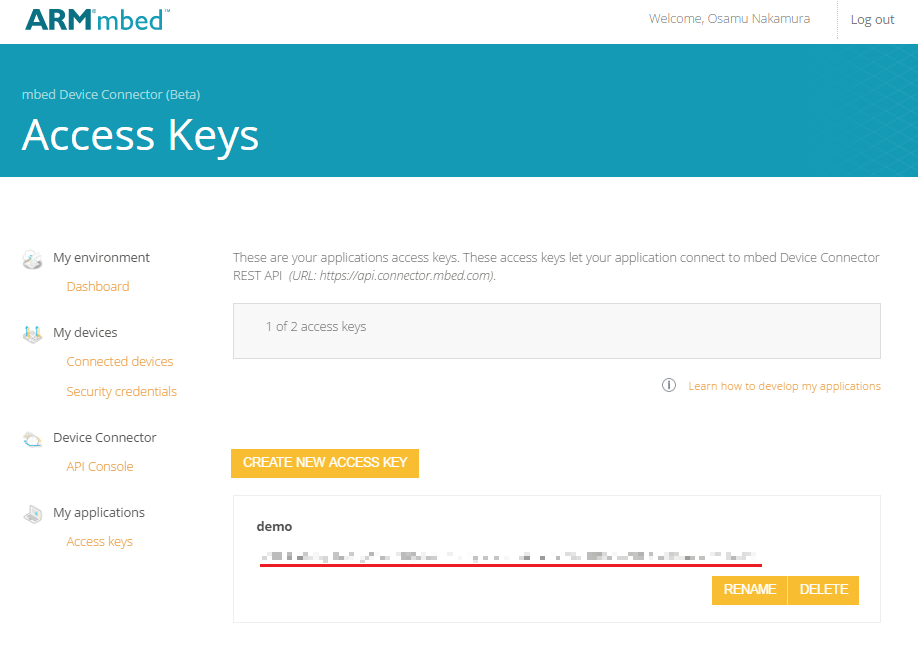
- an API token is generated. Need to save the generated string for later steps
- Go to the mbed Device Connector Dashboard: https://connector.mbed.com and log in
- You should configure Watson IoT ARM mbed Connector Bridge
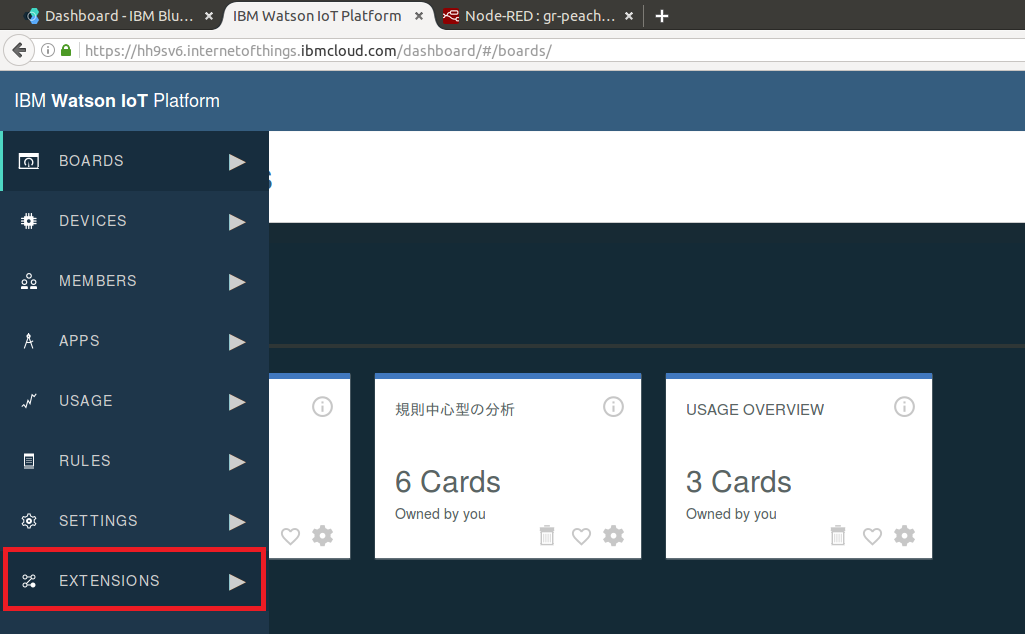
- Go back to the Watson IoT Dashboard and select Extensions
- Press Add Extension

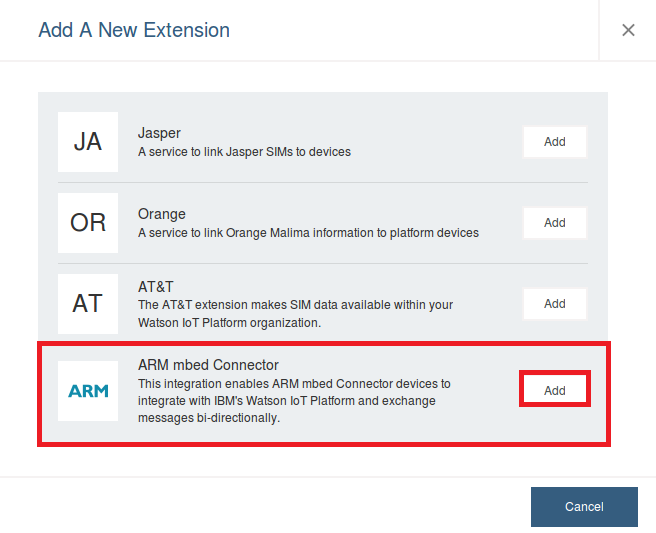
- Add ARM mbed Connector
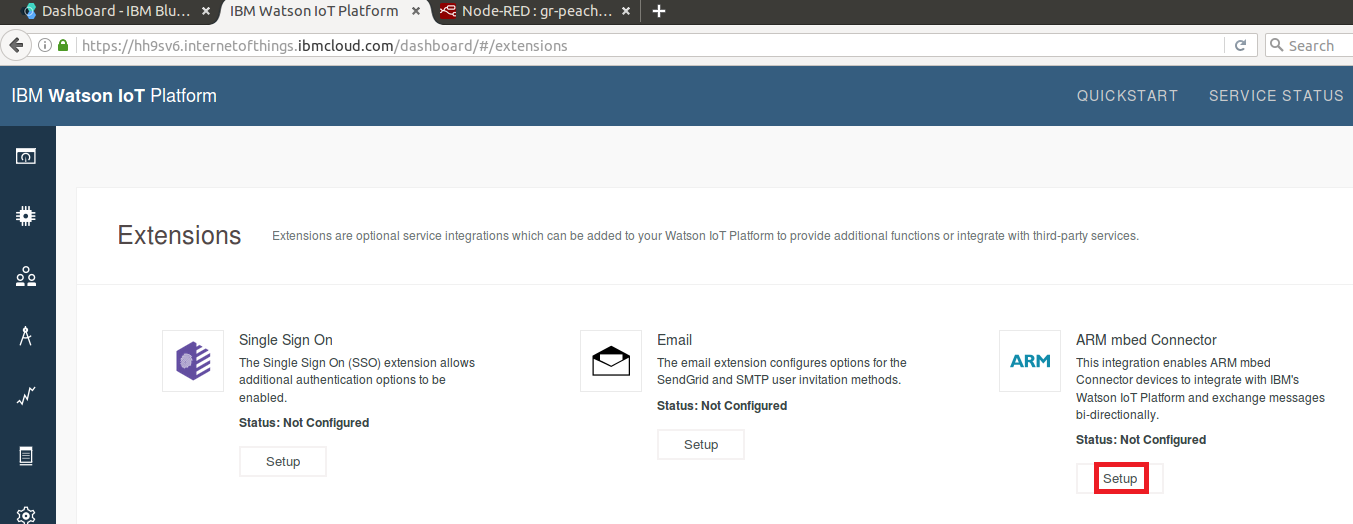
- Setup the bridge
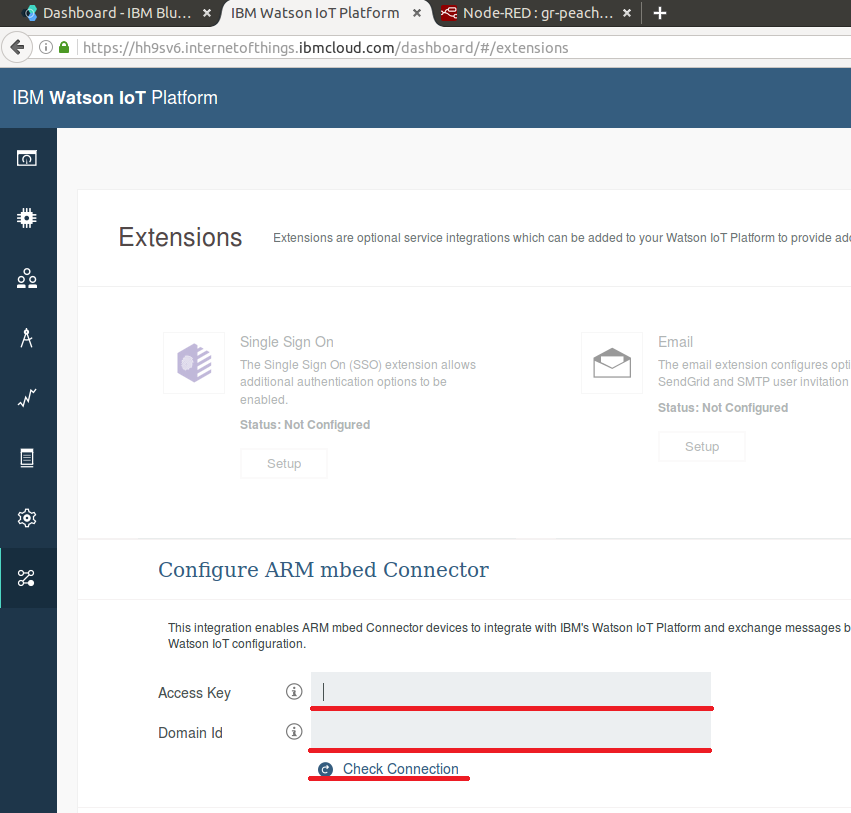
- Enter your Connector API Token to Access Key and MBED_DOMAIN to Domain Id, respectively. Then, click Check Connection
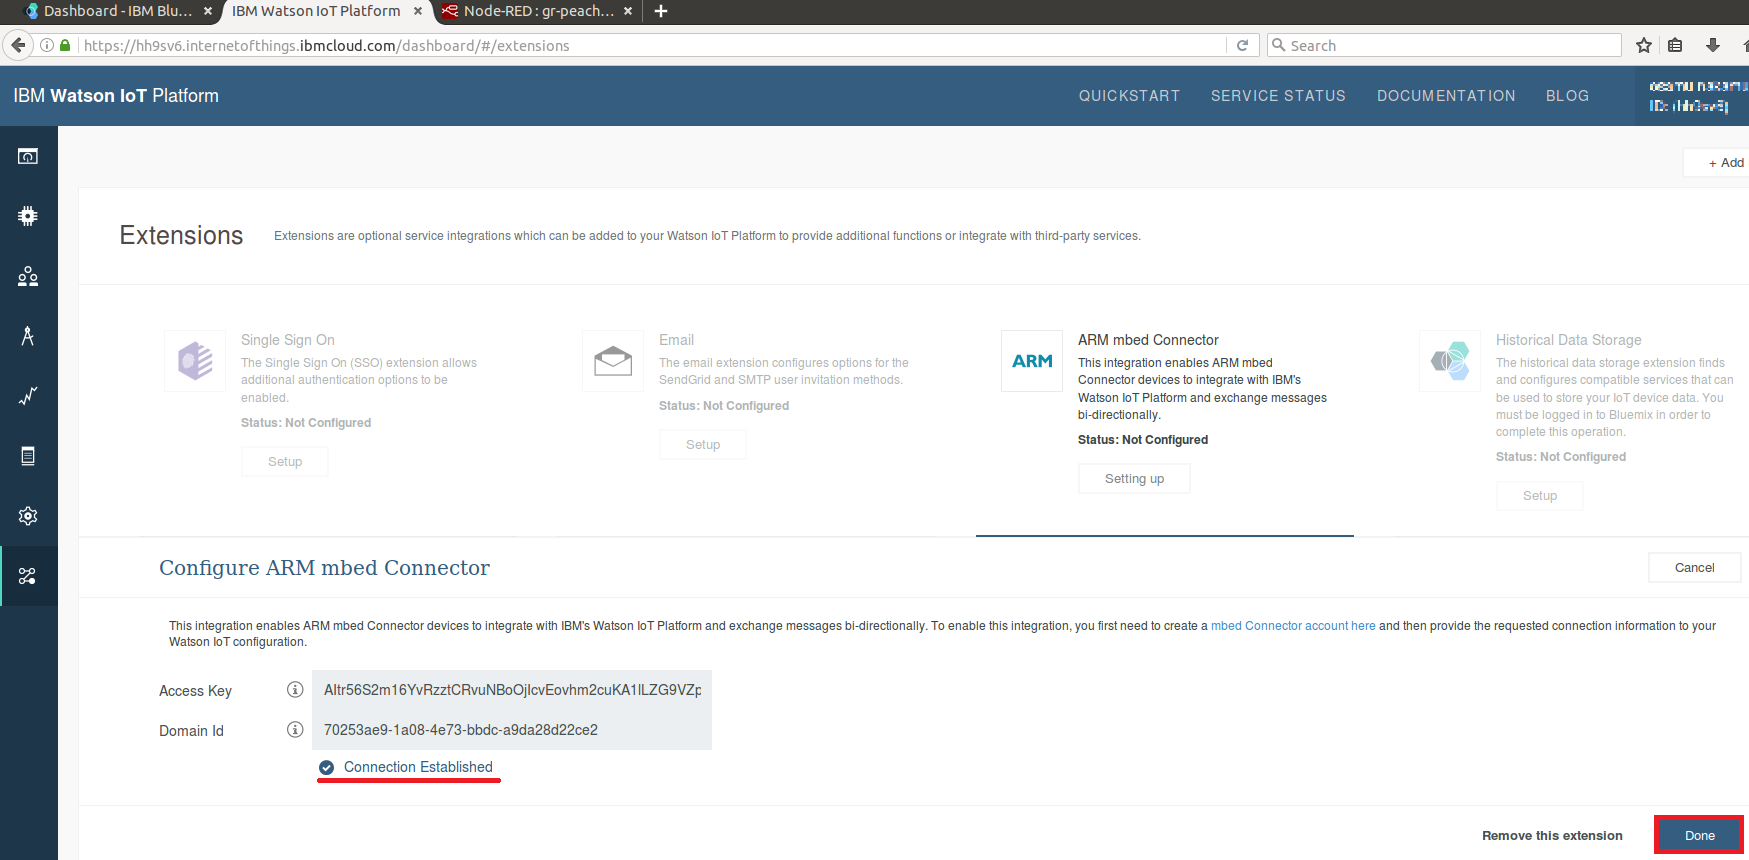
- If the connection is successfully established, you can see Connection Established. Then, press Done
- Go back to the Watson IoT Dashboard and select Extensions
- NodeRED Flow Example should be imported
- Open NODEFLOW_GR-PEACH.txt
- Navigate to the URL that you recorded earlier for your Watson IoT NodeRED Application (i.e. http://<app name>.mybluemix.net) and Select Go to your NodeRED flow editor
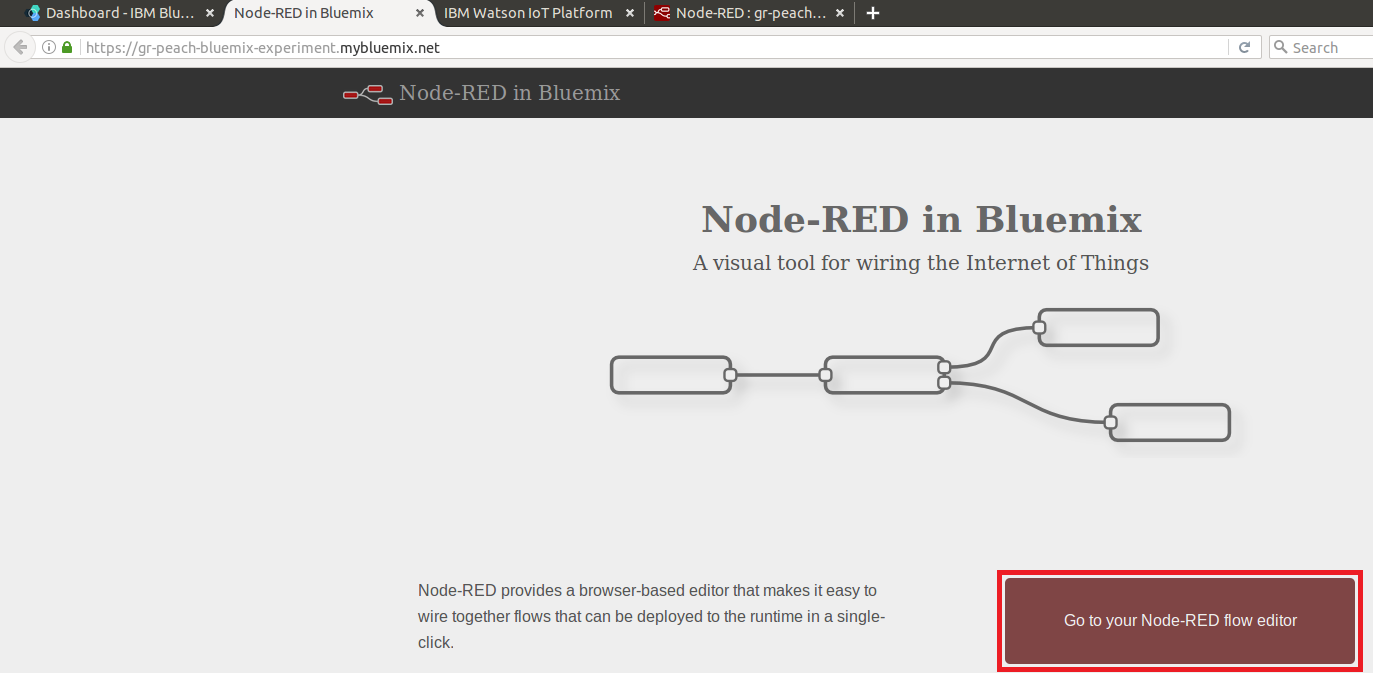
- Select menu, Import and Clipboard

- Paste the entire contents of JSON code described in NODEFLOW_GR-PEACH.txt and click Import
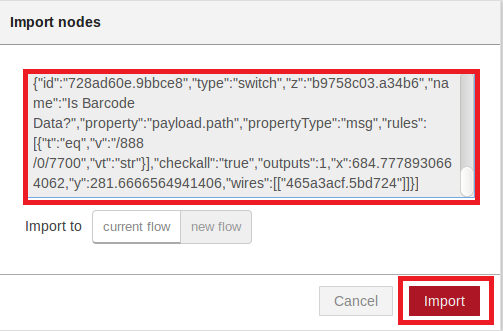
- Watson IoT Application Node Flow should be configured
- Double-click input node and link them to your Watson IoT instance.

- Click on the edit button
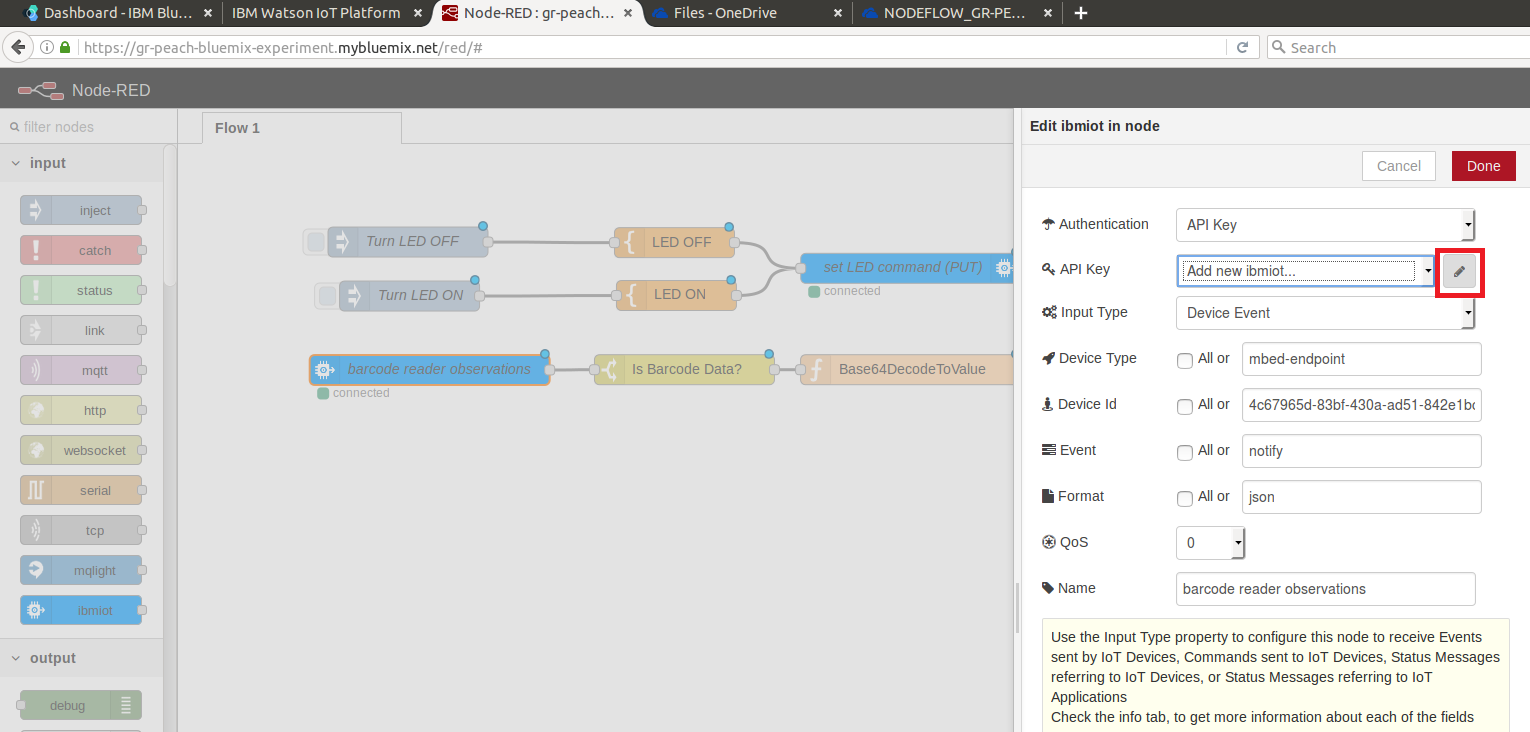
- First enter arbitrary name. Then, Watson API Key and Watson Auth Token previously acquired. Finally, press Add to save

- Enter MBED_ENDPOINT_NAME in security.h as Device ID. Then, press Done to save
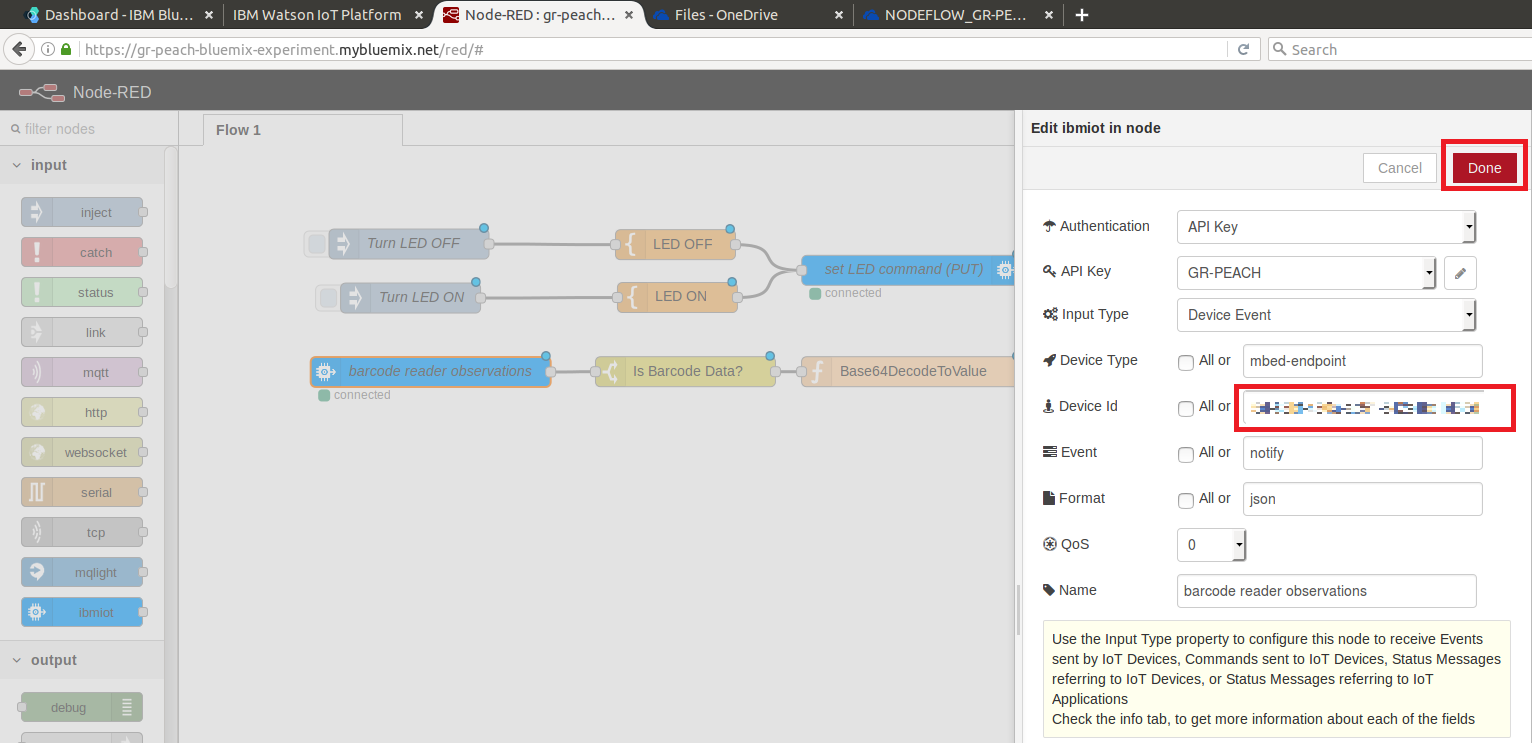
- Double-click output node
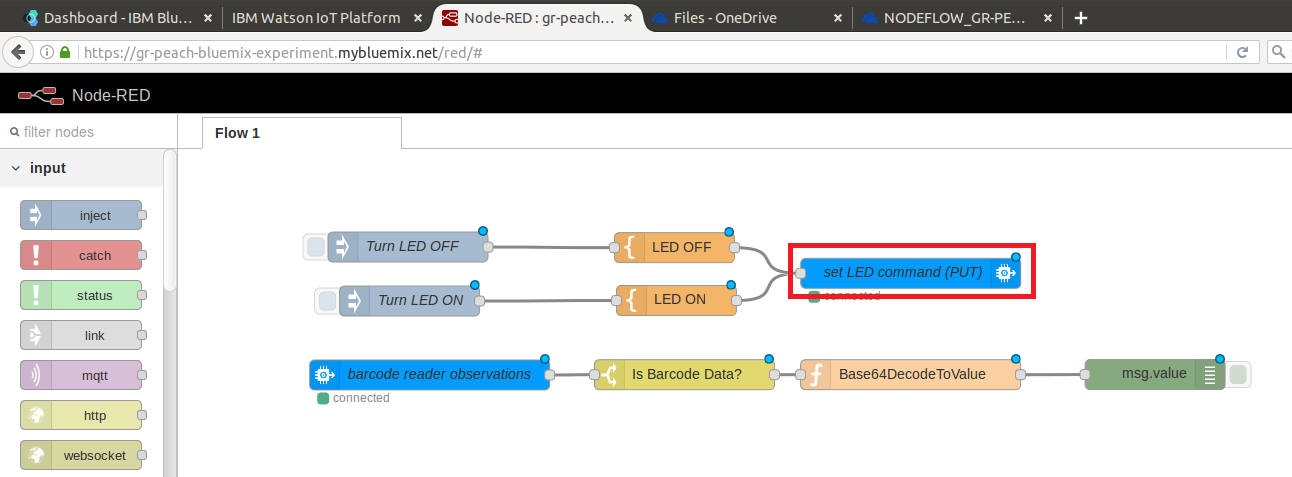
- Edit API Key and Device Id in the same manner as that for input node
- Click LED OFF and LED ON node and replace MBED_ENDPOINT_NAME_GOES_HERE with MBED_ENDPOINT_NAME as shown below:

- Click Deproy to deploy NodeRED application

- Double-click input node and link them to your Watson IoT instance.
- Invoke sample program
- Press the reset button on GR-PEACH
- The decode result of barcode data should be shown in debug window

- Also, you can toggle LED by clicking Turn LED OFF and Turn LED ON injection node
