Node.js based Web Application for mbed Device Connector specific to GR-PEACH_mbed-os-client-ZXingSample
Getting Started
Installing Node.js and npm
You need to have Node.js and npm installed.
To check if you have them installed, open a terminal or command prompt and run the following commands:
node --version
npm --version
If you see an number output similar to x.x.x for each command, then they are both installed and you can continue to the next section.
To install on Windows or mac, you can download the installer from https://nodejs.org/en/download.
To install on Linux, you can use a package manager. Instructions for installing Node.js on your distribution can be found in the following link:
https://nodejs.org/en/download/package-manager
Pre-requisite
This example assumes that you have the following example that can connect to mbed Device Connector:
Import programGR-PEACH_mbed-os-client-ZXingSample
This is a mbed Client sample where ZXing is incorporated, and works on GR-PEACH and GR-LYCHEE.
Configuring the App
Before running this app, you need to set some config options. This is done through environment variables or .env file stored in the root of the project.
The following variables are available to be configured:
- ACCESS_KEY
Set this to your Access Key you created in mbed Device Connector. If you don't have an Access Key, please create it by the following procedure:
1. Access https://connector.mbed.com/#accesskeys.
2. Click Create New Access Key.

When prompted, enter a name for the access key (ex. "demo") and click ADD.

3. Copy the access key you just created and use it in .env file.
- PORT:
Set this to override the default port for this example. The default port is 8080.
The .env file format is as follows:
ACCESS_KEY=Your ACCESS KEY
PORT=Port to be overridden (This is optional and can be omitted.)
Configuring the App
Once you've configured the example, you need to install its dependencies. Open a terminal or command prompt and run the following command:
npm install
If all the dependencies successfully installed, you can now run the app by using the following command:
node app.js
You should receive the following output:
mbed Device Connector Quickstart listening at http://localhost:8080
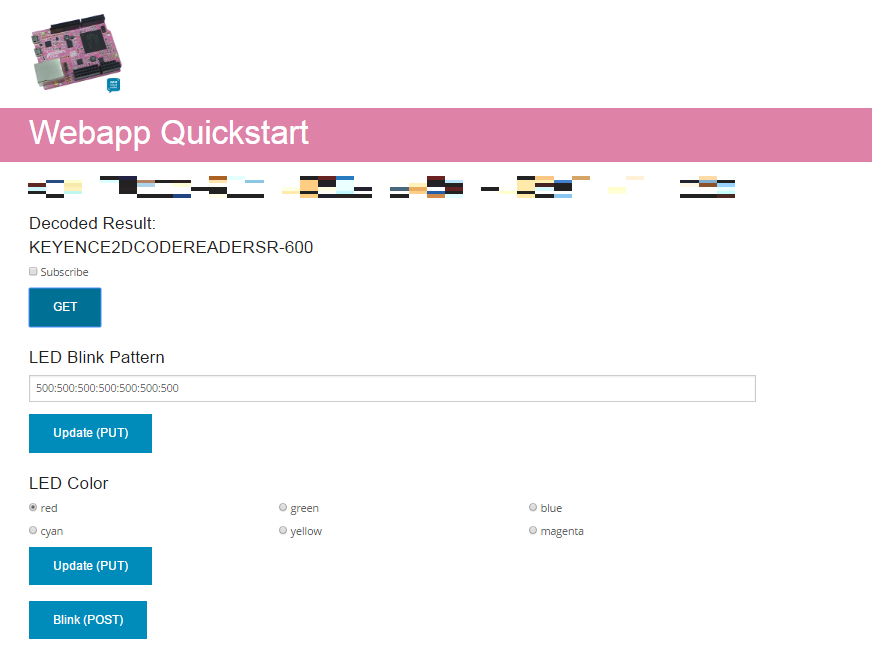
Copy and paste the printed URL into your browser and you should see the following screen:

Deploying this example on HEROKU
HEROKU ( https://id.heroku.com ) is PaaS (Platform as a Service) on which Node.js application can deploy free-of charge. By utilizing it, user can confirm the decode result and control LED blink from your mobile terminal.
Here is the procedure to deploy this application on HEROKU:
- Create your HEROKU account at https://signup.heroku.com/login if you haven't created it yet.
- Open a terminal or command prompt and invoke the command heroku login. If Email and password is required, please type those registered at the step 1.
- Invoke git init to create a local git repository.
- Invoke git add . to add all the files to the local repository.
- Invoke git commit -m "[commit message]" to commit the files.
- Invoke heroku create at the root of the project. When successfully terminated, the remote repository heroku should be created and associated with the local repository.
- Invoke git push heroku master. When successfully terminated, this example application should be deployed on HEROKU.
- Invoke heroku open. If the example is successfully deployed, Webapp Quickstart shown above should be displayed on your browser. Also, by accessing the URL shown in the browser from your mobile terminal (e.g. iPhone), you can confirm the decode result and control LED blink from there.

