CMSIS DAP MDK
This content relates to a deprecated version of Mbed
Mbed 2 is now deprecated. For the latest version please see the Mbed OS documentation.
Current limitations
For the purpose of this trial, it will not be possible to debug applications that use semi-hosting calls to the mbed interface. Examples of these calls are :
- Accessing the local file system
- Ethernet applications where the MAC address is provided by the interface (default)
- Accessing the power down functions of the interface
This is because the MDK does not currently support the use of semihosting calls.
Getting started
To try the mbed CMSIS-DAP upgrade you will need :
- The firmware that supports CMSIS-DAP for your target
- An offline tool that support CMSIS-DAP - Keil MDK v4.60 for example
- An example project you wish to debug!
1. Upgrading your board
a - Select your board
Select your board and follow the upgrade process for your board:
b - Install the latest serial driver
- Download and install the serial driver
c - Results
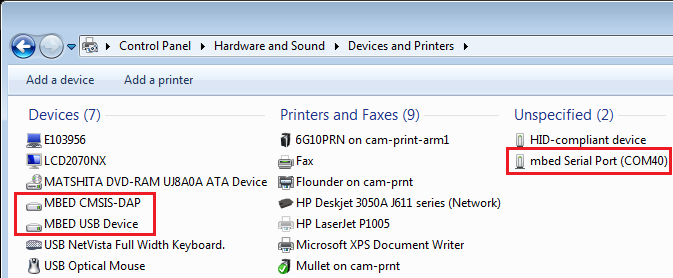
There will now be three mbed USB devices in device manager :
- USB disk
- mbed Serial port
- mbed CMSIS-DAP
Driver issue
If the serial is not recognised by the host:
- go into the device manager
- right click on "mbed composite"
- uninstall the driver
- then disconnect/connect your mbed
- install the serial driver
2. Install an offline tool
The recommended offline tool is Keil MDK v4.60. Follow the links and instructions to set up the evaluation copy.
3. Export a project
µVision is one of the external offline toolchains supported by the mbed platform.
For a complete overview of the "export" feature, please refer to our general: Exporting to offline toolchains.
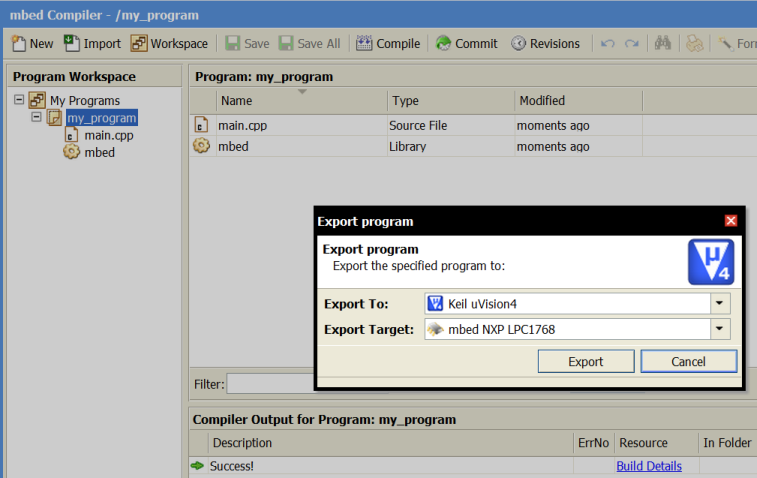
To export your mbed program for use in uVision, right-click the program in your program workspace. From the dialog, you can select the "Export To" as "Keil uVision4", and the target microcontroller you wish to export for.
When you choose export, a zip file containing all the files you need for uVision will be generated. Unzip it and open the uVision project file (In this case, "project.uvproj"):
4. Compile, download, debug!
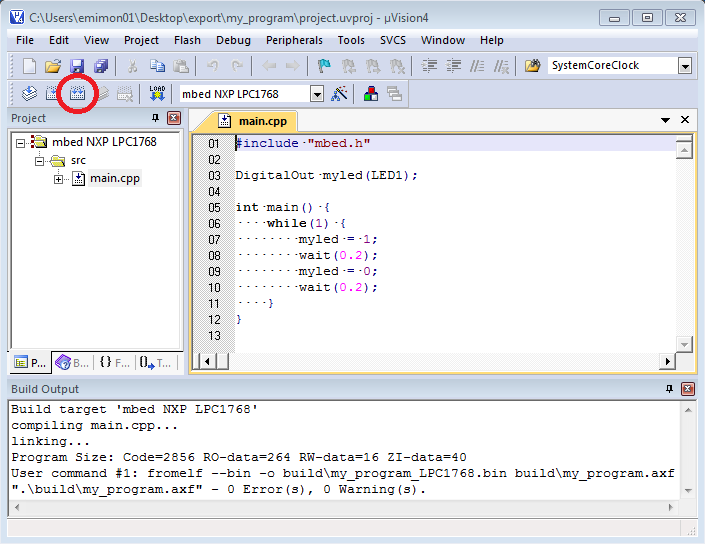
Once you have unzipped and opened the ".uvproj" file, your project should appear in the uVision IDE much in the same way it appeared in the online compiler. You can browse the project files by navigating in the left panel, and the code will appear in the main panel.
4.1 Compile
When the project has successfully compiled, "fromelf" will automatically run, to extract a binary file. This could be drag and dropped onto the mbed flash disk.
4.2 Download
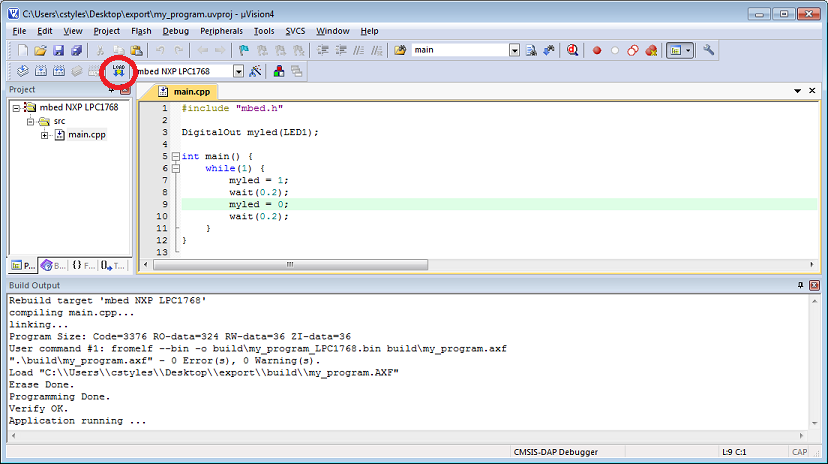
With the CMSIS-DAP upgrade, clicking the download button within uVision will send the binary directly to the flash of the MCU
4.3 Debug
Add break points (1) by clicking on the line of code you wish to stop at, and use the "run" button (2) to execute the program until the break point it hit.
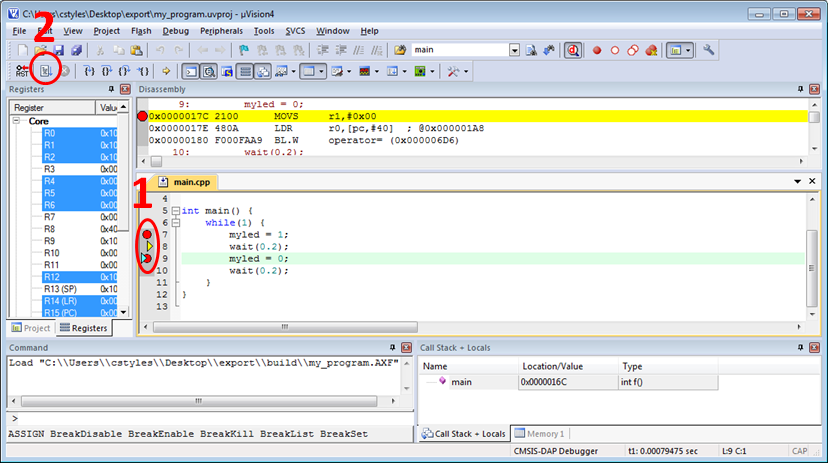
The tools enable you to step in various ways over/into/out of
Use the tool bar to add registers, memory, call stack, symbol and watch windows. This gives visibility on the system status when a breakpoint is reached.

5. Conclusion
A simple firmware upgrade of your board enables the on-board programming interface to communicate with debugging tools over the new CMSIS-DAP protocol. Over time we hope this will mean mbed will become interoperable with a wide range of offline tools, proving professional debug capabilities when they are needed.