Wiznet Wi-Fi WizFi310
WizFi310 offers a quick, easy, and cost-effective way for device and appliance manufacturers to add WiFi capabilities to their products.
Hello World
Import programmbed-os-example-client
This is a simple mbed client example demonstrating, registration of a device with mbed Device Connector and reading and writing values as well as deregistering on different Network Interfaces including Ethernet, WiFi, 6LoWPAN ND and Thread respectively.
Library
Import libraryWizFi310Interface
This library can be used in mbed driver or mbed OS2. So If you want to use WizFi310 on mbed OS5, You have to use another WizFi310 library(wizfi310-driver). That is git repository for wizfi310-driver. - https://github.com/ARMmbed/wizfi310-driver
Datasheet
http://wizwiki.net/wiki/doku.php?id=products:wizfi310:wizfi310ds:startNotes
WizFi310 Shield
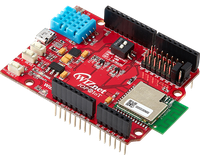
This document describes the contents of WizFi310 Shield. WizFi310 Shield is a Shield with built-in WizFi310 WiFi module of WIZnet.
Because WizFi310 Shield is Pin Compatible with Arduino, it can be used in Arduino, and it can be used in Arduino Pin Compatible development platform. It is also used on the WIZWiki Platform.
In addition, an temprature/humidity sensor and an CDS sensor are built in.
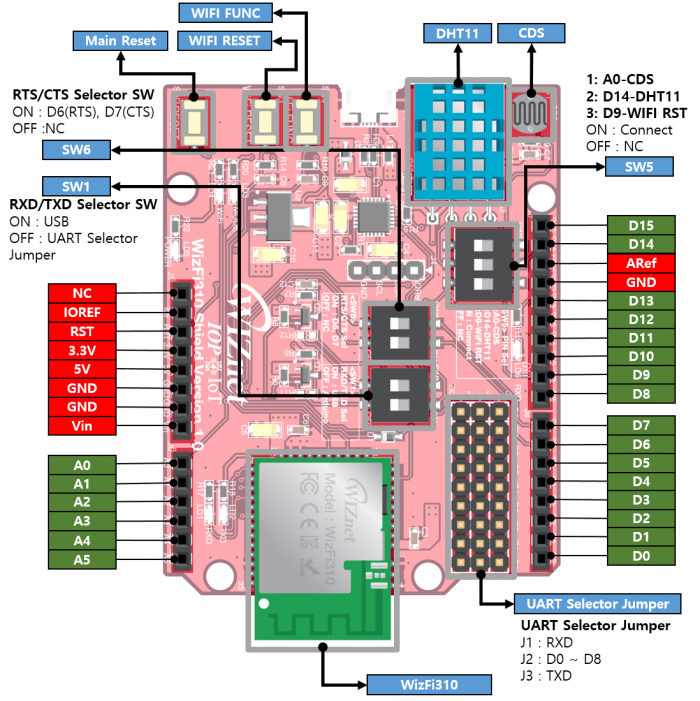
WizFi310 Shield Callout & Pinmap

SW1 - RXD/TXD Selector DIP Switch
- ON : RXD/TXD of WizFi310 connect to USB
- It is possible to communicate with WizFi310 using USB.
- OFF : RXD/TXD of WizFi310 connect to J1 and J3
- UART Pin Header, Arduino PIN
- If the jumper cap is not attached to the UART pin header, it will not be connected to the arduino pin.
Quote:
Pin 1 : RXD Pin 2 : TXD
SW6 - RTS/CTS Selector DIP Switch
- ON : RTS/CTS of WizFi310 connect to D6 and D7
- OFF : RTS/CTS of WizFi310 not connect to anywhere
- If the state of SW5 is ON, D6 and D7 of UART jumper can not be used.
Quote:
Pin 1 : RTS - D6 Pin 2 : CTS - D7
SW5 - Aruduino Pin Selector DIP Switch
- ON : Connect to Arduino Pin
- OFF : Not connect to anywhere
Quote:
Pin 1 : A0 - CDS Pin 2 : D14 - DHT11 Pin 3 : D9 - WizFi310 Reset Pin
UART Selector Jumper
- It can be used when SW2 is OFF.
- You have to specify the desired Arduino pin, use Jumper Cap to connect J1 to J2, and J3 to J2.
- Default : J1(RXD) - D1, J3(TXD) - D0
- If the state of SW5 is ON, D6 and D7 of UART jumper can not be used.
Quote:
J1 : RXD J2 : D0 ~ D8 J3 : TXD
You need to log in to post a discussion


