Google Cloud IoT from Mbed OS device
Connecting to Google Cloud IoT from Mbed OS device, with MQTT over TLS.
What's happening in this video?? Check Overview.
Overview
In this page, we'll try to connect to Google Cloud IoT Core from Mbed OS device. We'll do almost same thing in the Google Cloud Community's tutorial. In their tutorial, Device 1 and Device 2 are independent virtual devices runs on NodeJS. Here, we replace them with a Mbed OS device. Note that we use a single device, so Device 1 == Device 2 in our work.

Here are simplified steps:
- An Mbed OS device sends a MQTT message with hops=N to Google Cloud IoT Core.
- IoT Core transfers the message to Pub/Sub.
- Pub/Sub calls a function in Functions.
- The function changes hops = hops+1 and then publishes a message to the Mbed OS device through IoT Core.
- The Mbed OS device receives a message with hops = N+1.
Prerequisites
- Google Cloud Platform Account
- Mbed board and network connectivity. - Tested on FRDM-K64F with Ethernet.
- Mbed online compiler account - To build firmware.
- OpenSSL - To create a root CA and client certificate.
Please make sure that the required software are installed.
Prepare Google Cloud IoT Core
Generate keys and certificates
Let's create keys and certificates for authentication. First, create a self signed CA. You'll asked to enter a password. After entering password twice, you'll get ca.crt, which is used later.
$ openssl req -new -x509 -days 365 -extensions v3_ca -keyout ca.key -out ca.crt -subj "/C=JP/ST=Tokyo/L=Chiyoda-ku/O=MyCompany/OU=MyDepartment/CN=SELF_CA"
Then, create a client key pair and certification. You'll asked the password you entered above in the third command.
$ openssl genrsa -out client.key 2048
$ openssl req -out client.csr -key client.key -new -subj "/C=JP/ST=Tokyo/L=Chiyoda-ku/O=MyCompany/OU=MyDepartment/CN=CLIENT"
$ openssl x509 -req -in client.csr -CA ca.crt -CAkey ca.key -CAcreateserial -out client.crt -days 365
Now you get client.key and client.crt, these are used later.
Create a new project
Click the project name circled red in the picture below.

Then click the NEW PROJECT at the top of right corner.

Input your project name (anything you like), then click the CREATE buton.

Here, memo the Project ID for later use.
Enable IoT core
Choose the project you just created from the project menu at the page top. Then, select IoT Core from the side menu.

First time, you are asked to Enable API.

Create device registry
Also asked to create a device registry.

Then you'll move to Create a registry page.

- Input Registry ID, memo this for later use.
- Choose your region, memo this for later use.
- Create Default telemetry topic with a topic name, memo this for later use.
- Click Add CA certificate, choose Upload, and upload the
ca.crt, which is created above.
Add a device to the created registry
Click the + CREATE A DEVICE link in the Devices page.

You'll see the Create a device view. Input Device ID, which is used later. Choose Authentication method Upload and select the file client.crt created in the step above. Then Click the Add button.

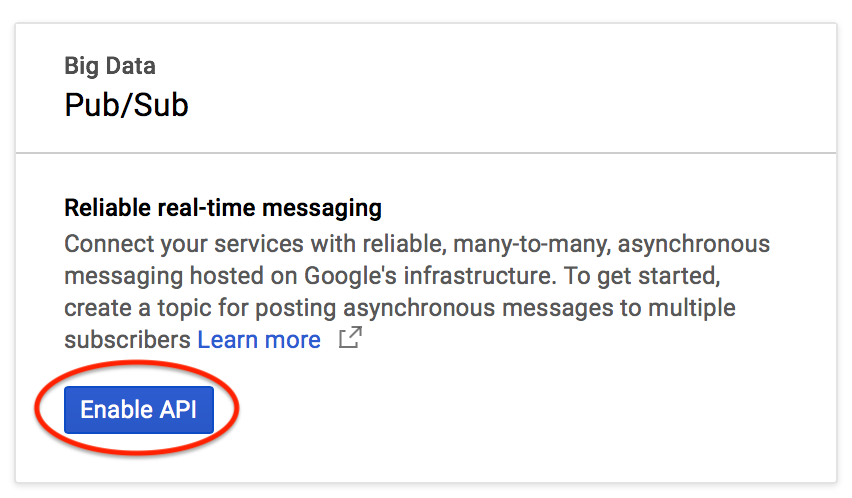
Enable Pub/Sub
From the left side menu, select Pub/Sub. You'll see an initial screen for the first time. Click the Enable API button.
Then you'll see topics list. Memo the topic name for later use.

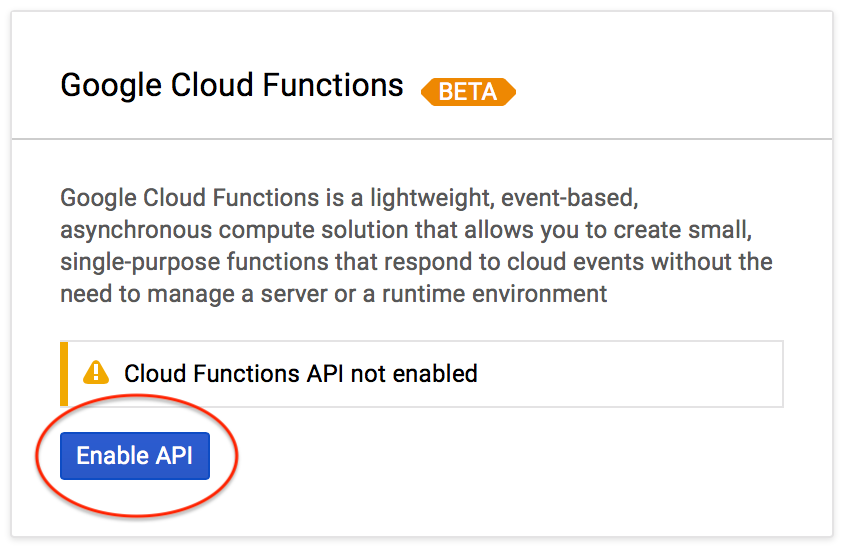
Enable Cloud Functions
From the left side menu, select Cloud Functions. You'll see an initial screen for the first time. Click the Enable API button.
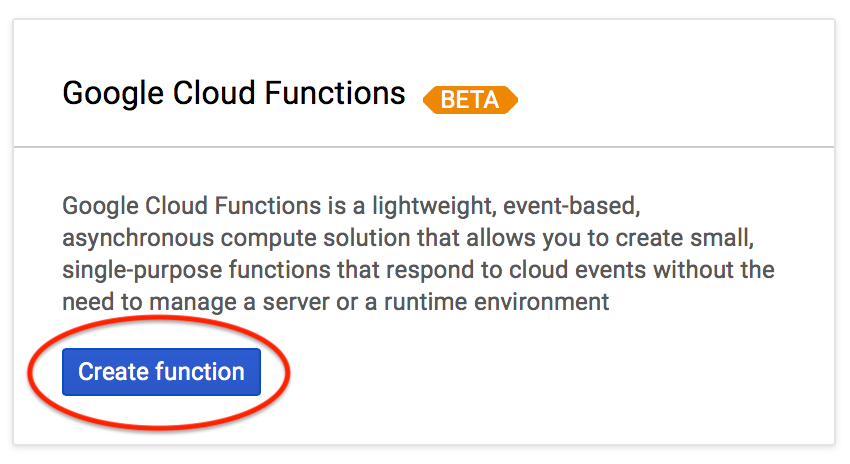
Deploy dev2dev function
Click the Create function button.
Then, you'll move to the Create function page. Let's deploy dev2 dev function, which relays a message from Device 1 to Device 2 and +1 a number hops in the message.
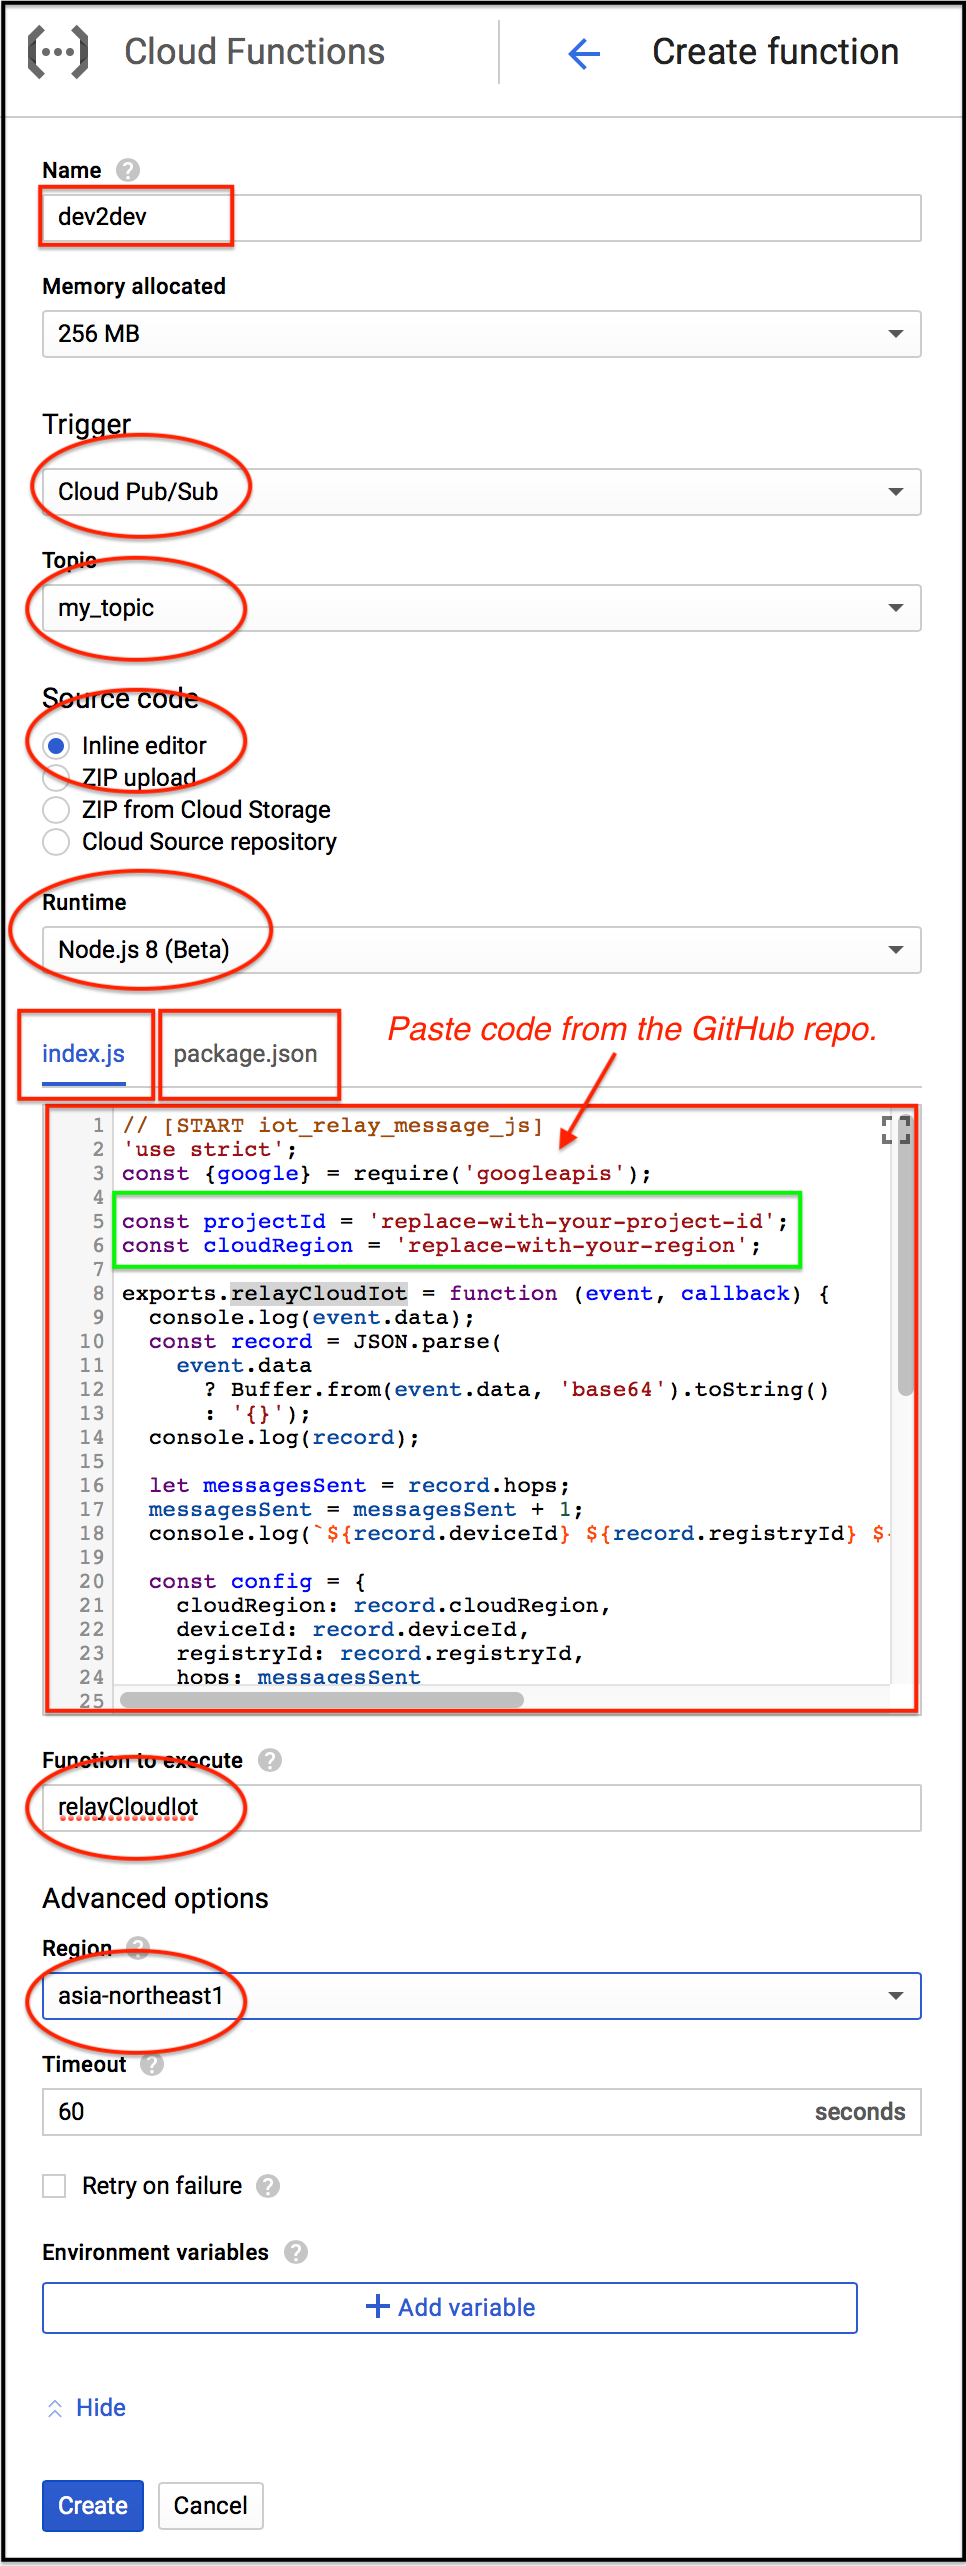
- Input Name, ex.
dev2devhere. - Choose Cloud Pub/Sub topic in Trigger
- Choose the topic you created above.
- Choose Node.js 8 in Runtime
- Choose Inline editor in Source Code, then replace the contents of index.js and package.json with the files in this GitHub repository.
- Replace values of
projectIdandcloudRegionin the source codeindex.js - Input
relayCloudIotinto Function to execute. - Choose your region from the Advanced options.
Then, click the Create button.
Cloud side preparation is done!
Build firmware
Next, let's build firmware for your Mbed board.
Import program into online compiler
Visit the Mbed program page, and click the Import into compiler button.
https://os.mbed.com/users/coisme/code/Mbed-to-Google-Cloud-IoT/
Change settings
You need to change some values to connect your endpoint. Once the project is imported, open MQTT_server_setting.h. You need to change these 6 items:
const char* GOOGLE_PROJECT_ID = "<< YOUR PROJECT ID >>";
const char* GOOGLE_REGION = "<< YOUR REGION >>";
const char* GOOGLE_REGISTRY = "<< YOUR REGISTRY ID >>";
const char* GOOGLE_DEVICE_ID = "<< YOUR DEVICE ID >>";
..
const char* SSL_CLIENT_CERT_PEM = "<< YOUR CLIENT CERT >>";
const char* SSL_CLIENT_PRIVATE_KEY_PEM = "<< YOUR CLIENT PRIVATE KEY>>";
Cloud Parameters
Replace the value of GOOGLE_PROJECT_ID, GOOGLE_REGION, GOOGLE_REGISTRY, and GOOGLE_DEVICE_ID with yours, memo in previous sections.
Client Certificate
Replace the content of SSL_CLIENT_CERT_PEM with the content in client.crt file generated in a previous step. You need to add " at the head of each line and \n" at the end of each line. The content in the file should start with -----BEGIN CERTIFICATE----- and end with -END CERTIFICATE-.
Example of SSL_CLIENT_CERT_PEM
const char* SSL_CLIENT_CERT_PEM =
"-----BEGIN CERTIFICATE-----\n"
"MIIFszCCA5ugAwIBAgIBBDANBgkqhkiG9w0BAQsFADA0MTIwMAYDVQQDDClBenVy\n"
...
Client Private Key
Replace the content of SSL_CLIENT_PRIVATE_KEY_PEM with the content in client.key file generated in a previous step. You need to add " at the head of each line and \n" at the end of each line. The content in the file should start with -----BEGIN RSA PRIVATE KEY----- and end with -----END RSA PRIVATE KEY-----.
SSL_CLIENT_PRIVATE_KEY_PEM
The contents of new-device.key.pem created in the Create certifications section. Do not share this key with anyone. You need to add " at the head and \n" at the tail of each line of the .pem file.
Example of SSL_CLIENT_PRIVATE_KEY_PEM
const char* SSL_CLIENT_PRIVATE_KEY_PEM =
"-----BEGIN RSA PRIVATE KEY-----\n"
"MIIJKAIBAAKCAgEApiYeU3PBEdfnhpYL8UBc56iptcmD/XtjWs5qMIadDmU8TlMT\n"
...
Build
Click the Compile button at the top of the compiler page. If no error, firmware will be download to your local machine.
Run
- Connect your Mbed board to your PC.
- Drag and drop the download firmware file (.bin) to your Mbed board.
- Launch a terminal program, for example TeraTerm, and connect to your Mbed board.
- Push the reset button on your board.
- You'll see the output from application on your terminal.

1 comment on Google Cloud IoT from Mbed OS device:
Please log in to post comments.
Google Cloud IoT from Mbed OS device
Connecting to Google Cloud IoT from Mbed OS device, with MQTT over TLS.
Page owner:  Osamu Koizumi
Created 27 Jun 2018.
Last updated 12 Feb 2019
Hello Osamu, By the way, what program/software package did you use to draw the first diagram on this page? The one showing the hops between the Mbed OS Device and the Google Cloud Platform. The one with the link: https://os.mbed.com/media/uploads/coisme/g-016.png
I am looking for tools on Ubuntu that I can use to draw similar diagrams. So far, I only know of umbrello, but that seems to be class diagram specific. Thank you Nuertey