Important changes to repositories hosted on mbed.com
Mbed hosted mercurial repositories are deprecated and are due to be permanently deleted in July 2026.
To keep a copy of this software download the repository Zip archive or clone locally using Mercurial.
It is also possible to export all your personal repositories from the account settings page.
Dependencies: EthernetInterface HttpServer mbed-rpc mbed-rtos mbed TextLCD
You are viewing an older revision! See the latest version
Homepage
新しいEthenetInterfaceで、なるべくいじらなくて過去(EthernetEth)と同様のことをします。
Thank You
新しいライブラリを作成するのにDonatien Garnier(@donatien )さん、Suga koubou(@okini3939 )さん、Norimasa Okamoto(@va009039 )さんのコードおよび記事を大変参考にさせて頂いています。
注意事項
まだ、すべてをチェックしているわけではありません。
環境
mbed+☆Board Orangeを使用する前提で書いています。
他のボードを使用する場合はTextLCDを代えたり、削除等すればご利用できると思います。
FSとしてLocalFileSystemでチェックしています。このページのtest.htm,mbedrpc.js,sample.htm,sample.jpgは、mbedに保存してください。
DEMO実行に必要なファイル
各ファイルをmbedのLocalFileSystemに保管してください。
mbedrpc.js /media/uploads/yueee_yt/mbedrpc.js
test.htm /media/uploads/yueee_yt/test.htm
sample.htm /media/uploads/yueee_yt/sample.htm
sample.jpg /media/uploads/yueee_yt/sample.jpg
HTTP Server
以前と同様SimpleHandler,FSHandler,RPCHandlerが利用できます。
RPCのJavaScript経由の場合は、このページにあるファイルを使用してください。
//#define DNS_SERVER_ADDRESS(ipaddr)        (ip4_addr_set_u32(ipaddr, ipaddr_addr("208.67.222.222"))) /* resolver1.opendns.com */
#include "mbed.h"
#include "rtos.h"
#include "EthernetInterface.h"
#include "HTTPServer.h"
#include "mbed_rpc.h"
#include "TextLCD.h"
EthernetInterface eth;

DigitalOut led4(LED4);

LocalFileSystem local("local");
   void LcdWrite(Arguments* arg, Reply* r);    //ADD Here!!

TextLCD lcd(p24, p26, p27, p28, p29, p30);

void aliveState(void const *args) {
    while (true) {
        led4 = !led4;
        Thread::wait(1000);
    }
}

int main()
{
    printf("********* PROGRAM START ***********\r\n");
    Thread thread(aliveState);
    RPC::add_rpc_class<RpcDigitalOut>();
    RPC::construct<RpcDigitalOut, PinName, const char*>(LED1, "led1");
    RPC::construct<RpcDigitalOut, PinName, const char*>(LED2, "led2");
    RPC::construct<RpcDigitalOut, PinName, const char*>(LED3, "led3");
    RPCFunction rpcFunc(LcdWrite, "LcdWrite"); //ADD Here!!
  lcd.cls();
    lcd.locate(0,0);

    printf("EthernetInterface Setting up...\r\n");
    if(eth.init()!=0) {                             //for DHCP Server
    //if(eth.init(IPAddress,NetMasks,Gateway)!=0) { //for Static IP Address
        printf("EthernetInterface Initialize Error \r\n");
        return -1;
    }
    if(eth.connect()!=0) {
        printf("EthernetInterface Connect Error \r\n");
        return -1;
    }
    printf("IP Address is %s\r\n", eth.getIPAddress());
    printf("NetMask is %s\r\n", eth.getNetworkMask());
    printf("Gateway Address is %s\r\n", eth.getGateway());
    printf("Ethernet Setup OK\r\n");

    HTTPServerAddHandler<SimpleHandler>("/hello"); //Default handler
    FSHandler::mount("/local", "/");
    HTTPServerAddHandler<FSHandler>("/");
    HTTPServerAddHandler<RPCHandler>("/rpc");
    lcd.locate(0,0);
    lcd.printf("%s",eth.getIPAddress());
    HTTPServerStart(80);
}

void LcdWrite(Arguments* arg, Reply* r)  //ADD Here!!
{
    lcd.locate(0,1);
    lcd.printf("%s",arg->argv[0]);
}
液晶の1段目にDHCPでGetしたIPアドレスを表示するので、web Browserで、接続します。この例では、192.168.1.68になります。
SimpleHandlerが/helloになっているので、"http://192.168.1.68/hello"で接続すると

LocalFileSystem(MBED本体のFlashメモリ)は/にマウントされているので、"http://192.168.1.68/MBED.HTM"とするとmbedのホームページに行きます。
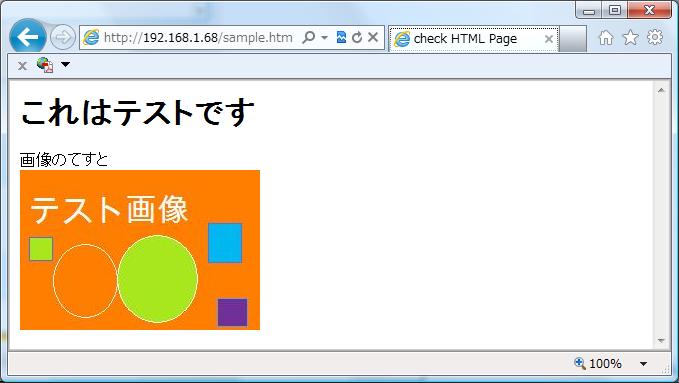
"http://192.168.1.68/sample.htm"で接続するとサンプルのHTMLを表示します。
(EthernetInterfaceになったからか、画像の読み込みが速いような気がします。)

RPC経由で led2を光らすには "http://192.168.1.68/rpc/led2/write 1"とすればLED2が光ります
消すにはもちろん"http://192.168.1.68/rpc/led2/write 0"とします。(空白は半角1スペース)。
RPCの設定はNorimasa Okamoto(@va009039 )のhttp://d.hatena.ne.jp/va009039/20130214/p1を参考にしました。
mbedは、プログラム中にHTMLを書かずにjavascriptで対応できるのが楽ですね。
最後のWebのTextBoxに英数字をいれ送信を押すとTextLCDの下段に表示されます。(RPCFunction のサンプル)
"http://192.168.1.68/test.htm"では、RPCをweb上から実行します。
test.htm
<html>
<head>
<meta http-equiv="Content-Type" content="text/html; charset=iso-2022-jp">
<title>mbed test web</title>
<script  type="text/javascript" src="mbedRPC.js" language="javascript"></script>
<script type="text/javascript">
            mbed = new HTTPRPC();
            led1 = new DigitalOut(mbed, LED1);
            led2 = new DigitalOut(mbed, LED2);
            led3 = new DigitalOut(mbed, LED3);
lcd = new RPCFunction(mbed,"LcdWrite");

</script>
</head>
<body>
<form action="test.htm" method="get">
<button type="submit" ID="btn_LED1a" onclick="led1.write(1)">LED1点灯</button> <br >
<button type="submit" ID="btn_LED2a" onclick="led2.write(1)">LED2点灯</button> <br >
<button type="submit" ID="btn_LED3a" onclick="led3.write(1)">LED3点灯</button> <br >
<br>
<button type="submit" ID="btn_LED1b" onclick="led1.write(0)">LED1消灯</button> <br >
<button type="submit" ID="btn_LED2b" onclick="led2.write(0)">LED2消灯</button> <br >
<button type="submit" ID="btn_LED3b" onclick="led3.write(0)">LED3消灯</button> <br >
<br>
</form>
<script type="text/javascript">
var led_1=led1.read();
var led_2=led2.read();
var led_3=led3.read();

document.write("LED1は");
if(led_1==0)document.write("消灯");else document.write("点灯");
document.write("しています<br>");

document.write("LED2は");
if(led_2==0)document.write("消灯");else document.write("点灯");
document.write("しています<br>");

document.write("LED3は");
if(led_3==0)document.write("消灯");else document.write("点灯");
document.write("しています<br>");

</script>
<input type="text" id="textbox" ></input><button onclick="lcd.run(textbox.value);">送信</button> <br>

</body>
</html>
参考
ファイル名は8.3形式しか使用できないので拡張子は"*.htm"になっています。
今後は
IEEE1888サーバを実装予定です。
履歴
2014/02/22 RPCHandlerのバグ(test.htmを複数回呼ぶと無応答)修正