Small Internet Protocol Stack using a standard serial port.
PPP-Blinky - TCP/IP Networking Over a Serial Port
Note: The source code is at the bottom of this page.
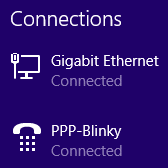
A Windows desktop showing PPP-Blinky in the network connections list.
Describe PPP-Blinky in Three Sentences
PPP-Blinky is a tiny library that enables Internet protocols (IPv4) to any mbed target hardware by using only a serial port.
The code runs on processors with as little as 8k RAM, for example the Nucleo-L053R8 board.
PPP-Blinky uses the industry-standard PPP (Point-to-Point) Protocol and a tiny "stateless" TCP/IP stack.
No Ethernet Port Required
No ethernet port is required - PPP-Blinky uses a serial port to send IP packets to your PC.
PPP-Blinky emulates a standard dial-up modem and therefore connects to Windows, Linux or Adroid machines.
The code runs on most ARM mbed platforms such as the LPC11U24 shown in the picture below:
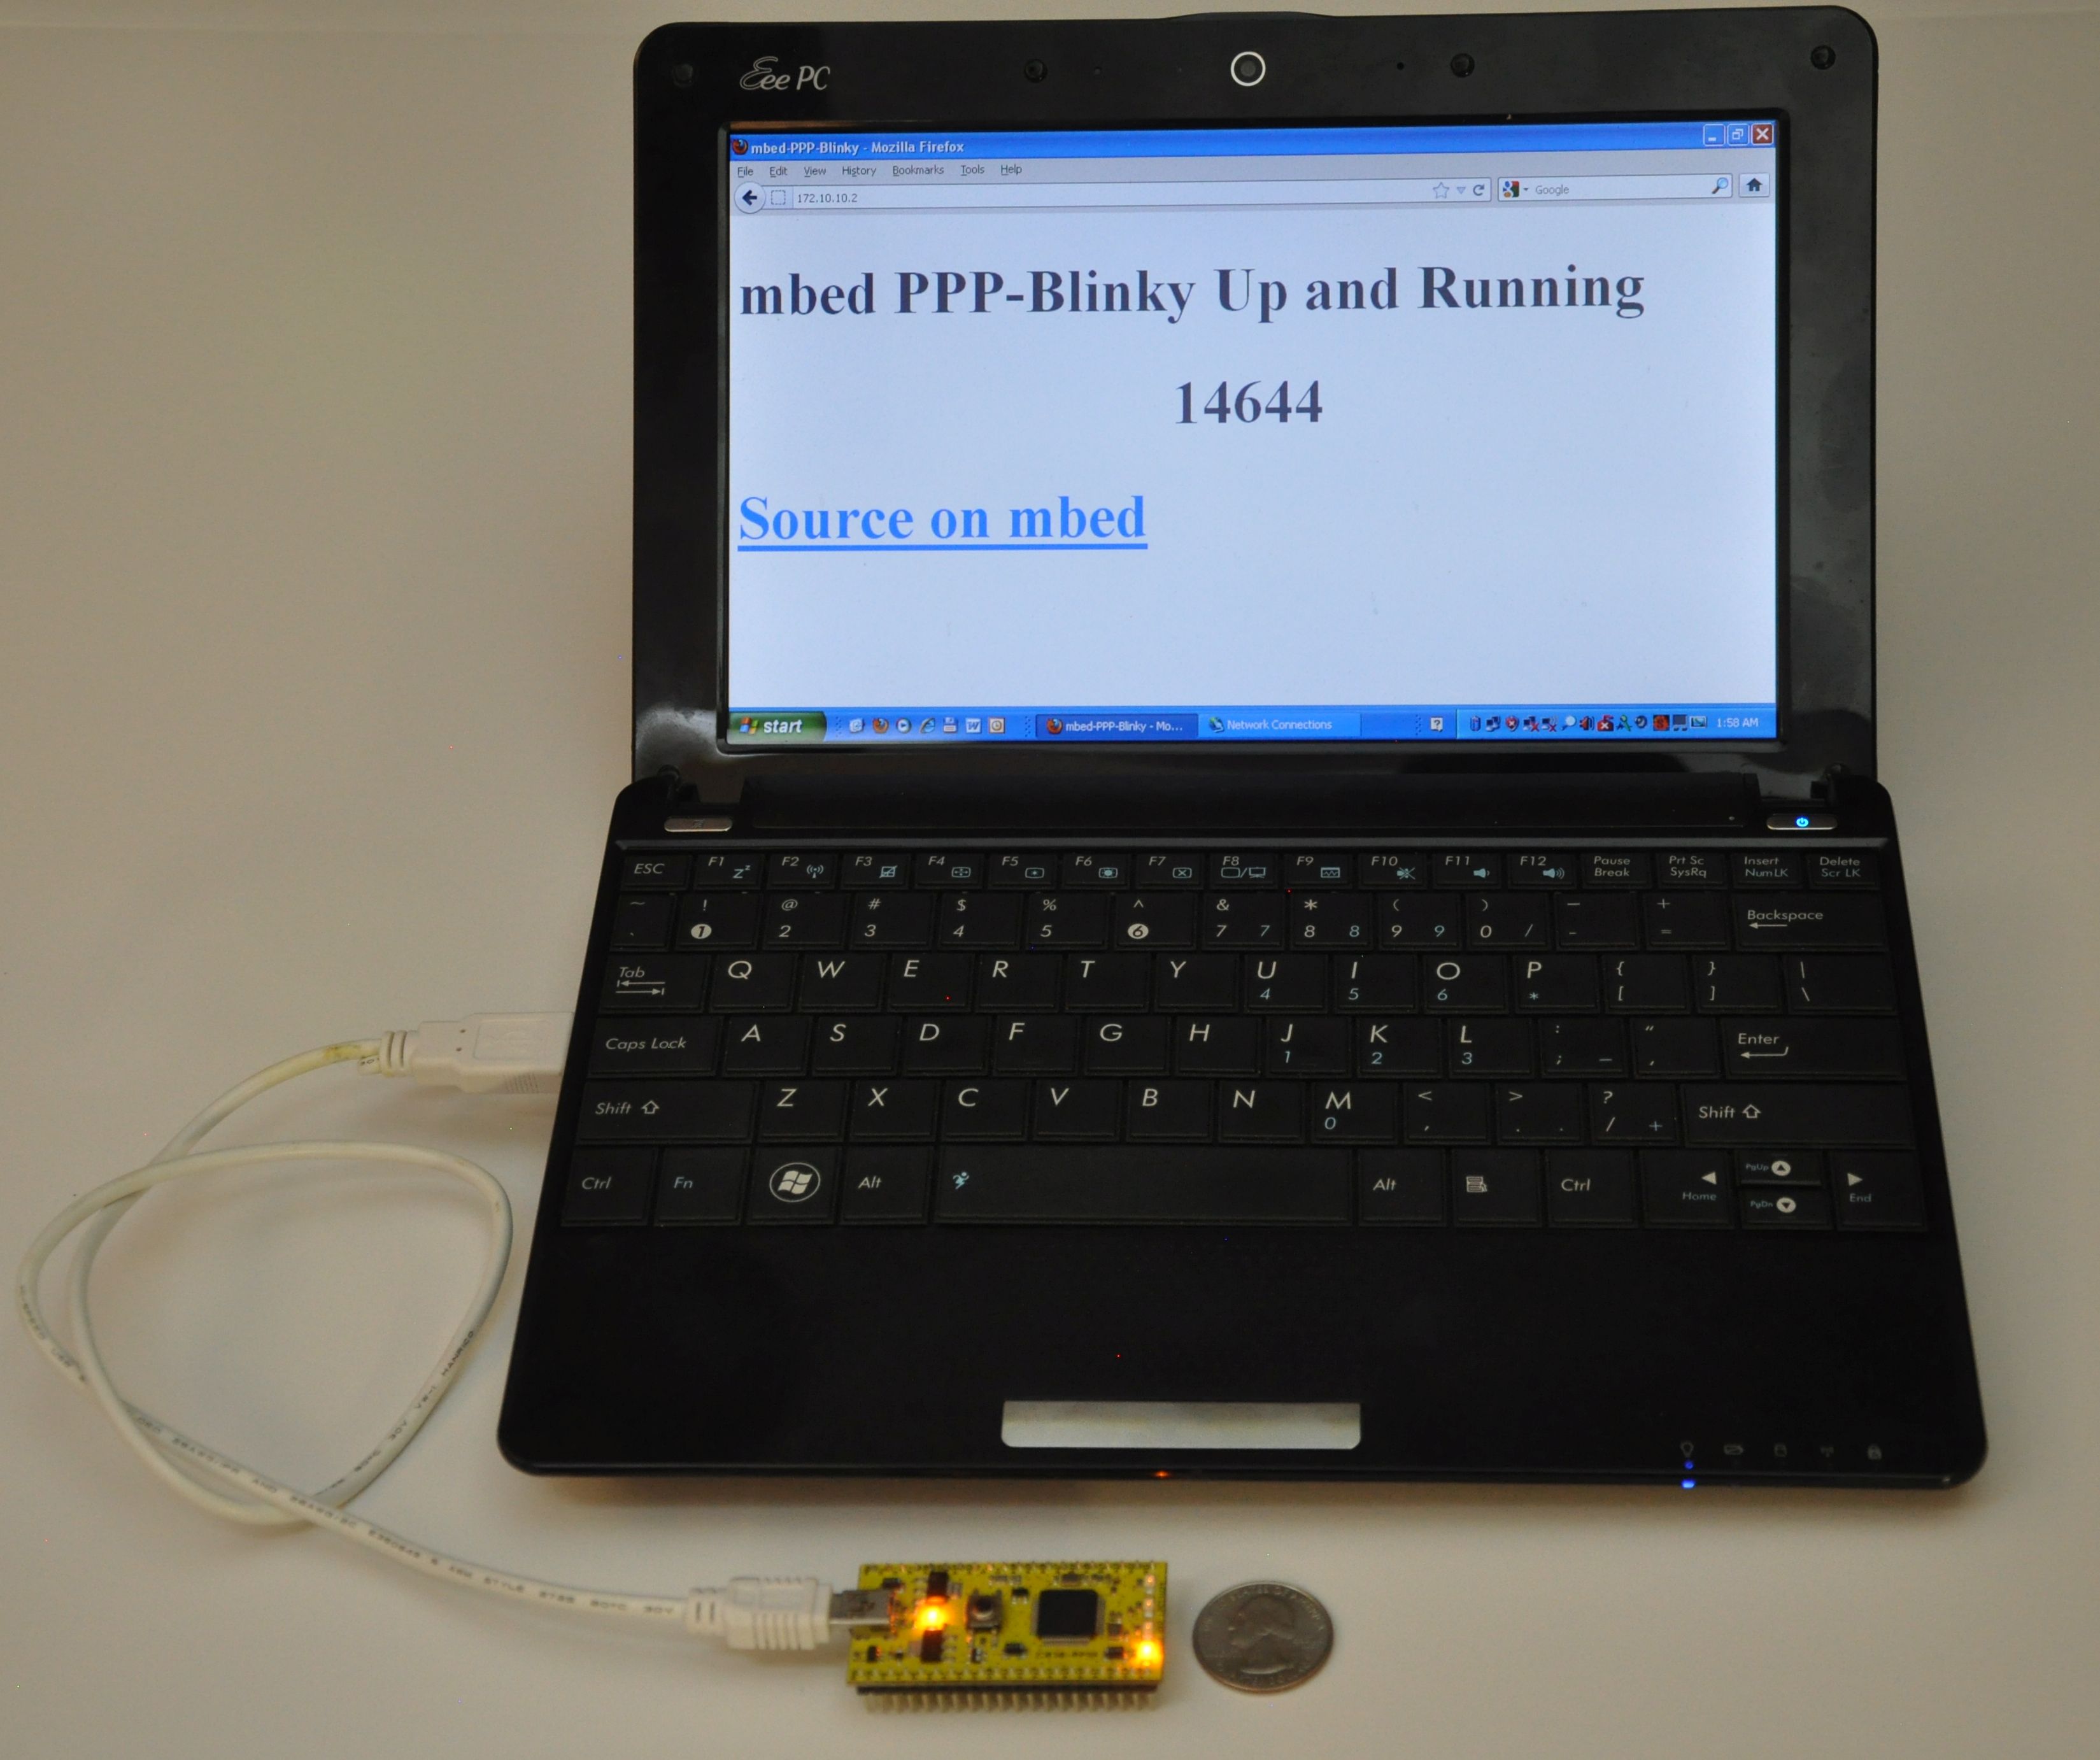 mbed LPC11u24 acting as a webserver to a Windows laptop.
Webserver
The Webserver and WebSocket functions are ideal for building browser-based GUIs on mbed-enabled hardware.
PPP-Blinky's HTTP webserver works with most web clients such as Internet Explorer, Mozilla Firefox, Google Chrome, Safari, Curl, wget and Lynx as well as Microsoft Powershell Invoke-Webrequest command.
In the image below Firefox web browser displays the main web page embedded into PPP-Blinky's code:
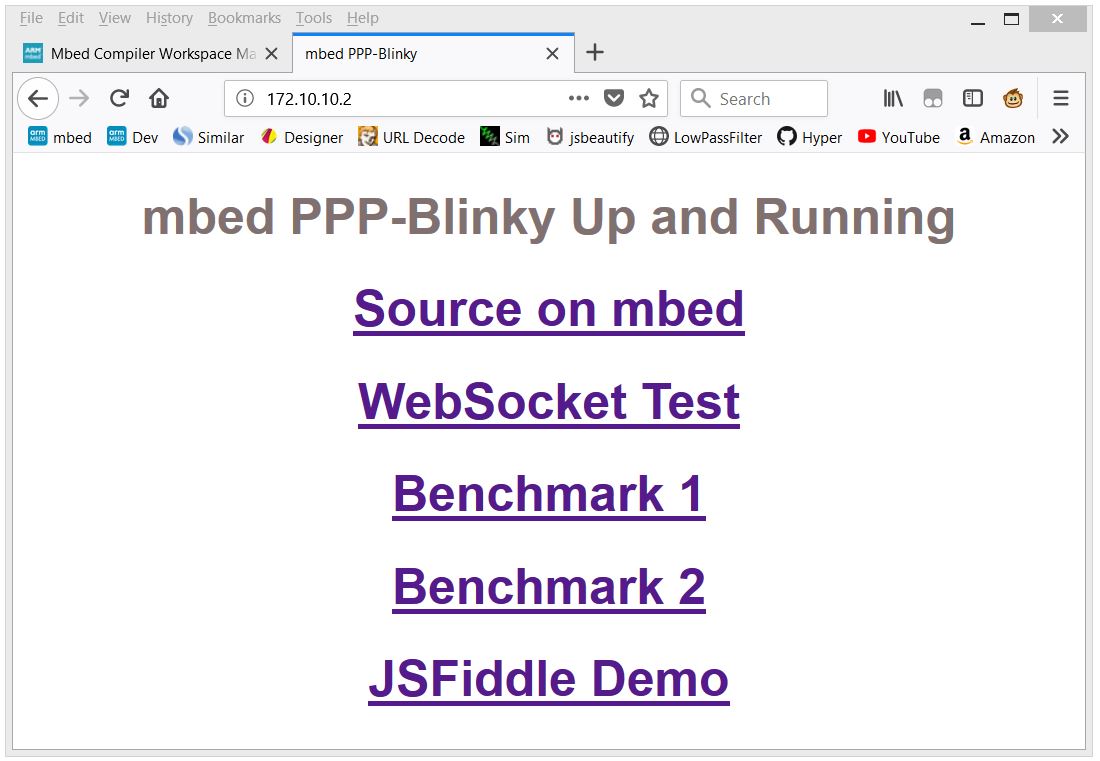 Firefox web browser displays a web page embedded into PPP-Blinky's code
WebSocket Service
WebSocket is the most popular protocol standard for real-time bidirectional TCP/IP communication between clients and servers.
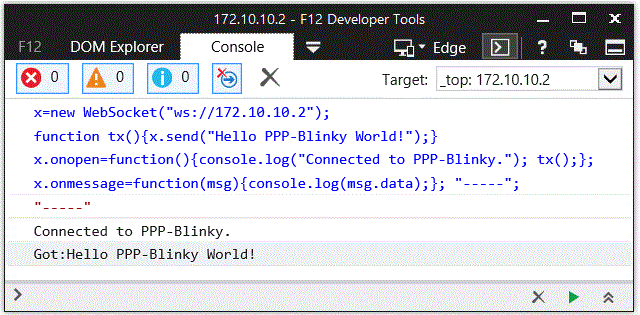
In the image below a small Internet Explorer script has connected to PPP-Blinky's WebSocket Service.
A websocket message was then sent by the browser and was echoed back by the WebSocket, triggering the onmessage event in the script.
The WebSocket service enables bidirectional real-time interaction between PPP-Blinky and any element in the browser DOM via JavaScript.
If you already have PPP-Blinky up and running you can test your WebSocket service using this: http://jsfiddle.net/d26cyuh2/112/embedded/result
Websockets are ideal for building browser-based GUIs for mbed hardware.
Trying PPP-Blinky on your mbed board
You will need an mbed-enabled hardware board: https://developer.mbed.org/platforms/
Establish a serial port connection between your host PC and your mbed board.
The easiest way is to use mbed hardware with a USB serial debug port. I've tried the ST-Micro Nucleo-L476RG, Nucleo-L152RE, Nucleo-F401RE, Nucleo-L432KC, Nucleo-L053R8, mbed-LPC11U24 and mbed-LPC1768 boards and they all work out of the box. Use the mbed online compiler to compile the software for your target board. Save the compiled binary to your hardware.
Before establishing a network connection, you can verify the operation of the code by opening a terminal program such as Tera Term, and setting the baud rate of the COM port on your mbed board to 115200 baud. LED1 should toggle for every two 0x7E (~) (i.e. tilde) characters you type, as 0x7E is the PPP frame start/end marker. Don't forget to close the port when your'e done testing, or else Windows Dial-up Networking will report that the COM port is in use by another program when you try to connect.
Once you are certain that the serial port and firmware is working, proceed to creating a new network connection on your PC -see below.
Creating a Dial-up Connection in Windows
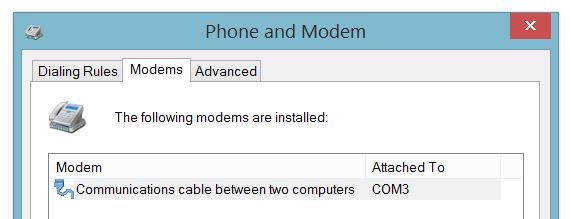
Setting up Dial-Up Networking (DUN) on your Windows 7 or 8 PC is essentially a two-step process: First, you create a new modem device, because PPP-blinky partially emulates a standard Windows serial port modem device. Second, you create a new Internet connection (in practice, a new network adapter) which is associated with your new "modem".
Step-by-step description of how to configure Windows for PPP-Blinky here:
/users/nixnax/code/PPP-Blinky/wiki/Configuring-Windows-Dial-Up-Networking
There is also a screen on how to set up Linux dial-up networking near the bottom of this page.
Connecting to PPP-Blinky from your PC
Once Windows networking is configured you can establish a dial-up connection to your mbed board over the USB virtual com port.
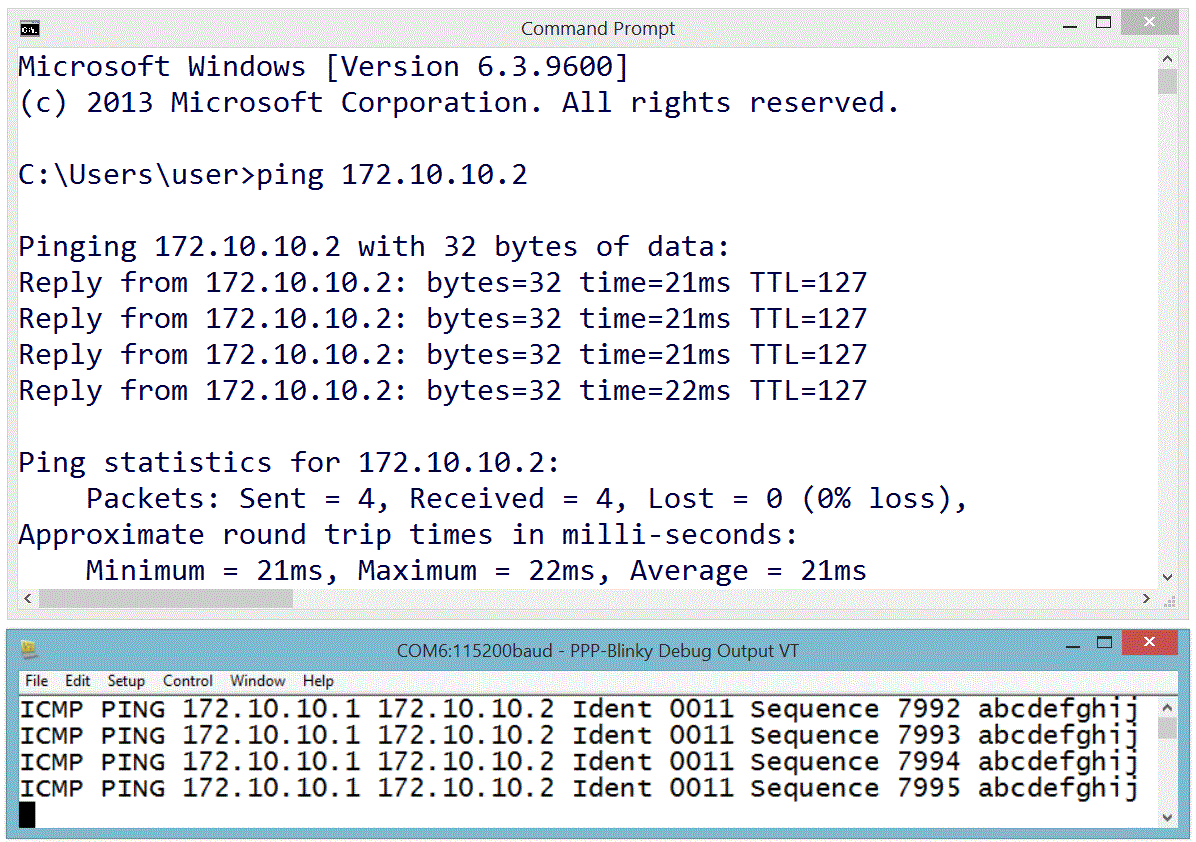
The IP address you manually assigned to the new dial-up network adapter (172.10.10.1) functions as a gateway to any valid IP address on that subnet. In the screen capture below, I'm sending pings from the Windows 8 command line to my ST-Micro Nucleo-L476RG board over the USB virtual serial Port. I'm also using a second serial port and Tera Term to capture the debug output from a second serial port on the hardware. The optional debug output from the board prints out the IP source and destination address and the first few bytes of the data payload. Note that the source is the adapter IP address, (172.10.10.1 in this case) and the destination is some other address on that subnet - all packets to the subnet are sent to our mbed hardware. For example, you could also ping 172.10.10.123 or, if your PPP-Blinky is running, simply click on this link: http://172.10.10.123
One Million Pings!
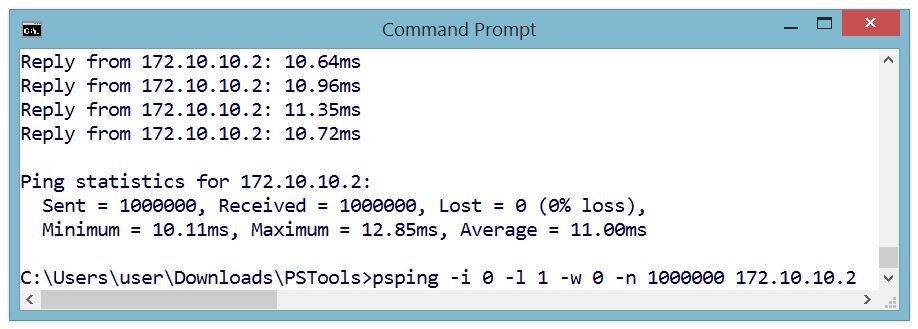
In the image below the ICMP ("ping") echo reply service was tested by sending one million pings to ppp-Blinky. This took over two hours.
The ping tool used on the Windows 8 PC was psping.exe from PsTools by Mark Russinovich - http://bit.ly/PingFast
The average reply time for a short ping (1 byte of payload data) was 11 milliseconds at 115200 baud on the $10 Nucleo-L053R8 board - barely enough time for 130 bytes to be sent over the port!
Monitoring PPP-Blinky Packets
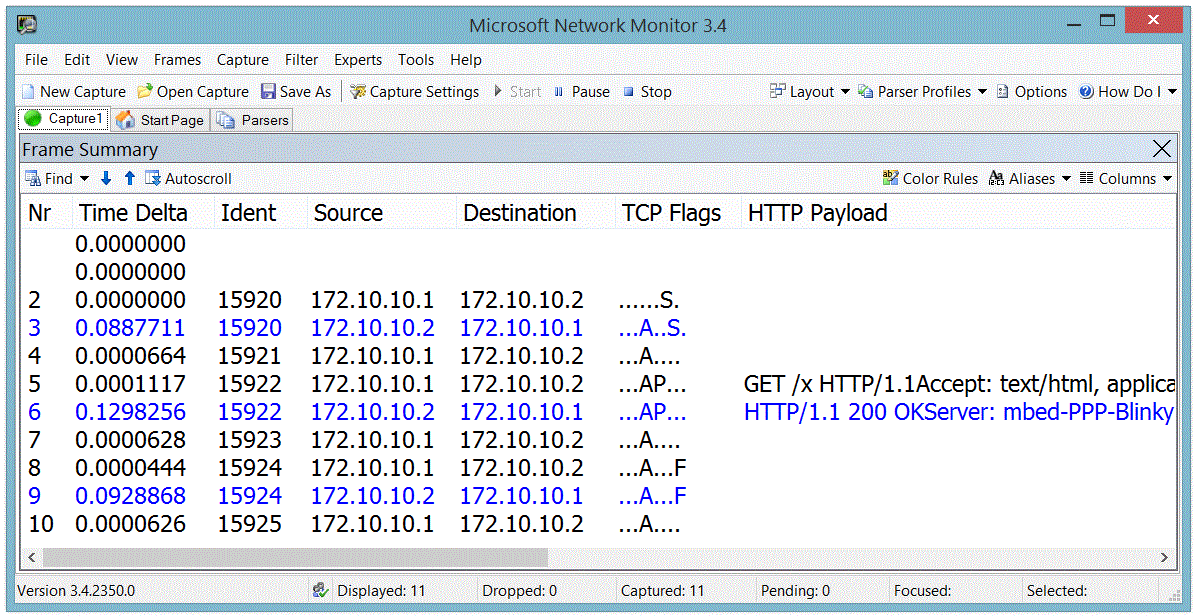
The image below is from a Microsoft Network Monitor 3.4 capture session.
Responses from PPP-Blinky are shown in blue.
Frame 2 - Internet Explorer at IP 172.10.10.1 (the Dial-Up Adapter IP) requests a TCP connection by sending an S (SYN) flag.
Frame 3 - PPP-Blinky at IP 172.10.10.2 responds with an ACK in frame 3. One direction of the link is now established.
Frame 4 - The PC acknowledges the SYN sent by PPP-Blinky in frame 3. The TCP link is now fully established.
Frame 5 - The browser "pushes" (P flag is set) an HTTP GET request to PPP-Blinky.
Frame 6 - PPP-Blinky responds with a standard HTTP response "pushes" (P flag set) back a small web page. It also sets the A (ACK) flag to acknowledge the message sent in frame 6.
Frame 7 - The PC acknowledges reception of the HTTP payload.
Frame 8 - The PC starts to shut down the TCP connection by sending a FIN flag.
Frame 9 - PPP-Blinky acknowledges the FIN request - the connection is now closed in one direction. It also sets a FIN flag in the response to request closure of the opposite direction of the connection.
Frame 10 - The PC acknowledges the FIN request. The closing of the TCP connection is now confirmed in both directions.
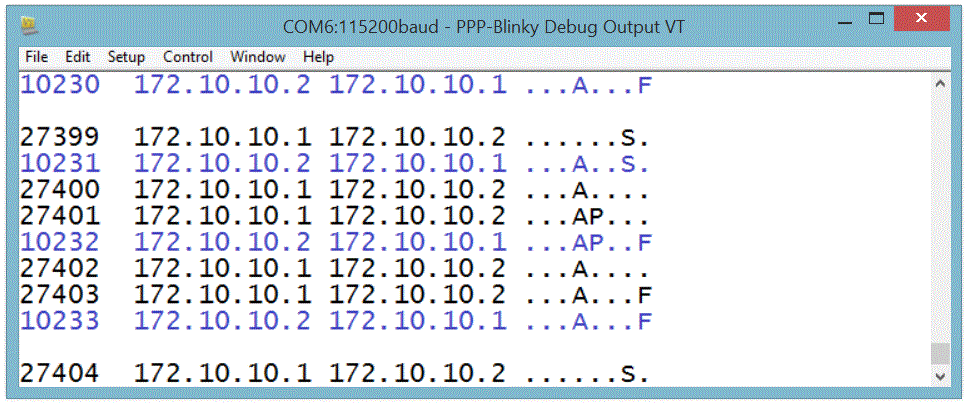
Debug Output
PPP-Blinky can output handy debug information to an optional second serial port.
The image below shows the debug output (Ident, Source, Destination, TCP Flags) for a complete HTTP conversation.
The PC messages are displayed in black. PPP-Blinky messages are blue.
Notice how PPP-blinky automatically inserts a blank line after each full HTTP conversation.
Creating a Dial-Up Connection in Linux
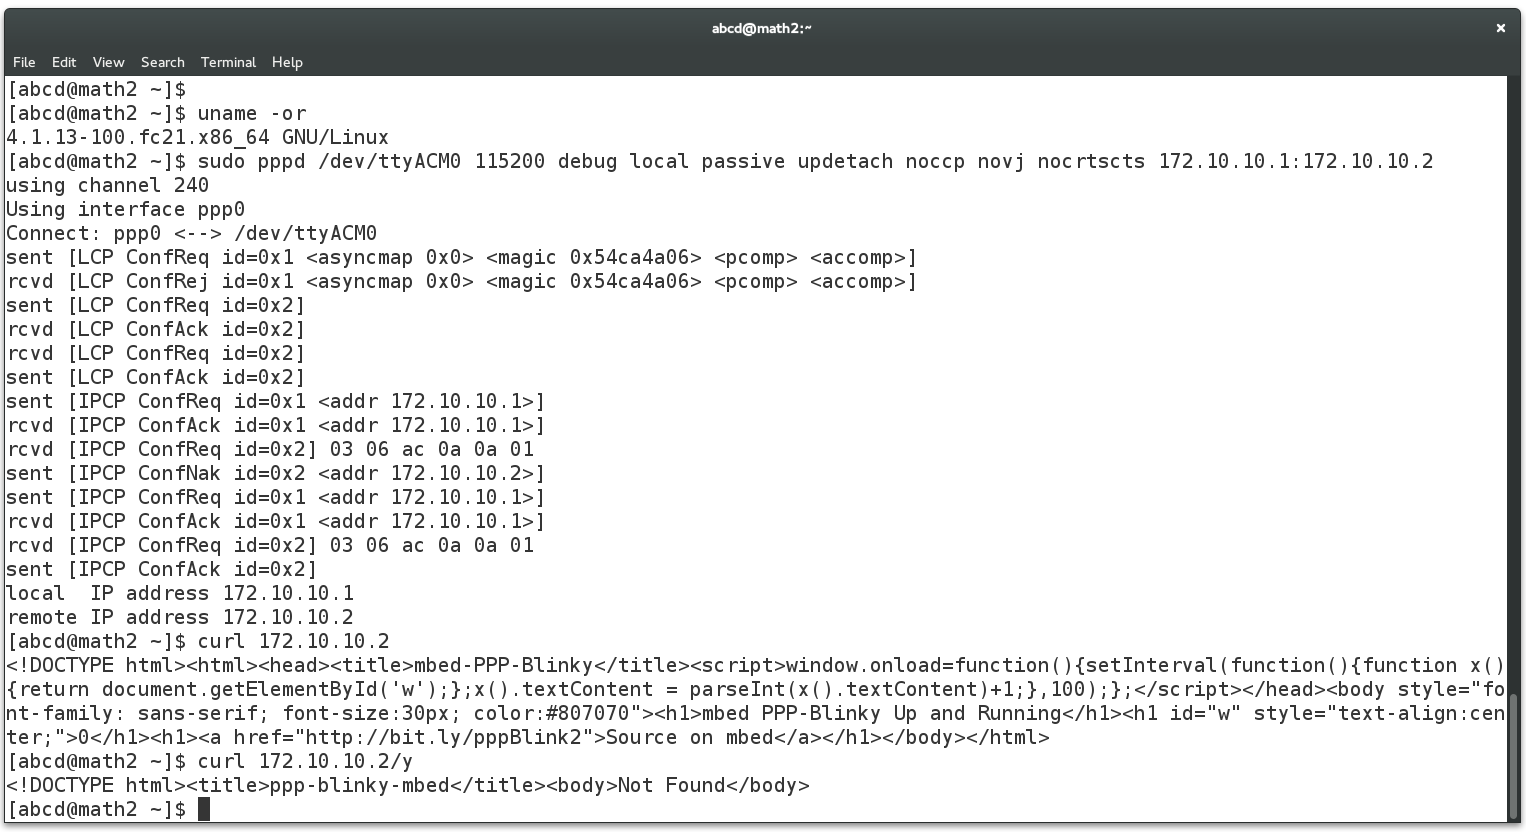
The screen below shows the required pppd command to connect to PPP-Blinky from a Linux machine. This was much simpler than Windows! The USB serial port of the mbed LPC1768 board registered as /dev/ttyACM0 on my Linux box. Do a websearch on pppd if you want to learn more about pppd, the Linux PPP handler. Near the bottom of the screen below, two webpages are fetched (/ and /y) by using the curl command on the command line. Gnome Webkit and Firefox work fine, too. Also try echo GET / HTTP/1.1 | nc 172.10.10.2 which uses netcat, the "Swiss army knife" of networking tools. PPP-Blinky was also tested with ApacheBench, the Apache server benchmark software. After 100000 fetches, the mean page fetch rate was reported as 6 page fetches per second for a small page.
Caveats
PPP Blinky is an extremely sparse implementation (1.5k lines) of HTTP,WebSocket,TCP, UDP, ICMP, IPCP and LCP over PPP, requiring around 8kB of RAM. The minimum functionality required to establish connectivity is implemented. These are often acceptable tradeoffs for embedded projects as well as a handy tool to learn the practical details of everyday networking implementations.
Diff: main.cpp
- Revision:
- 104:b1280b084f75
- Parent:
- 103:4f5512dd11cf
- Child:
- 105:45001195b325
--- a/main.cpp	Mon Jul 31 08:14:13 2017 +0000
+++ b/main.cpp	Mon Jul 31 08:41:44 2017 +0000
@@ -101,7 +101,7 @@
     int ledState; // state of LED1
     int httpPageCount;
     struct {
-#define RXBUFLEN (1<<14)
+#define RXBUFLEN (1<<12)
         // the serial port receive buffer and packet buffer, size is RXBUFLEN (currently 8192 bytes)
         char buf[RXBUFLEN]; // RXBUFLEN MUST be a power of two because we use & operator for fast wrap-around in ring buffer
         int head;
 Nicolas Nackel