IoT ID-20LA RFID Facebook Authenticator
An ID-20LA RFID reader module, authenticating a user to grant access to a Facebook profile, using Windows-specific keyboard shortcuts. In this demo, we're interacting with the mbed.
The purpose of this demo is to show a proof of concept for using an RFID tag as an authentication method, granting special permissions to users of a specific application or website.
As hinted at above, more advanced forms of RFID authentication can be extended to meet a wide variety of needs. One future work may include using a more capable RFID reader, capable of distinguishing between tags of different frequencies and bit numbers.
Information
The ID-20LA RFID reader is compatible with the below ID12RFID library.
This reader is only compatible with 64-bit 125 MHz tags.
USBKeyBoard Library
Import libraryUSBDevice
USB device stack
ID12RFID Library
Import libraryID12RFID
ID12 RFID library for reading 125KHz RFID tags
Code
#include "mbed.h"
#include "ID12RFID.h"
#include "USBKeyboard.h"
#include <string>


using namespace std;

ID12RFID rfid(p14); // uart rx
Serial pc(USBTX, USBRX); // tx, rx
USBKeyboard keyboard;

int tagArr[2] = {36910393, 36926259}; // 2 known tags
string unArr[2] = {"email1@gmail.com", "email2@gmail.com"};
string pwArr[2] = {"myPassword1", "myPassword2"};

int tagNum;

int tagFound(int tag) {
    for (int i = 0; i < 2; i++) {
        if (tag == tagArr[i])
            return i; // known tag
    }
    return 3; // tag ID not found
}

int main() {
    while(1) {
        // blocking. return when new rfid detected
        if(rfid.readable()) {
            tagNum = rfid.read();
            int id = tagFound(tagNum);
            if (id != 3) {
                // if familiar tag
                // find username & password

                keyboard.keyCode('r', KEY_LOGO); // (Windows-specific) Run program
                wait(0.3); // may not be necessary
                keyboard.printf("chrome --incognito\r\n");
                wait (1.2); // determined experimentally
                keyboard.keyCode('l', KEY_CTRL); // "Ctrl + L" = web address change
                keyboard.printf("facebook.com\n");
                wait(1.2);
                // input username, tab to PW field
                keyboard.printf("%s\t", unArr[id].c_str());
                // hit "ENTER" (\n) to login
                keyboard.printf("%s\n", pwArr[id].c_str());

            } else {
                // new tag (unfamiliar)
               // do nothing
            }
        }
    }
}
Remember!
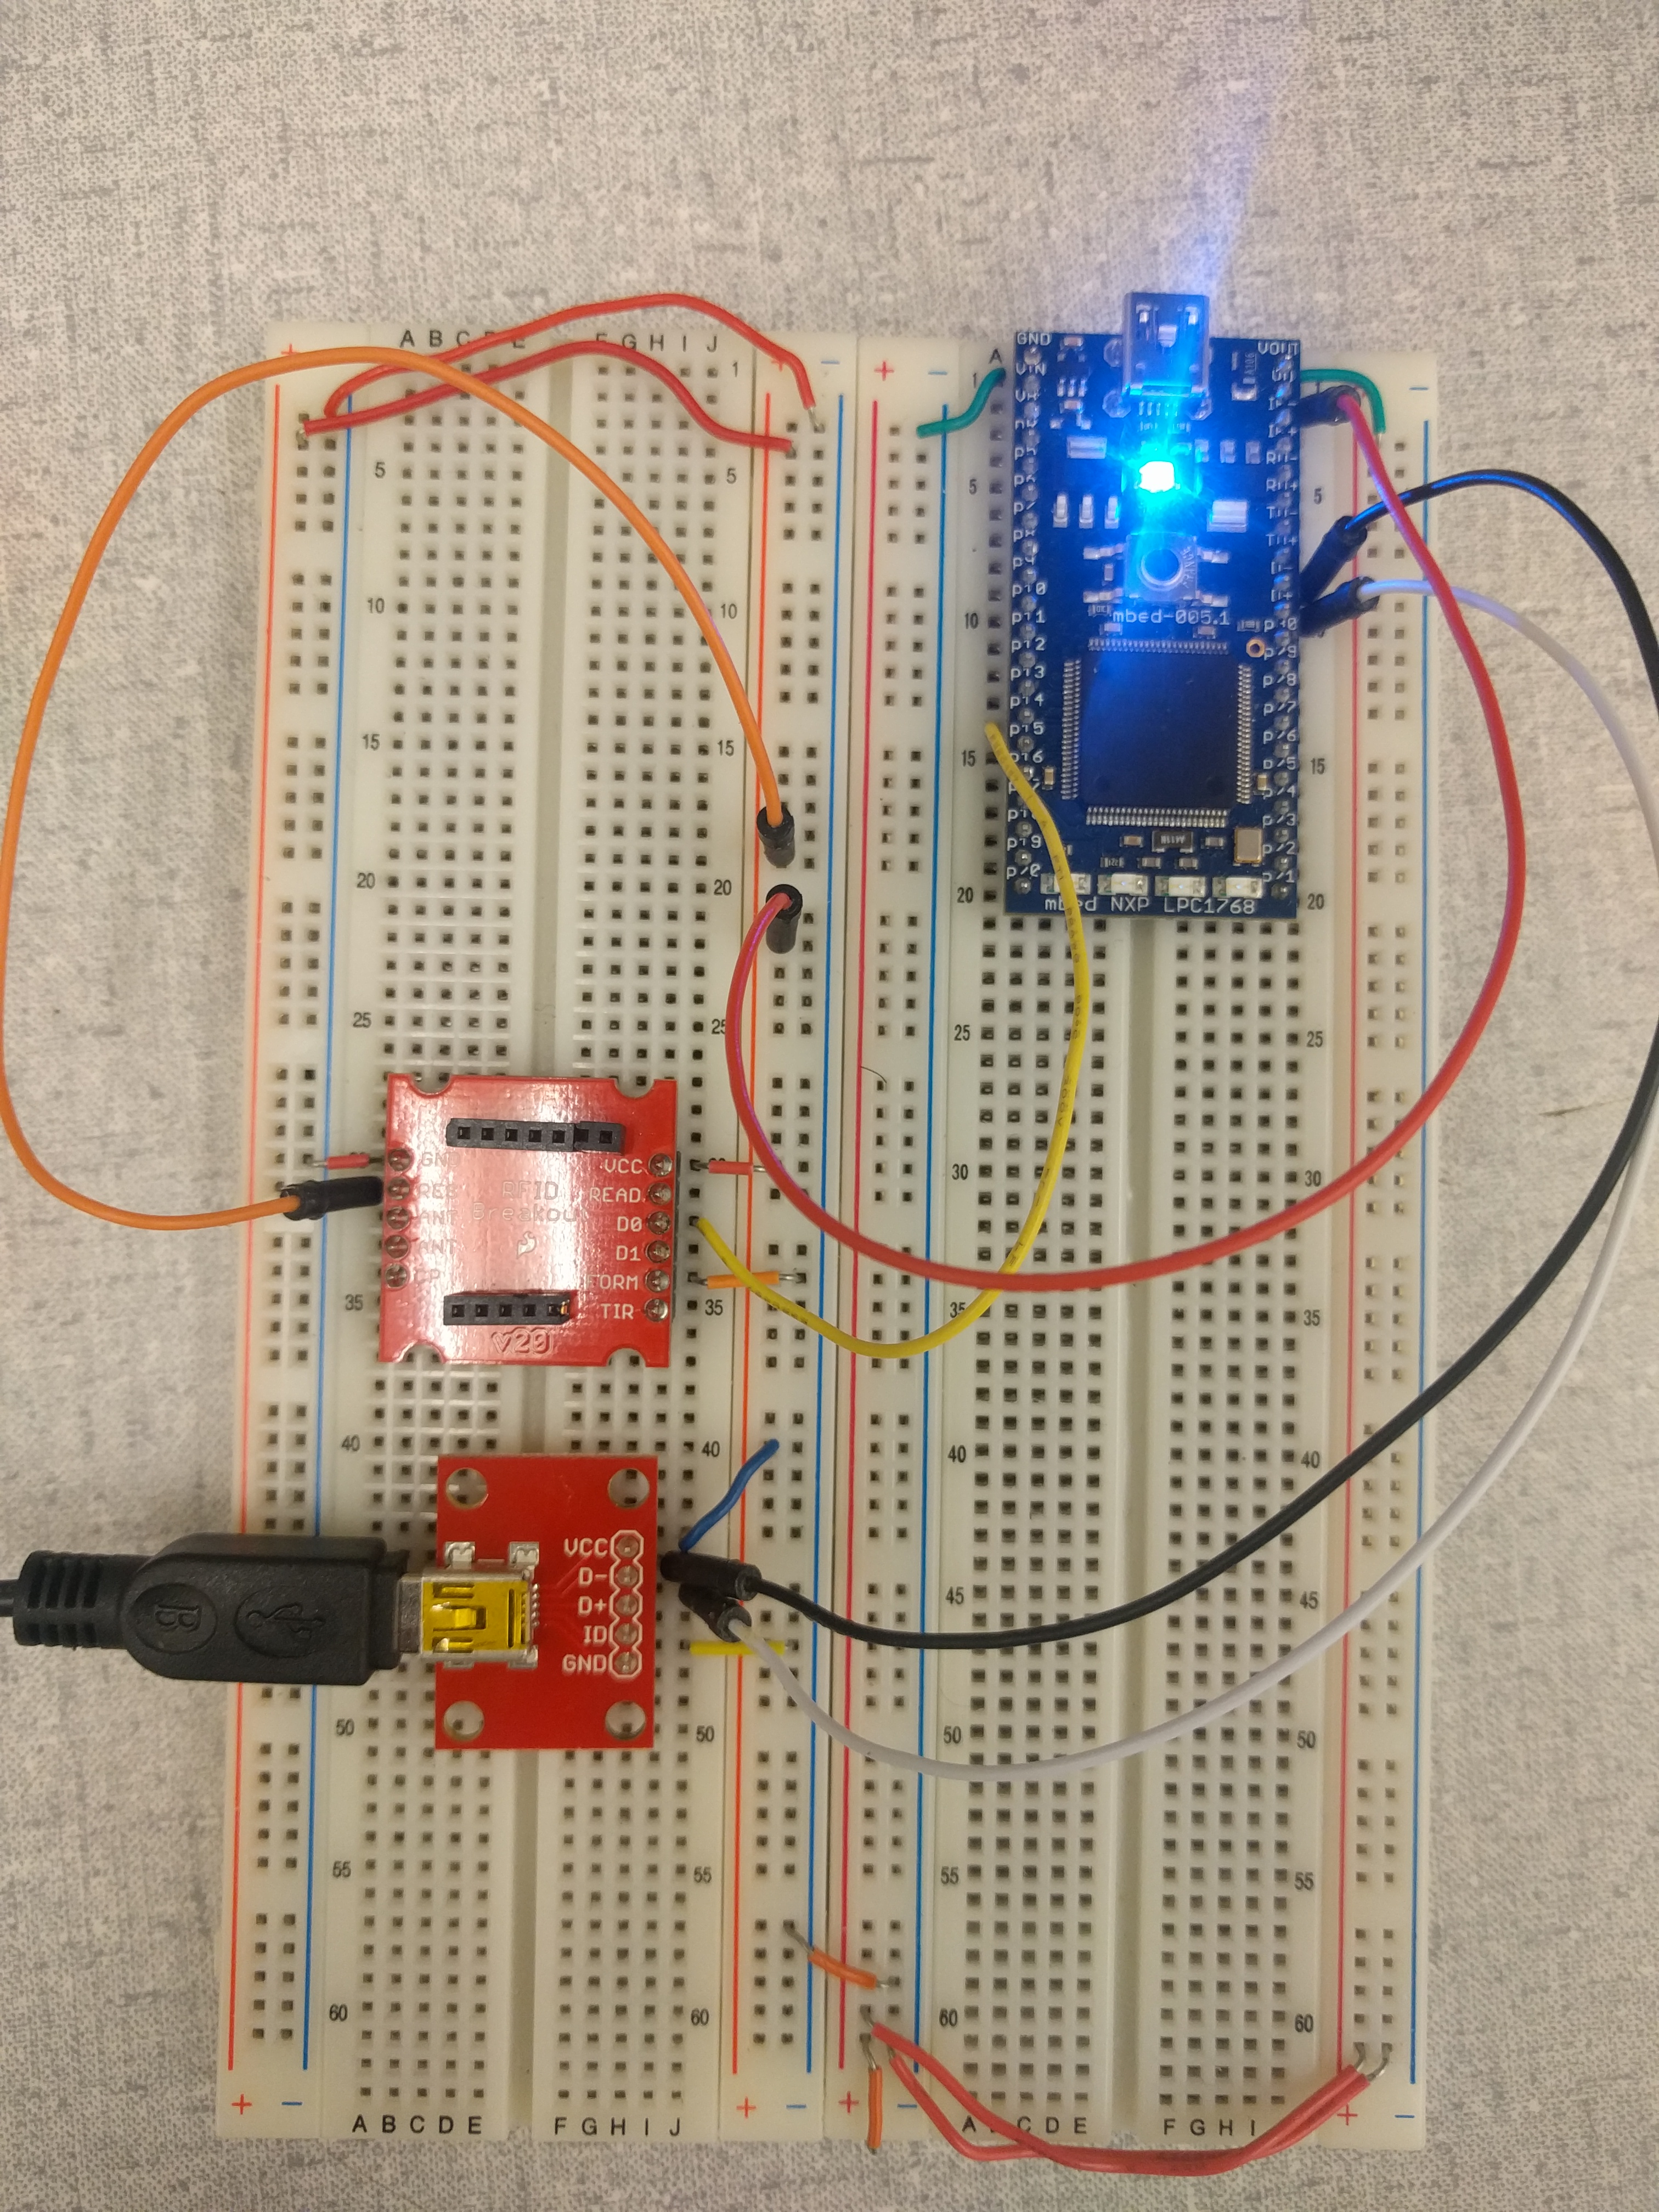
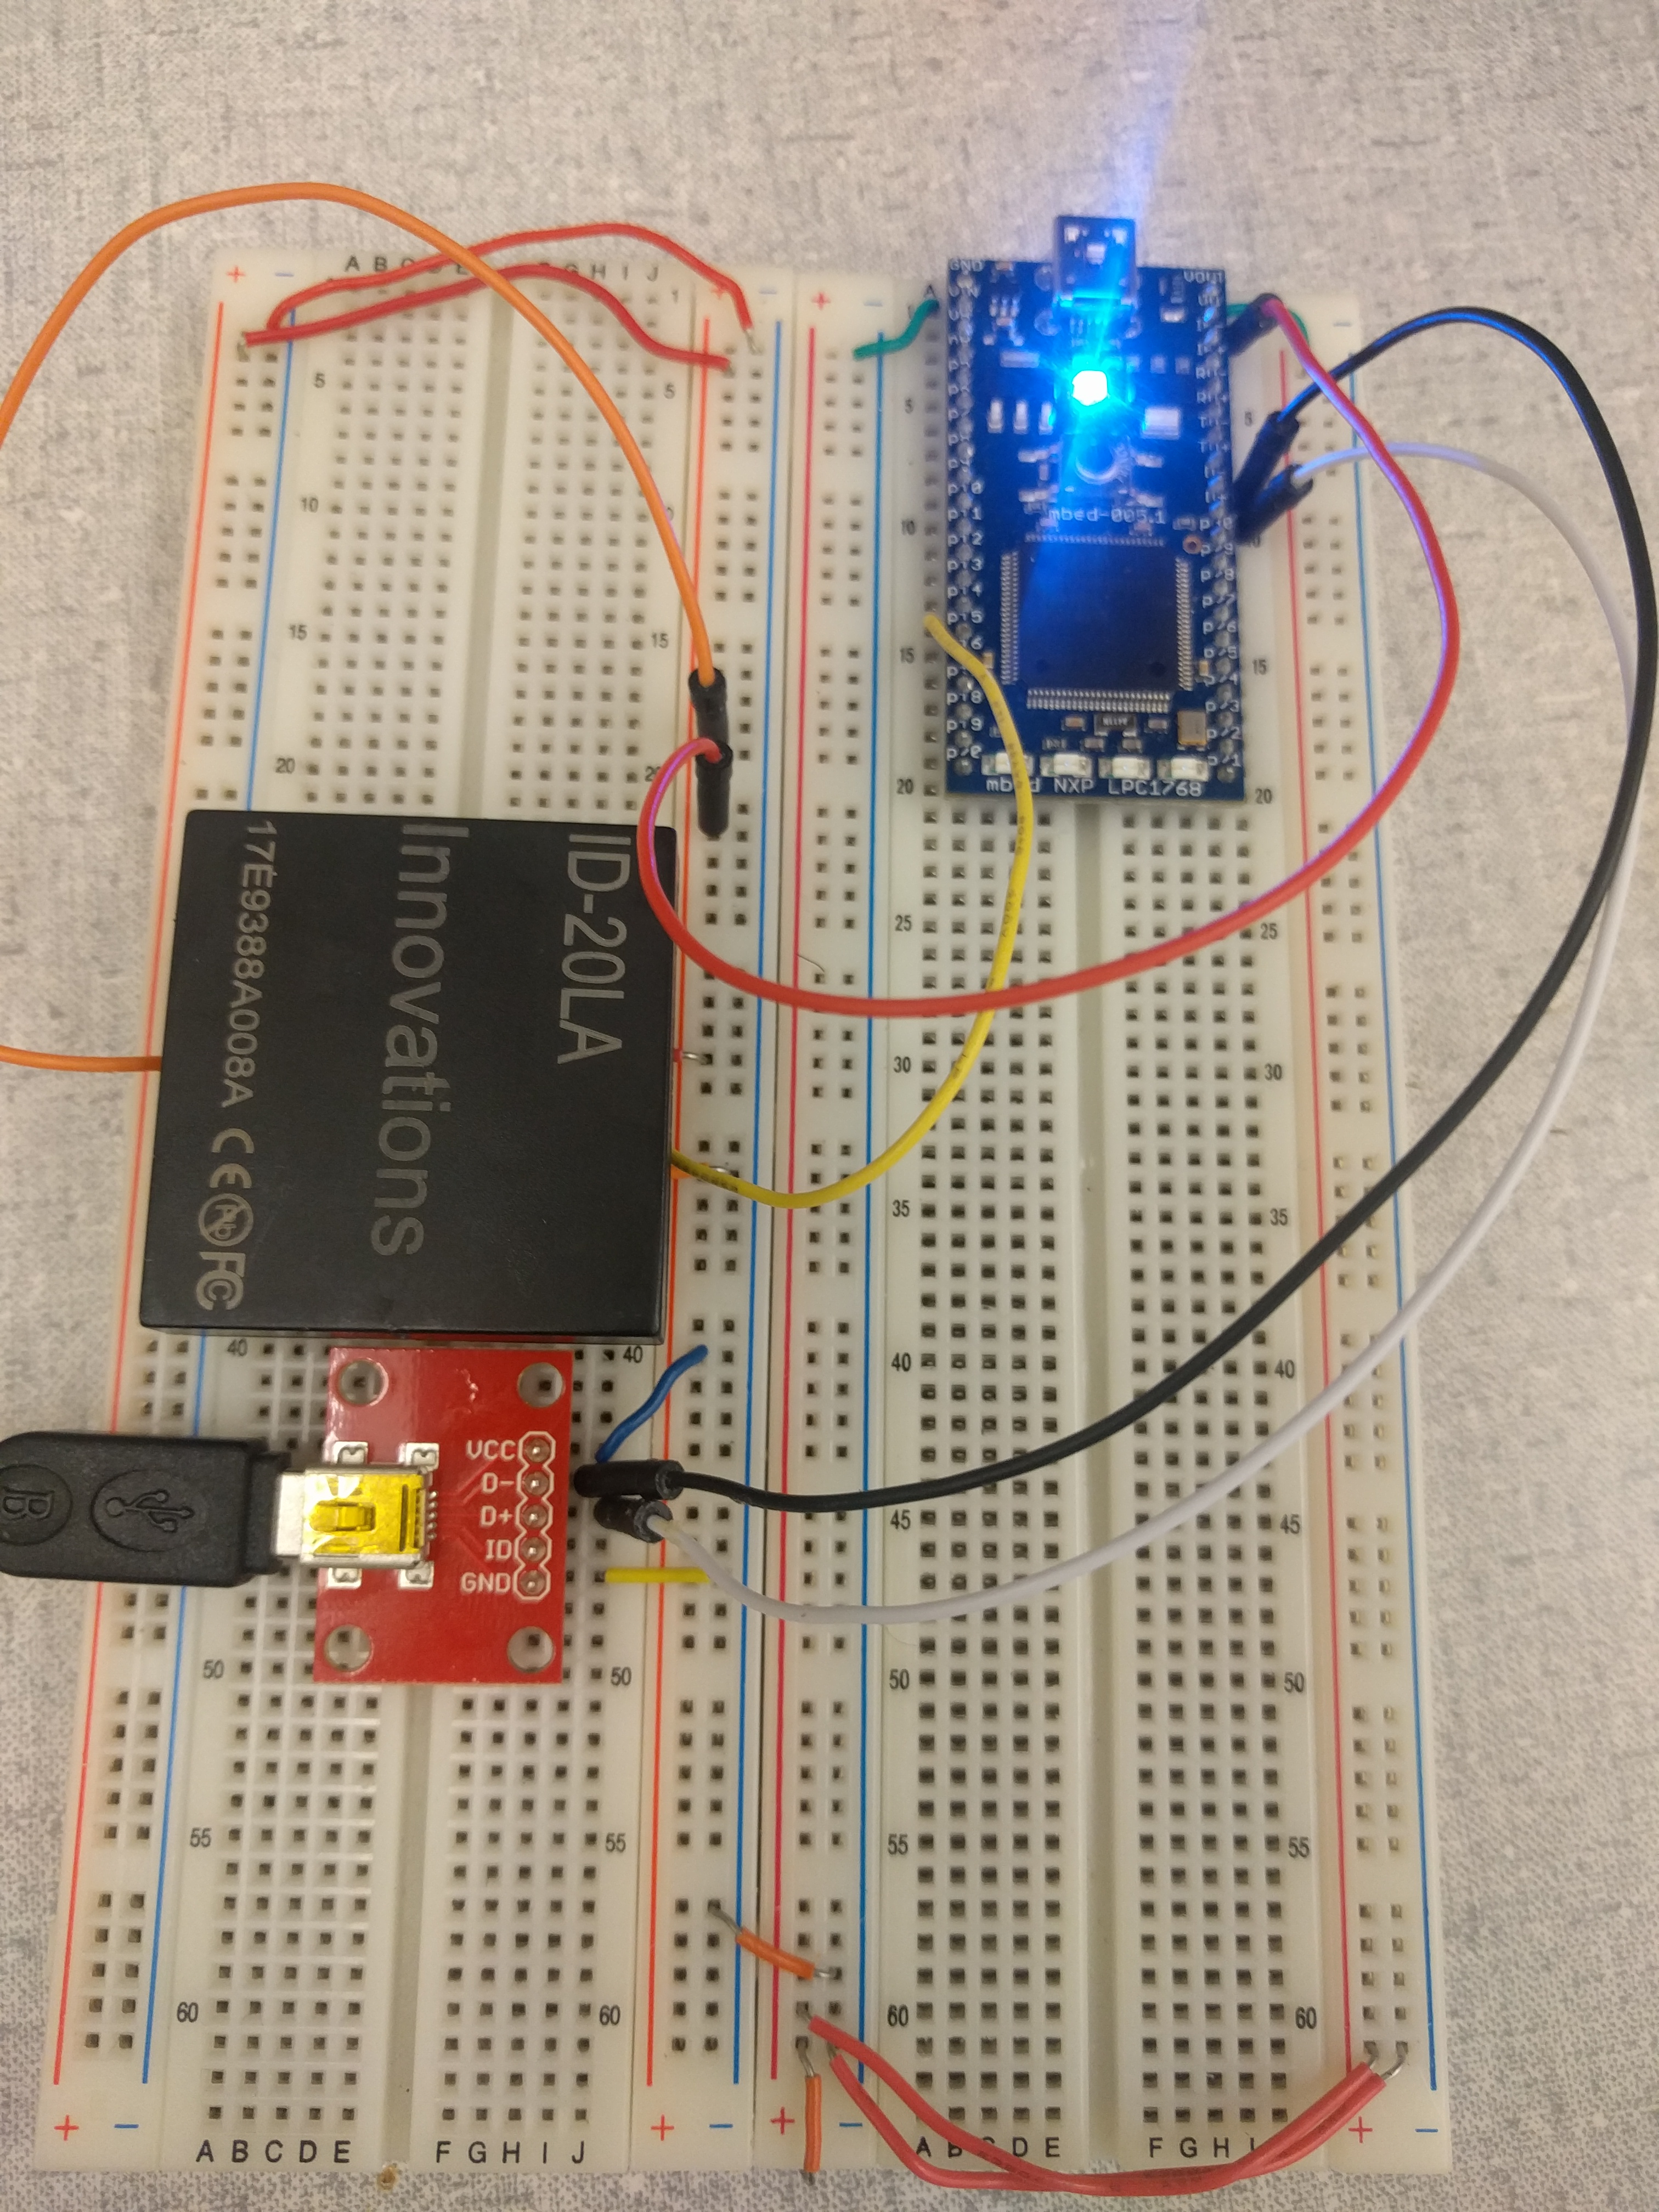
You'll need a breakout USB board to be wired to D+ (p30) and D- (p31) of your mbed. A mini USB-B breakout was used for this demo, but any type USB should suffice.
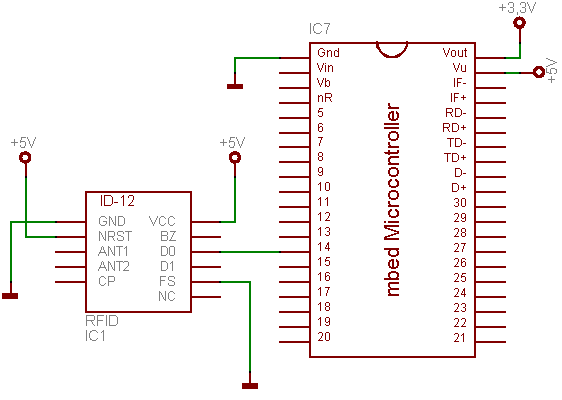
Wiring Schematic

Information
The wiring schematic for both the ID-12 and the ID-20LA are identical.
Breadboard Circuit


Video Demo
Please log in to post comments.
