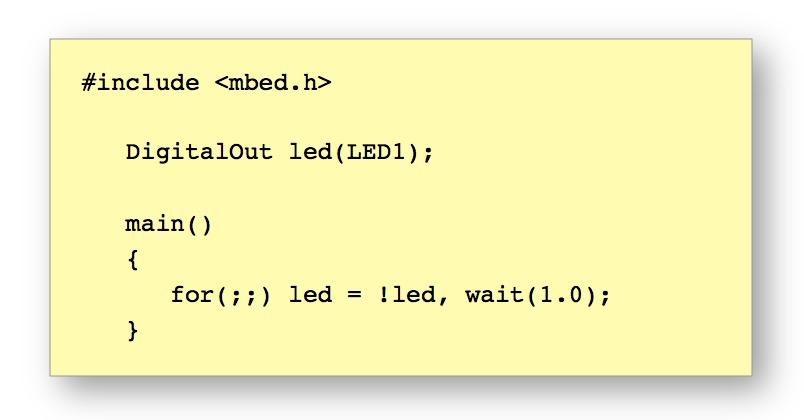
Tutorial 01: This is my favorite version of a "Hello IoT" program, a "Hello, World" program for embedded hardware which runs an on-board LED in continuous blinking mode. The program is tiny, simple and intuitively understandable. The big challenge is how you get such a program running on a embedded hardware in shortest time and with minimum efforts. With the help of this tutorial anyone who has an IoT developer kit hardware which is listed in the mbed.org library (https://developer.mbed.org/platforms/) should be able to get this "Hello IoT" program running on Windos, IOS or Linux, with a maximum time investment of one hour. I tested this program on several boards and it was well running on Nordic nRF51-DK, ST Microelectronics NUCLEO-F303K8, NUCLEO-F401RE and NUCLEO-L476RG.
Here is my favorite version of a "Hello, IoT" program, a tiny piece of code for an embedded hardware running an on-board LED in continuous blinking mode. Any user who has an IoT development board which is listed in the ARMmbed platform library (https://developer.mbed.org/platforms/) should be able to get this "Hello IoT" program running (within a maximum effort of one hour).
Since about two month I am searching through the internet how to get such a simple piece of code running on an IoT developer kit with minimum efforts. You can find thousands of aids and hints in the internet and be advised how to install your Integrated Development Environment (IDE) based on a proper tool chain, learn how you can install your link drivers and link loaders, setup your debugging tools, and how to use procedures which finally get you to a blinking LED.
Even if you want to climb up to a professional software developer level I'm seriously asking the question: is all this stuff really what you want to get in touch in the first round? Consider that you just bought a new smart phone. Would you really accept that you have to install and learn how to operate 20 apps in the right dependency before you can do what you expect from a phone: calling somebody up?
I was buying some NUCLEO boards from ST and a Nordic nRF51-DK including a nRF51-Dongle, and after having those boards on my desk I wanted to see one simple thing: a blinking LED on those boards driven by a self written code. Did I really want to do all these tasks listed above? No - it was never my intention to dig through all this ballast in order to see a blinking LED! At least not in the very beginning.
Why does nobody emphasize that the right way for beginners is to start with ARMmbed? OK, listen: If you want to get started with an IoT developer kit in the easiest and quickest way then do the following:
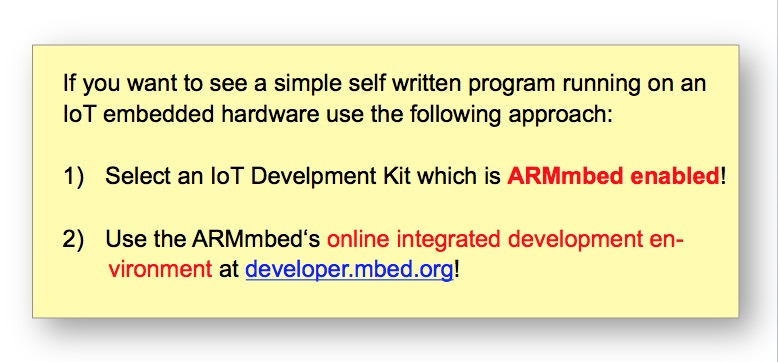
Did you catch it! Going this approach saves you plenty of head aches if your major goal is to get fast running with a simple piece of code. If this is what you are seeking too then follow the detailed procedure below.
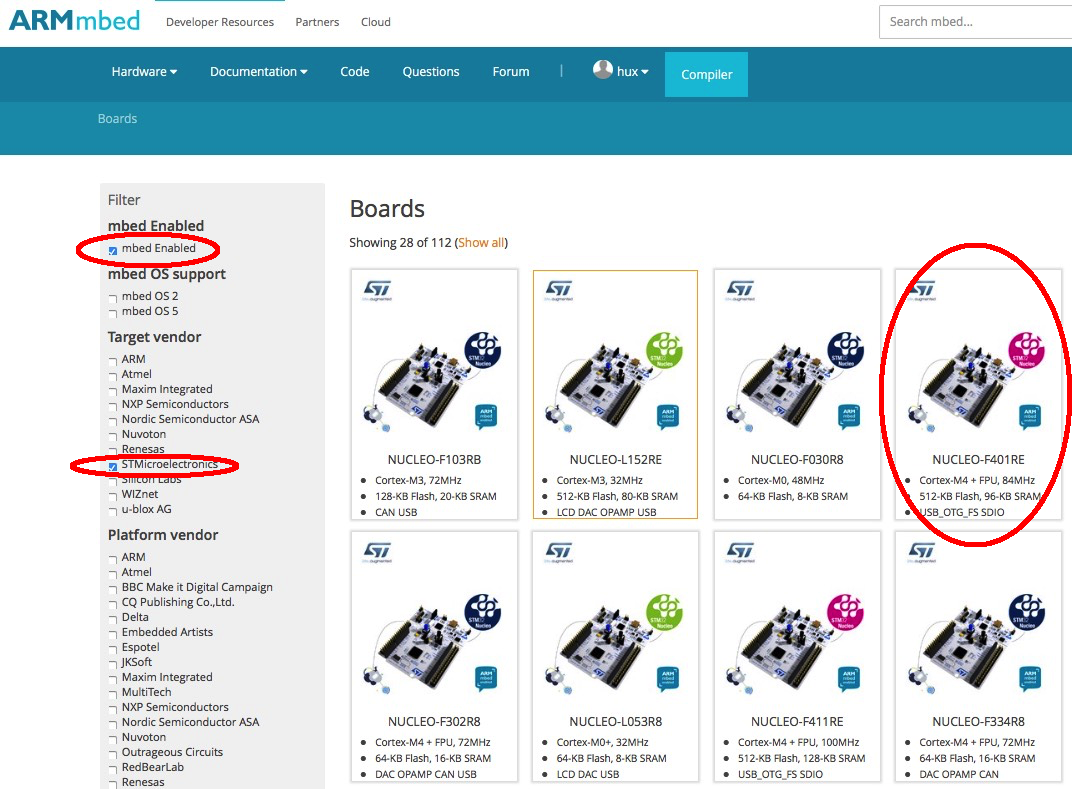
1) Buy a hardware which is "ARMmbed enabled". If you have no idea how you can find and select such hardware you can go to the platform page of developer.mbed.org (https://developer.mbed.org/platforms/), filter by activating the "mbed Enabled" checkbox at the top of the left side bar. Based on my experience the Nordic nRF51-DK as well as the STMicroelectronics NUCLEO boards (I use NUCLEO-F303K8, NUCLEO-F401RE and NUCLEO-L476RG) are quite a good choice, but I trust that all products on the ARMmbed platform page will do the job.
2) Sign up at mbed.org to get access to an ARMmbed account and sign-in at developer.mbed.org to your new created account.
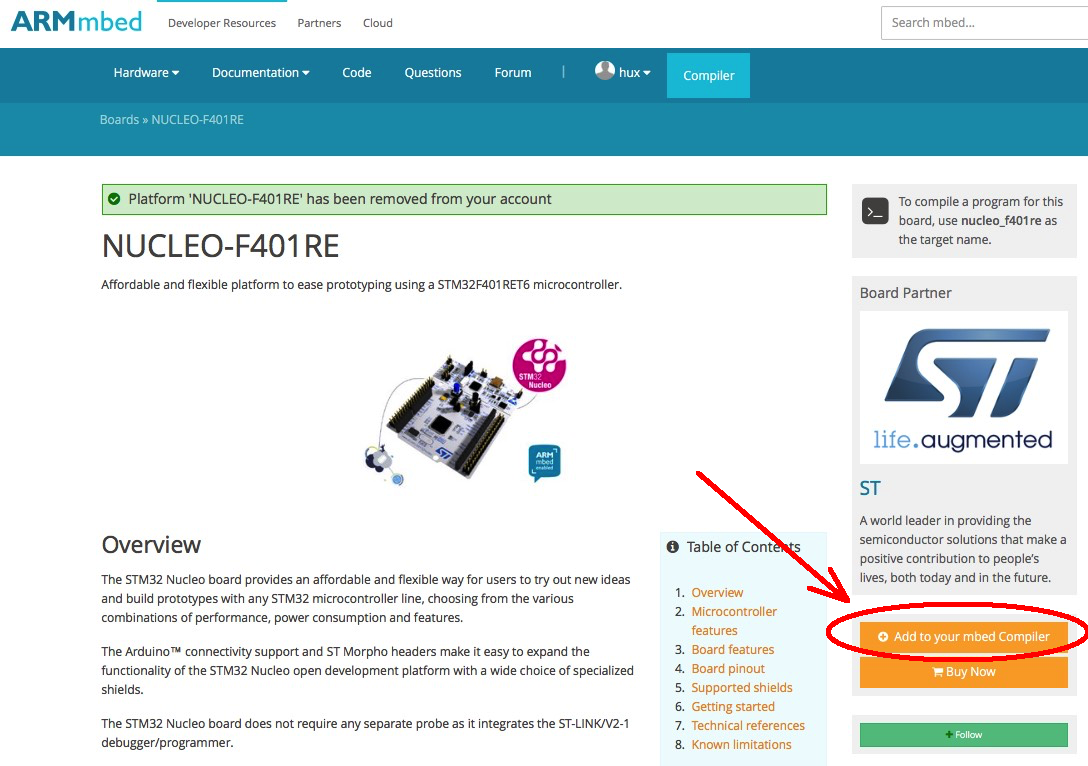
3) In the roll down menu at the top go to the left most roll down menu "Hardware", open the catalog of ARMmbed enabled hardware boards by choosing Hardware>Boards and select the board you have.
4) Add this board to your ARMmbed compiler environment by clicking the proper button on the right side bar.
5) Go now to the ARMmbed compiler environment by selecting "Compiler" at the top menu bar (alternatively you can directly activate the link: developer.mbed.org/compiler). On the top right corner you see the board name and icon of your board selection (clicking on this icon will allow you to add alternative boards and to switch between your selected boards).

6) Create a new project by clicking menu item New>New Program ... on the top left of the compiler environment menu bar. In the opening dialog leave the platform selection as it is (this should match your previous selection), select "Empty Program" for the template, and "Hello_IoT" for the program name. Close the dialog with OK.

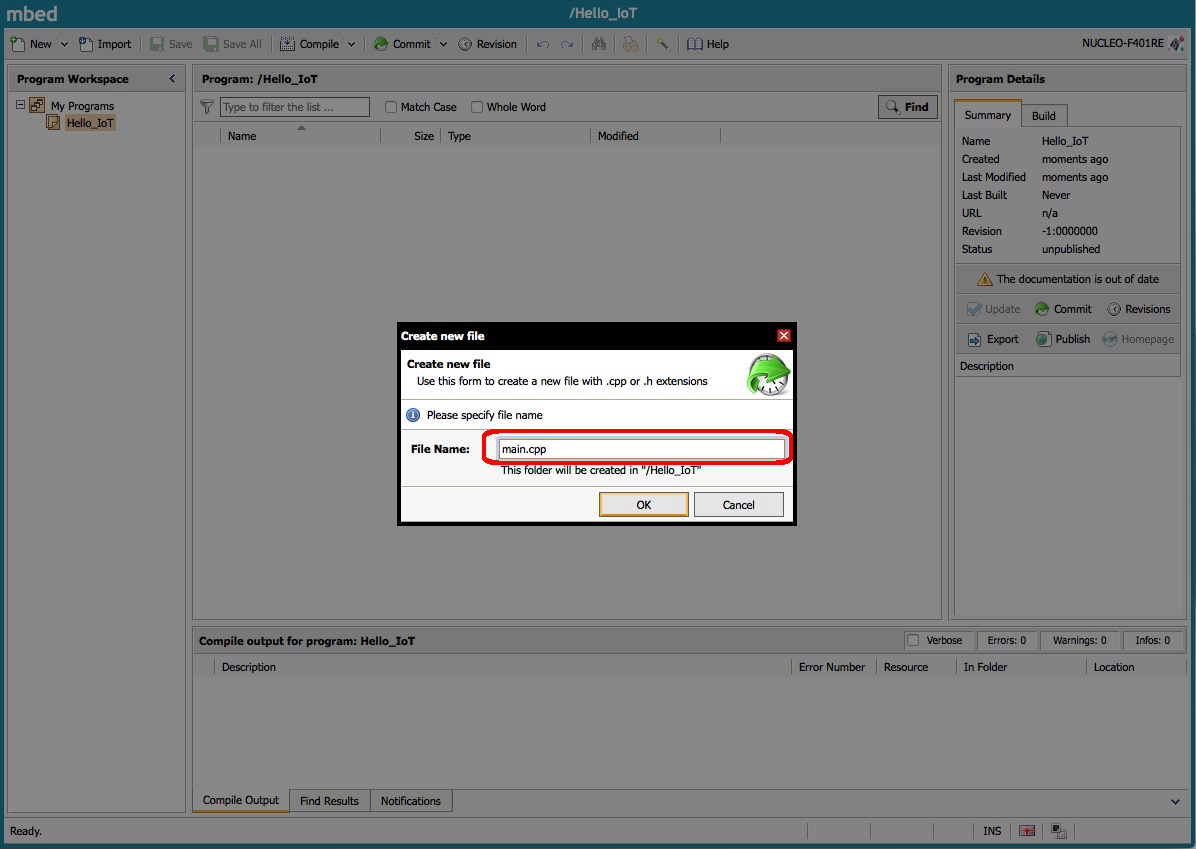
7) Create a new source file main.cpp by clicking on New>New File ..., enter "main.cpp" for the file name and close the dialog with OK. A new empty file main.cpp is going to be created.
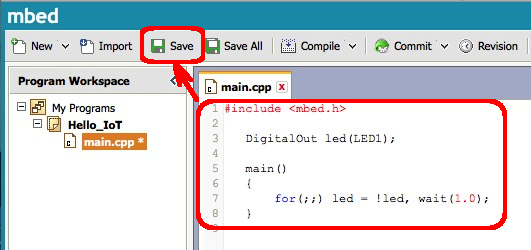
8) Enter the tiny piece of C++ code of the Hello_IoT program into main.cpp. Take special care about usage of semicolon (';') and comma (',') in order to avoid surprises. Cross check that everything has been entered correctly! Save the file by clicking on the "Save" button on the top.
9) We are going to compile the project. In the first step we will get an error because we do not have the proper libraries. See how we will fix this. Start clicking the "Compile" button at the top bar of the mbed window. After compiling look at the error message in the bottom window 'Cannot open source input file "mbed.h: ..."'.
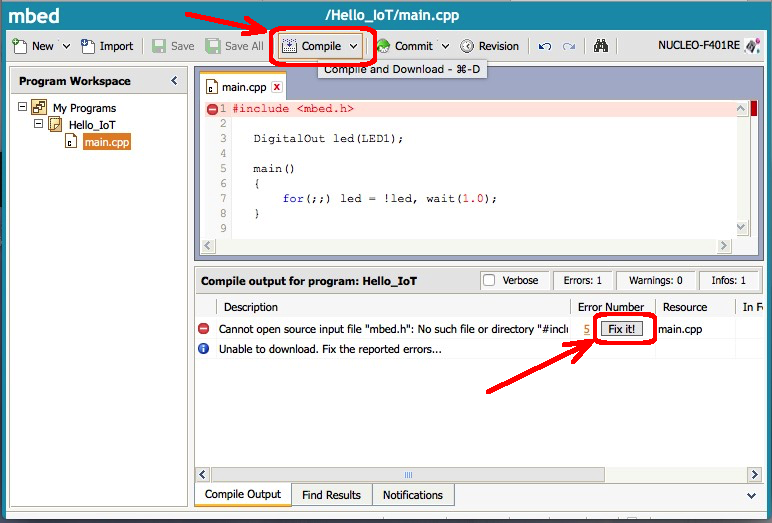
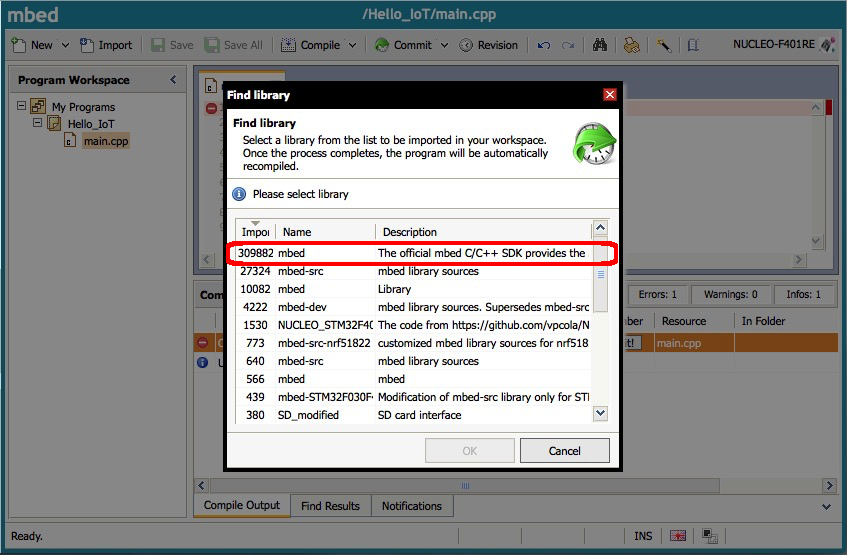
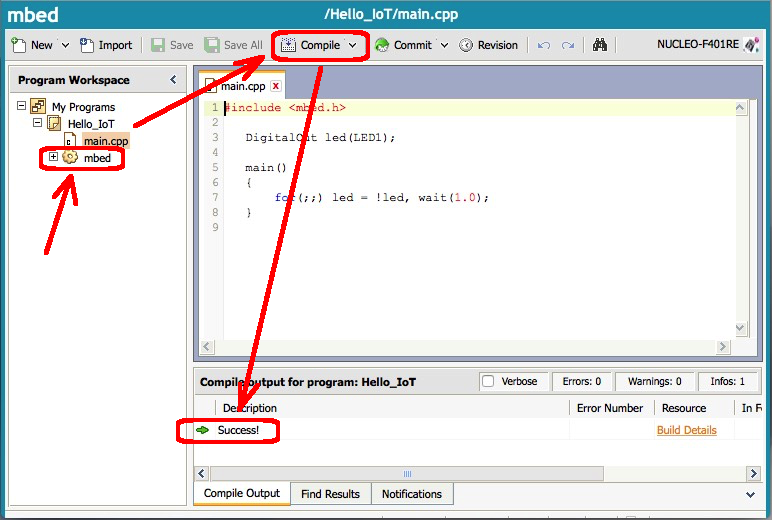
10) Click at the "Fix it!" button at the very right of this line. A dialog opens for selection of a proper library. Choose the first library item which is the official C/C++ mbed library and close the dialog with OK. After the compiler environment has completed the activity a new line with a gear wheel symbol labeled 'mbed' appears in your program tree. This indicates that the mbed library has been added sccessfully to your "Hello_IoT" program.
11) Compile the project again. This time the compiler should bring the simple message "Success" in the compile-output window at the bottom. This also means that a binary file with suffix ".bin" or ".hex" has been created in your Download folder.
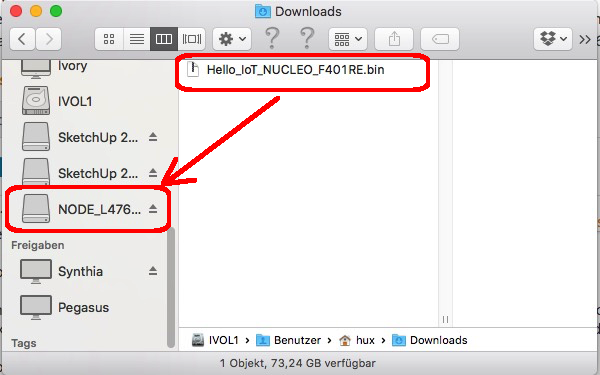
12) Now connect your IoT Developer Kit hardware with a USB cable with a USB port of your computer. A new external device denoting your IoT DK hardware will start to show up in your file system. Drag your binary file from the download folder to the Icon of your IoT DK device. This will download the binary code of the Hello_IoT program to your hardware and flash it. After completion of this task you should see a blinking LED. Congratulations - you mastered it!
