Important changes to repositories hosted on mbed.com
Mbed hosted mercurial repositories are deprecated and are due to be permanently deleted in July 2026.
To keep a copy of this software download the repository Zip archive or clone locally using Mercurial.
It is also possible to export all your personal repositories from the account settings page.
Homepage
mbedPi
This is an attempt to implement a limited number of mbed APIs for Raspberry Pi single-board computers. The project was inspired by and based on the arduPi library developed for the Arduino by Cooking Hacks .
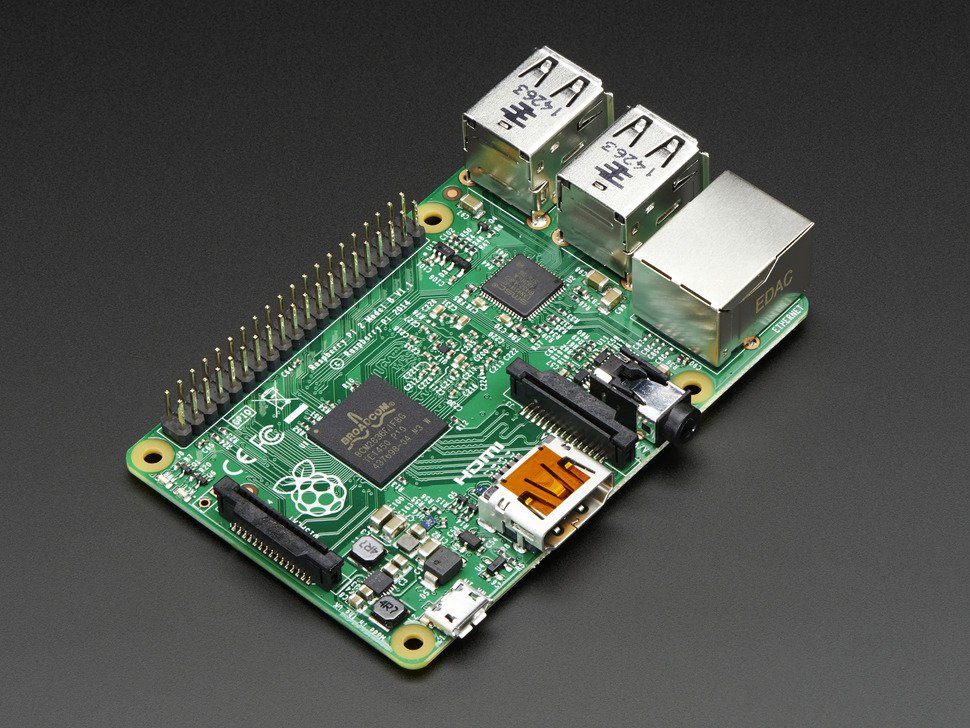
Specifications
- Chip: Broadcom BCM2836 SoC
- Core architecture: Quad-core ARM Cortex-A7
- CPU frequency: 900 MHz
- GPU: Dual Core VideoCore IV® Multimedia Co-Processor
- Memory: 1GB LPDDR2
- Operating System: Boots from Micro SD card, running a version of the Linux operating system
- Power: Micro USB socket 5V, 2A
Connectors
- Ethernet: 10/100 BaseT Ethernet socket
- Video Output: HDMI (rev 1.3 & 1.4)
- Audio Output: 3.5mm jack, HDMI
- USB: 4 x USB 2.0 Connector
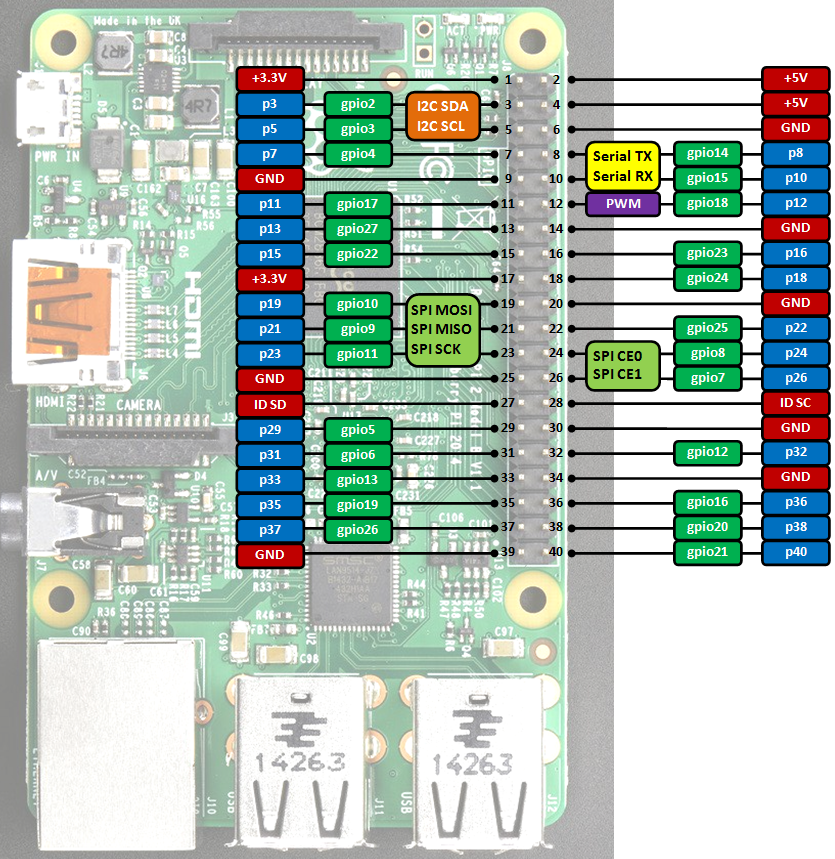
- GPIO Connector: 40-pin 2.54 mm (100 mil) expansion header: 2x20 strip providing 27 GPIO pins as well as +3.3 V, +5 V and GND supply lines
- Camera Connector: 15-pin MIPI Camera Serial Interface (CSI-2)
- JTAG: Not populated
- Display Connector: Display Serial Interface (DSI) 15 way flat flex cable connector with two data lanes and a clock lane
- Memory Card Slot: Micro SDIO
GPIO connector pinout
Information
Only the labels printed in blue/white or green/white (i.e. p3, gpio2 ...) must be used in your code. The other labels are given as information (alternate-functions, power pins, ...).
Building programs for the Raspberry Pi with mbedPi
I use Qt Creator for development, however you can use any other IDE available on the Raspberry Pi (e.g. Geany) if you like. For a quick try:
- Install Qt and the Qt Creator onto your Raspberry Pi. Then create a new "Blinky" Plain non-Qt C++ Project as follows:

- Change the main code as below:
main.cpp
#include "mbedPi.h"

int main()
{
    DigitalOut  myled(p7);

    while(1) {
        myled = 1; // LED is ON
        wait(0.2); // 200 ms
        myled = 0; // LED is OFF
        wait(1.0); // 1 sec
        printf("Blink\r\n");
    }
}
- Copy the mbedPi.zip file into your project's folder and unzip.
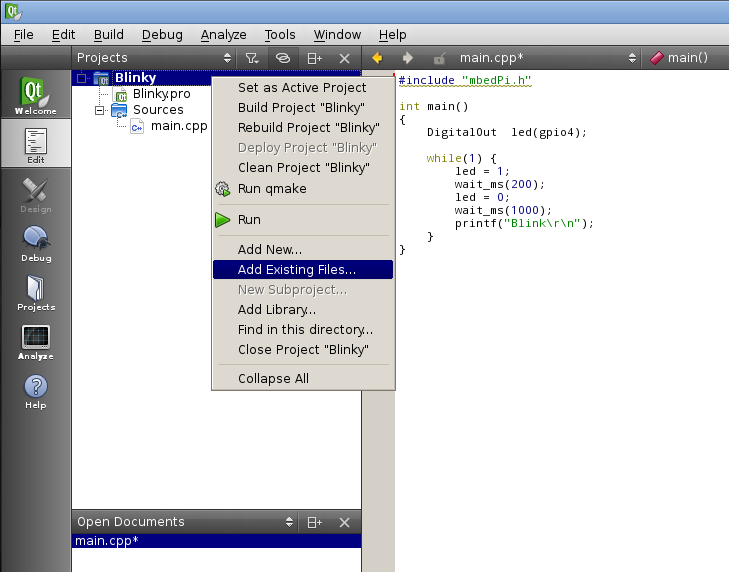
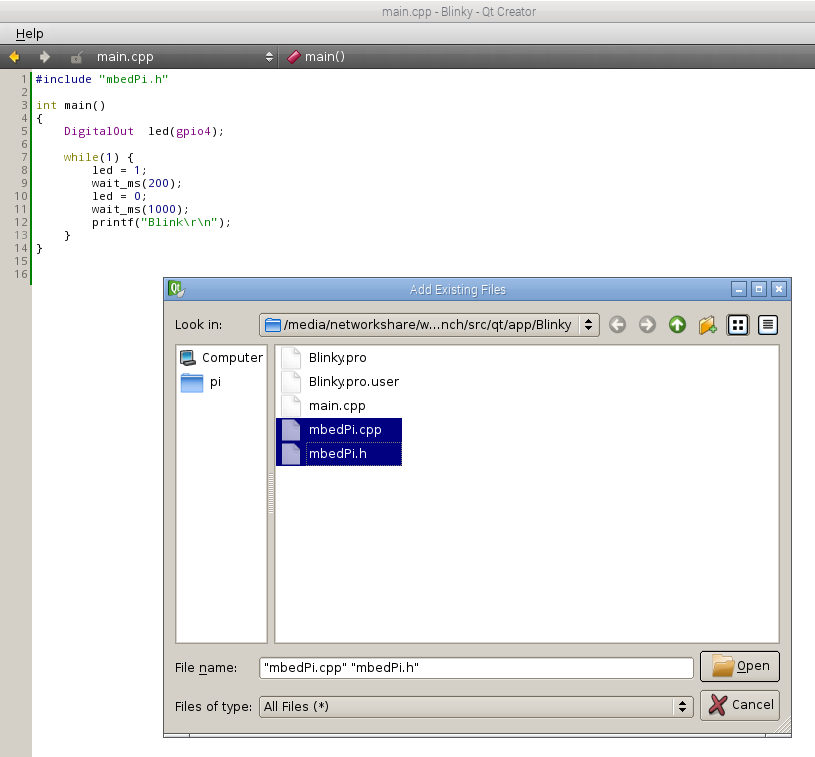
- Add the mbedPi.h and mbedPi.cpp files to your project by right clicking on the "Blinky" project and then clicking on the "Add Existing Files..." option in the local menu:
- Double click on Blinky.pro to open it for editing and add new libraries by inserting a new line as follows:
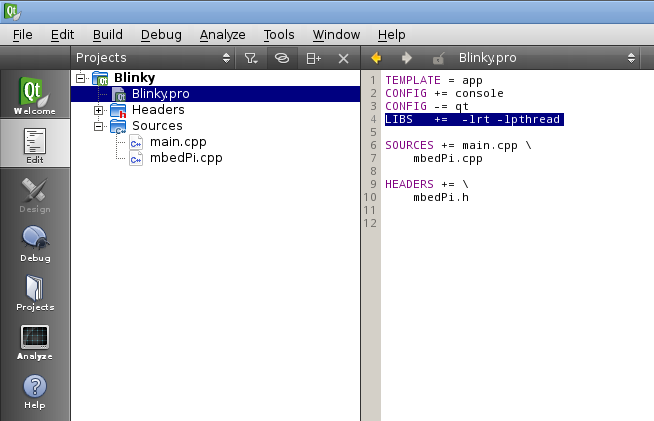
- Compile the project.
- Connect an LED through a 1k resistor to pin 7 and the ground on the Raspberry Pi GPIO connector.
- Run the binary as sudo (sudo ./Blinky) and you should see the LED blinking.

- Press Ctrl+c to stop running the application.
