Data acquisition and device control with Scilab.
Desciription
Scilab is a freeware alternative to MATLAB. For low-cost data acquisition and device control a nice Arduino toolbox is available.
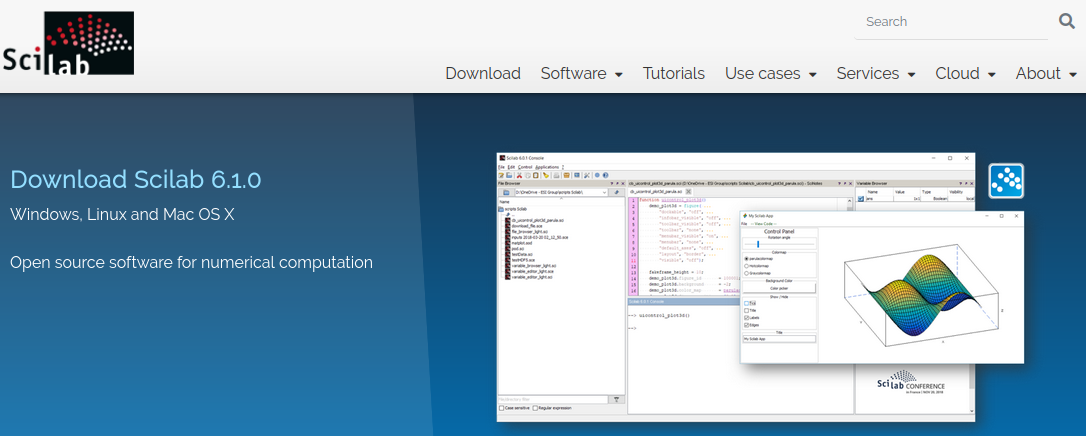
This site presents a Mbed port which allows to use Mbed boards (equipped with Arduino header) rather than Arduino to import real time data into Scilab and to control real equipment witch Scilab.

Installation
- Install Scilab to your PC, if not done yet.
- Launch Scilab and install the Arduino toolbox by executing the following command from the Scilab console:
--> atomsInstall("arduino")
Controlling Mbed's digital output from Scilab
- In Xcos open
examples/Arduino1.zcos
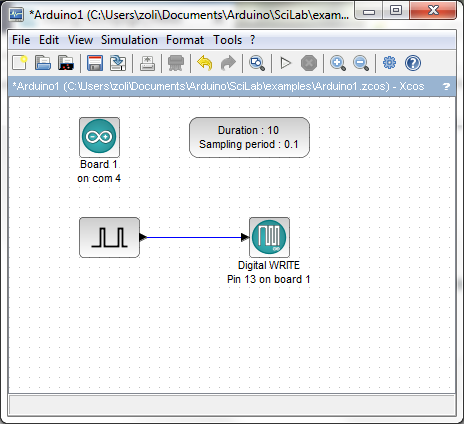
- Double click on the
Boardsetup block and replace the serial port number with mbed's actual virtual serial port number.
- Double click on the
Digital WRITEblock and set Digital Pin to 13 (D13 is connected to LED1).
- Start simulation and LED1 on the Mbed board should start blinking.
Reading and displaying Mbed's analog input
- In Xcos open
examples/Arduino2.zcos
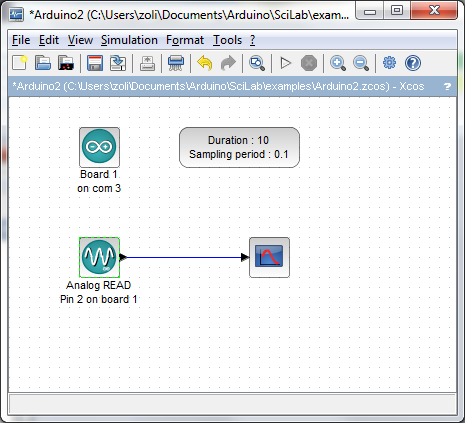
- Double click on the
Boardsetup block and replace the serial port number with mbed's actual virtual serial port number.
- Double click on the
Analog READblock and set Analog Pin to 2.
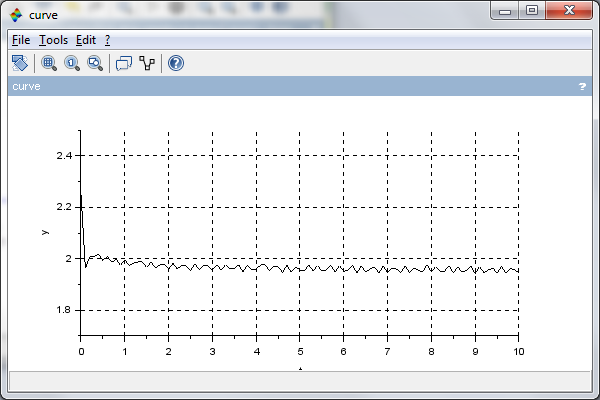
- Start simulation and a graph should appear showing the analog signal measured on Mbed's pin A2.
NOTE: Currently, there is bug in the toolbox ARDUINO_ANALOG_READ_sim function (I have reported to Scilab) so the analog readings are not correct.
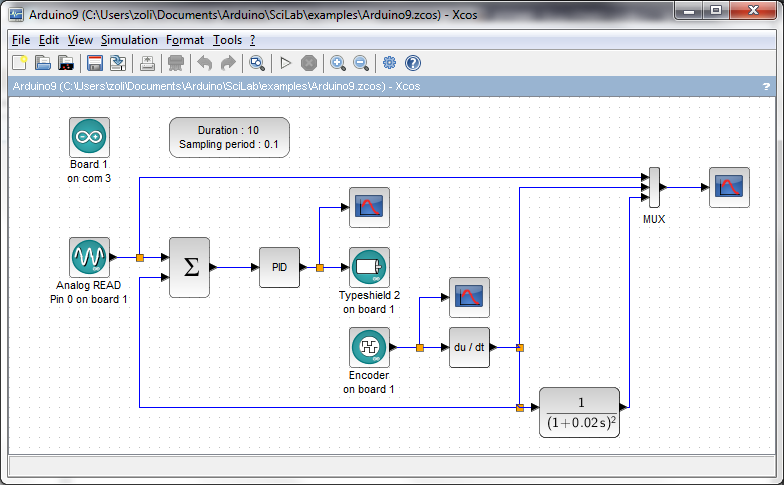
PID controller
- In Xcos open
examples/Arduino9.zcos
README.md
- Committer:
- hudakz
- Date:
- 2021-01-18
- Revision:
- 0:295b7e1c12f3
File content as of revision 0:295b7e1c12f3:

# Blinky Mbed OS example
The example project is part of the [Arm Mbed OS Official Examples](https://os.mbed.com/code/) and is the [getting started example for Mbed OS](https://os.mbed.com/docs/mbed-os/v5.14/quick-start/index.html). It contains an application that repeatedly blinks an LED on supported [Mbed boards](https://os.mbed.com/platforms/).
You can build the project with all supported [Mbed OS build tools](https://os.mbed.com/docs/mbed-os/latest/tools/index.html). However, this example project specifically refers to the command-line interface tool [Arm Mbed CLI](https://github.com/ARMmbed/mbed-cli#installing-mbed-cli).
(Note: To see a rendered example you can import into the Arm Online Compiler, please see our [import quick start](https://os.mbed.com/docs/mbed-os/latest/quick-start/online-with-the-online-compiler.html#importing-the-code).)
1. [Install Mbed CLI](https://os.mbed.com/docs/mbed-os/latest/quick-start/offline-with-mbed-cli.html).
1. Clone this repository on your system, and change the current directory to where the project was cloned:
```bash
$ git clone git@github.com:armmbed/mbed-os-example-blinky && cd mbed-os-example-blinky
```
Alternatively, you can download the example project with Arm Mbed CLI using the `import` subcommand:
```bash
$ mbed import mbed-os-example-blinky && cd mbed-os-example-blinky
```
## Application functionality
The `main()` function is the single thread in the application. It toggles the state of a digital output connected to an LED on the board.
## Building and running
1. Connect a USB cable between the USB port on the board and the host computer.
2. <a name="build_cmd"></a> Run the following command to build the example project and program the microcontroller flash memory:
```bash
$ mbed compile -m <TARGET> -t <TOOLCHAIN> --flash
```
The binary is located at `./BUILD/<TARGET>/<TOOLCHAIN>/mbed-os-example-blinky.bin`.
Alternatively, you can manually copy the binary to the board, which you mount on the host computer over USB.
Depending on the target, you can build the example project with the `GCC_ARM`, `ARM` or `IAR` toolchain. After installing Arm Mbed CLI, run the command below to determine which toolchain supports your target:
```bash
$ mbed compile -S
```
## Expected output
The LED on your target turns on and off every 500 milliseconds.
## Troubleshooting
If you have problems, you can review the [documentation](https://os.mbed.com/docs/latest/tutorials/debugging.html) for suggestions on what could be wrong and how to fix it.
## Related Links
* [Mbed OS Stats API](https://os.mbed.com/docs/latest/apis/mbed-statistics.html).
* [Mbed OS Configuration](https://os.mbed.com/docs/latest/reference/configuration.html).
* [Mbed OS Serial Communication](https://os.mbed.com/docs/latest/tutorials/serial-communication.html).
* [Mbed OS bare metal](https://os.mbed.com/docs/mbed-os/latest/reference/mbed-os-bare-metal.html).
* [Mbed boards](https://os.mbed.com/platforms/).
### License and contributions
The software is provided under Apache-2.0 license. Contributions to this project are accepted under the same license. Please see contributing.md for more info.
This project contains code from other projects. The original license text is included in those source files. They must comply with our license guide.