i hate drilling prototype PCB's by hand. Maybe a NXP powered mbed can do this job for me :-)
This project is about a low cost CNC machine to use for drilling PCB's, completely controlled with a NXP powered LPC1768 mbed micro controller module.
I will try to keep this project very flexible in a way that an EABaseboard could be used or just a mbed mounted at a cheap breadboard.
There are already quite a lot of functions implemented what a EABaseboard can offer for this project. Also, some nice external add-on functions will be created, too.
The nice thing about the EABaseboard is that there are two 2 x 25 pin expansion connector's available for further plug and play ideas. For example, this could be an interface for a RFID tag reader to select and start drill jobs. This is crazy but also big fun :-)
What components are needed for this project?
mbed LPC1768 microcontroller module
CNC machine
3 axis driver card
Embedded Artist LPCXpresso BaseBoard Rev B
36 VDC / 3 A Power Supply
optional a RFID ID-12 reader
my software (not published, yet)
easy to build interface cable
What this machine already can do?
drilling PCB's (use excellon files, generated by a PCB CAD System like Eagle or other's)
make use of the mbed file system to hold the excellon file
make use of the mbed file system for a machine config file
receive a excellon drill file via the mbed's USB interface
switch spindle motor on/off via excellon commands
make use of the Bresenham algorithm (for linear interpolation)
x-y-z limit switches for homing the machine
tool length measurement and compensation
manual movement control
use EABaseBoards Joystick and SW4 for manual x-y-z movement
use EABaseBoards Rotary switch for manual fine movement (xyz axis)
manual movement control via USB Terminal commands
use EABaseBoards OLED (via SPI)
use EABaseBoards I2C LED Port Expander for indicating status messages and system errors
support of a RFID reader added to select a job and to start the machine
What this machine maybe can do in the future?
G-code interpreting
rapid board prototyping (milling PCB's)
dispensing machine for SMD
pick and place machine for SMD
make use of EABaseBoards XBee (remote control via a wireless XBee pendant)
??????
About this project page
This is just a notebook page and the following information is written down very "fast and dirty"!!! All ideas and all functions are tested on a running CNC machine and not on just a "naked" mbed. But, there can be still software bugs, hardware errors, produced and created with my bad old mind or whatever problems i did not recognize yet. Please keep in mind that playing around with a CNC machine is dangerous. It is not a toy and you always need to know what you are doing!
mbed needs to know the actual position of all axis.
Therefore a reference movement has to be done before starting a drill-job.
Procedure searching for a reference switch
axis starts moving to the reference switch direction with start/stop speed
switch is changing the level and motor stops
axis moves with low speed in opposite direction till switch changes level again
motor stops and reference point is set to zero
The Excellon file format
I am going to use the excellon file format for this project. Here are some basic notes about:
So, the big question is: How to handle these excellon files?
Well, i think i like to have two operating modes available.
handle the file with a drill change function
drilling all holes with a fixed drill tool in one go
The second procedure should be easy to create. The mbed ignores all special drill change commands in the file and starts the drill motor when a
M48 command reads in. If the mbed reads a M30 command the drill motor stops and x/y/z axis move to their home positions. PCB drilling is ready.
hm...like this?
Procedure 1 is missing an important function. Drills can have a different length. If we go on with a shorter drill the PCB
maybe does not get drilled probably, if we keep on going with a longer drill some bad things can happen to the drill tool or to the PCB ...
We need a position at the machine table where the length of a new drill tool can be measured and z-movement can get re-calculated.
This work could do a simple micro switch, mounted at the table, and the CNC knows the position of this switch. The machine moves
to this switch position, lowers the z-axis as long as the switch does not change it's signal level and bingo ....... we can calculate an offset.
What,s next? Ok, i go for the easy part first. Drilling a PCB using procedure 2. But first i need to tell the Eagle CAD system a "story" about
my used hardware (the CNC machine). There is a eagle config file called "eagle.def". I have to change some parameters in the eagle
excellon driver about the resolution of the steppers. By default this is set to 10000 steps/inch. My machine needs (533.3333 x 25,4) steps/inch.
That gives me a value of 13547 steps/inch for ResX and ResY.
What else is needed? Of course, a CAD drawing :-)
Now, i need CAM data,s. Let's start the CAM processor and save the drill datas (in a file "test.txt") direct to the mbed file system.
Time to test procedure 2 at the running machine. I use pc.printf to get some messages out via mbed's serial interface. This is very handy for debug things. The mbed opens the file "test.txt", this is the drill file, and processes it. Mbed ignores all tooling stuff, get a start with "M48", reads x and y values, goto that point, gets the hole drilled, looks for new datas and if there is a "M30", mbed stops drilling and the machine's axis move to their home positions.
Oh, i think, this is looking not bad :-)
some code.....
Modified Bresenham line algorithm. Works with my CNC but acceleration/deceleration is not supported, yet.
So, the machine can already drill a PCB, generated by a CAM processor (excellon file).
Having a look what space is wasted in the mbed's LPC1768 flash so far :
great :-)
The mbed file system holds, besides the mbed.bin file and the excellon drill file, a machine configuration file.
With this file i can read value's for some important machine parameter (speeds, steps, name of the job-file etc).
ok, let me have a look if all implemented functions are working at the machine. Get the drill job started.
Have created a fast and dirty function that i can "adjust the machine" to a bare PCB using a serial terminal.
All axis can now be moved via serial key commands to the place i like to start a drill job. The zero-point of a PCB.
update: 21.11.2010
Having more and more fun with my project. Got a nice Embedded Artists Baseboard Rev.B at Elektor Live 2010 in Eindhoven. This Baseboard can be used for the LPCXpresso or for my mbed. It,s all just plug and play being ready to go for some electronic playings within minutes. I could use this board for my PCB drilling project because all i need is available at this nice Baseboard. A rotary-switch, a joystick, a OLED, more flash and also a connector for a XBee module. So, i will make my software ready to go for this board, too, using a Compiler-switch (#ifdef BASEBOARD).
update: 19.12.2010
Rotory switch function implemented. Now its possible applying "fine-moves" to the selected axis using the baseboard's rotory switch. With the joystick i can move X and Y axis by 1000 steps per klick. If i hold down the baseboards switch (SW_4) Z-movement is enabled and the Z-axis can be moved with the joysticks y+/y- switches. With the rotary switch the stepper makes 10 steps per change and its function always stays enabled to the last selected axis. (19.12.2010: Connections for RFID reader and I2C added).
running out of pins ???. Oh, i have 3 mbed-pins left :-)
Maybe i have 4 pins left, do i need that OLED_POWER signal at all? Difficult question at this time because i had to many beers :-)
update: 28.11.2010
Function overview so far:
first real pcb drilling job done :-) What a mess, i need a vacuum cleaner!!!
just for testing (placed a mbed and two DIL's):
mbed and some DIL socket's. A perfect fit. Drill diameter is 1 mm, z-move is 4 mm.
update: 1.12.2010
Jumpersetting of the Embedded Artist Base Board:
update: 14.12.2010
PCA9532 I2C 16-bit Port Expander
There is a nice I2C port expander at the EAbaseboard which controls 16 LED's. I use these LED's for:
how many files are found in the mbed file system (number of LED's = number of files)
LED4 blinks with 2 Hz if no config file is found
LED4 blinks with 1 Hz if there is a syntax error found in this file
LED5 blinks with 2 Hz if no excellon job file is found
LED5 blinks with 1 Hz if there is a syntax error found in this file
LED6 blinks with 2 Hz if there is a unknown command received via the serial interface
LED7 blinks with 1 Hz if the mbed filesystem is open
update: 19.12.2010
some more fun added. RFID reader to get a job selected and finally start this machine with the RFID selected drill job.
update: 20.12.2010
Schematic diagram and a possible pcb layout of the interface
Interface Cable
simple connection from the EABaseboard to the stepper driver
What should come up next to work on?
reference a PCB using a laser?
remote control using the XBee module of the embedded artist board?
Bresenham algorithm with acceleration/deceleration function
Very nice work. That is a fairly expensive CNC (for my budget) but I'm sure your code is easily useable for just about any low cost CNC. This may be a silly question, but do you know where to get the PCB material before it is milled? I've been interested in getting a CNC for doing PCBs but I'm not sure where you get the board material.
i think the key-thing is that you get it managed picking a component at the centre. Therefore the component supporter must work very accurate. The other stuff like rotating and placing is just handling CAM datas.
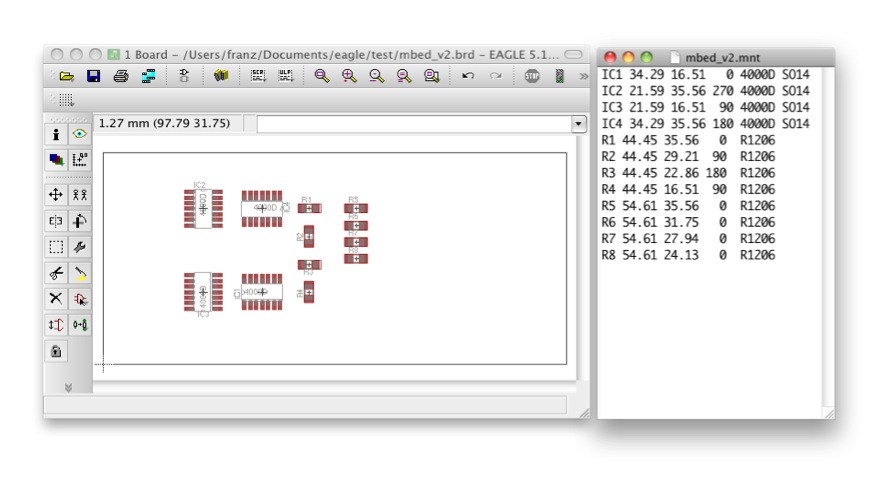
this is interesting. Generated pick and place datas with mountsmd.ulp. Get nice datas for the partname to pick and x/y datas where to place it. Also rotation datas are there (for the Steppermotor Nr. 4).
for the pick up head a vacuum pen could be used. A stepper motor could rotate the vacuum pen (0, 90, 180, 270) and a function is needed for switching the vacuum on/off. At this moment the machine runs at about 20 mm/sec. This is not very fast but ok for a hobby project :-) Maybe i can optimize it to 30 mm/sec.
"this is a vacuum pick-and-place head design for automated electronic assembly. It features a stepper-driven rotary head with Luer-Lock port for interchangeable needles, and a feature for attachment of an "eyeball" style Webcam for optical placement. Vacuum is provided to the head via flex (fishpump) tubing."
Excellent Job!!! I my self have a CNC that uses a dedicated PC... can't run anything else when milling because of the resources it requires to toggle the parallel port. Having a standalone CNC controller is awesome. Maybe you wrote it, but how many steps/s can you drive?
That is good... doing my math 2500 steps/s with a 10 TPI screw is about 1.25"/s (3.175cm/s)... 75IPM or 1.9m/min at max speed. Am I write by saying that the interpolation of points is the bottleneck? In my case, the driver I use (G540) needs 10 usteps/step... do you think the steps/s can be increased to 20000 only to comply with this microstepping requirement?
PCB drilling machine for the excellon file format. The mbed holds the excellon file in it's mbed file system and applies all required signals to a 3-axis stepper driver.
This site uses cookies to store information on your computer.
By continuing to use our site, you consent to our cookies.
If you are not happy with the use of these cookies, please review our
Cookie Policy
to learn how they can be disabled.
By disabling cookies, some features of the site will not work.
Access Warning
You do not have the correct permissions to perform this operation.
 Franz Achatz.
25
replies
Cad,
CNC,
drilling,
Eagle,
motor,
PCB,
Stepper
Franz Achatz.
25
replies
Cad,
CNC,
drilling,
Eagle,
motor,
PCB,
Stepper


Looks really good. Where did you get the CNC platform from?