A simple program that uses the UARTService to transfer string data over GATT. Can be used with the nRF Toolbox app for rapid prototyping.
Dependencies: BLE_API mbed nRF51822
ABOUT
This program is intended to make it easy to prototype a sensor that sends data to a smart device using Bluetooth Low Energy (AKA Bluetooth Smart). Nordic's UARTService is used because it allows string data to be exchanged over GATT using Nordic's nRF Toolbox app (available for download in both Apple and Google app stores).
HARDWARE
By default the program assumes that the hardware being used is Nordic's nRF51822-mKIT (PCA10024) along with an analog sensor.
SETUP
A simple light sensor is a great example of an analog sensor and requires only:
Example breadboard circuit (with the photoresistor acting as part of a voltage divider):
                   +---------------+
                   |   XXXXXXXXXX  |
                   |             X |
                   | PHOTORESISTOR |
VCC                | X             |
 ^                 |  XXXXXXXXXX   |
 |                 +---------------+
 |                 |               |
 |     +-----+     |               |
 +-----+ 10k +-----+               +------+
       +-----+     |               |      |
                   |               |      |
P0.01+-------------+               |     -+-
                   |               |     GND
                   |               |

             NOTE:

             It doesn't matter which lead of
             the sensor is connected to VCC
             and which is connected to GND.
The value that will be read on the analog pin will decrease if the sensor is exposed to brighter light.
VCC is about 2.9V when the board is powered via USB and 2.2V when using the 2032 coin cell battery.
SOFTWARE
The only file in the program that is not part of the normal libraries is main.cpp.
The easiest way to get started is to use the precompiled nRF Toolbox app on your smart device (iPhone4s or newer, Android 4.3 or newer).
SETUP
It is recommended to change the SHORT_NAME variable to differentiate the device from other devices in the area (default is 'HACKDEMO'). Note that the SHORT_NAME string will probably be used as the description when the device is discovered by scanners.
The nRF51822-mKIT has a UART-to-USB adapter that can be used for debugging. The default configuration is 19200 baud, 8N1, no flow control. On Linux, the serial port enumerates as /dev/ttyACM0. On Windows, the port is displayed in the Device Manager as 'mbed Serial Port (COMX)'. Note that the serial port will be temporarily disabled when new programs are loaded.
USAGE
After the program is compiled and downloaded it will advertise continuously.
To connect:
- Open the nRF Toolbox app
- Select the 'UART' mode
- Click the 'CONNECT' button
- Select the device with the correct SHORT_NAME from the 'AVAILABLE DEVICES' list
- Wait for the primary service to be found
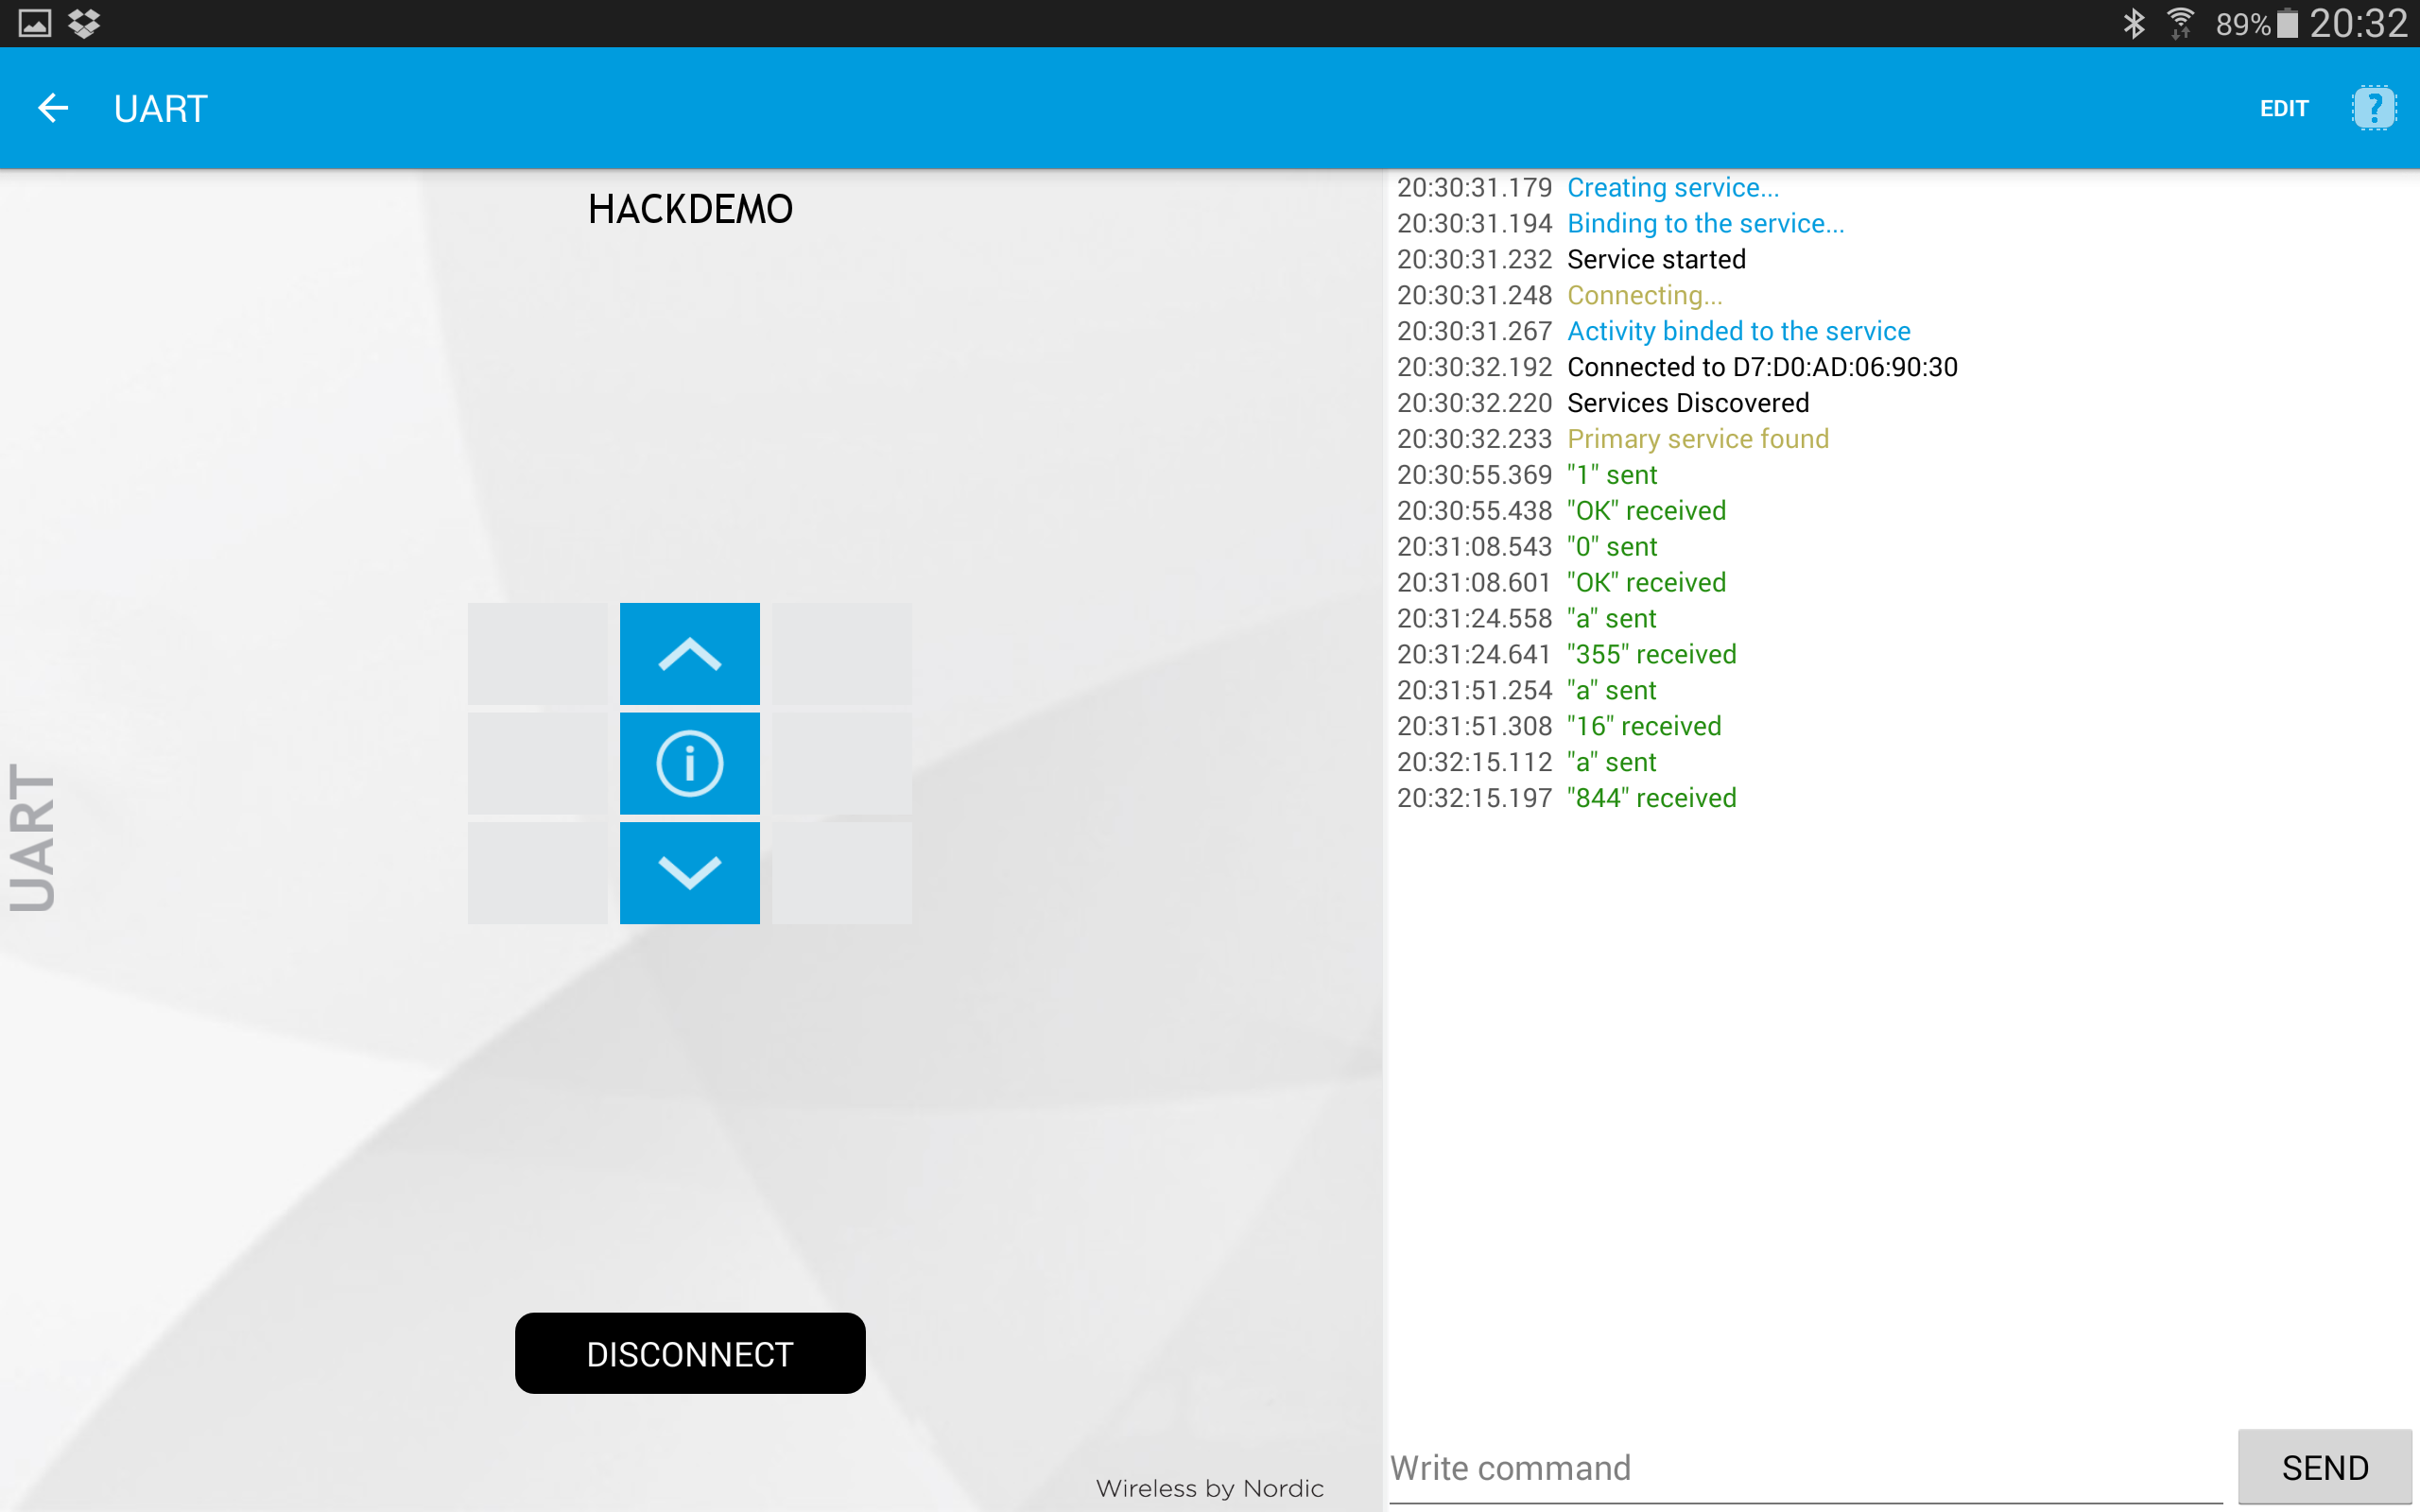
All of the commands that are sent to the mKIT will be acknowledged with a string in the form 'OK' or a string in the form 'ERROR: ...'. The following commands are defined:
- Write a '1' character to turn LED_1 on
- Write a '0' character to turn LED_1 off
- Write an 'a' character to read P0.01 as a 16-bit integer
If an error occurs then LED_2 will be turned on and a line number and non-zero error code will be printed to the UART.
In this screenshot the up-arrow button sends a '1', down-arrow sends a '0', and the info button sends an 'a':

Changes
| Revision | Date | Who | Commit message |
|---|---|---|---|
| 0:442c7a6f1978 | 2014-12-15 | Daniel Veilleux |
Initial commit. |