uLCD-144-G2 128 by 128 Smart Color LCD
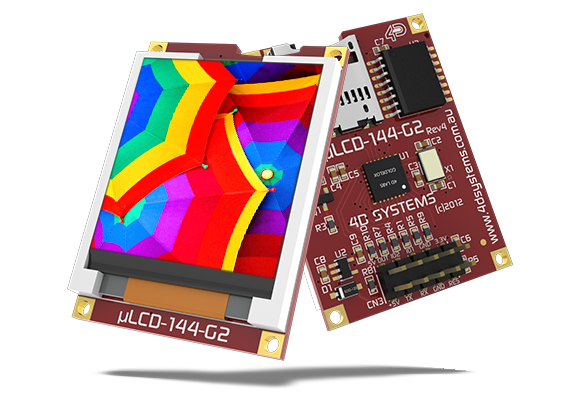
The uLCD-144 board from 4D Systems
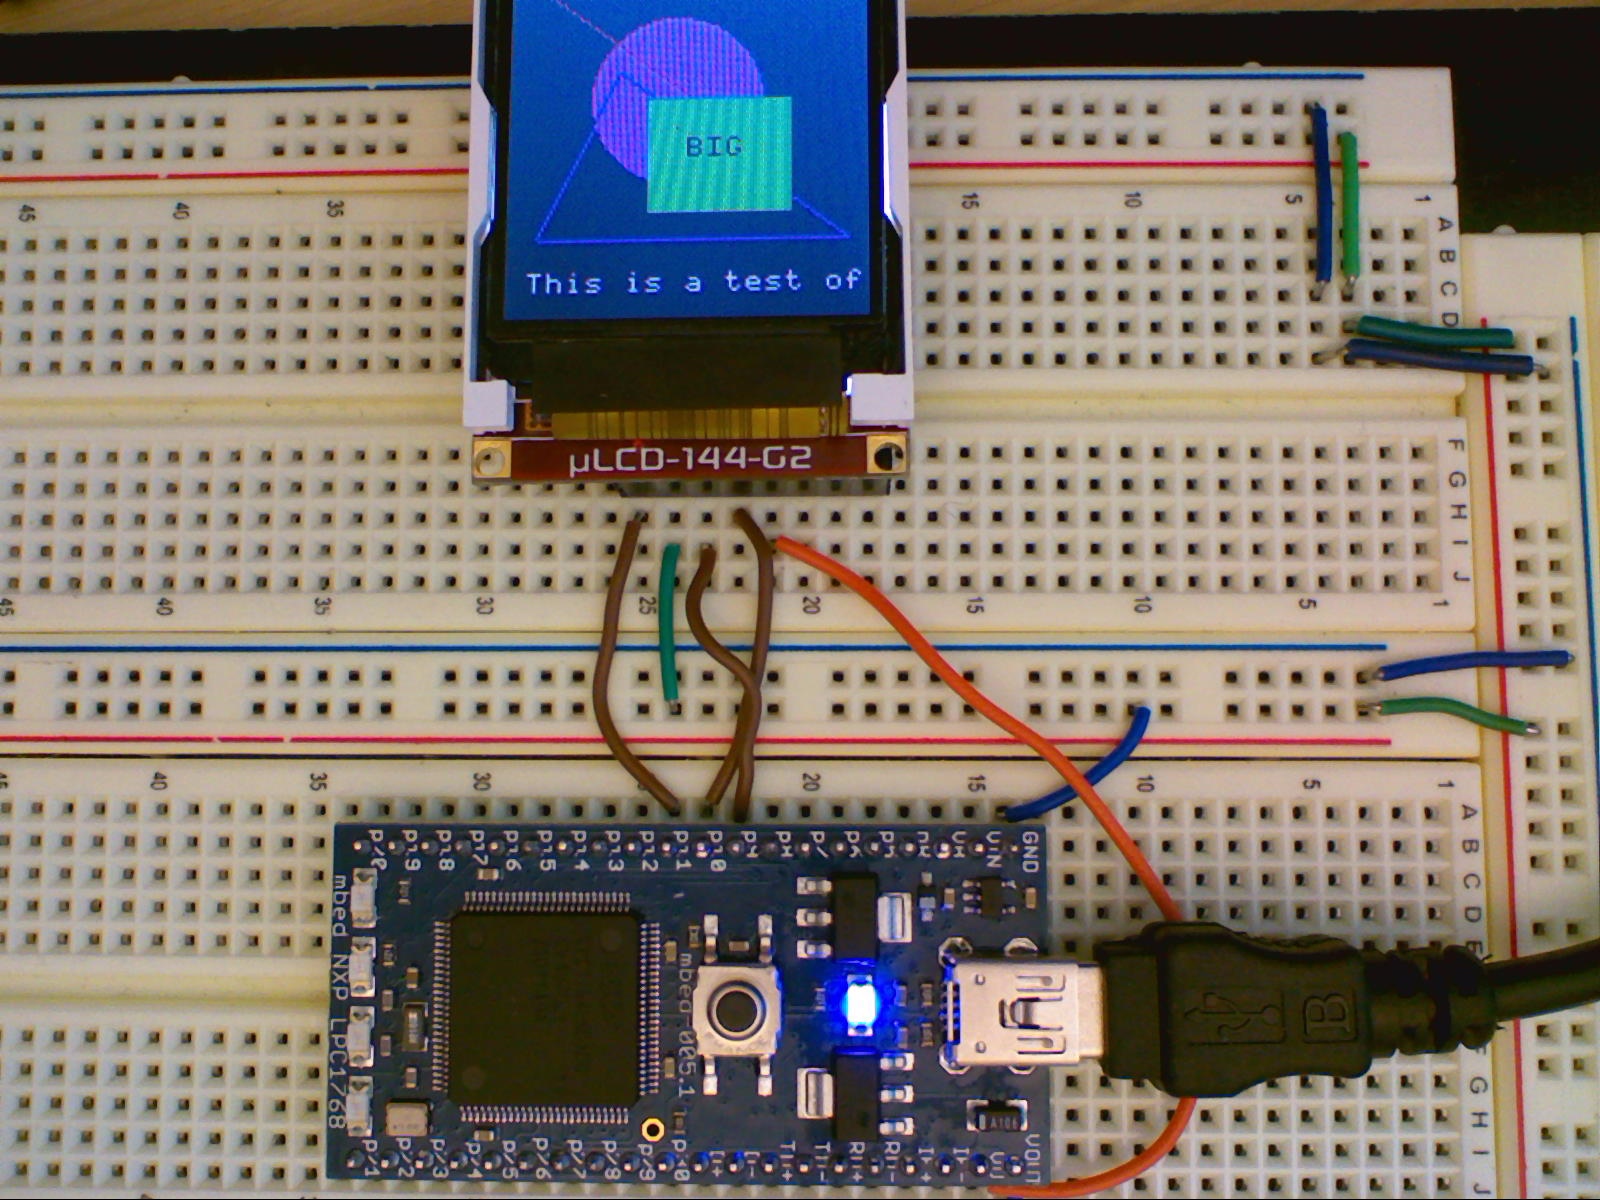
The uLCD-144-G2 from 4D Systems is a low-cost ($25 qty. 100) smart color LCD display board with a serial interface. They are also available from Sparkfun. It looks like a nice alternative to the now hard to find Nokia 6100 LCD breakout boards. It has a TTL level serial interface and a reset pin. An optional uSD card inserted in the display module's socket can be used to load fonts, images, and play videos in response to serial commands. Here is the wiring for the demo program:
| mbed | uLCD Header | uLCD cable |
|---|---|---|
| 5V=VU | 5V | 5V |
| Gnd | Gnd | Gnd |
| TX=P9 | RX | TX |
| RX=P10 | TX | RX |
| P11 | Reset | Reset |
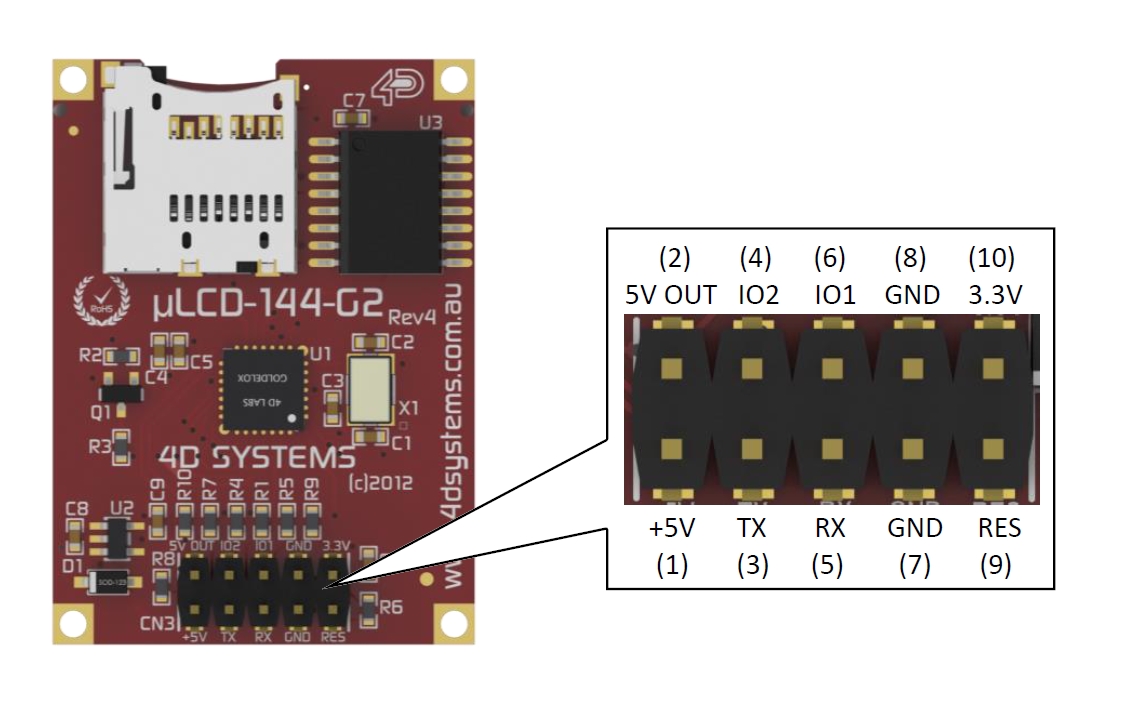
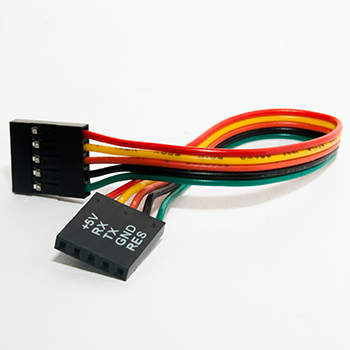
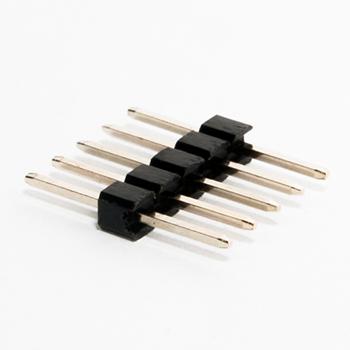
In the drawing above, the pins are labeled from the uLCDs perspective with TX and RX pins. Mbed RX goes to uLCD TX and mbed TX goes to uLCD RX. So mbed TX goes to the middle pin on the connector which is the uLCD's RX pin. The included cable seen below is plugged into the bottom row of pins and plugged into a breadboard using the male header pins for hookup. Note that on the cable silkscreen seen in the image below RX and TX have been swapped to indicate the connections needed to the microprocessor pins.
Using the Display on a Breadboard
Since the board has two rows of header pins, it cannot be plugged directly into a breadboard as the breadboard would short out the two rows of pins. The 5-pin cable and M/M header pin provided can be used for connection to a breadboard.
As an alternative, a two row 10-pin M/F header socket with long PCB leads can be used to make a breadboard adapter by cutting off one row of pins. The header socket plugs into the breadboard and the module plugs into the header socket. The second row of pins could also be cutoff on the LCD module itself, but this would preclude later use of the board’s GPIO pins and 3.3V supply for other projects. For more stable mounting, there are 2mm screw holes at the corners that could be used, but the header socket alone holds it rather well given the small size and weight.
LCD mounted on breadboard using a 10-pin dual header socket with one row of pins cut off.
The easy solution for breadboard use
The real problem on a breadboard is shorting the 3.3V pin to the reset pin. The board needs a 5V input, but it outputs 3.3V in case it is needed for external devices when it is used in standalone mode. Shorting the other 4 pins does not impede normal serial slave mode operation. Without a reset, the board typically locks up whenever mbed is reset. If the 3.3V pin is carefully bent down 90 degrees towards the center of the board and away from the reset pin, it will plug directly into a breadboard and work as seen in the photo below. The 3.3V pin could be bent back later if it is ever needed, but don’t count on this working more than once or twice before it breaks off. It would be a good idea to just leave it bent over and use a F/M flexible jumper wire to connect to it, if 3.3V from the display module is ever needed later in other projects. This might be the best solution for most users that want to plug it directly into a breadboard, avoid cutting off pins and avoid hooking it up through another connector.
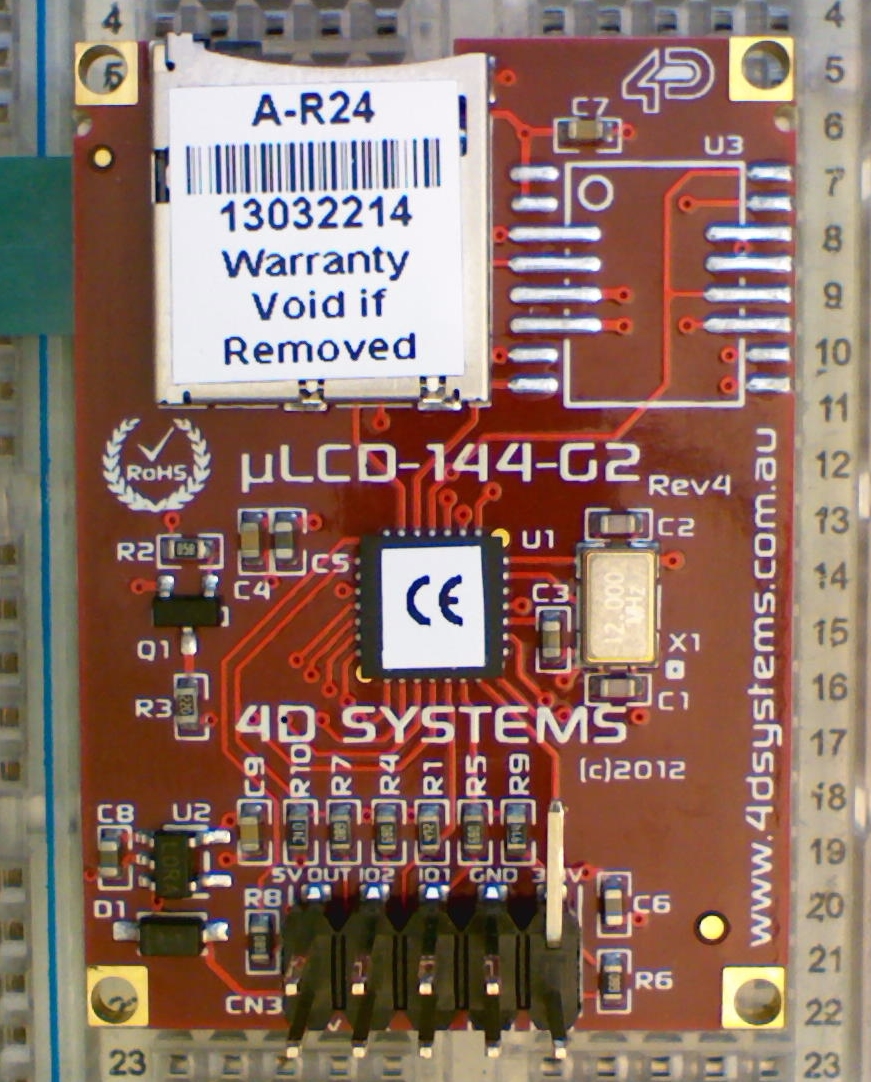
Bend over the 3.3V pin (upper right pin in photo) and it will plug directly in a breadboard and work.
If you are using an mbed plugged into an application board or other baseboard, use the cable provided with the display and stick short jumper wires in one end of the display's cable connector and the other end of the jumper wires into the mbed header pin sockets that are found on most of these boards.
Demo Program
Initially, it would seem that the existing mbed cookbook 4DGL library would work with this module. It turns out that it has a different processor, Goldelox, and a different but similar command set than the earlier 4D Systems displays supported by the 4DGL mbed library. So a fork of 4DGL was required with quite a few changes in #defines for command values and baud rate divisors. Some functions are not available and some now have 16-bit arguments instead of 8. The basic features used in the demo code below work correctly and some additional work on the new library code could add other features. Support was also added for the use of printf by using the Stream base class and providing _putc and _getc virtual functions. With some minor changes (#defines for number of x and y pixels) the library should also work with the other small LCD displays from 4D systems that use the Goldelox processor. The large LCD modules and modules with touch use a different processor.
Video of demo code. A micro SD card on the LCD module is required for images and videos. The display is actually a bit more colorful and clearer than it appears in the video. Demos include text using printfs, basic graphics commands, a simple bouncing ball animation, computing the Mandelbrot set pixel by pixel, a Plasma wave BLIT, a JPEG image, and a *.wmv video clip.
// uLCD-144-G2 demo program for uLCD-4GL LCD driver library
//
#include "mbed.h"
#include "uLCD_4DGL.h"

uLCD_4DGL uLCD(p9,p10,p11); // serial tx, serial rx, reset pin;

int main()
{
    // basic printf demo = 16 by 18 characters on screen
    uLCD.printf("\nHello uLCD World\n"); //Default Green on black text
    uLCD.printf("\n  Starting Demo...");
    uLCD.text_width(4); //4X size text
    uLCD.text_height(4);
    uLCD.color(RED);
    for (int i=10; i>=0; --i) {
        uLCD.locate(1,2);
        uLCD.printf("%2D",i);
        wait(.5);
    }
    uLCD.cls();
    uLCD.printf("Change baudrate......");
    uLCD.baudrate(3000000); //jack up baud rate to max for fast display
    //if demo hangs here - try lower baud rates
    //
    // printf text only full screen mode demo
    uLCD.background_color(BLUE);
    uLCD.cls();
    uLCD.locate(0,0);
    uLCD.color(WHITE);
    uLCD.textbackground_color(BLUE);
    uLCD.set_font(FONT_7X8);
    uLCD.text_mode(OPAQUE);
    int i=0;
    while(i<64) {
        if(i%16==0) uLCD.cls();
        uLCD.printf("TxtLine %2D Page %D\n",i%16,i/16 );
        i++; //16 lines with 18 charaters per line
    }
    wait(0.5);
    //demo graphics commands
    uLCD.background_color(BLACK);
    uLCD.cls();
    uLCD.background_color(DGREY);
    uLCD.filled_circle(60, 50, 30, 0xFF00FF);
    uLCD.triangle(120, 100, 40, 40, 10, 100, 0x0000FF);
    uLCD.line(0, 0, 80, 60, 0xFF0000);
    uLCD.filled_rectangle(50, 50, 100, 90, 0x00FF00);
    uLCD.pixel(60, 60, BLACK);
    uLCD.read_pixel(120, 70);
    uLCD.circle(120, 60, 10, BLACK);
    uLCD.set_font(FONT_7X8);
    uLCD.text_mode(TRANSPARENT);
    uLCD.text_bold(ON);
    uLCD.text_char('B', 9, 8, BLACK);
    uLCD.text_char('I',10, 8, BLACK);
    uLCD.text_char('G',11, 8, BLACK);
    uLCD.text_italic(ON);
    uLCD.text_string("This is a test of string", 1, 4, FONT_7X8, WHITE);
    wait(2);

//Bouncing Ball Demo
    float fx=50.0,fy=21.0,vx=1.0,vy=0.4;
    int x=50,y=21,radius=4;
    uLCD.background_color(BLACK);
    uLCD.cls();
    //draw walls
    uLCD.line(0, 0, 127, 0, WHITE);
    uLCD.line(127, 0, 127, 127, WHITE);
    uLCD.line(127, 127, 0, 127, WHITE);
    uLCD.line(0, 127, 0, 0, WHITE);
    for (int i=0; i<1500; i++) {
        //draw ball
        uLCD.filled_circle(x, y, radius, RED);
        //bounce off edge walls and slow down a bit?
        if ((x<=radius+1) || (x>=126-radius)) vx = -.90*vx;
        if ((y<=radius+1) || (y>=126-radius)) vy = -.90*vy;
        //erase old ball location
        uLCD.filled_circle(x, y, radius, BLACK);
        //move ball
        fx=fx+vx;
        fy=fy+vy;
        x=(int)fx;
        y=(int)fy;
    }
//......more code demos can be found in main.cpp
}
The more complex Mandelbrot and Plasma wave demo code is not listed here for brevity but can be found after the code seen above in main.cpp in the uLCD144G2_demo program with the download link below.
The image and video portion at the end of the demo requires an unformatted uSD card with the RAW image and video files. Instructions on those tasks and the tools used are provided later on this page. If you create your own uSD card files, the starting sector address for these items in the demo code may need to change.
Import library4DGL-uLCD-SE
Fork of 4DGL lib for uLCD-144-G2. Different command values needed. See https://mbed.org/users/4180_1/notebook/ulcd-144-g2-128-by-128-color-lcd/ for instructions and demo code.
The library is already included in the following demo program:
Import programuLCD144G2_demo
Demo of 4DGL library for the uLCD-144-G2 128 by 128 color display. See https://mbed.org/users/4180_1/notebook/ulcd-144-g2-128-by-128-color-lcd/ for instructions
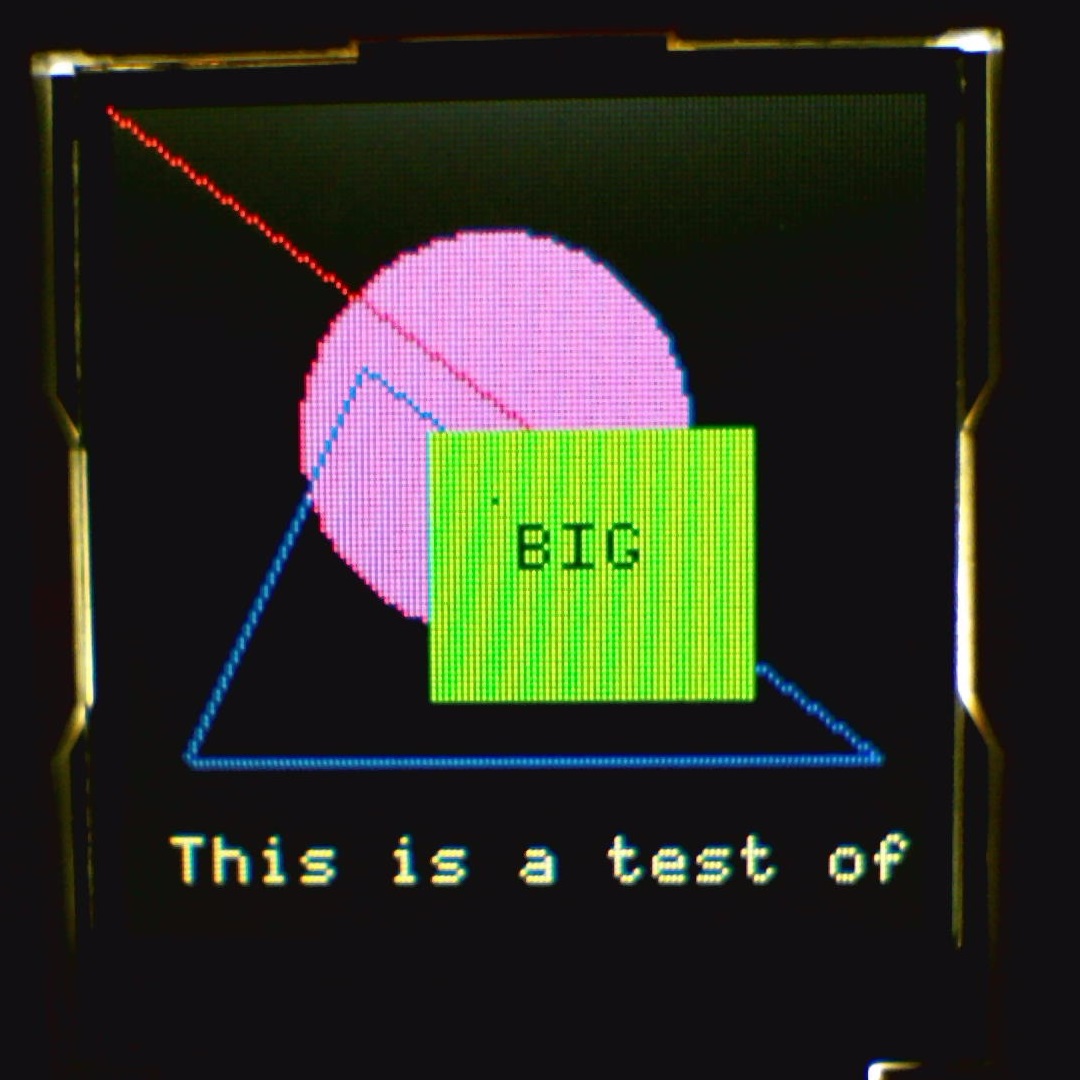
Graphics demo code running on uLCD 144 G2 display
The Goldelox Serial Command Manual explains the command set used in serial slave mode. It works in serial slave mode out of the box. Mbed can send it data too fast at higher baud rates and some small time delays (<=1ms) between characters in the library code are needed to avoid dropping characters when sending out some of the longer commands such as text string (perhaps a display UART buffer overflow?). Each complete command sent gets back an acknowledge character and the library code waits for it for synchronization.
Higher Baud Rates
After some experimentation with delays, the driver library now works up to the LCD's maximum supported baud rate of 600,000. For extreme overclockers, the undocumented baud rates of 750,000, 1,000,000, 1,500,000 and 3,000,000 are running this demo successfully on the mbed LPC1768 with the current delay setup. On other mbed platforms, it will depend on the processor's baud rate clock and divisor hardware. The quickest way to find out is likely to be through experimentation. The mbed serial API computes the closest possible baud rate match. The demo starts out with 9600 baud which should work on any platform. After the first demo screen, the baud rate is changed on the display and mbed with uLCD.baudrate(value). If it hangs in the demo with the message, "Change baudrate", that baud rate is not working on the platform. For fast transfers and more bandwidth, most applications should use the highest baud rate that works.
Loading other fonts, images and playing videos using the display's uSD card
The Free 4D Workshop IDE (click "download" icon on that page and again on the next page for download) contains tools to translate fonts, images, and videos on a PC into formats used on the module’s micro SD card in response to serial display commands. This data is then stored on an unformatted uSD card mounted on the PC. Most laptops have an SD reader slot and many uSD cards come with a larger SD adapter, if not there are low cost USB to SD adapters that can be used on a PC. After writing the files, the uSD card is then removed from the PC and inserted in the display module. Serial commands from mbed can then load the fonts, images, and play video clips. For speed, the unformatted uSD card uses disk sector addresses in the serial commands and not filenames in a directory to locate this data, and files are stored in a contiguous RAW format. The procedure to create these files with the IDE tools is described in more detail in two application notes:
4D-AN-G5001 AP Note - Displaying Third Party Fonts and this newer version
4D-AN-G5002 AP Note - Displaying an Image, Video or Animation and this newer version
The module now comes with the serial mode firmware preinstalled, so it is not necessary to reprogram the module's firmware to use these features as shown in the manuals with the special programming cable. When starting a new project in the IDE tool, be sure to select the correct LCD module and "Serial". This means that the display's special IDE tools only need to be used to convert font, image, and video files and write them to the uSD card. The optional programming cable is not needed to write to the uSD card from the PC.
Loading Fonts from the uSD card
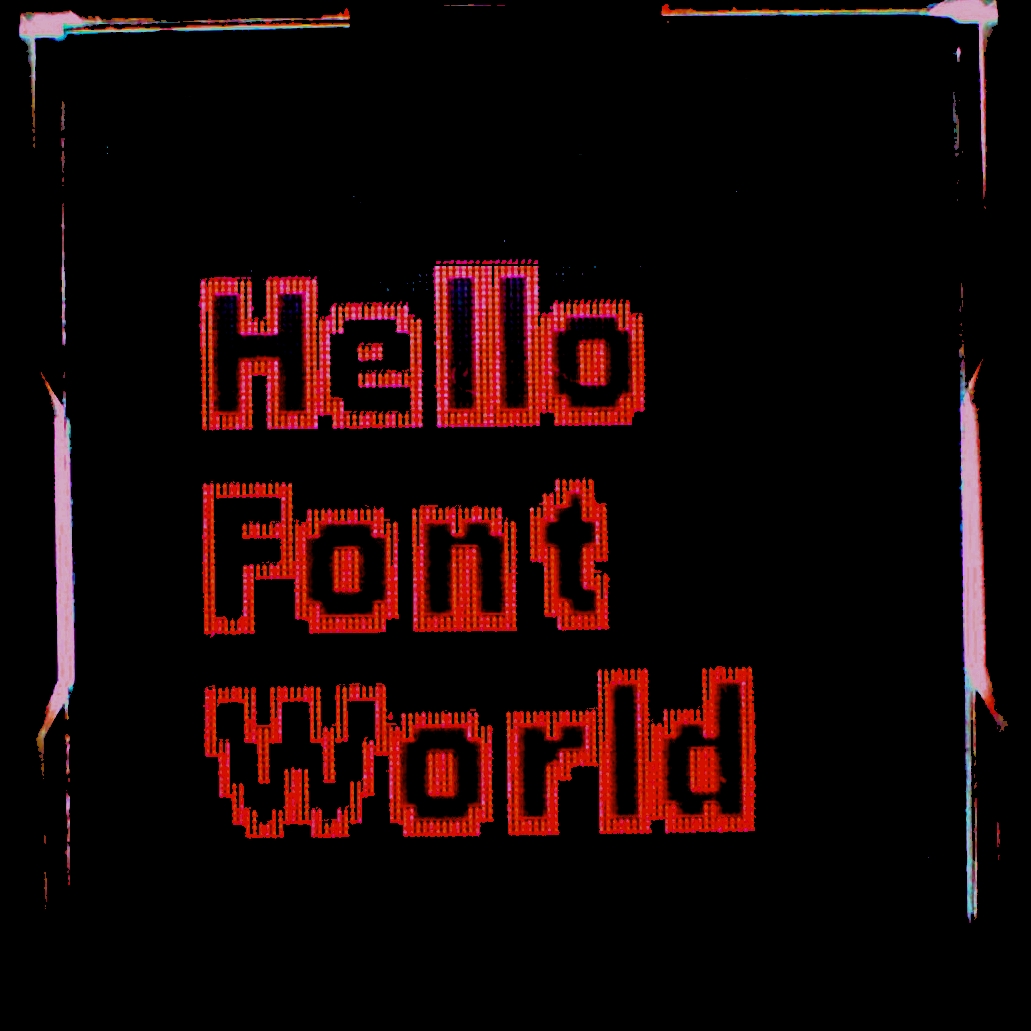
Converted Windows True Type Font loaded from uSD card
Using the 4D Workshop IDE, a Windows True Type Font was converted to RAW format and written on the unformatted uSD card. The initial steps are not intuitive, so be sure to read the font application note. The new font from the uSD card was selected and a double size "hello world" message was printed out to the display as seen in the image above. The serial commands sent from mbed are shown in the code below . The disk sector address varies depending on what files are already on the uSD card. In this case, nothing else was on the uSD card (i.e., 0,0). In addition to the new IDE tools, there is also an older free True Type Font conversion tool that can be used to generate font files for the uSD card or even C include files with font data.
    uLCD.media_init(); // initialize uSD card
    uLCD.set_sector_address(0,0);  // address of font file
    uLCD.set_font(MEDIAFONT);  // load new font from uSD
    uLCD.text_width(2); //2X size text
    uLCD.text_height(2);
    uLCD.printf("\n  Hello\n  Font\n  World");
    uLCD.set_font(FONT_7X8);  // back to built-in system font
Loading Images from the uSD card
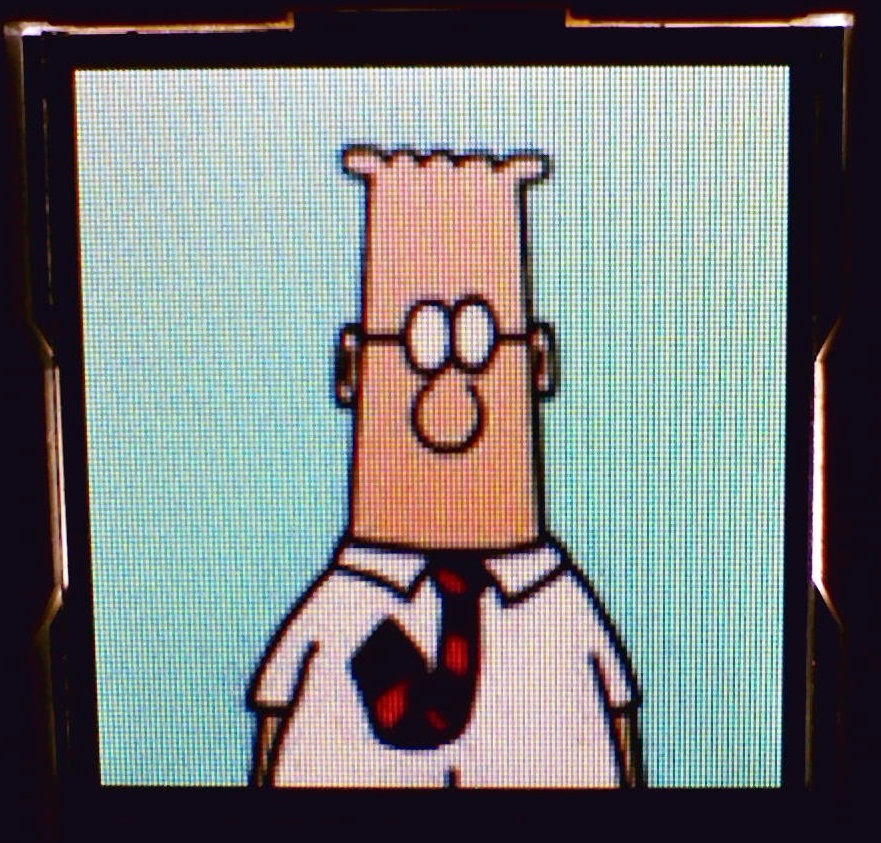
128 by 128 image loaded from module's SD card using the serial commands below from mbed.
    uLCD.media_init();
    uLCD.set_sector_address(0x001D, 0x4C01);
    uLCD.display_image(0,0);
Paint.net was used to resize the original jpeg image to 128 by 128. The IDEs disk partition tool, RMPet, was used to create two partitions on the uSD card, one FAT and one unformatted (50/50 on a 2G uSD) . The graphics composer tool (tool in IDE) converted the image file and created the new image file on the unformatted partition on the SD card. Windows will not be able to read files on a RAW SD card.This tool can also resize images and *.wmv videos for the display by selecting the file and clicking the "edit" button. It reported which sector address to use for the image (listed in project's *.GC file).
JPEG, BMP, and other encoded image files could also be stored on a filesystem on mbed such as the SD card, local filesystem, or a USB flash drive. It could be read, decoded, and sent to the display using the BLIT (BLock Image Transfer) command. A fairly complex program is required to decode image files and the RAM buffers needed for decoding use most of the available RAM on mbed, so not much is left for any other purpose such as networking or the RTOS. Information on a student project that ported simple open source JPEG and BMP file decoders to mbed for use on an earlier LCD display is available on the project’s notebook page.
Playing a video from the uSD card
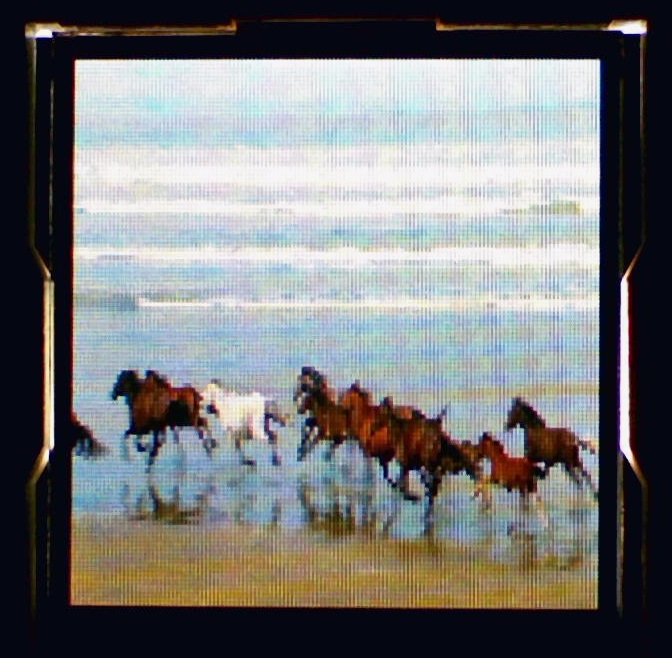
Wildlife video on LCD using uSD card video player feature.
To display a video clip, the various conversion steps used and mbed code needed are just as simple:
    uLCD.media_init();
    uLCD.set_sector_address(0x001D, 0x4C42);
    uLCD.display_video(0,0);
It takes a bit less than 1MB/sec for full screen videos and a couple minutes on a PC to initially render the video into the RAW binary format to write it to the unformatted SD card. The original video clip used in the demo was 900 frames with a play time of 30 seconds. The module's uSD card video player will be able to support higher video frame rates than sending video data over the serial connection from mbed using the BLIT command.
It might make sense to create several partitions with the tool provided on the uSD card when a complex set of fonts, images, and videos are all required to minimize the issues with keeping track of the disk sector addresses used.
Writing and reading data from the display's micro SD card
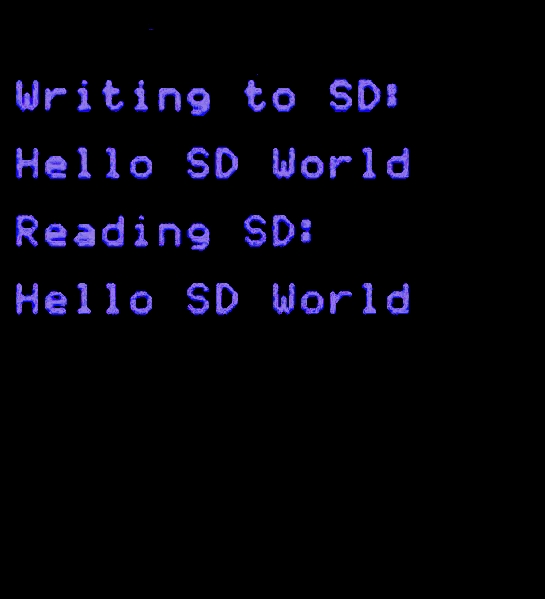
Display output from mbed SD card R/W access test.
If the display is being used with an SD card, an mbed application can also write or read data from the display's SD card using serial commands. This is going to be slower than an SD card directly attached to mbed, but might be fast enough for some applications that need non-volatile storage. Here is a short code snippet showing how the serial read and write commands work.
	//.... assumes uLCD already setup as in earlier demo code
    uLCD.cls();
    uLCD.media_init(); //init SD card for use
    char datastring[80]="";
    uLCD.set_sector_address(0,1000); //go to an unused area on SD card
	//Write Hello SD World to SD card
    sprintf(datastring,"%s","Hello SD World");
    uLCD.printf("\n\nWriting to SD:\n\n");
    for (int i=0; i<strlen(datastring); i++) {
        uLCD.write_byte(datastring[i]); //write a byte to SD card
        uLCD.putc(datastring[i]); //also send byte to display
    }
    uLCD.flush_media(); //flush out (write) entire 512 byte sector with 0xFF fills
	//Now Read back bytes from SD card
    uLCD.set_sector_address(0,1000); //reset to start of sector
    char readchar =' ';
    uLCD.printf("\n\nReading SD: \n\n");
    while (readchar != '\xFF') { //0xFF is padding character at end of bytes
        readchar = uLCD.read_byte();  //read a byte from SD card
        uLCD.putc(readchar); //also send byte to display
    }
When the code runs, it writes "Hello SD World" to the SD card and writes out the sector.
It then resets to the start of the sector and reads it back. Messages appear on the display to show that it works.
A sector is 512 bytes and the flash only writes a sector at a time. When the last sector is not full, a flush_media is needed to force the last sector write.
If more than a sector of bytes is written, it automatically writes out the sector and moves to the next one.
It takes a bit of extra effort to manually keep track of the free space sectors on the unformatted SD card since font, image, and video data may also be on the SD card.
This is working in the beta version of the driver that I will update in a few days after some more testing - (i.e., flush_media and write_byte needed to read in a two byte return error code from the display).
Use of the LCD display in threads, interrupt, and callback routines
If the LCD display functions are used in multiple threads, or in a main program and an interrupt routine or callback additional steps are needed to insure mutual exclusion when accessing the LCD's IO hardware. In general, the use of LCD commands in interrupt routines and callbacks should be avoided and all LCD commands should be placed in main. Global variables can be set in interrupt routines that code in main could check to send out any needed LCD commands.
With the RTOS, a mutex synchronization lock from the RTOS should be used to control access to the display in the case of multiple threads. In such cases, I/O devices typically need mutual exclusion locks to avoid problems. For example, one thread could be in the middle of a long LCD display command just at the point when execution switches to another thread (or interrupt routine) using the display. The display could wind up in the wrong state when a new command is sent before the first one is completed. In general, printf also contains non re-entrant code. An mbed RTOS LCD mutex lock code example (demo4) is available using a different LCD with several threads that display data in different areas of the display. If the RTOS is not being used, it is also possible to implement a mutex lock by disabling and enabling interrupts on a processor with one core.
Instrument Gauges on the uLCD
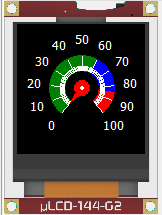
With the 4D IDE tool it is possible to create high quality images of various instrument gauges. Each frame in the video clip stored on the uSD card shows a different gauge setting, and the display frame command can be used to select the correct frame needed for the desired gauge setting. It is possible to achieve a high update rate (higher than using graphics to redraw the gauge). There is a components page and video demoing this feature with mbed.
Ideas for Further Enhancements
The module's firmware can also be changed to work as a standalone module and a development tool IDE that supports and programs it is also available. The IDE needs a special programming cable available separately to download to the module's flash. It might be possible to setup a serial bridge program on mbed to use in place of the special programing cable.
A code example for mbed could be developed to load images to the display using the mbed filesystem.
Mbed could read a font file or data include file to load font data. A character could be sent over to the display using a BLIT.
Not every single possible serial command is included in the library and more commands could be added. The existing commands are likely the most useful ones, but the remaining ones could be added at the expense of a bit more code memory. To aid debugging of new features, messages can be sent out on the mbed USB serial port at 115200. To enable these debug messages, change DEBUGMODE in the *.h file.
It should be possible to add support for a file system driver on the display's SD card using the serial commands. The FATFILESYSTEM library needs a couple virtual functions to read and write disk sectors and initialize the disk to provide support for new media. It is about the same as the SD card file system driver, but it is using serial and not SPI for transfers. Might even work for an SD card with two partitions, one formatted for files and another unformatted for fonts, images, and videos.

Student projects using the LCD are shown above. They include a Pac Man game using an accelerometer, an IoT Alarm Clock with networking, an iPod-like music & video player, a Nest-like thermostat using a temperature sensor, and a Missile Command game using pushbuttons.
1 comment on uLCD-144-G2 128 by 128 Smart Color LCD:
Please log in to post comments.

The very nice library for this display, at https://os.mbed.com/users/4180_1/code/4DGL-uLCD-SE/docs/tip/classuLCD__4DGL.html , seems to contain a number of deprecated functions. Is it to be updated (or am I missing that somewhere)?
Thanks for any guidance!