You are viewing an older revision! See the latest version
u blox C030 Getting Started
Getting started
Rapid Prototyping for Internet of Things applications
Overview
Features
u-blox SARA-U201 HSPA/GSM Module
- Global 2G/3G coverage
- 2G Bands: 850, 900, 1800, 1900
- 3G Bands: 800, 850, 900, 1900, 2100
u-blox MAX-M8C Concurrent GNSS Receiver Module
- Receives up to 3 GNSS technology out of GPS, Galileo, GLONASS, and BeiDou
STMicroelectronics STM32F437VG MCU
- High-performance ARM® Cortex™-M4 running up to 180MHz
- 1024 KB on-chip Flash
- 256 KB on-chip SRAM + 4 KB Battery backed up on-chip SRAM
- 192 KB of on-chip SRAM for Application use
- 64 KB of on-chip SRAM as Closely Coupled Fast RAM
- 10/100 Mbps Ethernet MAC
- Cryptographic acceleration for Internet message protocols
- True random number generation, CRC calculation unit
Getting Started with mbed
1. Connect your C030 to a PC
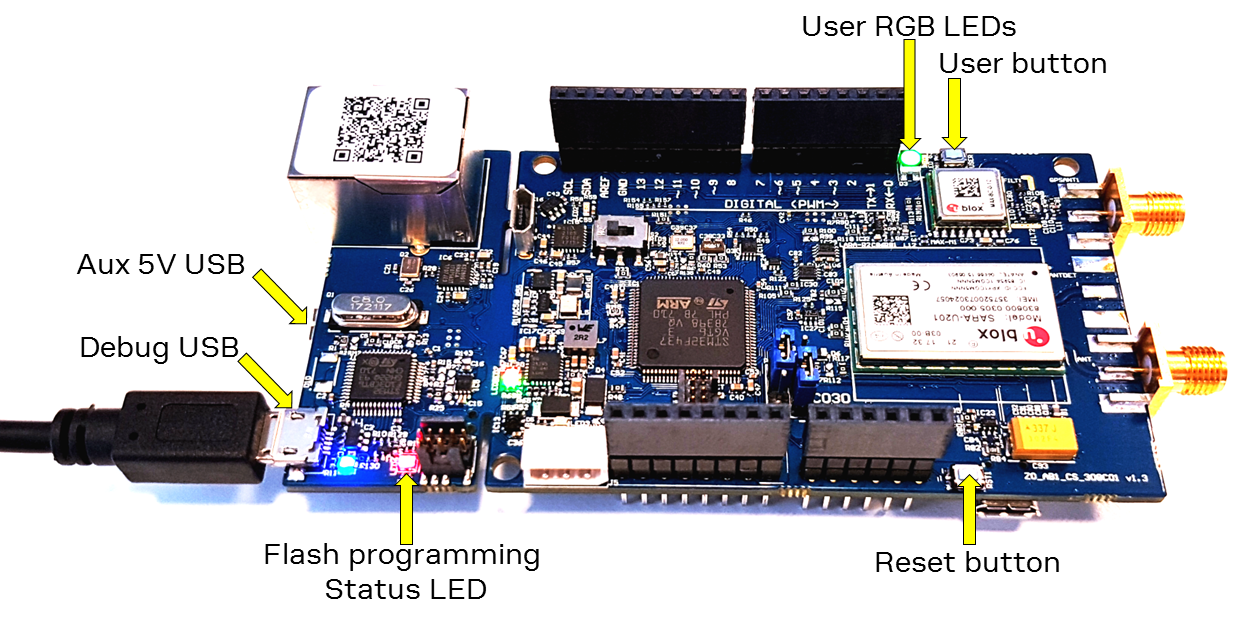
Connect a USB cable to the C030 Debug USB port and the PC. The Flash programming Status LED will come on. After a few seconds of activity, the PC will recognise the C030 as a standard USB drive.

External Power Supply is recommended !
Due to the USB current limitation, optimal RF performance can be achieved only by supplying the board either through the C030 Aux 5V USB connector or the VIN pin of the Arduino row connector.
 |
| Windows 7 example |
2. Click the MBED.HTM link to get logged in
Go to the new USB Drive, and click MBED.HTM to open it in a web browser.
If you do not have an mbed account, choose "Signup", and create your mbed Account. Otherwise, log in with your normal username and password.
This will give you access to the website, tools, libraries and documentation.
3. Have Fun!
Your account is now ready and you can start using your C030!
Where next?
A good starting point is to download a pre-compiled program, so that you get used to downloading and running programs before you start compiling your own.
