WIZnet
WIZnet is a fabless semiconductor company specializing in Hardware TCP/IP Ethernet controller and SoC, with high performance and low cost solution.
How to write the firmware into WIZwiki W
How to write the firmware into WIZwiki-W7500
Writing firmware into WIZwiki-W7500 has 2 ways.
- Using the CMSIS-DAP (Drag and Drop)
- Using the ISP
Examples Binary
- Hardware test & Loop back binary (WIZwiki-W7500 default binary) : Download
- LED Blink binary : Download
- Serial Out binary : Download
Using the CMSIS-DAP (Drag and Drop)
1. When you connect the USB cable to the WIZwiki-W7500, PC recognized as a removable disk. Removable disk name is MBED.
2. You "drag and drop" or copy the firmware to the removable disk, the firmware writing progress has completed.
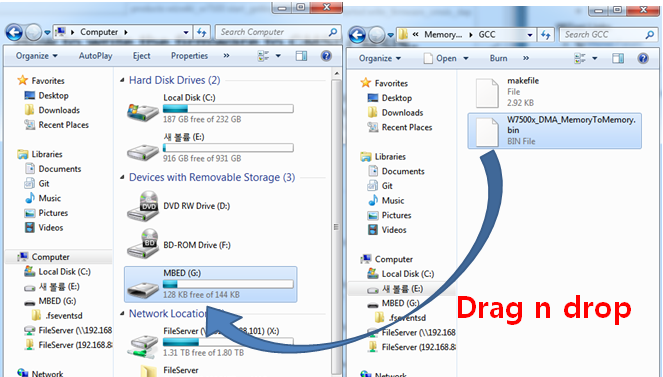
3. After completing the firmware writing, open to check the removable disk.
4. If "fail.txt" file is exists in the removable disk, it means writing the firmware has failed.
5. After pressing the Reset button (SW1) of WIZwiki- W7500, please repeat the steps from step 2.
Using the ISP
W7500 ISP Program
When W7500 is in the boot mode, firmware writing is possible via the ISP since WIZwiki-W7500 has built-in an ISP header. As ISP header supports the UART signals, you need a converter like TTL to RS232 or TTL to USB in order to connect to your PC.
Please refer the block diagram setting as below.
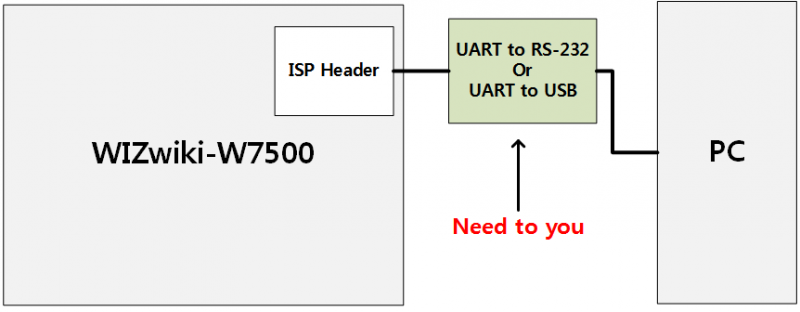
To follow
1. Run "W7500_ISP (20xxxxxx) .exe".
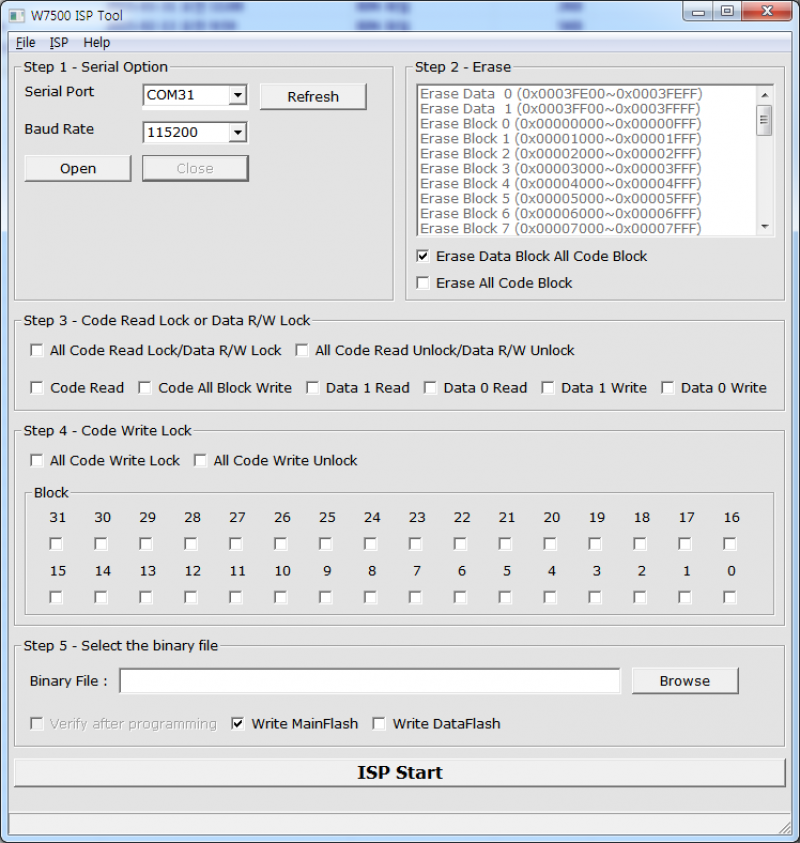
2. To make WIZwiki-W7500 enter the Boot Mode, press the SW1 once while keeping the SW2 pressed.
3. Select the device connected to the ISP header from "Serial Port" and click "Open". If you entered Boot Mode successfully, then "Serial Open Complete" message will be printed on the status bar at the bottom of window.
Before click the open button of ISP tool, we suggest you to test it in other terminal windows.After opening serial port using the terminal windows,enter the capital "U". If it is in the ISP mode, you can see the returned character.
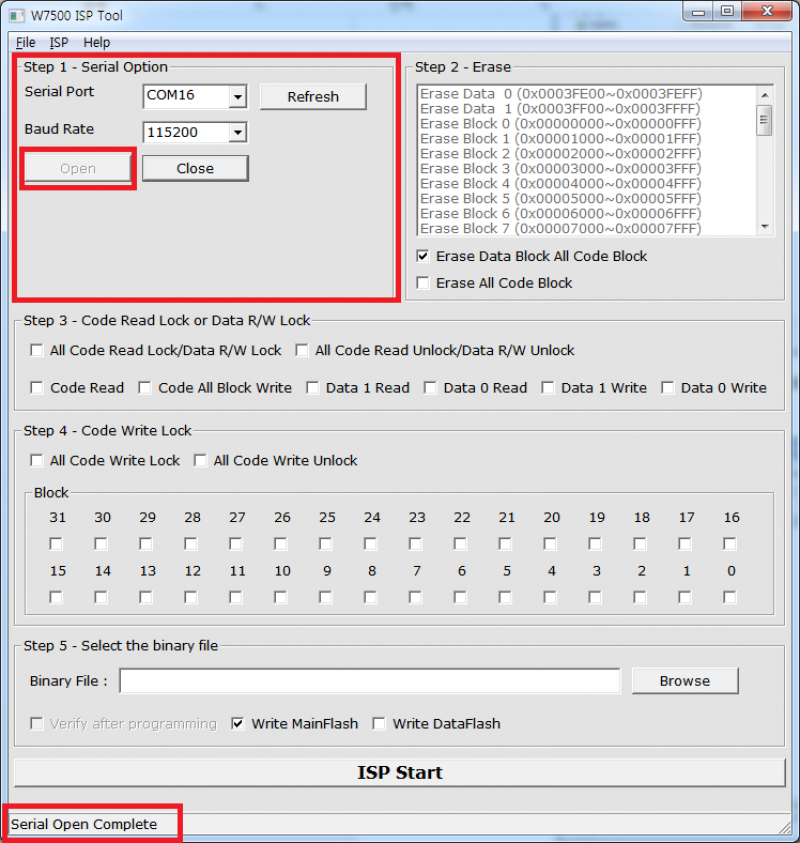
4. Click "Browse" to select the binary file.
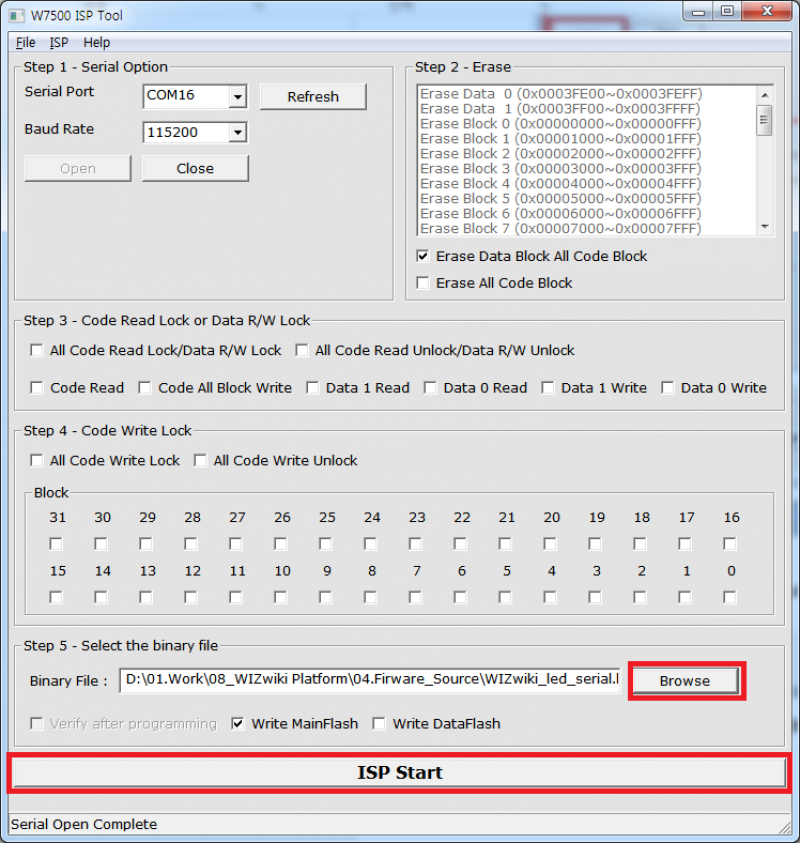
5. Click "ISP Start" button, then the firmware writing will be performed.
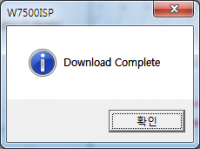
6. After the firmware writing completes, the window like below will pop up.
