The "GR-PEACH_Audio_Playback_7InchLCD_Sample" is a sample code that can provides high-resolution audio playback of FLAC format files. It also allows the user to audio-playback control functions such as play, pause, and stop by manipulating key switches.
Dependencies: GR-PEACH_video R_BSP TLV320_RBSP USBHost_custom
Fork of GR-PEACH_Audio_Playback_Sample by
Note
For a sample program of without LCD Board, please refer to GR-PEACH_Audio_Playback_Sample.
Introduction
The "GR-PEACH_Audio_Playback_7InchLCD_Sample" is a sample code that can provides high-resolution audio playback of FLAC format files. It also allows the user to audio-playback control functions such as play, pause, and stop by manipulating key switches.
1. Overview of the Sample Code
1.1 Software Block Diagram
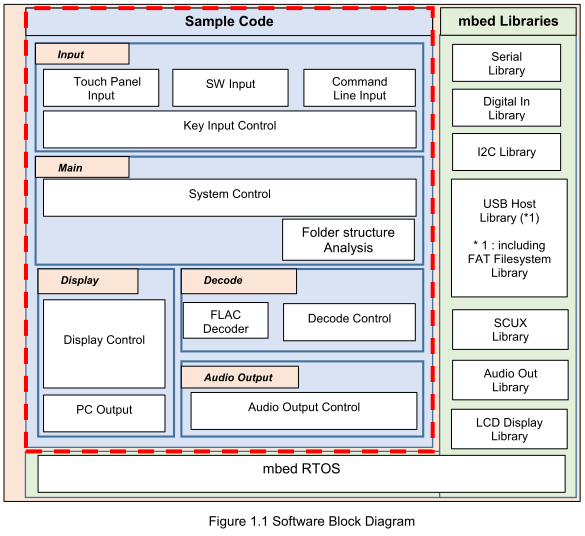
Figure 1.1 shows the software block diagram.
1.2 Pin Definitions
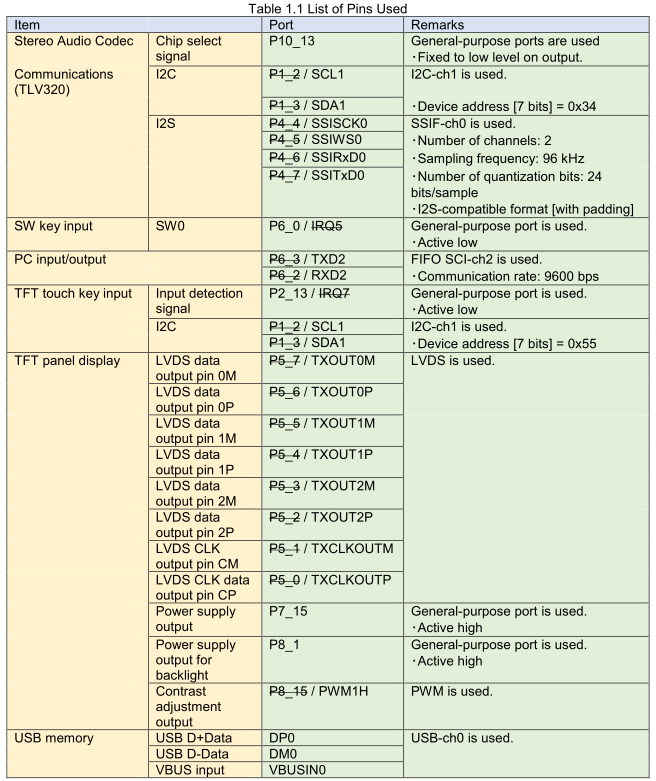
Table 1.1 shows the pins used in this sample code.
2. Sample Code Operating Environment
In order to operate this sample code, GR-PEACH, Audio Camera Shield and 7.1 inch LCD Shield must be needed. For details on Audio Camera Shield and 7.1 inch LCD Shield, please refer to the following links, respectively:
- Audio Camera Shield
https://developer.mbed.org/teams/Renesas/wiki/Audio_Camera-shield - 7.1 inch LCD Shield
https://developer.mbed.org/teams/Renesas/wiki/LCD-shield
In this section, it is described that how board is configured and to control audio playback via command line and touch screen.
2.1 Operating Environment
Figure 2.1 shows the overview of the operating environment for this sample code.
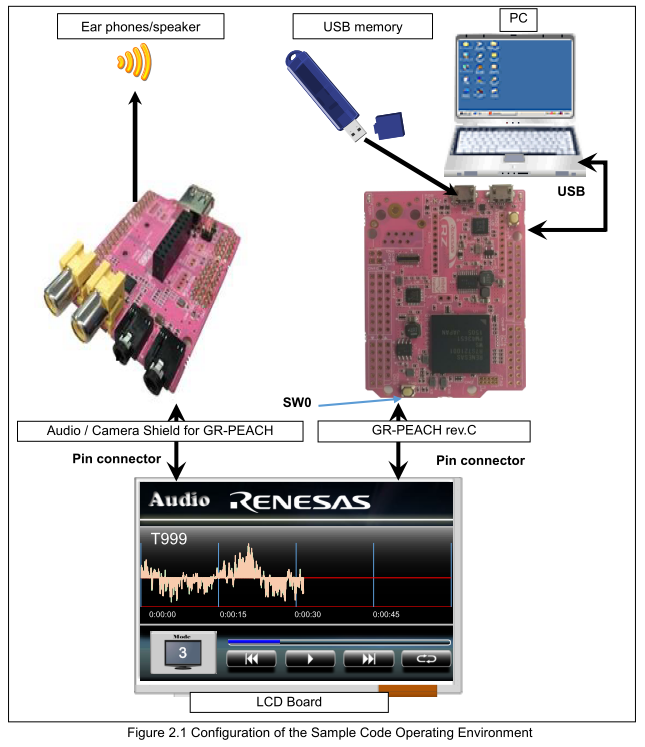
Figure 2.2 and 2.3 show how to configure GR-PEACH, Audio Camera Shield and 7.1 inch LCD shield when using USB0 and USB1, respectively.
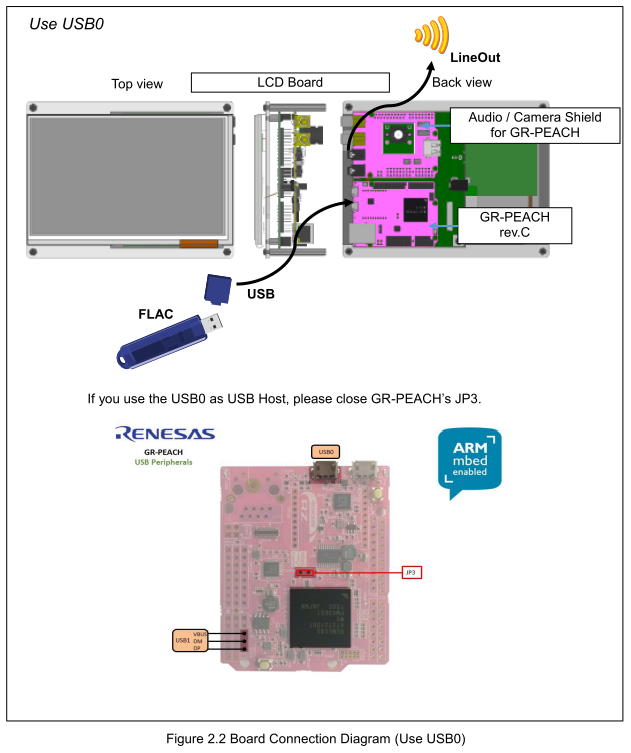
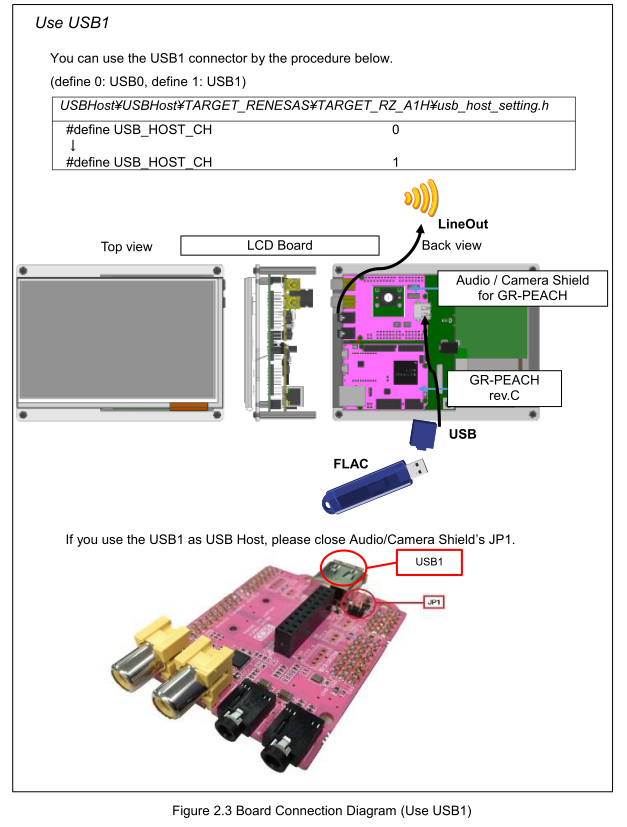
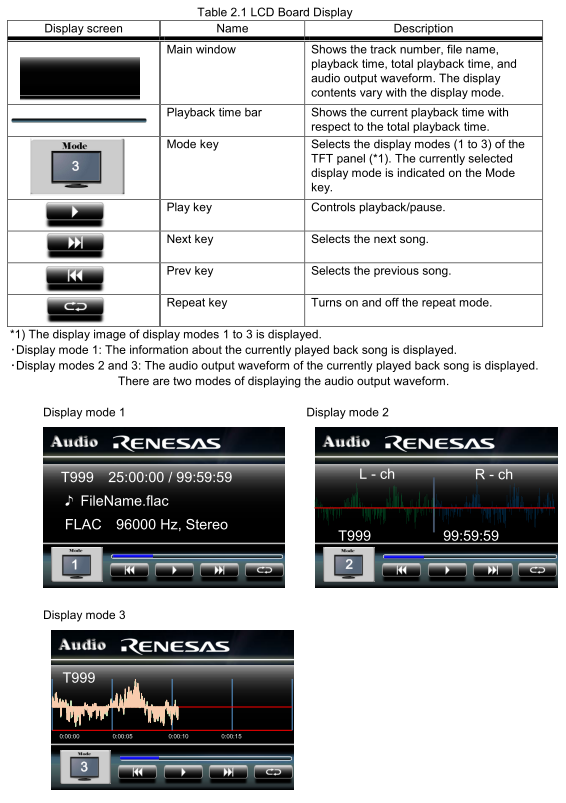
Table 2.1 lists the overview of Graphical User Interface (GUI) of this sample code.
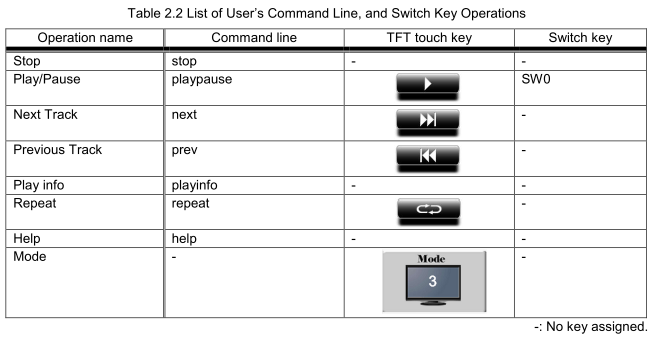
2.2 List of User Operations
Table 2.2 shows the relationship among Audio Playback, Command Line and Onboard Switch.
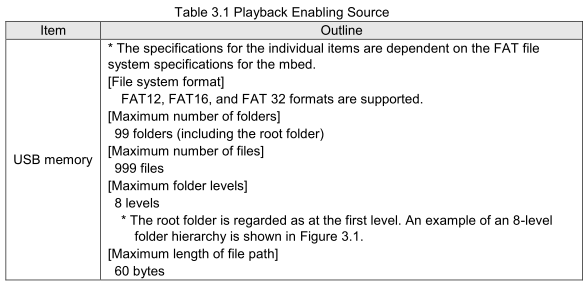
3. Function Outline
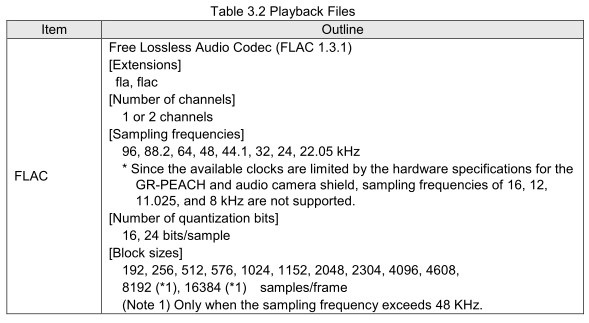
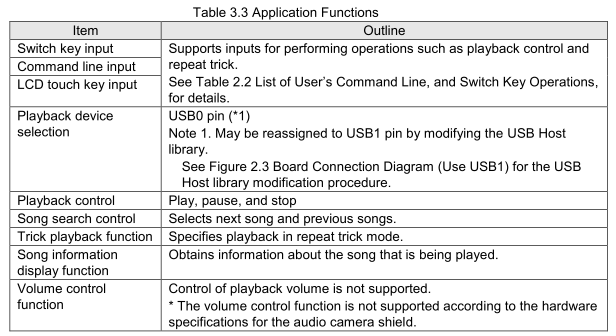
Table 3.1, 3.2 and 3.3 shows the overview of functions implemented in this sample code.
3.1 Playback Control
This sample program supports the operation "play", "pause", "stop", "play next song" and "play previous song".
3.2 Trick Play Control
In order to enable/disable Repeat Mode, user need to type "repeat" on command line or click the corresponding icon shown in Table 2.2. By derault, Repeat Mode is enabled. When Repeat Mode is enabled, the first song is played back after the playback of the last song is finished. Otherwise, the playback is shopped when finishing to play back the last song.
3.3 How to see Song Information
The information of the song being played back can be seen by typing playinfo on command line. Table 3.4 lists the items user can see on the terminal.

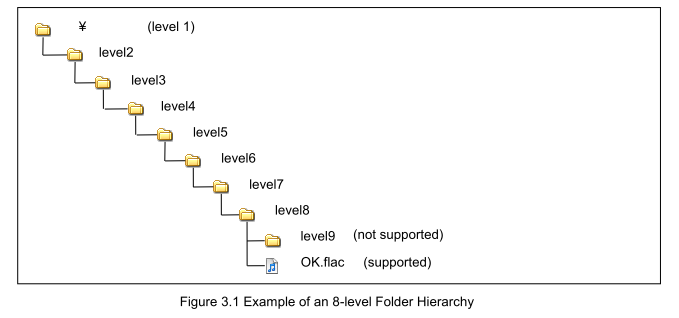
3.4 How to analyze the folder structure in USB stick
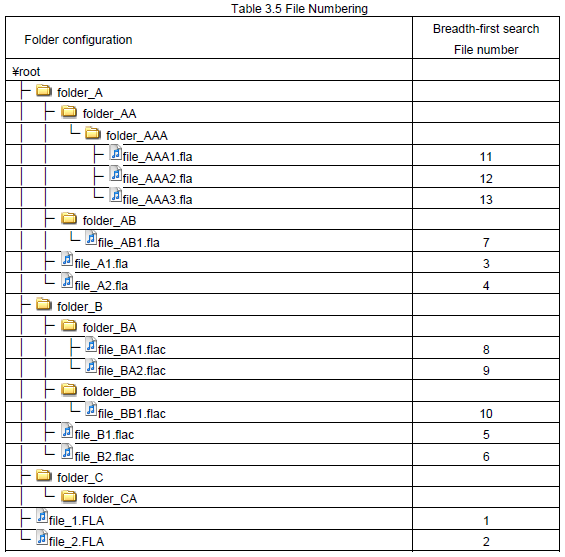
In this sample code, the folder structure in USB stick is analyzed in the breadth-first order. Table 3.5 shows how the files in USB stick are numbered.
4.Others
4.1 Serial Communication Setting
With respect to the default serial communication related setting on mbed, please refer to the follwing link:
https://developer.mbed.org/teams/Renesas/wiki/GR-PEACH-Getting-Started#install-the-usb-serial-communication
Please set up the terminal software you would like to use on your PC in consideration of the above. For example, 9600 should be specified for the baud rate on the terminal in order to control this sample via command line.
4.2 Necessary modification when using GCC ARM Embedded
If you would like to use GCC ARM Embedded, you must revise the following linker script incorporated in mbed OS 5 package as follows:
- Linker Script to be modified
$(PROJECT_ROOT)/mbed-os/targets/TARGET_RENESAS/TARGET_RZ_A1H/device/TOOLCHAIN_GCC_ARM/RZA1H.ld
Please note that $(PROJECT_ROOT) in the above denotes the root directory of this sample code
- Before Modification
RZA1H.ld
/* Linker script for mbed RZ_A1H */

/* Linker script to configure memory regions. */
MEMORY
{
  ROM   (rx)  : ORIGIN = 0x00000000, LENGTH = 0x02000000
  BOOT_LOADER (rx) : ORIGIN = 0x18000000, LENGTH = 0x00004000
  SFLASH (rx) : ORIGIN = 0x18004000, LENGTH = 0x07FFC000
  L_TTB (rw)  : ORIGIN = 0x20000000, LENGTH = 0x00004000
  RAM (rwx) : ORIGIN = 0x20020000, LENGTH = 0x00700000
  RAM_NC (rwx) : ORIGIN = 0x20900000, LENGTH = 0x00100000
}
(snip)
- After Modification
RZA1H.ld
/* Linker script for mbed RZ_A1H */

/* Linker script to configure memory regions. */
MEMORY
{
  ROM   (rx)  : ORIGIN = 0x00000000, LENGTH = 0x02000000
  BOOT_LOADER (rx) : ORIGIN = 0x18000000, LENGTH = 0x00004000
  SFLASH (rx) : ORIGIN = 0x18004000, LENGTH = 0x07FFC000
  L_TTB (rw)  : ORIGIN = 0x20000000, LENGTH = 0x00004000
  RAM (rwx) : ORIGIN = 0x20020000, LENGTH = 0x00180000
  RAM_NC (rwx) : ORIGIN = 0x20200000, LENGTH = 0x00680000
}
(snip)
