Important changes to repositories hosted on mbed.com
Mbed hosted mercurial repositories are deprecated and are due to be permanently deleted in July 2026.
To keep a copy of this software download the repository Zip archive or clone locally using Mercurial.
It is also possible to export all your personal repositories from the account settings page.
Dependencies: mbed pixart_heart_rate_demo pixart_heart_rate_lib_keil_m4
Fork of PixArt_PAH8011_HeartRate_NUCLEO-L476RG by
Homepage
This section highlights the setup and operating guide to integrating PAH8011 with the Nucleo L476RG.
Setup
Hardware:
- 1. PC with Windows Operating System
- 2. Nucleo L476RG Dev Kit Board from ST
- 3. PAH8011 Arduino Enabled Board
- 4. USB Cable (one end with miniUSB)
Connection:
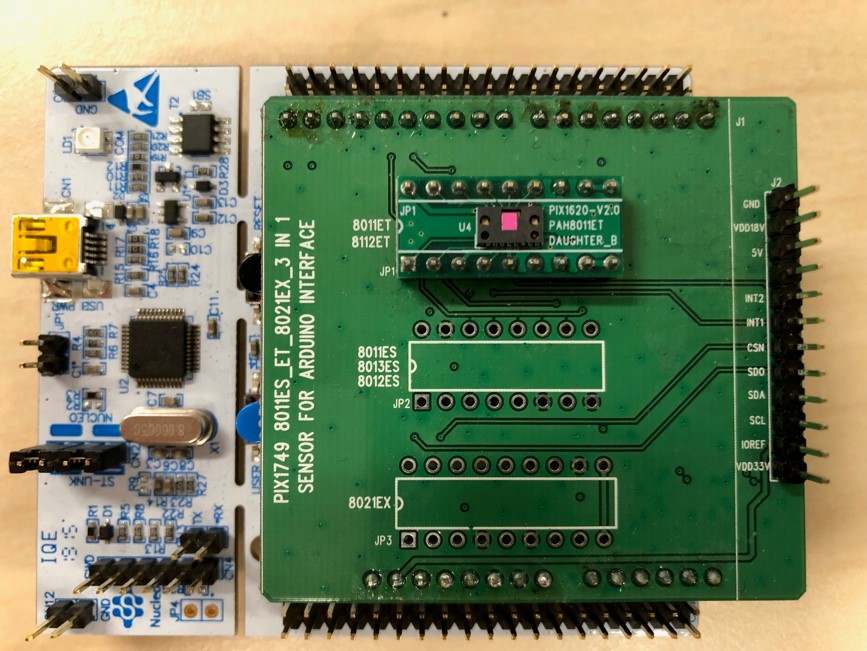
Please connect the board as show below.
Supplying Power
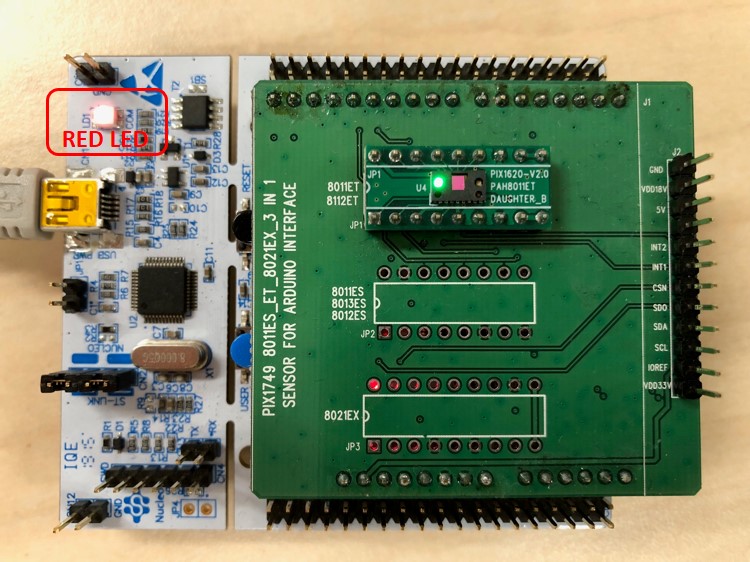
Connect the one end of the USB to the PC USB and the other to the Nucleo L476RG miniUSB as shown in the figure below.
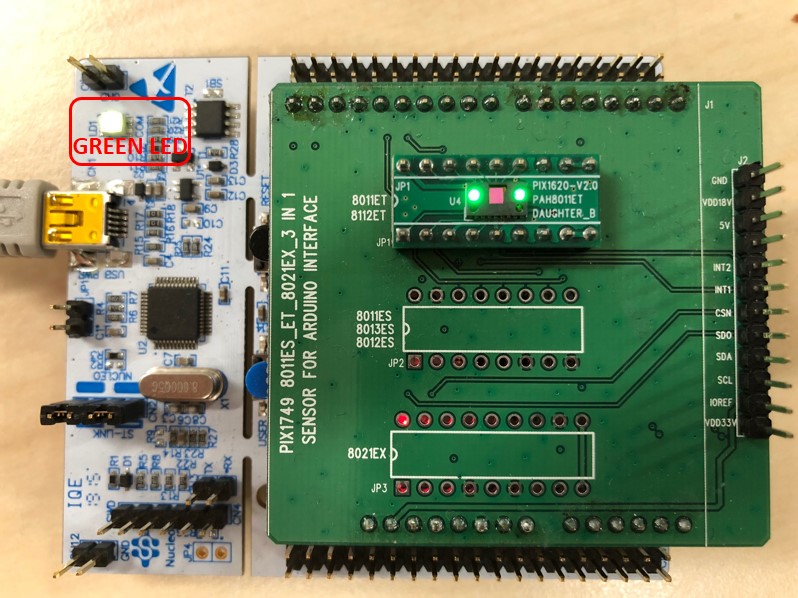
I am assuming that you already know and are able to download the code at this point. Once programmed with the latest compiled .bin file, the LED should turn Green, as illustrated below.
Next, we will test to see if the sensor is indeed functional and deriving the Heart Rate.
Functional Test
1. Open up Tera Term. If you do not have Tera Term, you can download here.
https://en.osdn.jp/projects/ttssh2/releases/
2. Once you have your Tera Term open, go to File > New Connection or use the Hot Key "Alt + N".
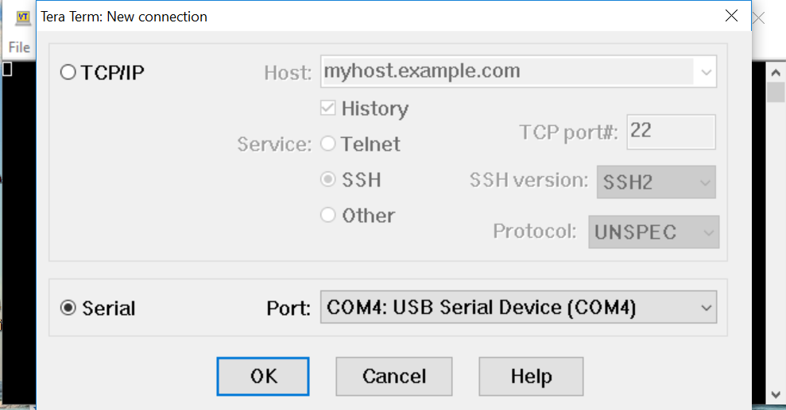
3. Select "Serial".
4. On the Port selection, click on the drop down menu and select the port that describes "COM4: USB SERIAL DEVICE(COM4)".
5. Click on "OK"
6. Go to "Setup" on your top menu, and select "Serial".
7. Set the BAUD Rate to 115200.
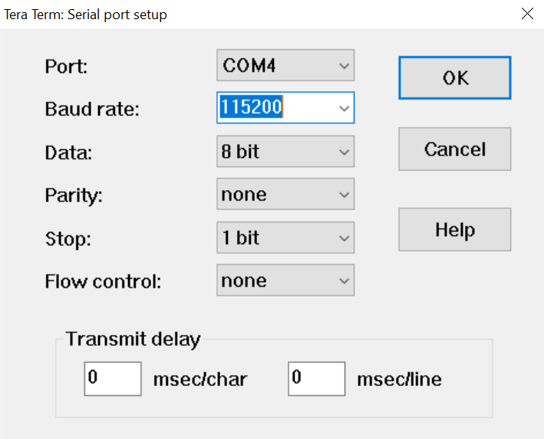
8. Select "OK".
9. Place finger gently on the PAH8011 as illustrated below. Remember that finger does NOT need to press hard onto the sensor package in order to derive a heart rate. A gentle touch will do. Keep in mind the first Heart Rate readout will take a few seconds (6 secs of more).
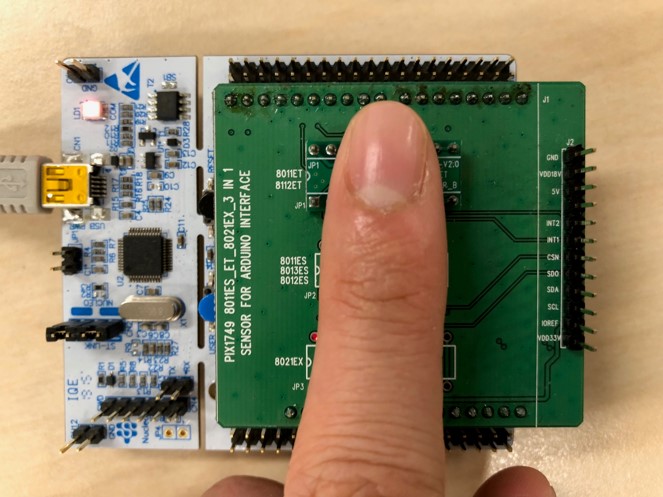
10. Going back to the Tera Term window, you should see the printouts on the TeraTerm Window that includes HR Data and MEMS DATA. Since the Arduino Shield do not come with an Accelerometer, the data will just be 0 throughout. However, the program can take in MEMs data for motion compensation purposes.
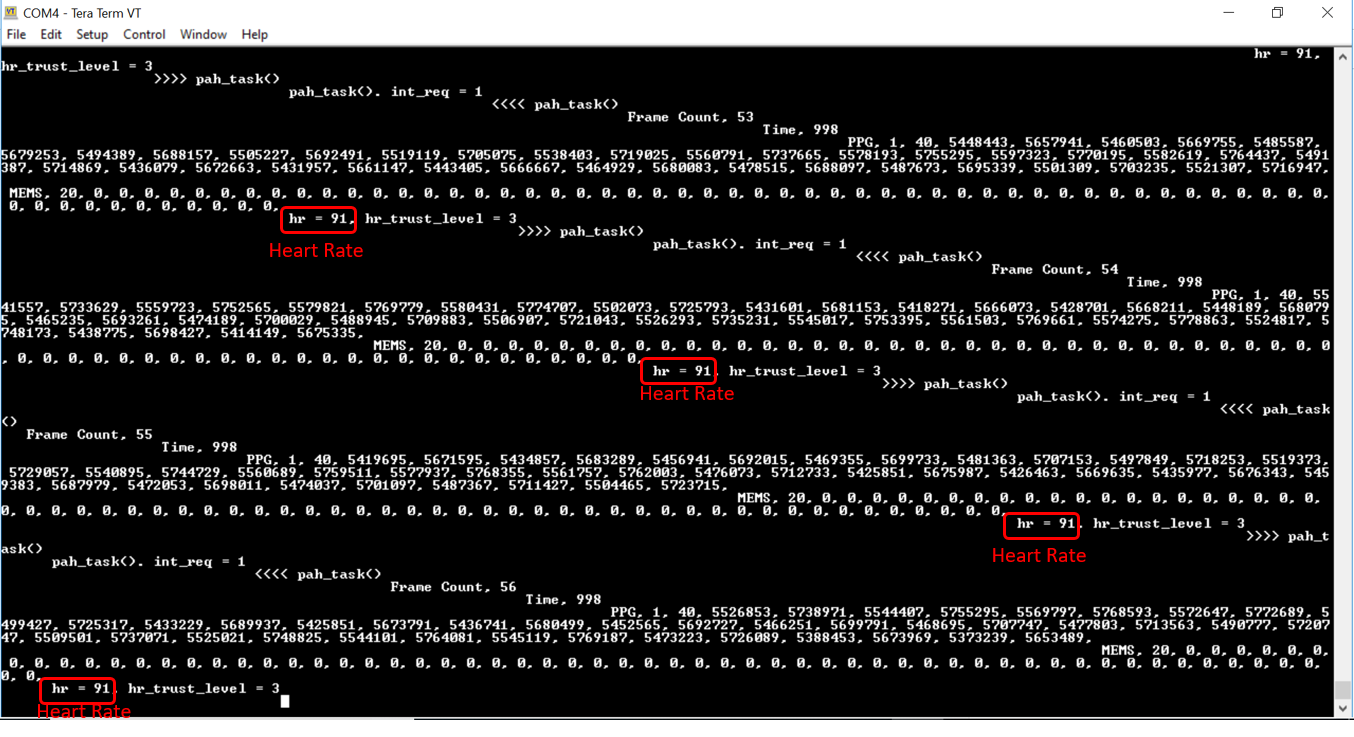
Have fun with this and let us know if you have any further questions!
