LIDAR-Lite v2
Lidar sensor with up to 40-meter range capability at 1cm resolution, 500hz readings, and I2C interface
Hello World
Import programLidar_Distance
Basic HelloWorld on how to use LidarLitev2
Last commit 22 Oct 2015 by  Steven Ventura
Library
Import libraryLidarLitev2
LidarLitev2 Library for distance reading. Capable of both single distance reads and continuous distance read setup.
Last commit 22 Oct 2015 by Steven Ventura
Datasheet
http://lidarlite.com/docs/v2/specs_and_hardware/Notes
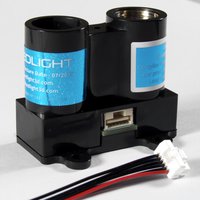
The LidarLitev2 from Pulsedlite is a low cost($115) lidar system with I2C interface. They are available from sparkfun and robotshop. It utilizes lidar(Laser Radar) technology for ultra fast and ultra precise measurements. Here is the wiring utilized for the first demo program.
Functions
| Function | Inputs | Outputs | Description |
|---|---|---|---|
| LidarLitev2 | PinName sda, PinName scl, bool fast | NONE | Constructor that initiates the I2C interface from the mbed with the constructor I2C(sda,scl). The fast input is either true or false. If true the I2C frequency is 400KHz, if false the the frequency is 100KHz |
| configure | int config, int LidarLitev2_addr | NONE | Config is used to chose the mode the user wants the lidar in. Input 0 is 100hz readings, and input 1 sets the acquisition to 1/3 default value. LidarLitev2_addr is simply the slave address of the Lidar |
| beginContinuous | bool modePinLow, char interval, char numberOfReadings,int LidarLitev2_addr | NONE | This function initiates continous setup with mode from Lidar and pulldown to indicate when a read can be done. Look at example 2 to understand. modePinlow false indicates pullup set up, whilst trus is pulldown setup. Interval sets the time between measurements. numberOfReadings indicates how many readings the lidar will do in this mode. LidarLitev2_add simply the slave address of the Lidar |
| distance | bool stablizePreampFlag, bool takeReference, int LidarLitev2_addr | int distance | Return the distance as a int in cm read by the lidar. stablizePreampFlag true = stabilize the DC for slower but more accurate readings. LidarLitev2_addr is simply the slave address of the Lidar |
| distanceContinuous | int LidarLitev2_addr | int distance | Return the distance as a int in cm read by the lidar. LidarLitev2_addr is simply the slave address of the Lidar. |
Wiring

| mbed | Lidar-lite |
|---|---|
| 5V=VU | 5V |
| SDA=P28 | SDA |
| SCL=P27 | SCL |
| Gnd | GND |
As with all I2C devices this device requires a SDA(Serial Data Line) and a SCL(Serial Clock Line). The mbed pinout can be referred to for other I2C setups.
Using Lidar on Breadboard
The Lidar comes with a proprietary cable for connecting the device. This cables can be seen in the photo below:

Thankfully these cables are pre-soldered and thick enough to fit right into the breadboard with no modifications. Only one change was needed to plug this device onto a breadboard. The device connects to mbed's VU(5V) pin which is supplied from USB and has DC stabilization issues. To solve this connect a single capacitor or several capacitors in parallel (C1 + C2.. + Cn) to achieve 680uF or greater. This will provide the stabilization required for the lidar to detect distance with insignificant noise. Below is a picture of the device fully connected to the mbed with capacitors.

Demo Program Lidar_Distance
This wiki page consist of two demos. The first demo will demonstrate how to setup and utilize the basic distance function for the LidarLitev2 library. The main file is shown below:
#include "LidarLitev2.h"


LidarLitev2 Lidar(p28, p27); // Instantiate the LidarLitev2 with name Lidar and I2C pin (SDA, SCL)
Serial pc(USBTX,USBRX);  // Create a serial connection to pc through the mbed USB cable


Timer dt;    // Instantiate a timer for clocking the Hz of the distance reads
int main()
{

    pc.baud(115200);  // Set the baud rate for serial communication with the computer
    Lidar.configure();   // Configure the Lidar
    dt.start();  // Start the timer
    while(1){
         /*Call the lidar distance function and and the timer read while printing out
              both statements formatted to the computer through serial. */
         pc.printf("distance = %d cm frequency = %.2f Hz\n", Lidar.distance(), 1/dt.read());
         dt.reset(); // Reset the timer
    }
}
Video Demonstration
Demo Program Lidar_DistanceContinuous
Import programLidar_DistanceContinuous
Hello world for utilizing the Lidarlitev2 for distance measurements with the continuos reading setup
Last commit 22 Oct 2015 by Steven Ventura

#include "LidarLitev2.h"

LidarLitev2 Lidar(p28, p27);// Instantiate the LidarLitev2 with name Lidar and I2C pin (SDA, SCL)
Serial pc(USBTX,USBRX);     // Create a serial connection to pc through the mbed USB cable
DigitalIn pinMode(p24);     // This pin is to detect the mode out of the lidar in continous mode


Timer dt;   // Instantiate a timer for clocking the Hz of the distance reads
int main()
{

    pc.baud(115200);    // Set the baud rate for serial communication with the computer
    Lidar.configure();  // Configure the Lidar
    Lidar.beginContinuous();/* Set the lidar for continous reading
                            this mode makes the lidar pull pinMode low when ready to be read*/
    dt.start(); // Instantiate a timer for clocking the Hz of the distance reads
    while(1){
        if(!pinMode)    //Check if the lidar is pulling low
        {
            pc.printf("distance = %d cm frequency = %.2f Hz\n", Lidar.distanceContinuous(), 1/dt.read());
            /*Call the lidar distance function and and the timer read while printing out
              both statements formatted to the computer through serial. */
        }

    }
}
Fun With the Lidar theremin
You need to log in to post a discussion