IR and RF remote controls
Many embedded devices use handheld IR and RF remote controls. TVs and radios typically have Infrared (IR) remote controls. Most cars now have a radio frequency (RF) remote key fob. Wireless keyboards and mice use RF links at 27Mhz or 2.4Ghz. Cordless phones use 900Mhz, 2.4Ghz, and now 5.8Ghz. Key fobs, garage door openers, and some home automation systems use 315Mhz or 434Mhz. Since these devices are used in mass produced consumer products, these parts are widely available and relatively inexpensive.

TV remotes use an Infrared LED
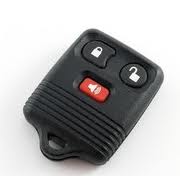
Car key fobs use RF
Using some low-cost parts and breakout boards that should only cost around US $10 per demo, two basic demos will be setup. One using IR and one with RF. Each demo has a transmitter and matched receiver attached to mbed. To keep it simple in each case, 8-bit ASCII character data will be sent out over the link and received back using mbed's serial port hardware. A terminal application running on the PC attached to mbed's USB virtual com port will be used to type in test data. The data will only appear back on the PC if the IR or RF communications link is operating correctly.
Serial ports use a 10-bit protocol to transfer each character. The idle state of the serial TX pin is high. For bit 1, the start bit, the signal goes low. It is followed by the 8-bits of ASCII character data and a high stop bit (total of 10 bits). The rate at which bits change is called the baud rate. The low cost devices used in the demos will operate at 1200-2400 baud max(or bits per second (BPS) ). For the demo, both the transmitter and receiver are attached to mbed, but in a typical application they would be on different subsystem with its own processor, and physically separated by several meters.
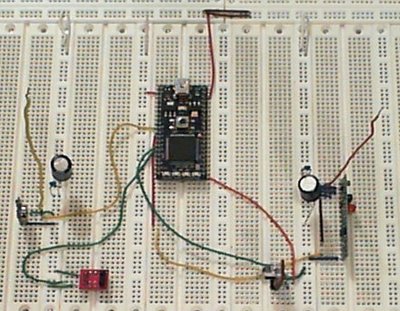
IR and RF communication links assembled on a breadboard for the demo.
IR transmit and receive demo
Consumer IR devices use an infrared LED in the handheld remote and an IR receiver located inside the device. Since sunlight and ambient room lighting would interfere with any IR detector just looking at light levels, the signal modulates (i.e. turns on and off) a high frequency carrier signal. This is called amplitude shift keying(ASK). Typically for IR, the frequency is in the 30-60Khz range with 38Khz being the most common carrier frequency. There are a few early first generation electronic ballasts for fluorescent lights operating this range that can cause interference with IR remotes, but in most cases it works well. This means that the IR LED transmitter must be modulated. On mbed, this can be done using the PWM hardware. The IR detector modules have a built-in bandpass filter and hardware to demodulate and recover the original signal.
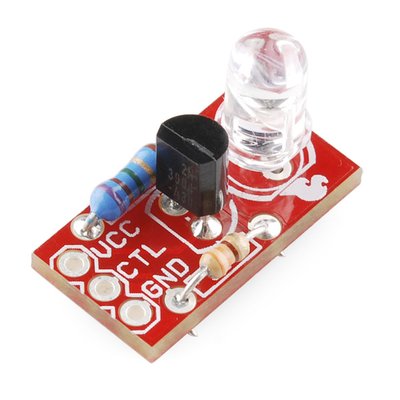
Sparkfun IR LED transmitter module
The Sparkfun IR LED breakout board seen above contains a 50MA high output IR LED and a driver circuit using a transistor as seen in the schematic below. An IR Led can be used instead now that this board is no longer available, but the circuit still needs the correct polarity to control the LED on/off state, since the serial port's internal UART receiver hardware must have a low start bit and a high stop bit to work. A discrete IR LED should have an operating voltage of around 1.5V, so don't forget the series voltage dropping resistor!
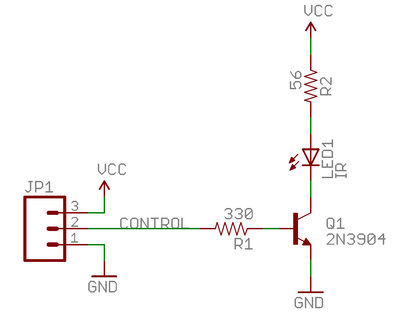
Schematic of IR LED breakout board
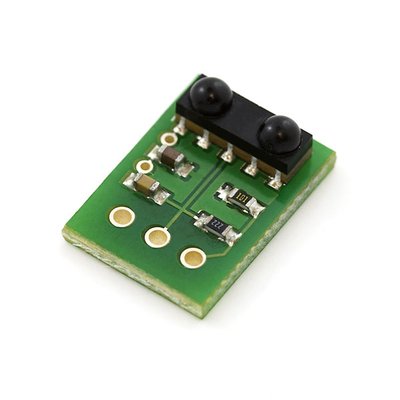
Sparkfun IR receiver module
The Sparkfun IR receiver breakout board seen above contains a Vishay TSOP853 38Khz IR receiver module. The block diagram is seen below.
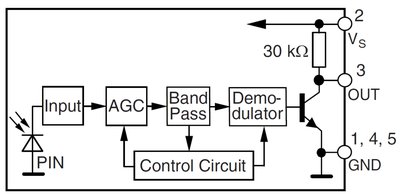
IR receiver module block diagram
This newer 38Khz IR receiver module from Sparkfun should also work for the demo.
Wiring
| mbed | IR transmitter | IR receiver |
|---|---|---|
| gnd | gnd | |
| VU(5V) | Vcc | Vcc |
| pin 13(TX) | GND | |
| pin 14(RX) | DATA | |
| pin 21(PWM) | CTL |
Solder header pins into the breakout boards and everything will hookup on a breadboard. Point the IR LED towards the receiver breakout board. At a range of just a few inches the receiver can pickup the signal from the side, if case you have trouble pointing it directly towards the IR LED. Long right angle header pins might be a good idea on these IR breakout boards since they can then be mounted sticking up and directly facing each other. At close range, your hand or a piece of paper will reflect back enough IR to transmit the signal in case you can't mount them facing each other on the breadboard.
IR Demo Code
In the demo code, mbed's PWM hardware supplies the 38Khz carrier for transmission. The PWM period is set to 1/38000. The IR LED CTRL input is driven by the 38Khz PWM signal. IRLED = .5 generates a 50% PWM duty cycle to produce a 38Khz square wave for the carrier. The gnd pin on the IR LED is actually switched on and off using mbed's serial data output to eliminate the need for any external digital logic, and still permit direct use of the serial port hardware for 38Khz IR data transmission. It is a bit more complex than appears at first glance, since the start bit must be zero for the 10-bit serial port input hardware to work, and the IR receiver inverts the signal.
IR_Demo
#include "mbed.h"

Serial pc(USBTX, USBRX); // tx, rx
Serial device(p13, p14);  // tx, rx
DigitalOut myled1(LED1);
DigitalOut myled2(LED2);
PwmOut IRLED(p21);
//IR send and receive demo
//LED1 and LED2 indicate TX/RX activity
//Character typed in PC terminal application sent out and returned back using IR transmitter and receiver

int main() {
    //IR Transmit code
    IRLED.period(1.0/38000.0);
    IRLED = 0.5;
    //Drive IR LED data pin with 38Khz PWM Carrier
    //Drive IR LED gnd pin with serial TX
    device.baud(2400);
    while(1) {
        if(pc.readable()) {
            myled1 = 1;
            device.putc(pc.getc());
            myled1 = 0;
        }
        //IR Receive code
        if(device.readable()) {
            myled2 = 1;
            pc.putc(device.getc());
            myled2 = 0;
        }
    }
}
Import programIR_demo
IR transmit and receive demo using Sparkfun breakout boards See http://mbed.org/users/4180_1/notebook/ir-and-rf-remote-controls/
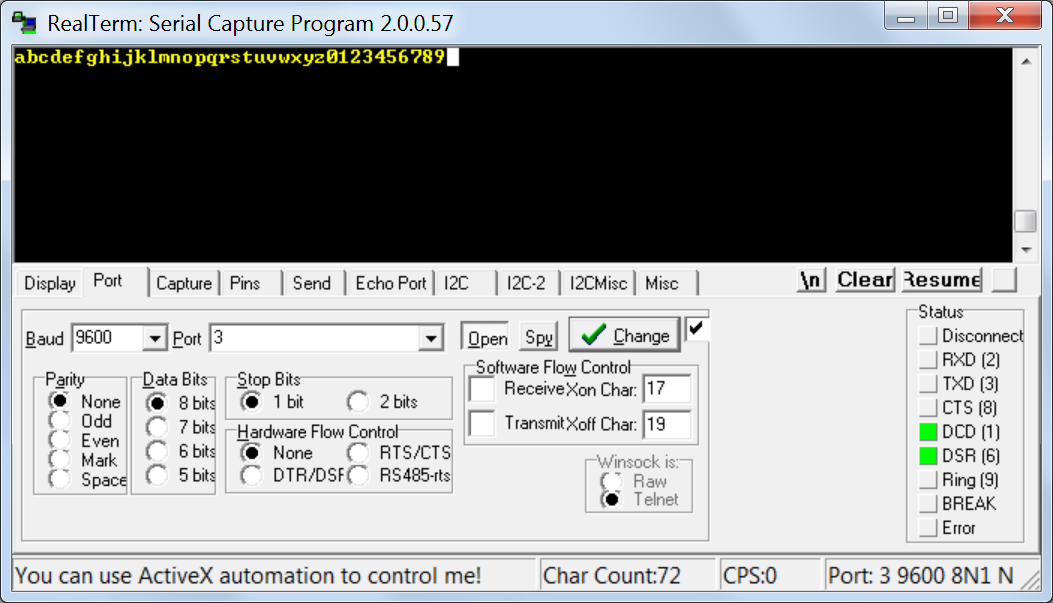
Characters typed in PC terminal window echo back using the IR link
The demo is started on mbed and a terminal application window is started on the PC using mbed's virtual com port. As seen above in the demo, any character typed in the PC's terminal application window is sent out over the serial port, transmitted and received using the IR link, read back in on the serial port, and echoed back in the terminal application window. If the characters typed in do not appear in the window as they are typed, there is a problem with the IR link. LED1 and LED2 on mbed are used to indicate TX and RX activity. If you only see a few occasional errors, look around for a fluorescent light that might be causing interference. While running the demo if you happen to have an IR remote control handy, point it at the IR receiver and hit a button. Assuming that the IR remote uses a carrier near 38 KHz, you should see a random looking string of characters on the PC every time you hit a button.
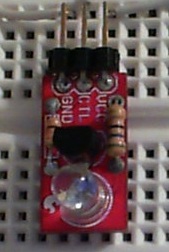

A Camera can detect the invisible IR light from an IR LED
While you can't see the IR light from an IR LED with your eyes directly to see if it is working, it will show up on a webcam, digital camera, or a cell phone camera as a faint purple light as seen in the image on the right above. The IR LED is off in the left image. Unlike your eyes, the image sensors used in cameras have a slight response to IR light.
Applications that need to transfer longer streams of data and not just 8-bit characters will need a bit more complex code for a different communications protocol. In most cases, shifting, some bit banging, and time delays will be needed since it will not be possible to use the serial transmission protocol implemented in hardware in mbed’s serial port UART. On mbed, a PWMOut pin can also be used to drive a low power IR LED directly or the CTL input on the IR breakout board. In this case, the IR LED breakout board power pins are tied to 5V and gnd, producing a bit more drive current for the LED than the demo setup. Set the period to 38Khz, assign the PWM output a value of 0.0 to turn it off (sends a "0" bit) , or a value of 0.5 to turn it on (sends a "1" bit a 38Khz square wave). In this case the serial port hardware would not be used at all, the software shifts out each bit. Each data bit would need to be shifted over, and masked off, and used to drive the PWM output pin after the appropriate time delay using wait(). Several cycles of the carrier frequency are required for the receiver to lock onto each bit and this sets the maximum data transfer rate (around 2400bPS).
Consumer IR remotes send out a long continuous stream of bits (around 12-50 bits long) for each button, so the serial port cannot be used to send these codes (i.e., no start and stop bits for every eight bits of data). Universal remotes with learning have an IR detector and they learn by recording the bit pattern from the old IR remote control and then they play it back. For more information on consumer IR signals see http://en.wikipedia.org/wiki/Consumer_IR and http://www.hifi-remote.com/infrared/IR-PWM.shtml. Two cookbook projects, TxIR and IR remote provide additional insight into this approach and code examples for mbed. LIRC is a PC application designed to decode and send consumer IR signals. An extensive table of the IR formats and codes from LIRC used by different manufacturers can be found at http://lirc.sourceforge.net/remotes/ and the table format is described at http://winlirc.sourceforge.net/technicaldetails.html. The IR codes often contain preamble bits that help the receiver’s automatic gain control (AGC) circuit adjust the gain to the signal strength to minimize errors.
IrDA is an infrared communications protocol designed to work at a range of around 1 meter. The IrDA IR signal is not modulated. It relies on high signal strength at a short distance to overcome interference from ambient light. It was a bit more popular in portable devices prior to the introduction of Wi-Fi and Bluetooth. It would require a different IR detector without a band pass filter and demodulator along with software to implement the complex protocols needed for data transfer. IrDA transceiver modules are available in packages similar to the IR receiver used in the demo with data rates from 115KbPS to 4000KbPS.
RF transmit and receive demo
RF remotes tend to cost a bit more, have longer range, and are not line of sight only as is the case for IR. Most car key fobs operate at 315Mhz or 434Mhz. Most key fob systems use encryption to prevent a car thief from intercepting and spoofing the codes.Rolling codes are used in most remotes to prevent simple “replay” devices from gaining access. Governments allocate and license the use of RF frequencies and place limits on power output, so frequencies used can vary from country to country. A final product with RF modules may require testing and certification. In the USA, many products using RF are required to have a label with an FCC ID number that can be searched to quickly determine the operating frequency of the device.
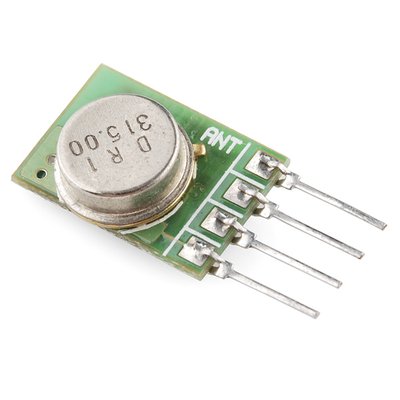
Sparkfun RF transmitter module
For the RF demo, the 315Mhz RF transmitter module seen above was used. It uses a surface acoustic wave (SAW) device. It is the metal can seen in the image above. A SAW device has significant performance, cost, and size advantages over the traditional quartz crystal for a fixed frequency transmitter. The RF transmitter’s 315 MHz carrier is turned on and off by the signal (ASK modulation). This is similar to the earlier IR example, but it is operating at a much higher frequency in the UHF range (315 MHz vs. 38 KHz). A similar pair of 434MHz modules is also available from Sparkfun and it is more common in Europe and Asia. The pins have the same function and the demo should also work for the 434MHz modules without changes (other than a shorter antenna length).
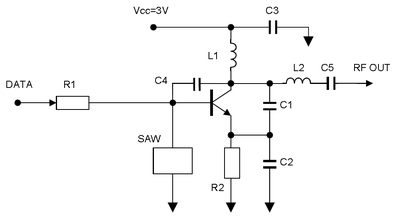
Schematic of a SAW transmitter
The schematic is hard to find for each module, but a typical SAW transmitter for this frequency range is shown above. Basically, it has a high frequency transistor, the SAW device for the correct frequency, and some RLCs. This looks identical to the circuit found on the back side of the Sparkfun module.
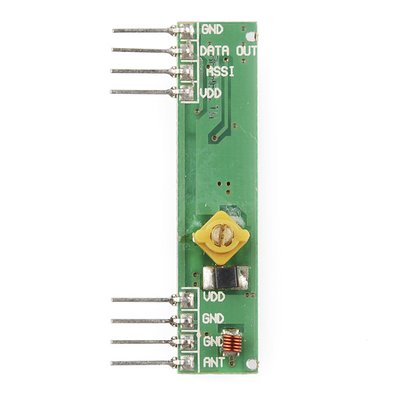
Sparkfun RF receiver module
The 315MHz Sparkfun RF receiver module seen above is used in the demo to receive the signal. These modules are also available from a number of other sources. Similar RF modules in small surface mount packages are also available, but a breakout board would be needed for use on a breadboard. The datasheets provide little information, but the module is basically a low-cost bare bones super-regenerative receiver. A super-regenerative receiver uses a minimum of parts and has a basic automatic gain control (AGC). An AGC attempts to automatically adjust the amplification (gain) needed to match the signal strength.
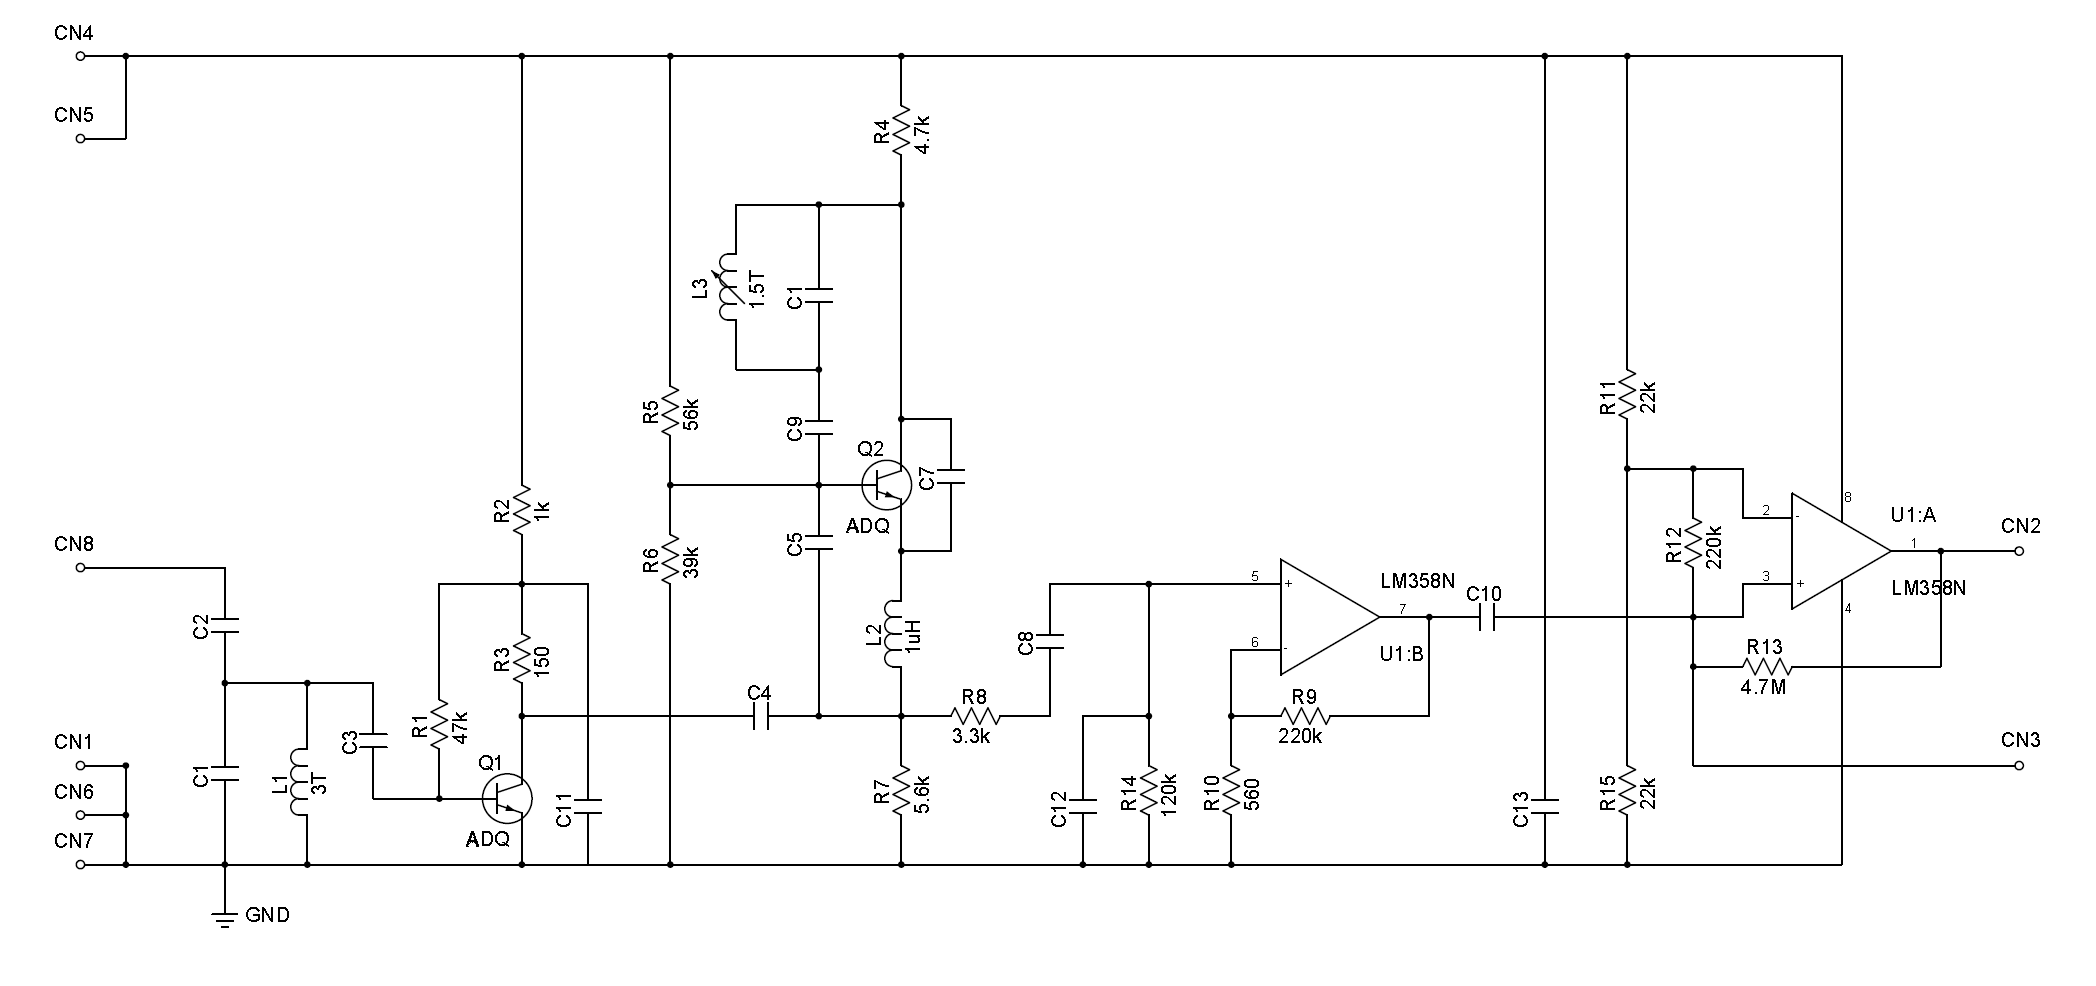
A schematic for a 434MHz RF receiver module
The datasheet does not include a schematic, but a schematic is shown above for another RF module in this frequency range and the same parts are found on the Sparkfun receiver module. A dual op amp, two high frequency transistors, some RLCs and a variable inductor with a screw slug for frequency tuning. For a more in depth discussion on how the various parts of this circuit function see http://www.valontechnology.com/images/REGEN.PDF.
On the breadboard, a decoupling capacitor of 330uf was placed near the power pins of each module and it greatly reduced transmission errors. Some PCs also seem to have a bit more noise present on the USB 5V power lines than others and this can increase the RF transmission error rate and the need for decoupling capacitors. Each module has an antenna pin and a 6-13cm jumper wire works well as an antenna at short distances on a breadboard. At greater distances, the antenna would need to be longer (1/4 wave = 23cm (at 315MHz) is suggested). To get maximum range, don’t forget that a 1/4 wave monopole antenna is supposed to be sticking above (but not touching) a ground plane about the same size as the antenna. Earth approximates a ground plane, but metal provides more directional gain. The RF modules have a maximum range of up to 160M under perfect conditions. Some of the new surface mount RF modules mounted on breakouts have a range of a 1000M or more with a corresponding increase in price. Antenna size in a final product can also be reduced using several techniques.
Wiring
| mbed | RF transmitter | RF receiver | Decoupling Cap |
|---|---|---|---|
| gnd | pin 1 | pins 1,6,7 | lead- |
| VU(5V) | pin 3 | pins,4,5 | lead+ |
| pin 9(TX) | pin 2 | ||
| pin 10(RX) | pin 2 | ||
| pin 4 - antenna | pin 8 - antenna |
The RF modules have pins with spacing that fits in standard breadboards. Exercise some caution inserting the modules into the breadboard as they are not quite as sturdy as standard IC pins. The pins are also a bit smaller in size and on some breadboards they need to be adjusted a bit for a good clean contact. On this demo setup, the receiver had more errors until the module was pulled up a bit from the breadboard. Make certain that you hookup all of the power and ground pins. If the RF modules are placed too close on a breadboard, it can cause errors. In the demo setup, the metal can on the transmitter module was placed facing the receiver module to provide a bit of shielding.
RF Demo Code
In the RF demo, data is sent out over the serial port, transferred using the RF link, and read back in on the serial port. It seems straightforward, but to keep the transmitter and receiver locked on, the signal needs to be constantly changing. In the demo, the idle state constantly sends out a 10101010 pattern to keep the receiver locked on to the correct gain for the signal's strength. Without sending the sync pattern, if no change in data occurs for several ms, the receiver's AGC will start turning up the gain. Eventually, it cranks up the gain way up and outputs whatever RF noise it sees at the time (the digital data output appears almost to be random noise when this happens).
RF_Demo
#include "mbed.h"

Serial pc(USBTX, USBRX); // tx, rx
Serial device(p9, p10);  // tx, rx
DigitalOut myled1(LED1);
DigitalOut myled2(LED2);
//RF link demo using low-cost Sparkfun RF transmitter and receiver modules
//LEDs indicate link activity
//Characters typed in PC terminal windows will echo back using RF link
int main() {
    char temp=0;
    device.baud(2400);
    while (1) {

        //RF Transmit Code
        if (pc.readable()==0) {
            myled1 = 1;
            //Send 10101010 pattern when idle to keep receivers AGC gain locked to transmitters signal
            //When receiver loses the signal lock (Around 10-30MS with no data change seen) it starts sending out noise
            device.putc(0xAA);
            myled1 = 0;
        } else
            //Send out the real data whenever a key is typed
            device.putc(pc.getc());

        //RF Receive Code
        if (device.readable()) {
            myled2 = 1;
            temp=device.getc();
            //Ignore Sync pattern and do not pass on to PC
            if (temp!=0xAA) pc.putc(temp);
            myled2 = 0;
        }
    }
}
Import programRF_loopback_test
RF link test program using low cost modules from Sparkfun See http://mbed.org/users/4180_1/notebook/ir-and-rf-remote-controls/

Characters typed in PC terminal window echo back using the RF link
The demo is started on mbed and a terminal application window is started on the PC using mbed's virtual com port. As seen above in the demo, any character typed in the PC's terminal application window is sent out over the serial port, transmitted and received using the RF link, read back in on the serial port, and echoed back in the terminal application window. Keep in mind that any RF link will occasionally experience errors and is subject to interference from other RF sources nearby, cosmic radiation, and thunderstorms. If you happen to have a car key fob that operates at 315MHz (or 434Mhz in Europe and Asia), try holding it right next to the receiver antenna when running the demo and hit a button. Typically, you will see a long random looking string of characters when it generates and transmits the encrypted code for the button. If you disconnect power to the transmitter chip, the receiver's AGC will crank up the gain until it starts sending out the background RF noise converted to random strings of ASCII characters.
The demo code leaves the transmitter turned on. Some applications may need to turn off the transmitter whenever it is not sending data out on the serial port. When the transmitter turns on, sending a preamble of 0xFF, 0xFF, 0x00, 0x55 and having the receiver wait for 0x55 only, prior to sending data will help the receiver's AGC lock onto the signal strength a bit faster.
Instead of using the serial port hardware directly and constantly sending a sync character, bit banging and a different sync method or encoding scheme that always changes the data could be used. Two such common coding schemes are NRZ and Manchester coding. This type of receiver works best with an encoding scheme that has a DC level (average value) near zero (i.e. 50% "0"s and 50% "1"s in the digital signal). It is also possible to tune the receiver circuit to the transmitter by adjusting the screw on the receiver module, but they seem to be set very close at the factory and the tuning procedure is a bit involved. Tuning probably will be needed only if it is operating near the maximum range.
The analog output on the receiver module (Received Signal Strength Indicator (RSSI) pin 3) can be connected to an ADC and used as a rough indicator of signal strength whenever the receiver is locked on an RF signal. To be useful, it needs to be read only during signal transmissions. When there is no signal present it will still be a bit high. This is a result of the receiver’s automatic gain control (AGC) slowly turning up the gain until the digital output starts to toggle from background noise whenever a signal is not present. Some designs disable the receiver output when RSSI falls below a fixed threshold (i.e., a squelch feature).
One widely used IR and RF transmission protocol sends a preamble to lock in the AGC to the correct level followed by the data, and then the inverse of the data. This insures that the signal's DC level is always near zero to keep the AGC locked onto the signal. By checking each data byte against its inverse, errors can also be detected by the receiver. The disadvantage is that you lose half of the useable signal transmission bandwidth by sending the data bytes twice. Another wireless protocol sends the data three times and uses a majority vote to attempt to correct errors whenever a checksum or CRC error occurs on a packet of data. There is an mbed cookbook project using this transmitter module to send signals to the X10 home automation wireless receiver. These low cost IR and RF devices designed for remotes have limited bandwidth. If you need to transfer large amounts of data there are other wireless options to consider.

A Wijit Smart AC Plug
The Wijit is one of the newer low cost home automation examples. It has a Wi Fi hub that communcates to 10A relay controlled plug modules using a newer generation of 434Mhz RF receiver and transmitter modules similar to those used earlier. Information on the WiJit is a bit hard to find, but some details and internal photos from the FCC approval are at https://fccid.io/O6PWJTHUB. They can be controlled from a free smart phone app.
Additional Wireless Options
These demos show just the basics of getting the communication channel operational. In the case of a handheld remote, if the signal is not received the user just hits the button again and perhaps moves closer. For applications that need more reliability, a bidirectional link would be required. One solution to support bidirectional communication is for each device to have a transmitter and receiver operating at a different frequency. Another possibility is to turn off the transmitter when it is not sending data. This requires a more complex protocol such as CSMA to solve the problems that would occur whenever two devices start to transmit at the same time. Being able to send data in both directions would allow each message to be acknowledged and checked for transmission errors using a checksum or CRC. In case of an error, it could automatically be retransmitted. Many of the higher data rate RF modules use frequency shift keying (FSK) instead of the simpler ASK for modulation. Similar to AM versus FM commercial radio broadcasts, having the signal change the frequency of the carrier signal provides more noise immunity than changing the amplitude, but it also requires a bit more hardware and power. More advanced wireless systems also have several channels at different frequencies and they automatically switch to an inactive channel to avoid conflicts.
These techniques are required for reliable networking and many are built into the more complex and costly wireless communication standards and protocols such as WiFi, Bluetooth and Zigbee. In general, higher data rates, longer range, and higher reliability always adds to the power used, hardware cost, and software complexity. If you need higher data transfer rates and higher reliability, there are several wireless networking solutions available on breakout boards with mbed code examples in the wireless section of the mbed cookbook. These modules offer a drop-in solution and typically have a RF transceiver along with a microcontroler with firmware that implements the wireless protocol. Other wireless modules available on breakout boards shown below to consider for use with mbed and with mbed code examples are the RFM22B (128KbPS low-cost FSK transceiver), XBee (Zigbee), RN-42(Bluetooth) and the WiFly (WiFi)
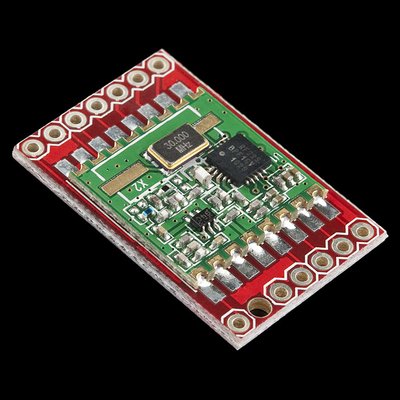
RFM22B (128KbPS low-cost FSK transceiver)
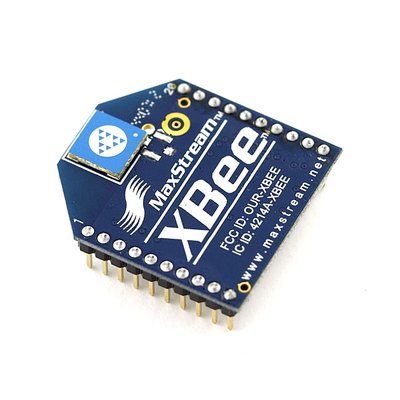
XBee (Zigbee)
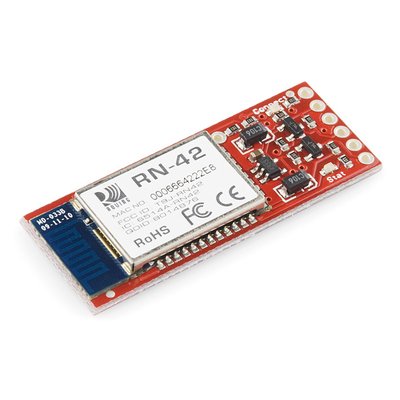
RN-42(Bluetooth)
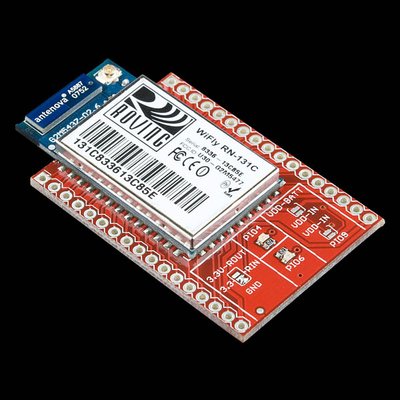
WiFly (WiFi)
Extending the Range on RF devices
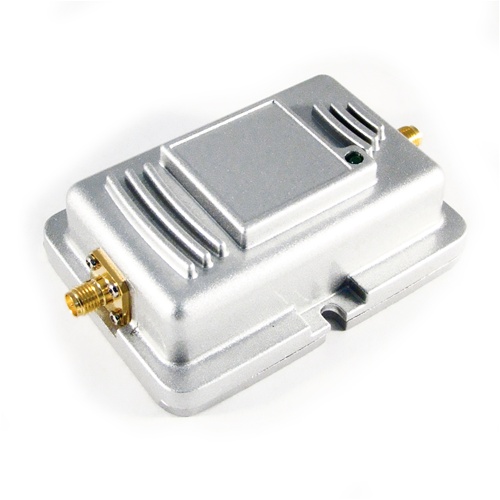
For longer range, more advanced antennas with high directional gain pointed in the correct direction can be used for stationary transmitters and receivers. The Wi Fi antenna seen below worked at 56Km using 200mw of RF power with a gain of 23.5 dBi. RF amplifiers can also be used to boost RF output and increase range, but check regulations and limitations in each country on RF output power. The 1000mw RF amplifier seen below can boost Wi Fi range to 12Km and has been used for remote control of UAVs.
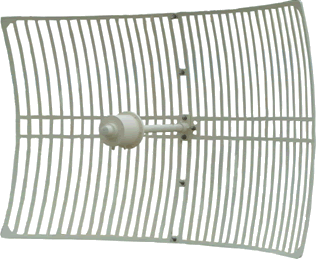
2.4 GHz Grid Antenna with 23.5 dBi gain
7 comments on IR and RF remote controls:
Please log in to post comments.

Regarding Code for RF link module: I'm using 2 Microprocessors communicating using these RF link modules. Is the given code to program only one Microprocessor? If i'm using 2 microprocessors, one connected to Transmitter and pin 9 of mbed and the other microcontroller connected to reciever and pin 10 of the mbed, would the transmitter microcontroller only have the transmitter code and would the reciever microcontroller have the corresponding receiver code separately? Thank you very much for clarifying this. Regards.