Sparkfun Magician Robot Base Kit
Sparkfun's Magician robot base kit is probably one of the lowest cost robot options for mbed at around $15 US quantity one. The kit comes with two geared DC motors, wheels, a 4AA battery holder, and the base. The wheels have a small slotted wheel on the inside that could be used for feedback. It comes in a bag with minimal instructions. The motors are a tight fit and take a bit of a push to get it together. In some kits, the "T" shape motor mounts seem a tad short and might need to be filed down a touch on the inside edges of the "T" to get the motor screw holes to line up. Make sure that the tires and slotted feedback wheels have clearance from the edges of holes in the mounting platform. If they get close, they can bind making one wheel move slow. When comparing robot kit prices, kind in mind that this robot kit will also need two H-bridge drivers and a small breadboard for use with mbed. Those items will likely cost as much as the robot kit.
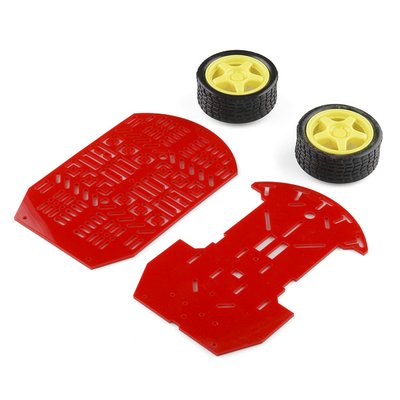
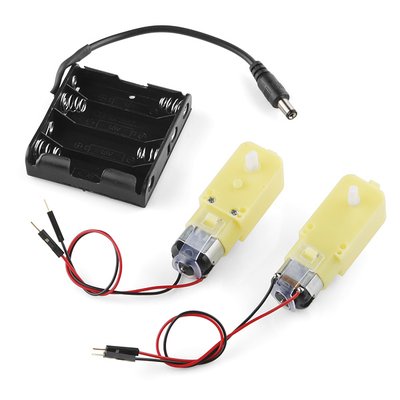
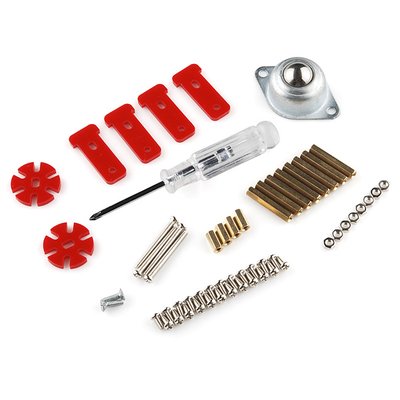
Sparkfun's Magician Robot Base Kit
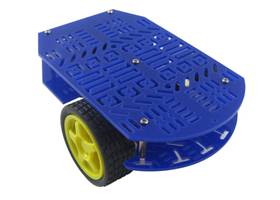
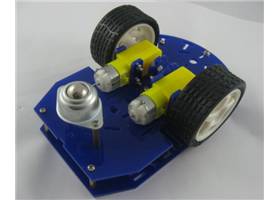
Assembled kit top and bottom views
Information
Update: New assembly tutorials for the nearly identical Redbot are available at Sparkfun https://learn.sparkfun.com/tutorials/redbot-assembly-guide-rev-02/introduction. The mechanical parts are the same, but the Redbot just uses a different micro.
Adapting the Magician robot base kit for use with mbed
As seen in the image below, you will also need a small breadboard and two H-bridge drivers or a single dual H-bridge driver to control the two DC motors. Sparkfun and Pololu have several H-bridge breakout boards that can be used. The motor stall current is rated at 1A, so keep this in mind when selecting an H-bridge.
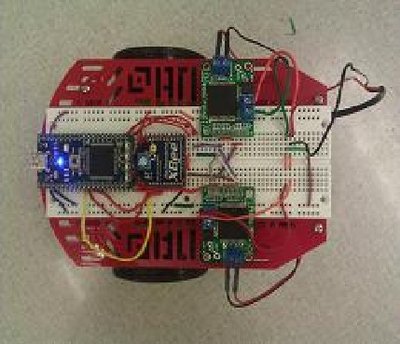
Using mbed to control the Magician robot
Additional Parts Needed
1. Two H-bridge driver breakouts 6V+ @1A or larger
2. Small Breadboard
3. 4 AA Batteries
4. mbed module
The 4AA battery holder mounts on the lower deck along with the two geared DC drive motors. The battery output can be used to power mbed using the Vin pin for standalone operation. The USB cable could be used as a tether cable to test short movements and sensors, but it will not supply enough current to drive the motors, so they should remain connected to the battery and the battery gnd should be tied to mbed gnd. The mbed's 5V supply cannot handle all of the motor current needed, so be sure to tie the motor driver's output stage directly to battery+.
As an alternative to the breadboard setup seen in the image above, several very small breadboards can also be mounted sideways. The breadboard can be attached using screws or double sided tape. The battery connector can be cut off and wires used to connect power to the breadboard's power bus lines, if you do not have a mating power connector to use. A toggle switch might also be handy for power on and off instead of pulling out the battery wire. There is room on the lower deck for one of the very small protoboads that could be used for the H-bridge setup, if more space is needed on the upper deck.
The cookbook's motor project shows how to connect an H-bridge driver with mbed to reverse and control the speed of DC motors along with code examples. Just setup two H-bridge circuits (using different pins on mbed). Use one H-bridge for the right motor and one H-bridge for the left motor. In the image above, a larger on hand H-bridge from Pololu was used, but a smaller dual H-bridge that handles less current would be less expensive and save some space on the robot as seen in the image below.
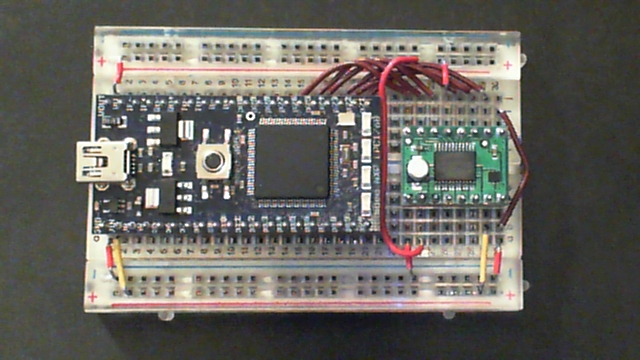
The small dual H-bridge driver breakout with mbed
Here are the results of an initial motor test using the smaller lower cost H-bridge from Pololu. It saves a lot of breadboard space and seems to work well with the motors without signs of overheating. The cookbook's motor driver example was used for PWM speed control. In the video, one motor uses dynamic braking and one coasts to a stop (when the LED turns off).
Magician motor driver and speed control test
Wiring
| mbed | Dual H-bridge Breakout | Robot DC motors | Battery |
|---|---|---|---|
| Vin | Vmot | + | |
| Gnd | Gnd | - | |
| Vout | Vcc | ||
| p21 | PWMB | ||
| p22 | BIN2 | ||
| p23 | BIN1 | ||
| p24 | AIN1 | ||
| p25 | AIN2 | ||
| p26 | PWMA | ||
| Vout | /STBY | ||
| A01 | left-red | ||
| A02 | left-blk | ||
| B02 | right-blk | ||
| B01 | right-red |
An external decoupling capacitor of a few hundred uf might be a good idea near the H-bridge power pins to smooth out the voltage drop when motors switch on (i.e., a short duraction large inrush current spike occurs on DC motors). This breadboard and power supply setup worked without it, but others have needed it.
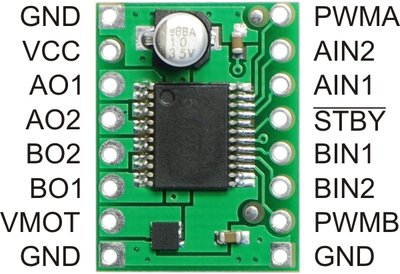
Dual H-bridge breakout board
Import programMagician_Motor_Test
Magician robot DC motor test demo
Example Projects
Here is a video of a recent student project using mbed with an XBee wireless module for remote control of the robot
Remotely Controlled Magician Student Project Page
The project page contains wiring data and a code example. A second breadboard seen below contains another mbed with an XBee and two Phidgets analog slider pots that are used for the remote controller:
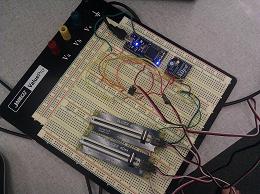
mbed XBee remote control unit
Each analog slider pot controls the speed and direction of a motor.
Here are some early results from a student project using the EasyVR module for voice control
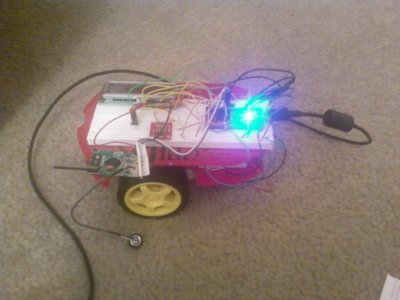
Using EasyVR for voice control of the magician robot
The next step would be to add sensors such as IR distance, Sonar, and IR motor position feedback using the slotted wheels.
Information
Update: Several new sensors are now available for this robot kit including a motor feedback kit for $10. The tutorials also have installation instructions for the new sensors. Photos and links are shown below on the new sensors.
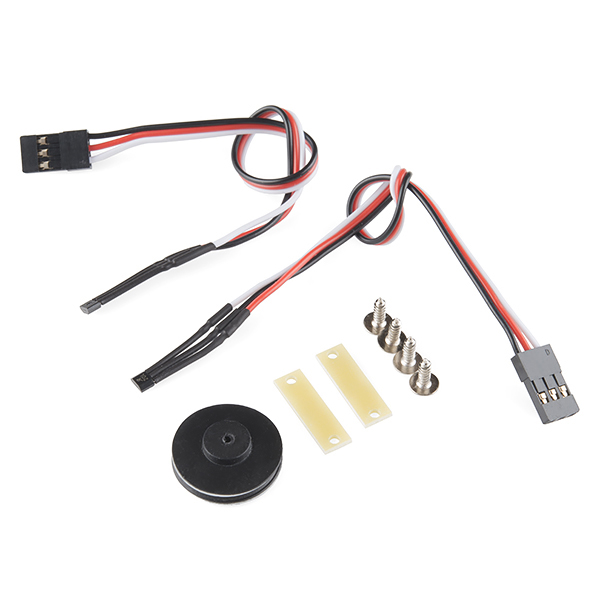
Sparkfun's DC motor add on feedback kit with hall effect sensors
Installation Instructions https://learn.sparkfun.com/tutorials/redbot-assembly-guide-rev-02/wheel-encoder
There is also an optical wheel encoder option. It uses IR and the red slotted wheels in the kit.
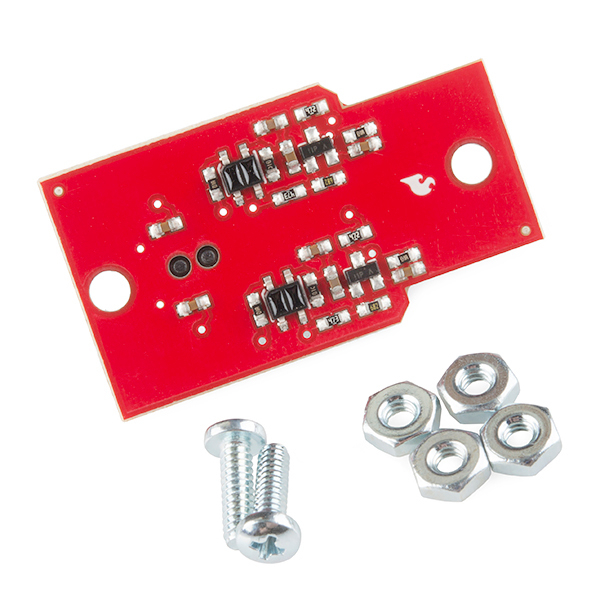
IR Wheel encoder board
Other kits for a piano wire bumper ($5) and line following sensors (3 for $9) are also available now at Sparkfun for the magician robot kit.
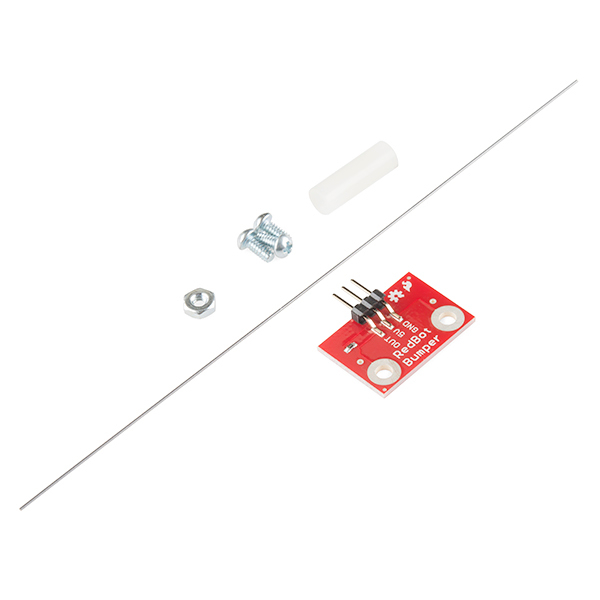
Piano wire bumper sensor kit
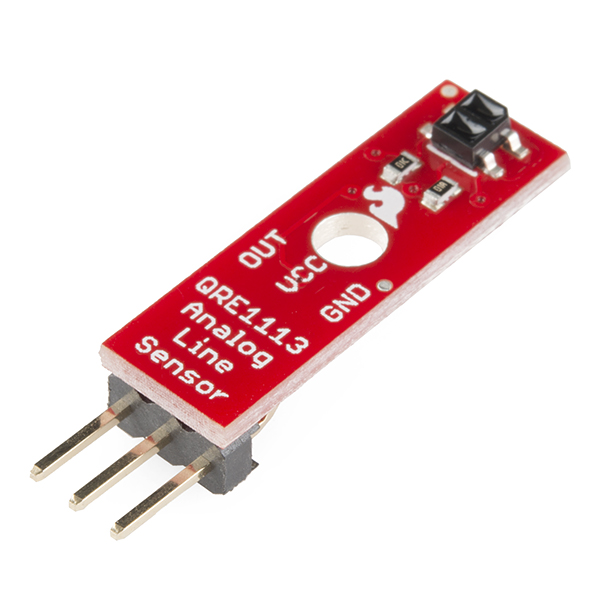
Line following sensors, typically 3 to 5 are used.
1 comment on Sparkfun Magician Robot Base Kit:
Please log in to post comments.


hello? i want to ask, how about i'm using another motor driver such as SC08A 8 channel servo controller because dual h bridge is hard to find in malaysia except mini dual h bridge.