Laser Harp
Team Members: Xuan Li, Yingyan Wang
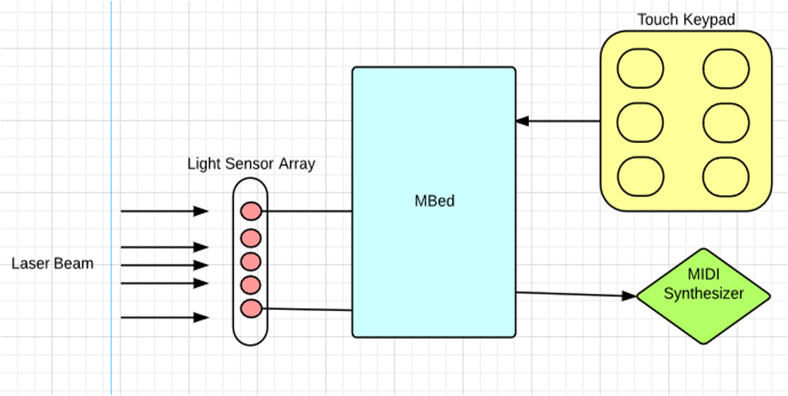
The Mbed Laser Harp project uses multiple photo detectors, laser output systems, a capacitive touch pad, and a MIDI synthesizer to create a "harp" like instrument.
Demo
Harp Implementation
The harp is controlled through the use five laser outputs. These are sent to photodiodes registered by the mbed. They are connected to the analog pins and output the approximate light received. They each correspond to notes on the scale similar to a five stringed instrument. A capactive touchpad is also connected to the mbed, it controls if the note is flat or sharp, and octave changes. The mbed processes the input and controls a connected MIDI synthesizer to play the note.
The Laser Harp uses a MIDI synthesizer that interfaces with the mbed to generate the output. This has several advantages, allowing for dynamic instrument control, sound effects, and more. Based on the put from the lasers and the touchpad, mbed determines the appropriate note to send.

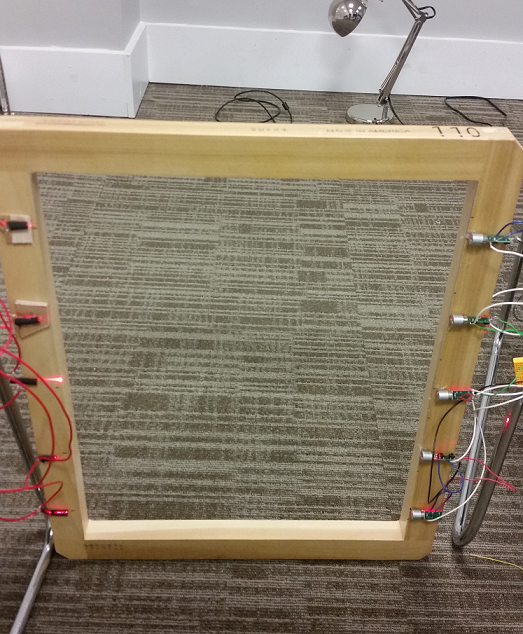
The Harp itself is installed on a wooden frame. On one side contains the lasers needed to act as the "string" of the harp. On the other side contains the photodiodes that process each laser. They, in turn, are connected to the mbed. One "plays" the harp by moving your hand within the frame to break the beams to "pluck" the harp, which another hand controls the notes through the touchpad.
Details

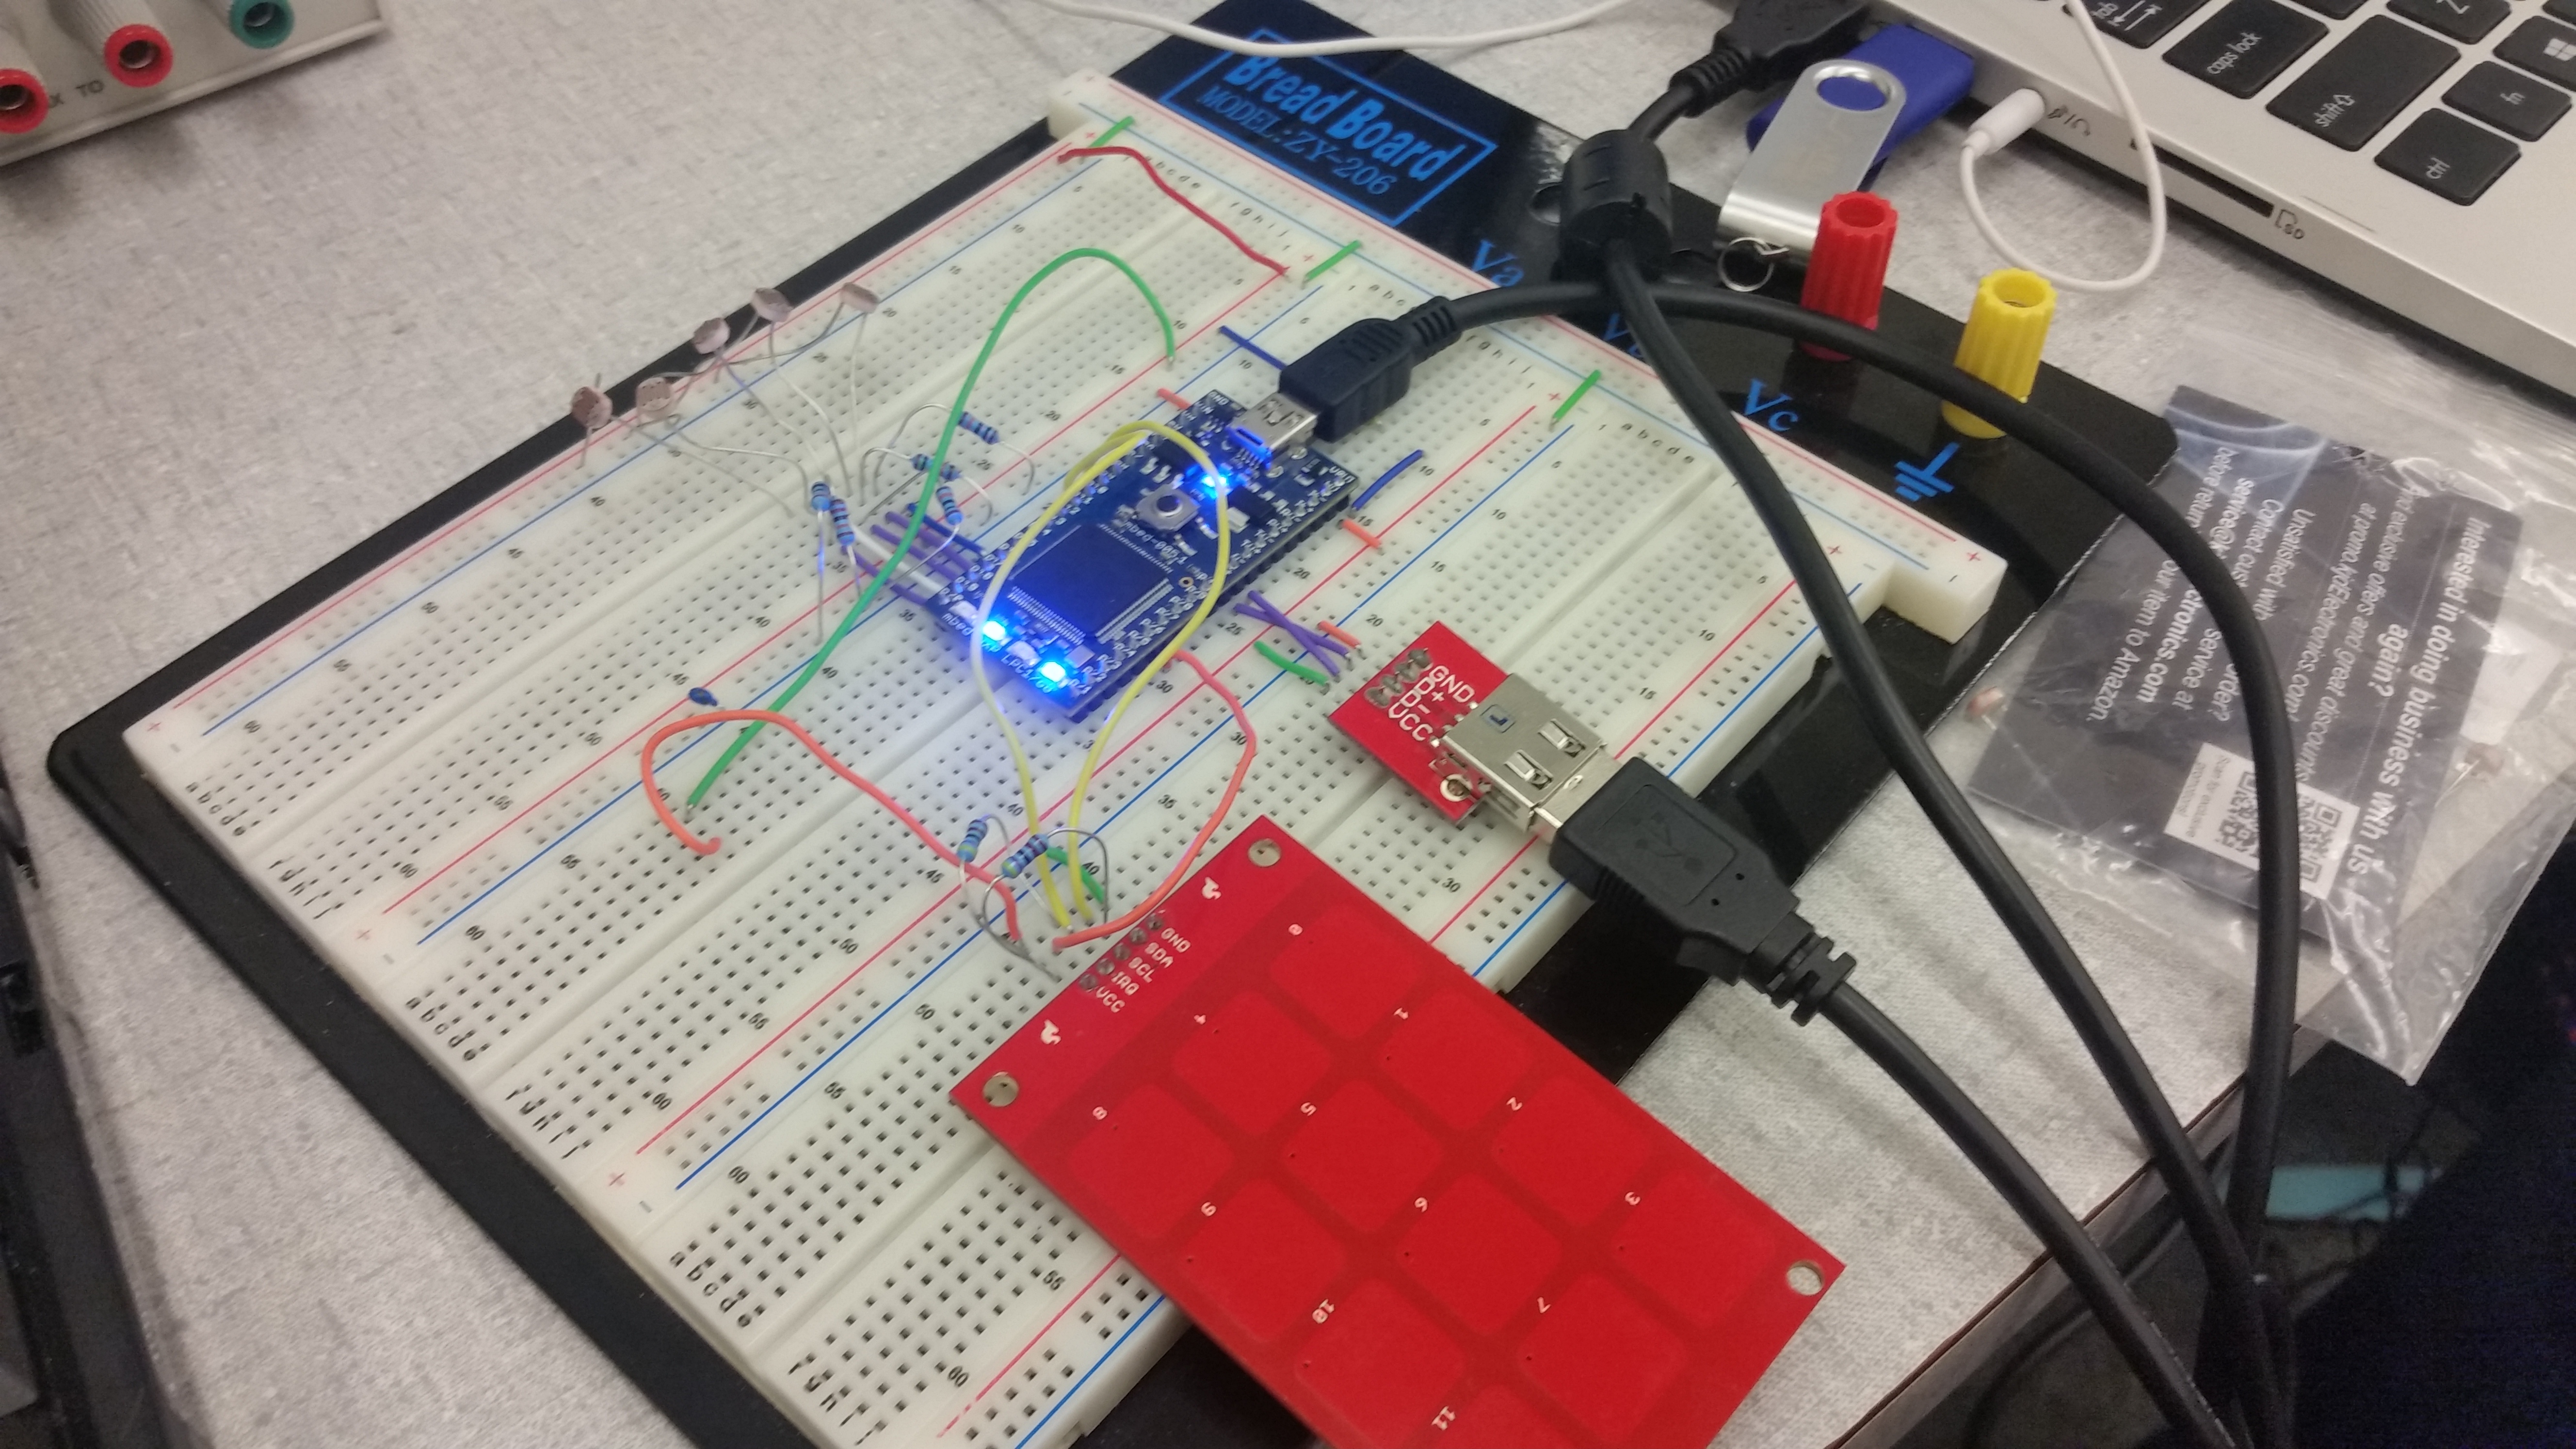
The photodiodes are connected to analog input. In the above picture. They are connected to p6-p10, with a pulldown resistor diagrammed below.

The capacitive touchpad is connected to SDA SCL and IRQ with an I2C interface. By reading the appropriate registers, one can determine which button is being pressed. This is done in the mbed.

Code Implementation
The mbed code has several key components. The first is to initialize the photosensors on the analog pins, the capacitive touchpad, and the USB connection to the music synthesizer. Then, the mbed receives the input sensor data from the two control mechanisms.
It then processes the data and determines the appropriate note to be send. The interface to the MIDI synthesizer is called, and the output is processed within the synthesizer. Here, effects can be applied, and one can choose the appropriate instrument sample. The note is then played.
Import programFramedLaserHarp
Framed Laser Harp Implementation with MBed, that allows interface with MIDI synthesizers software.
The photosensors often has noise, so a rolling time delay system smooths the inputs to have a more consistent reading. The code first verifies that there it is a sensor edge, a change from high to low. Then, it verifies the laser continues to stays blocked for one more cycle. This prevent errant noise, which often lasts for only 1 cycle or less, from triggering the MIDI output.
Laser Alignment
An important point to keep in mind is the alignment of the lasers on the harp frame. One can install the lasers first and then set the photodetectors in position afterwords. Access to a drill press to accurately position the components is very useful. Due to the precise quality of the "strings", a minor bump can bring the lasers out of alignment and cause the harp to work improperly. Highly recommended is to output the sensor outputs directly to a controlling computer to ensure the alignment is in position when testing the harp.

Please log in to post comments.
