Gesture Controlled Music Glove
Overview
Gesture Controlled Music Glove is a device that allows the user to control music playback on an mbed through the use of different hand gestures. These songs can then be seen on a Windows C# based GUI.
Team Members
- Jgenisius Harris
- Sam Horwich
- Donovan Kuhstoss
- Christian Steinmetz
Hardware


The project made use of the mbed, two pushbuttons, a SD card, and the following chips.
SmartWAV Audio Processor
Easily play-back pre-stored songs from a microSD card through an on board 3.5mm stereo plug connector for headphones. Link
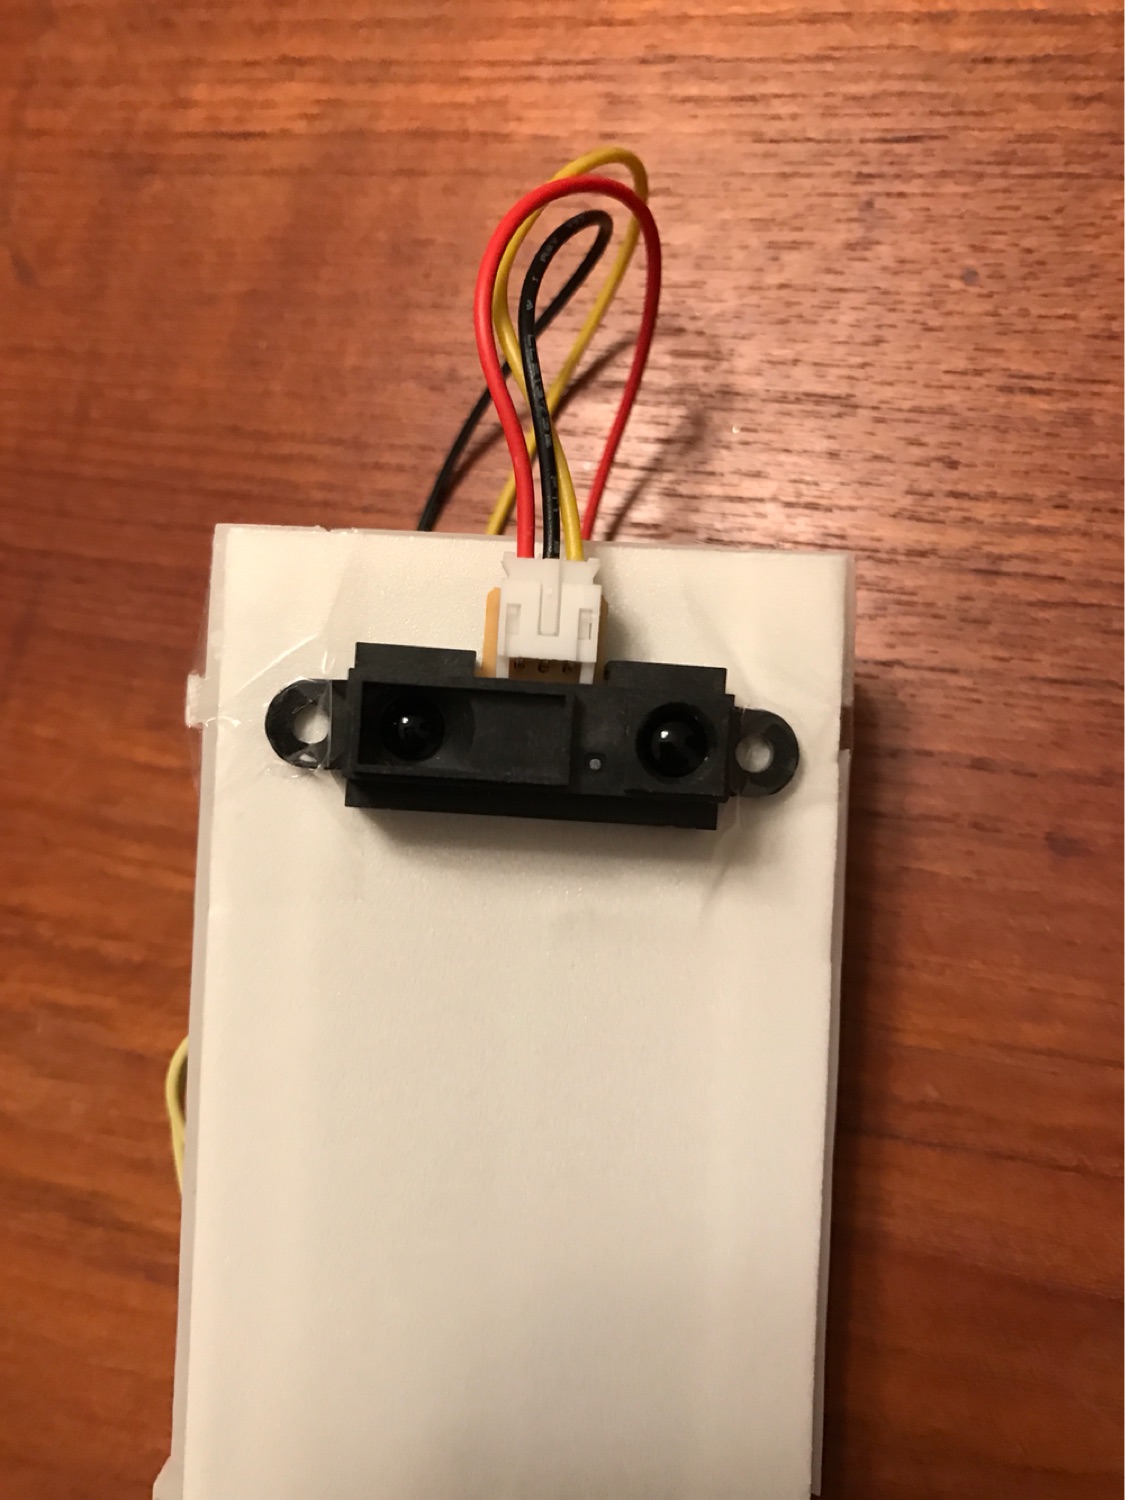
Infrared Proximity Sensor Short Range - Sharp GP2Y0A41SK0F
An IR Sensor was used to alter the volume range of the audio wav files that were played-back through the headphones. Link
SparkFun 9DoF IMU Breakout - LSM9DS1
An IMU was used to determine which direction the remote is turning in order to determine which features was being selected. Link
Pin Connections
| mbed | SmartWav |
|---|---|
| VOUT | 3.3V |
| GND | GND |
| TX=P13 | RX |
| RX=P14 | TX |
| P15 | Reset |
| mbed | IMU |
|---|---|
| VOUT | VDD |
| GND | GND |
| P9 | SDA |
| P10 | SCL |
| mbed | Pushbutton 1 (gesture control) |
|---|---|
| P20 | Pin |
| GND | Pin |
| mbed | Pushbutton 2 (volume control) |
|---|---|
| P8 | Pin |
| GND | Pin |
| mbed | IR Sensor |
|---|---|
| VU | Red |
| GND | Black |
| P19 | Yellow |
mbed Interface
Media Control
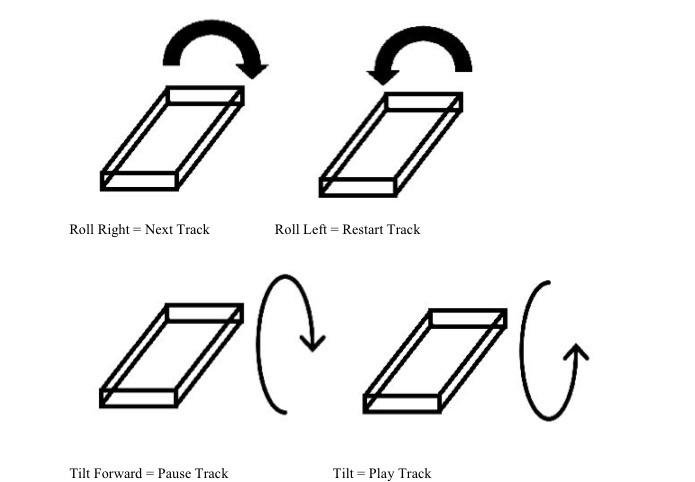
To control playback, the user will push and hold down the button wired to pin 20. This activates the IMU and resets the default orientation of the device. While still holding the button, the user will rotate the remote to the right, left, forward or backward in order to perform the desired function. After the IMU readings have deviated a set amount from the starting orientation, the gesture is calculated and a character that identifies each function is sent over the PC Serial port to the Windows Application.
Media Gestures

Volume Control
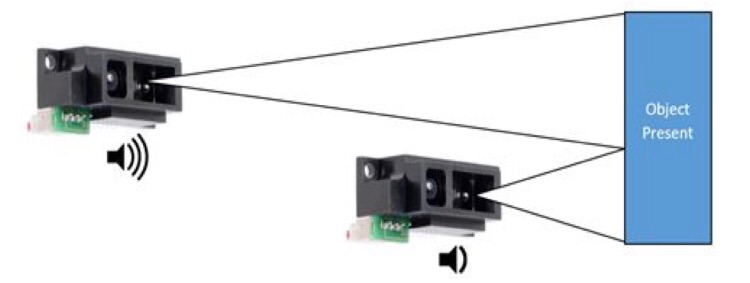
To change the volume, the user will push and hold down the button wired to pin 8. The user will then move the IR sensor connected to the back-side of the breadboard between 4 and 30 centimeters away from a flat surfaced object. Once the desired volume of a song is heard through the headphones, the user will release the button.

Code
Import programGesture_Glove
Gesture Controlled Music Glove
Windows Interface
The GUI is coded as a Windows Forms Application in Visual Studio. It consists of:
- Varying labels for the current and next songs
- A picture box for the album cover of the current song
- Two progress bars for volume level and song/time tracking
- A richTextBox for the lyrics of the song
- A button (nothing happens when pressed) with a “play”-image that is only visible when music is played
- A serialPort that gets commands from the hardware to change the labels/cover/lyrics/timing/volume
- A Timer and Stopwatch objects
Serial Port Commands
The different commands sent by the mbed are strings:
- “P”: start playing song - makes the play button visible. Starts the stopwatch.
- “p”: pauses the song - makes the play button invisible. Stops the stopwatch.
- “b”: rewinds the song to the beginning - resets the stopwatch and starts it again
- Can only be called while playing
- “n”: next song - Increments the current song count (resets back to zero if the last song is reached).
- Updates current song/next song-label and album cover in the picture box, restarts the stopwatch
- (“v%c”,level): sends a ‘v’ followed by a volume level (0-8). updates the volume displayed in progressBar1.
Information
The lyrics, song lengths, and names are stored in an array of fixed length that has to be modified if new songs are used. The song lengths have to be accurate in case a song is played until the end, in which case a next song command would not be sent.
Timing
The timer in C# lets you call a function in a fixed interval (every 200ms) like a Ticker in the mbed. However this is not accurate enough for the purposes of the project so the StopWatch class was used instead. So, I use the Timer1.tick()-fctn (called every 200ms) to read the Stopwatch and update the progressBar2 (lower one for timing) read the Stopwatch-object “watch” like that:
int elmin = (int) watch.Elapsed.TotalMinutes;
int elsec = (int) watch.Elapsed.TotalSeconds;
Events
C# is event-driven. Therefore, the event
private void serialPort1_DataReceived(object sender, System.IO.Ports.SerialDataReceivedEventArgs e)
is called every time the serialPort1 receives a message from the mbed. Other events are e.g. the Timer1.tick()-function. C# automatically initiates all the forms and so on within the constructor of the GUI:
public Form1()
        {
     //...
            InitializeComponent();//this initializes everything
        }
C# automatically puts the serialPort1 events in a different thread than the rest. As such, the labels cannot be updated directly from that that function. "Invoke" calls need to be used. For example, the following has to be put before the refresh_songs() function
private delegate void refresh_songsEvent(); //Declaration
this.BeginInvoke(new refresh_songsEvent(refresh_songs)); //function call
Warning
All pictures have to be in the folder "/bin/Debug" , same folder as the executables, to be seen correctly in the program.
GUI Code
Demo
Please log in to post comments.


