Important changes to repositories hosted on mbed.com
Mbed hosted mercurial repositories are deprecated and are due to be permanently deleted in July 2026.
To keep a copy of this software download the repository Zip archive or clone locally using Mercurial.
It is also possible to export all your personal repositories from the account settings page.
You are viewing an older revision! See the latest version
Homepage
PPP-Blinky - TCP/IP Networking Over a Serial Port

In A Nutshell
PPP-Blinky transforms your typical mbed-enabled hardware into a standard Windows 7/8 (or Linux) Dial-UpNetworking (DUN) Adapter and Webserver using the industry-standard Point-to-Point Protocol. (PPP)
No Ethernet Port Required
No ethernet port is required - PPP-Blinky uses the standard mbed serial port.
The code should run on every mbed ARM platform, like this LPC11U24:
https://developer.mbed.org/media/uploads/nixnax/blinky-to-laptop1.jpg
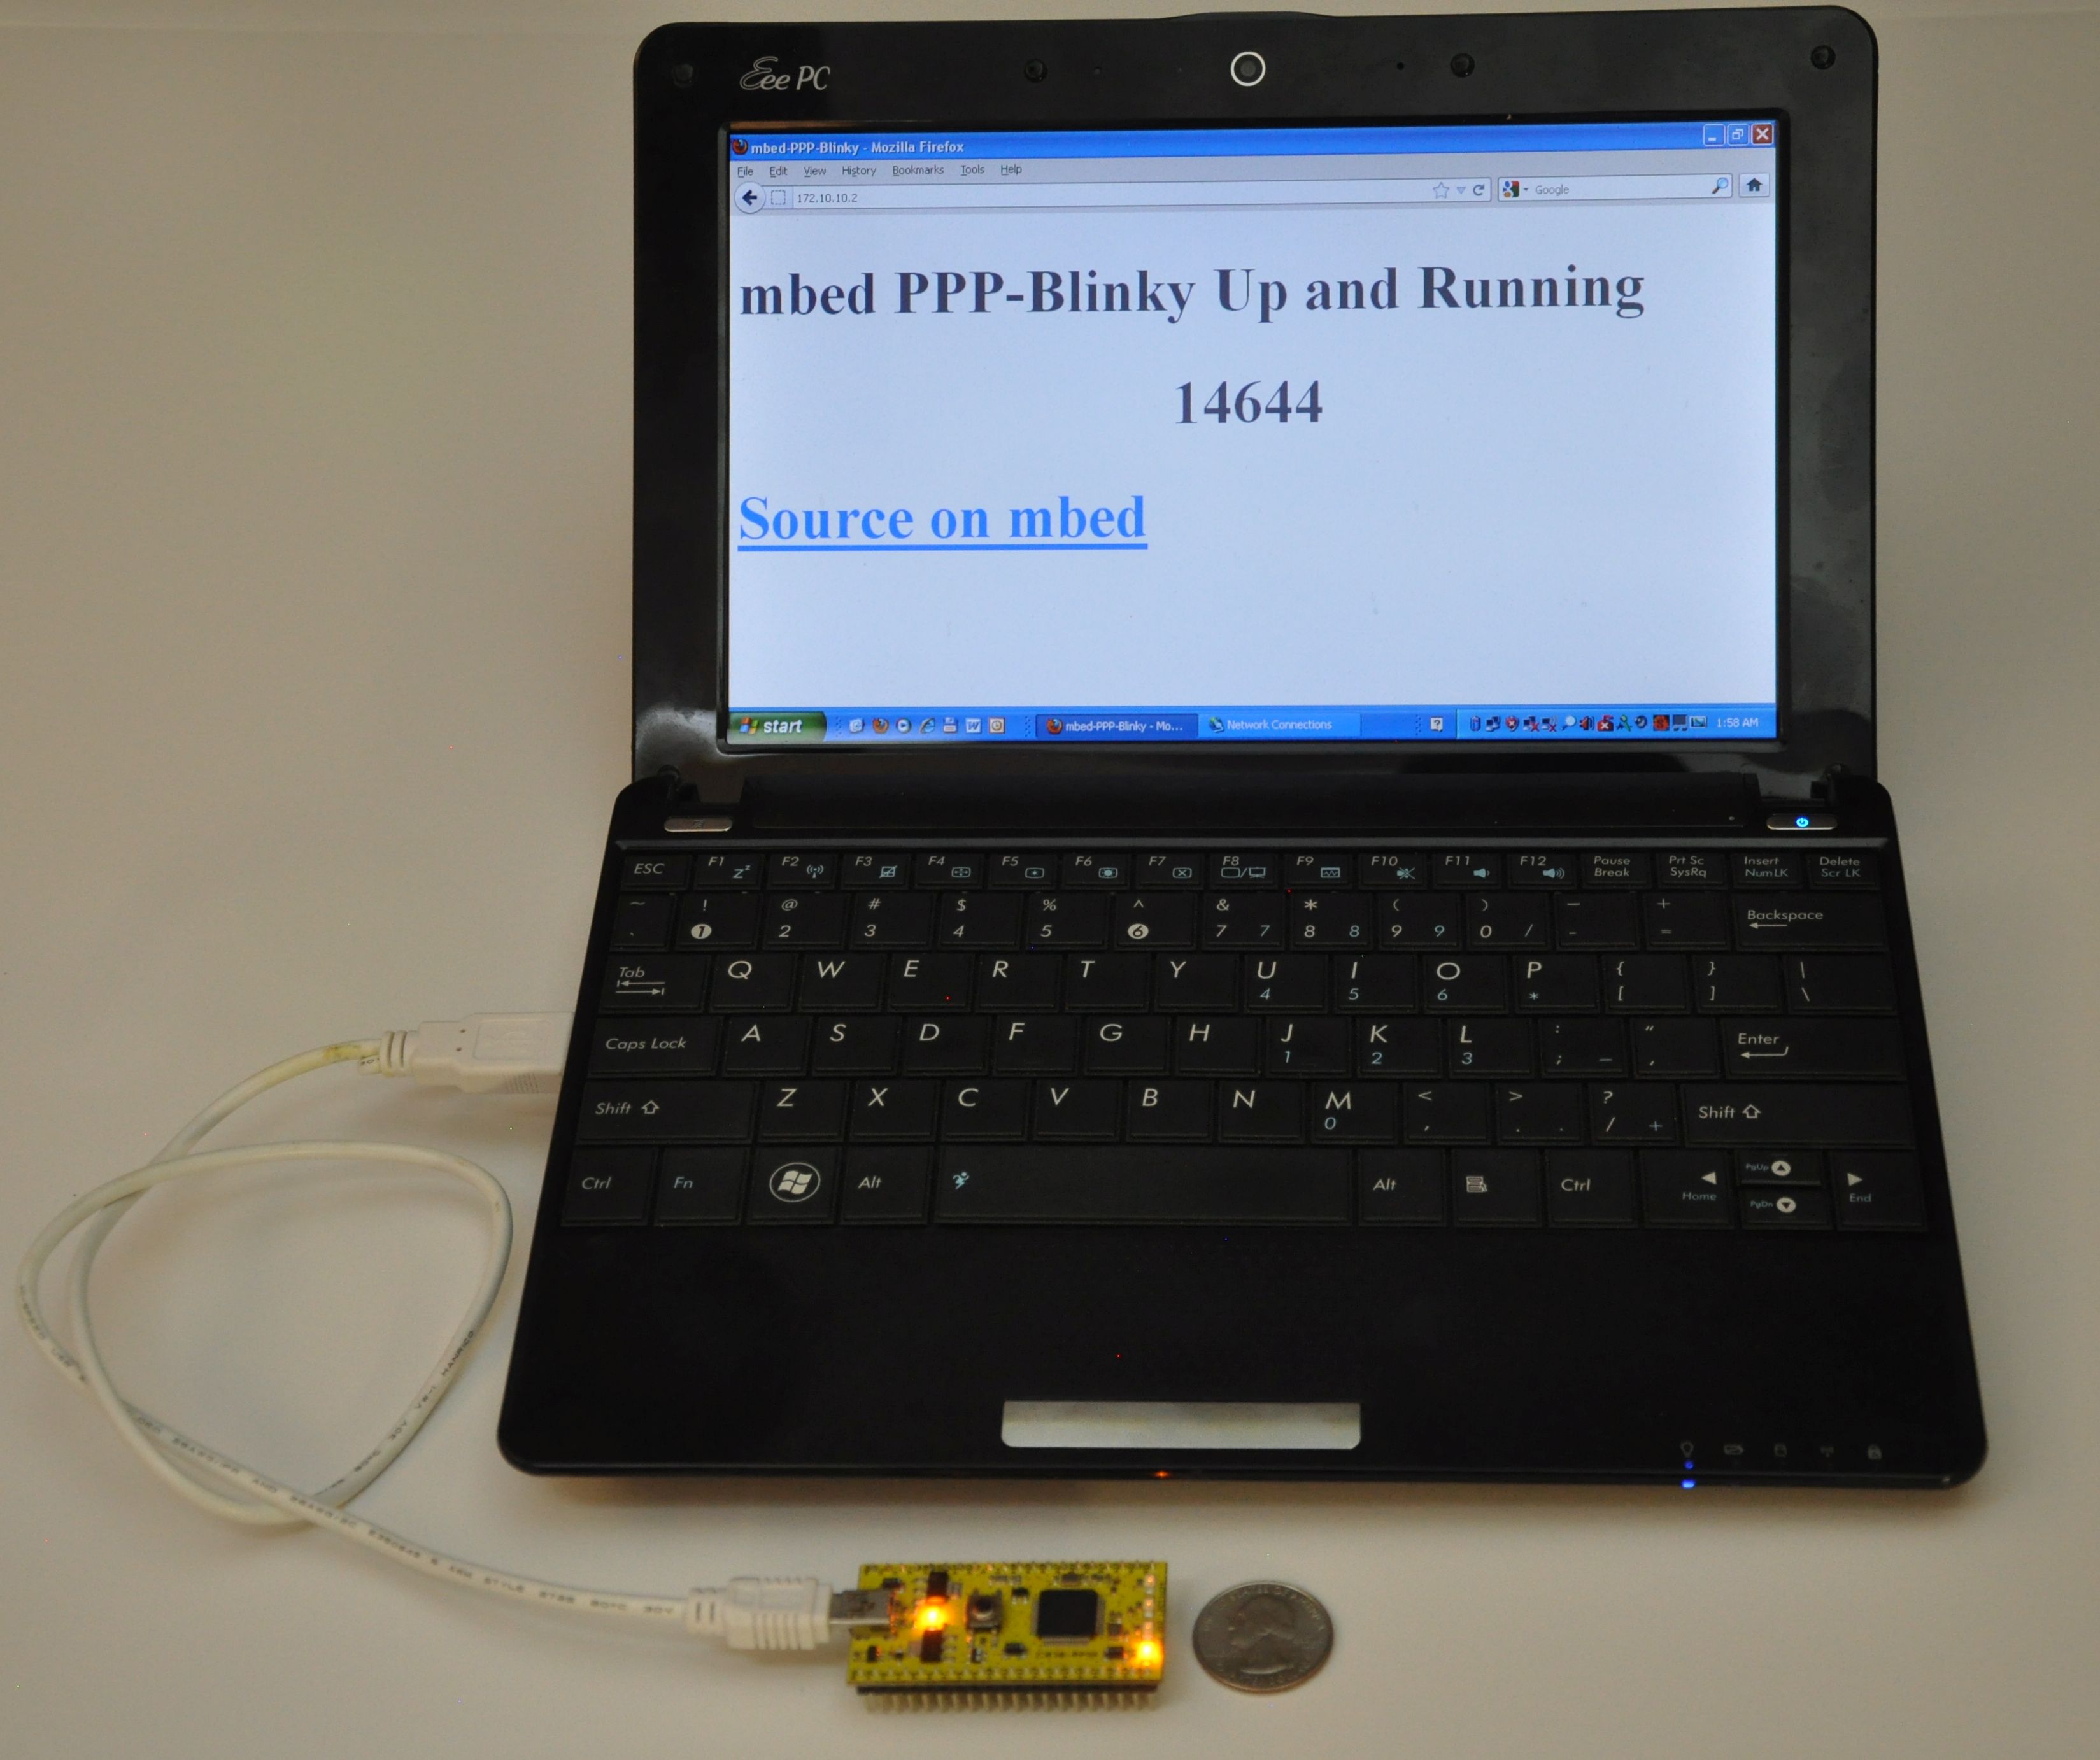
Tiny Embedded Webserver
PPP-Blinky contains enough smarts to work with web browsers such as Internet Explorer, Mozilla Firefox, Google Chrome, Safari, Curl, wget, Lynx and the Powershell Invoke-Webrequest command.
In the picture below Internet Explorer displays a small web page that is embedded in PPP-Blinky's code.

Try it with your own mbed board
You will need an mbed-enabled hardware board. Establish a serial port connection between your mbed board and your host PC. The easiest way is probably to use mbed hardware with a USB serial debug port. I've tried the ST-Micro Nucleo-L476RG, Nucleo-L152RE, Nucleo-F401RE, mbed-LPC11U24 and mbed-LPC1768 boards and they all work right out of the box. Use the mbed online compiler to compile the software for your target board. Save the compiled binary to your hardware.
You can manually check the code by opening a terminal program such as Tera Term, and then setting the relevant COM port baud rate to 115200 baud. LED1 should toggle for every 0x7E (~) (i.e. tilde) character you type, as 0x7E is the PPP frame start/end marker. Don't forget to close the port when your'e done testing, or else Windows Dial-up Networking will report that the COM port is in use by another program when you try to connect.
Creating a Dial-up Connection in Windows

Setting up Dial-Up Networking (DUN) on your Windows 7 or 8 PC is essentially a two-step process: First, you create a new modem device, because PPP-blinky partially emulates a standard Windows serial port modem device. Second, you create a new Internet connection (in practice, a new network adapter) which is associated with your new "modem".
There is a detailed description on how to configure PPP-Blinky for Windows here:
/users/nixnax/code/PPP-Blinky/wiki/Configuring-Windows-Dial-Up-Networking
There is also a screen on how to set up Linux dial-up networking near the bottom of this page.
Connecting to PPP-Blinky from your PC
Once everything is configured you establish a dial-up connection to your mbed board over the USB virtual com port.
The IP address you manually assigned to the new dial-up network adapter (172.10.10.1) functions as a gateway to any valid IP address on that subnet. In the screen capture below, I'm sending pings from the Windows 8 command line to my ST-Micro Nucleo-L476RG board over the USB virtual serial Port. I'm also using a second serial port and Tera Term to capture the debug output from a second serial port on the hardware. I've also added the hostname mbed-PPP-Blinky to my Windows hosts file so I don't have to type in the IP every time. The optional debug output from the board prints out the IP source and destination address and the first few bytes of the data payload. Note that the source is the adapter IP address, (x.x.x.10 in this case) and the destination is some other address on that subnet - all packets to the subnet are sent to our mbed hardware. For example, you could also ping 172.10.10.123 or, if your dial-up connection is running, simply click on this link: http://172.10.10.123

Pings are Fast!
In the image below the ICMP echo reply service was tested by sending one million pings from the PC. This took several hours.
The ping tool used on the Windows 8 PC was psping.exe from PsTools by Mark Russinovich - http://bit.ly/PingFast
The average reply time for a short ping (4 bytes of data payload) was 11.23 milliseconds at 115200 baud on the amazing $15 Nucleo-L476RG board at 115200 baud - barely enough time for 130 bytes to be sent over the port!

Monitoring PPP-Blinky Packets
WireShark (actually Winpcap 4) does not monitor Dial-Up packets on Windows. Therefore Microsoft Network Monitor is a very handy tool to monitor PPP-Blinky's packets. (Note - if you really love WireShark, Network Monitor can save PPP captures in a .cap file format which can be read by WireShark). In the picture below, in frame #3, you'll see Firefox from IP 172.10.10.1 (the Dial-Up Adapter IP) establish a connection to PPP-Blinky at 172.10.10.2 using the S (SYN) flag. PPP-Blinky responds with an ACK in frame 4 - the responses from PPP-Blinky are shown in red. In frame 5 the adapter acknowledges the SYNC sent by PPP-Blinky in frame 4. This establishes a TCP connection. Firefox then pushes an HTTP GET /x packet to PPP-Blinky in frame 6. In frame 7 PPP-Blinky's HTTP server responds with a standard HTTP response header and a small web page, and also sets the FIN flag to start closing the TCP connection. Windows ACKS the close request in frame 8, and asks to close its side of the connection in frame 9 by setting the FIN flag. (Frame 8 is most likely not fully transmitted. Windows sees that frame 9 is identical to frame 8, and may early-terminate Frame 8, which results in a discarded short-frame/CRC error frame on the PPP-Blinky side - you can verify this by doing a debug frame dump on the PPP-blinky side.) In frame 10, PPP-Blinky acknowledges the FIN request, confirming that the links is now closed in both directions. PPP-blinky receives and responds to any IP address that is on the subnet of the network adapter's IP address, because Windows automatically created a route to all those IPs and sends all traffic straight to PPP-Blinky. PPP-Blinky effectively monitors the entire subnet established by the IP of the dial-up adapter. Note that PPP-blinky also sees DHCP request packets, but ignores them., so a manually assigned IP address (IPV4) is needed for your new dial-up network - see the detailed setup instructions. If you want to learn more, run Microsoft Network Monitor while connecting to PPP-Blinky.

Creating a Dial-Up Connection in Linux
The screen below shows the required pppd command to connect to PPP-Blinky from a Linux machine. The USB serial port of the mbed LPC1768 board registered as /dev/ttyACM0 on my Linux box. Do a websearch on pppd if you want to learn more about pppd, the Linux PPP handler. Near the bottom of the screen below, two webpages are fetched (/ and /y) by using the curl command on the command line. Gnome Webkit and Firefox work fine, too. Also try echo GET / HTTP/1.1 | nc 172.10.10.2 which uses netcat, the "Swiss army knife" of networking tools. PPP-Blinky was also tested with ApacheBench, the Apache server benchmark software. After 100k fetches, the mean page fetch rate was reported as 6 page fetches per second for a small page.

Caveats
PPP Blinky is an extremely sparse implementation of TCP, UDP, ICMP, IPCP and LCP over PPP, requiring around 8kB of RAM. The minimum functionality required to establish PPP, IP, and HTTP connectivity is implemented. These are often acceptable tradeoffs for small projects as well as an excellent tool to learn the finer details of everyday networking implementations.