SeeedStudio GPRS Shield
GPRS Shield
GPRS Shield, which designed by seeedstudio provides you a way to use the GSM cell phone network to receive data from a remote location.
Introduction
The GPRS Shield The shield allows you to achieve this via any of the three methods:
- Short Message Service
- Audio
- GPRS Service
The GPRS Shield is compatible with all boards which have the same form factor (and pinout) as a standard Arduino Board. The GPRS Shield is configured and controlled via its UART using simple AT commands. Based on the SIM900 module from SIMCOM, the GPRS Shield is like a cell phone. Besides the communications features, the GPRS Shield has 12 GPIOs, 2 PWMs and an ADC.
Feature
- Based on SIMCom's SIM900 Module
- Quad-Band 850 / 900/ 1800 / 1900 MHz - would work on GSM networks in all countries across the world.
- Control via AT commands - Standard Commands: GSM 07.07 & 07.05 | Enhanced Commands: SIMCOM AT Commands.
- Short Message Service - so that you can send small amounts of data over the network (ASCII or raw hexadecimal).
- Embedded TCP/UDP stack - allows you to upload data to a web server.
- Speaker and Headphone jacks - so that you can send DTMF signals or play recording like an answering machine.
- SIM Card holder and GSM Antenna - present onboard.
- 12 GPIOs, 2 PWMs and an ADC (all 2.8 volt logic) - to augment your Arduino.
- Low power consumption - 1.5mA(sleep mode)
- Industrial Temperature Range - -40°C to +85 °C
- you can download GPRS Shield eagle file here /media/uploads/lawliet/gprs_shield_eagle_file.zip
Application Ideas
- M2M (Machine 2 Machine) Applications - To transfer control data using SMS or GPRS between two machines located at two different factories.
- Remote control of appliances - Send SMS while you are at your office to turn on or off your washing machine at home.
- Remote Weather station or a Wireless Sensor Network - Mate it with Seeeduino Stalker and create a sensor node capable of transferring *sensor data (like from a weather station - temperature, humidity etc.) to a web server (like https://xively.com/).
- Interactive Voice Response System - Couple the GPRS Shield with an MP3 Decoder and DTMF Decoder (besides an Arduino) to create an Interactive Vocice Response System (IVRS).
- Vehicle Tracking System - Couple the GPRS Shield with an Arduino and GPS module and install it in your car and publish your location live on the internet. Can be used as a automotive burglar alarm.
Cautions
- Make sure your SIM card is unlocked.
- The product is provided as is without an insulating enclosure. Please observe ESD precautions specially in dry (low humidity) weather.
- The factory default setting for the GPRS Shield UART is 19200 bps 8-N-1. (Can be changed using AT commands).
- When using GPRS Shield with Seeeduino Stalker v2.0 please remember to dismount the OK_READ Jumper (i.e. open it). This will disconnect the Battery Charger IC's OK pin from the microcontrollers Digital Pin 7 and hence allow unhindered communication with GPRS Shield using NewSoftSerial Library.
Specifications
For SIM900's Specifications, please refer this PDF file: /media/uploads/lawliet/sim900_spec.pdf
Hardware Interface
- Power select - select the power supply for GPRS shield(external power or 5v of arduino)
- Power jack - connected to external 4.85VDC power supply
- Antenna interface - connected to external antenna
- Serial port select - select either software serial port or hareware serial port to be connected to GPRS Shield
- Hardware Serial - D0/D1 of Arduino/Seeeduino
- Software serial - D7/D8 of Arduino/Seeeduino only
- Status LED - tell whether the power of SIM900 is on
- Net light - tell the status about SIM900 linking to the net
- UART of SIM900 - UART pins breakout of SIM900
- Microphone - to answer the phone call
- Speaker - to answer the phone call
- GPIO,PWM and ADC of SIM900 - GPIO,PWM and ADC pins breakout of SIM900
- Power key - power up and down for SIM900

Hardware Installation
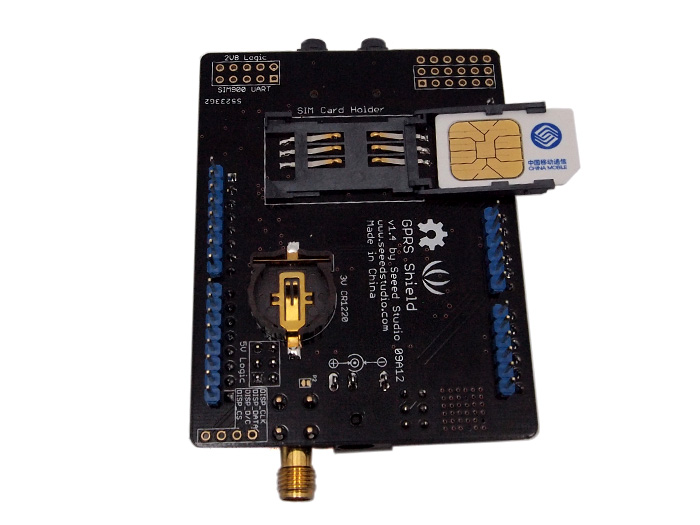
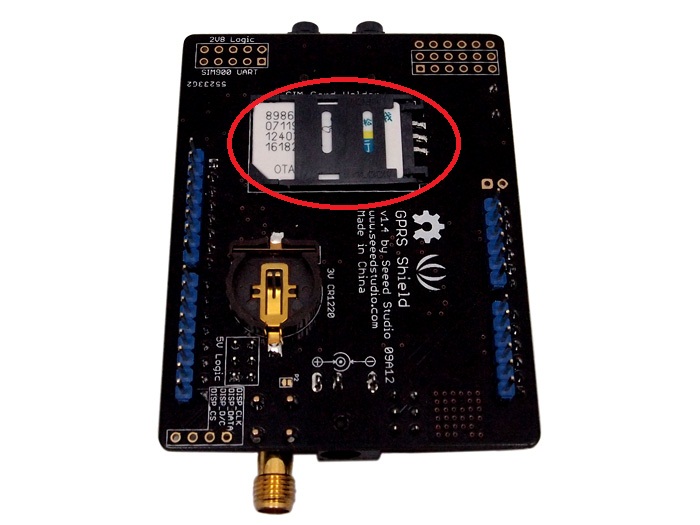
- Insert an unlocked SIM card to SIM Card Holder - 6 Pin Holder for SIM Cards. Both 1.8 volts and 3.0 volts SIM Cards are supported by SIM900 - the SIM card voltage type is automatically detected.
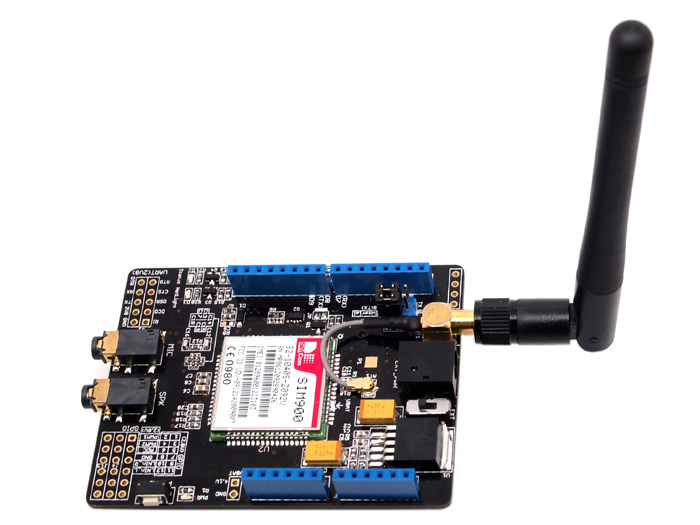
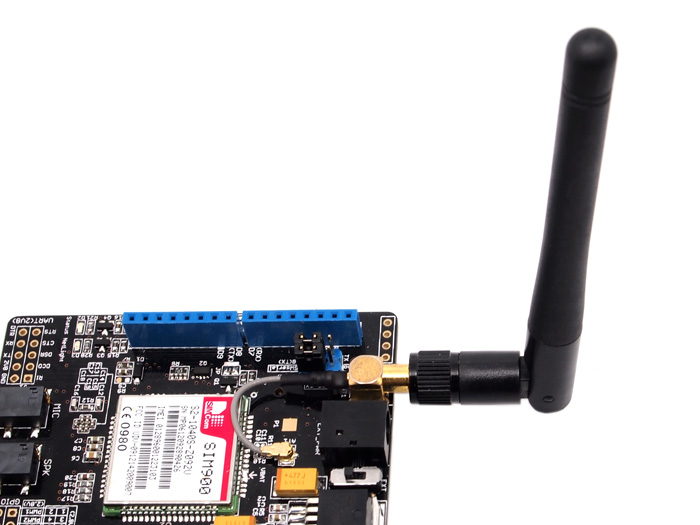
- Make sure the antenna pad buckled properly - A miniature coaxial RF connector is present on the GPRS Shield board to connect with a GSM Antenna. The connector present on the GPRS Shield is called a U.FL connecto]. The GSM Antenna supplied with the GPRS Shield has an SMA connector (and not an RP-SMA connector) on it. A patch cord is also supplied with the GPRS Shield to interface the antenna to the board. The connection topology is shown in the diagram below:

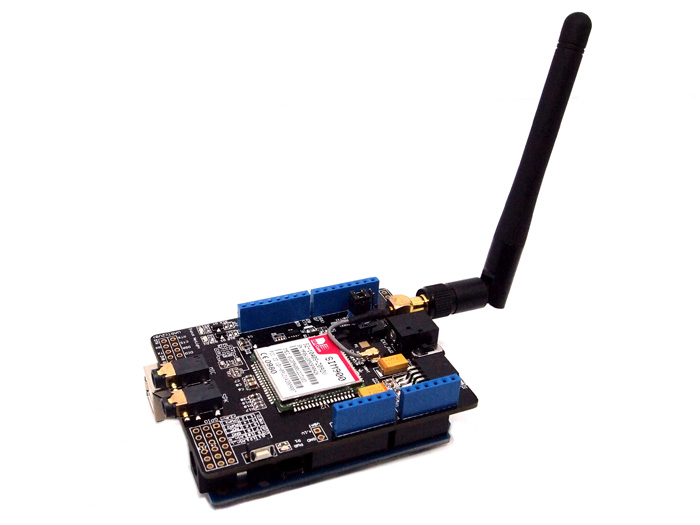
- Assemble the GSM antenna
- Power supply for GPRS shield - Select power source with the switch on board, you can select the 5V power supply from arduino or exteral power.Select the 5V source from Arduino as the following picture

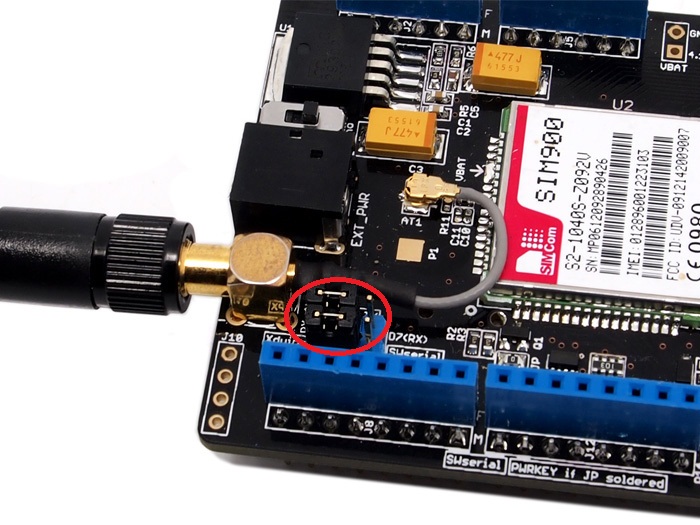
- Communication port configure.- The GPRS shield can be controlled via Hardware serial port of Arduino or Software serial port, Select the Software serial port with the jumpers

- Plug to ARCH - The GPRS Shield, like any other well designed shield, is stackable as shown in the photo below.
Power Up And Power Down
- Hardware trigger—— Press the power key for about 2 seconds to power up or power down.
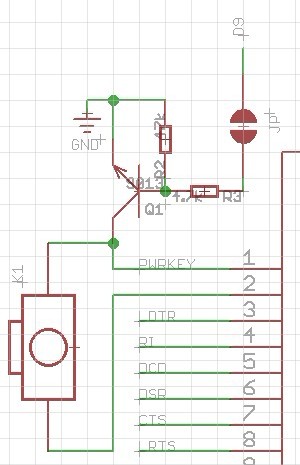
- Software trigger—— You can power up/down the shield with Software, Control D9 of Arduino to add software triggering in your firmware.

GPRS Shield With UartSBee
Here we introduce how to use GPRS Shield with UartSBee
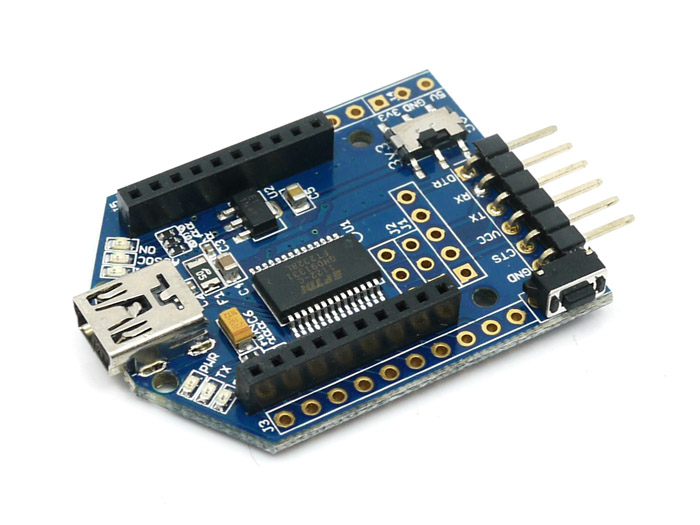
UartSBee Introduction
UartSBee is a fully loaded USB to Serial adapter equipped with BEE socket(20pin 2.0mm). The integrated FT232RL can be used for programming or communicating with MCUs.On the other hand, you might connect your PC to various wireless applications via a Bee compatible module. UartSBee provides breakouts for the bit-bang mode pins of FT232RL as well.This Bit-bang mode pins (8 I/O pins) can be used as a replacement for applications involving PC parallel port (which is scarce nowadays).
Getting Started
we start from AT commands, UartSBee maybe a good choice. we connect UartSBee with GPRS Shield like below, be careful that UartSBee' Power Swith should turn to 5V gear.
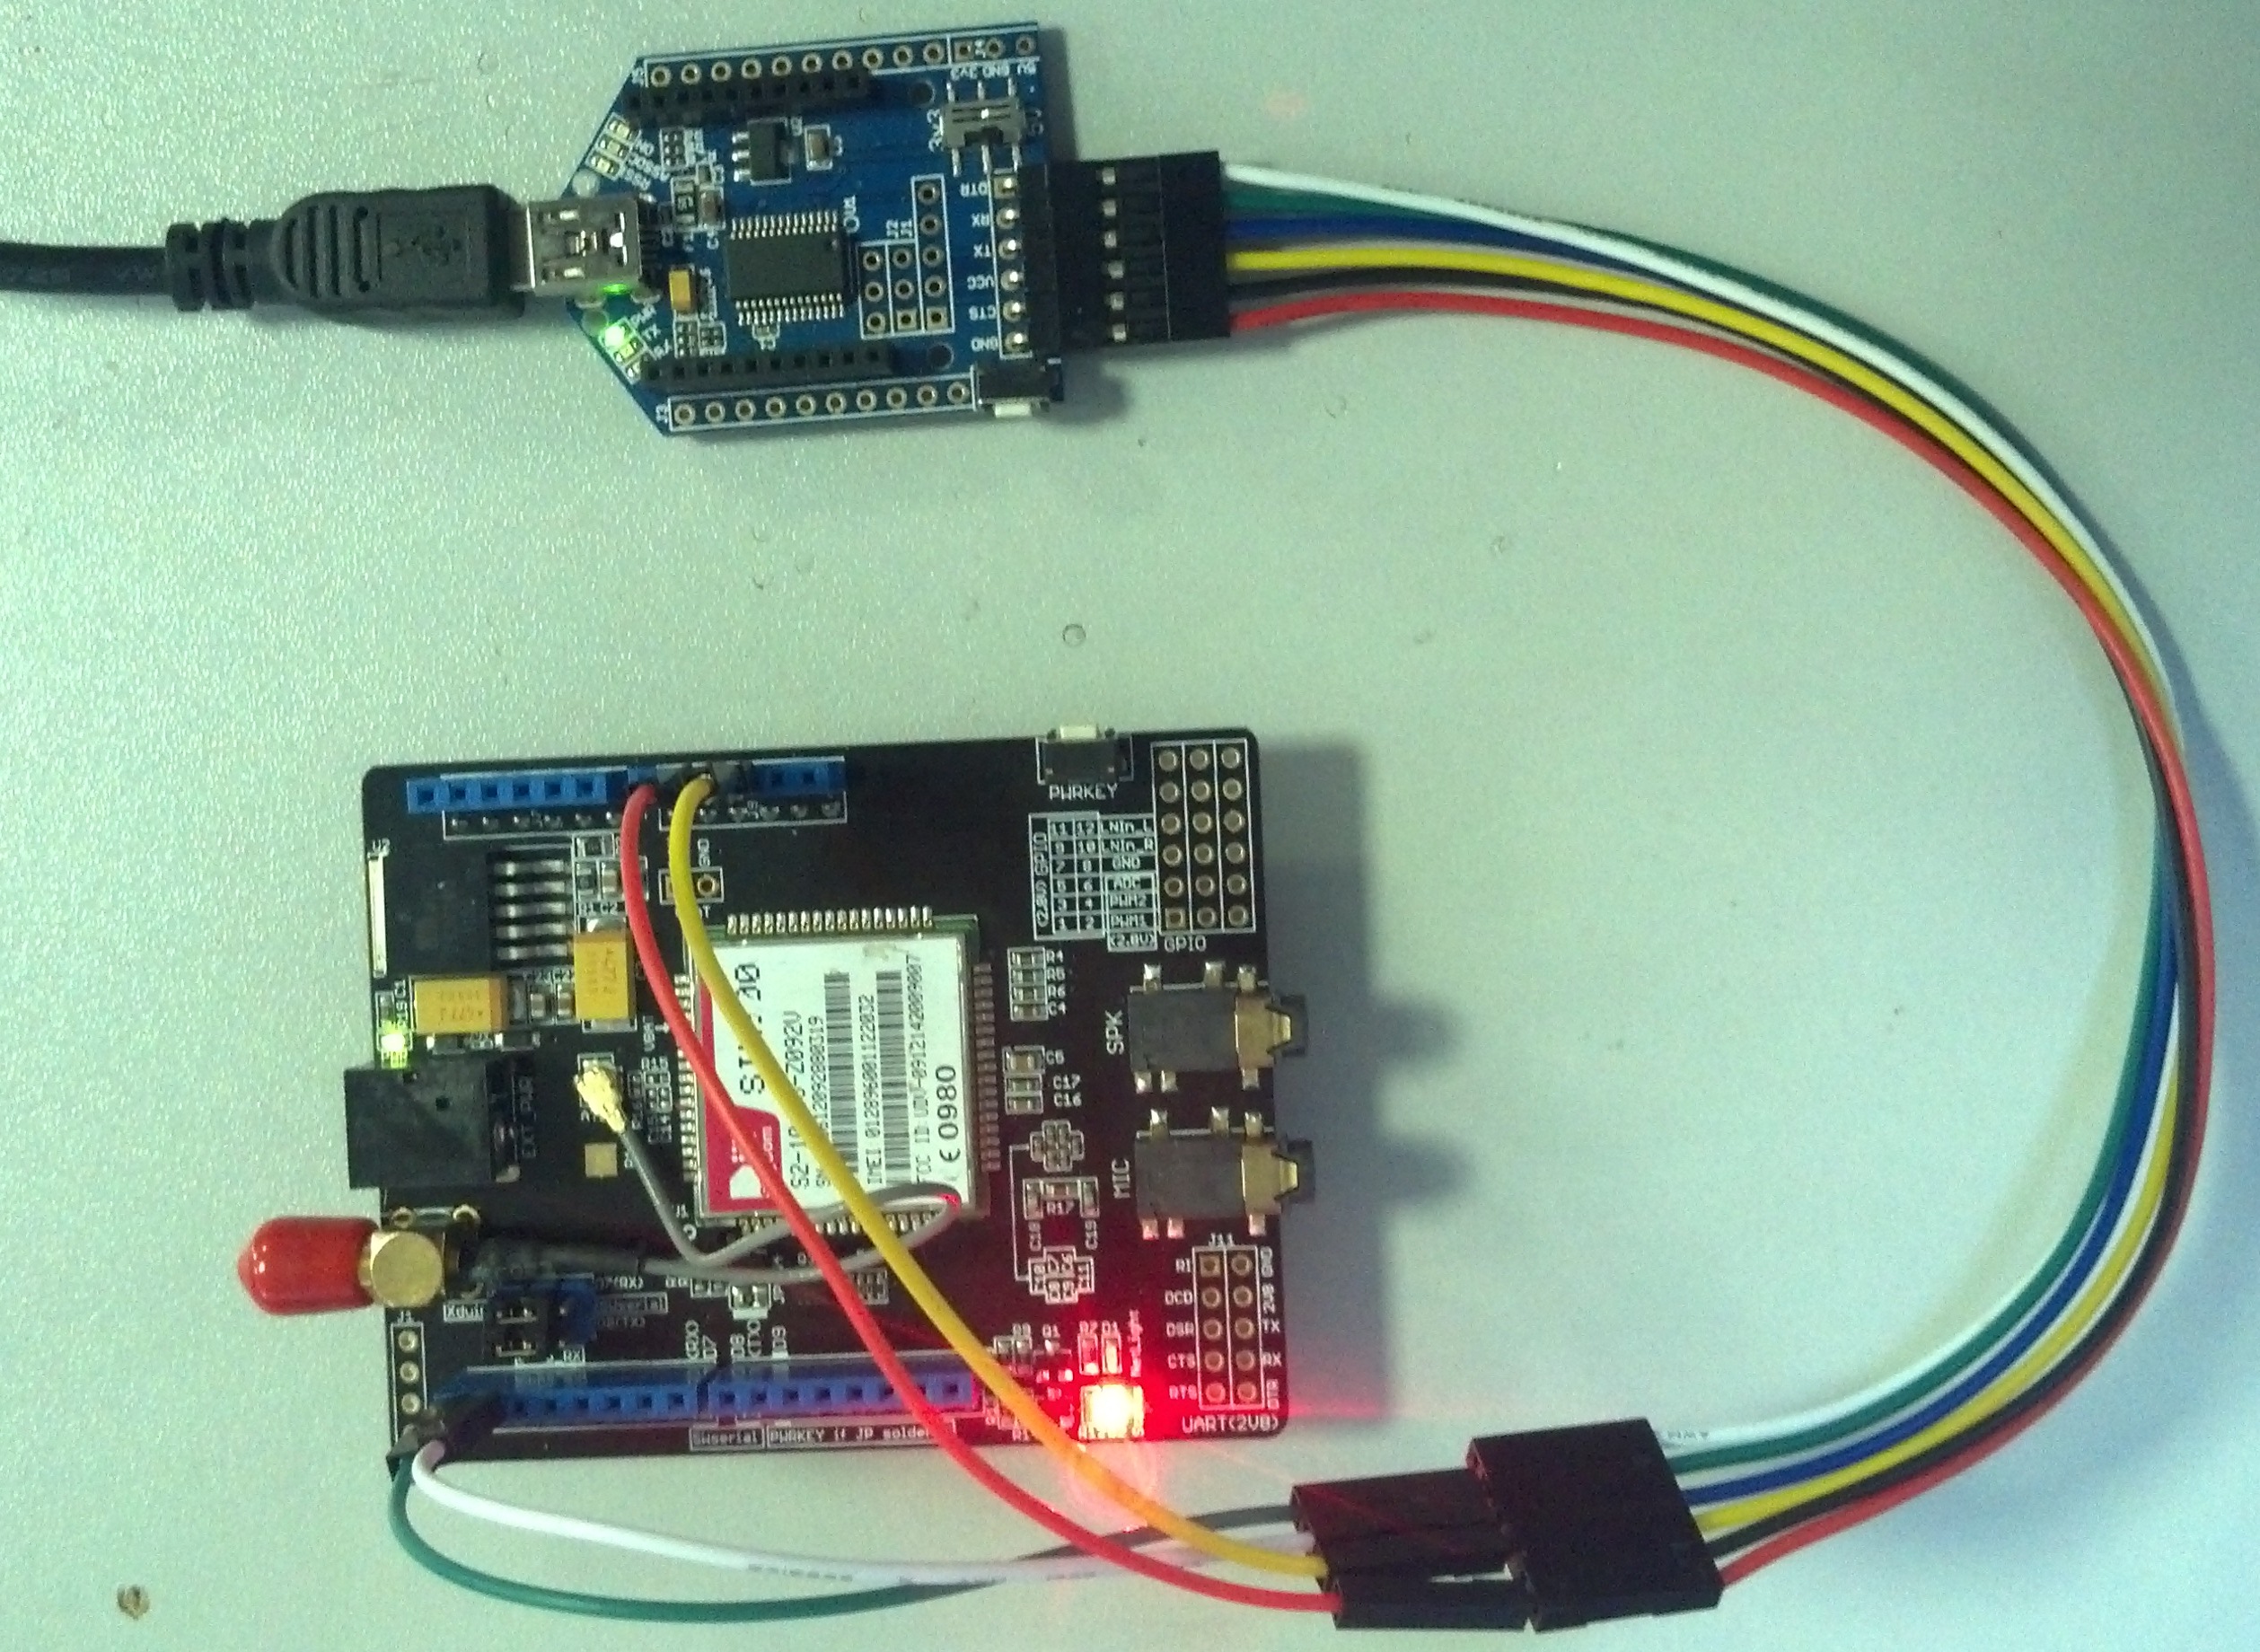
we use SSCOM32 as a com debug tool to communicate with GPRS Shield, you can download it here/media/uploads/lawliet/sscom32e.exe
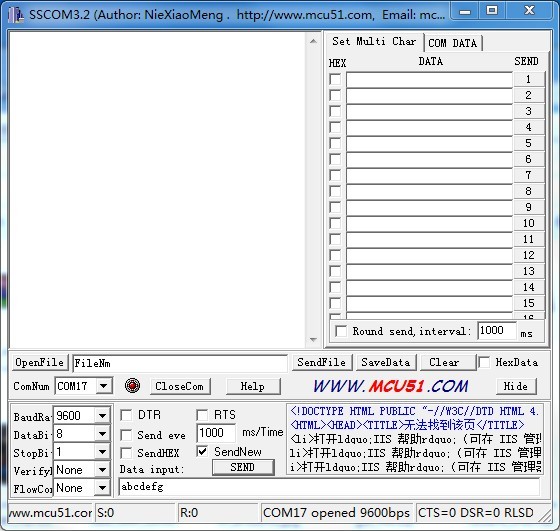
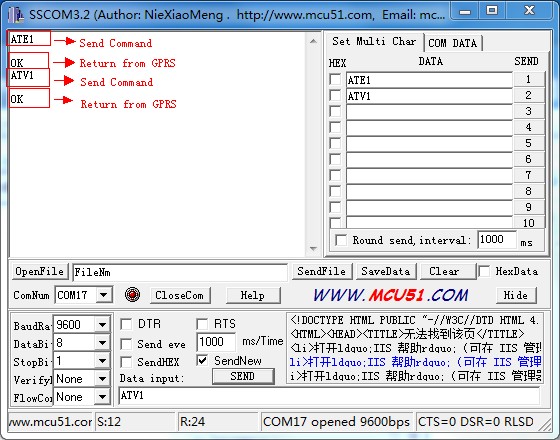
now, we can use AT Command to control GPRS Shield, It is like this
GPRS Shield With Mbed Shield
Here we introduce how to use GPRS Shield with Mbed Shield
Mbed Shield Introduction
The Mbed Shield is the Mbed application board based on Mbed LPC1768 Prototyping Board. Just try imagine controlling Ethernet devices using environmental data from sensors. It integrates a series of external interfaces,such as CAN, Ethernet, USB and 4 standard Grove sockets, all together on a single board.The Mbed Shield is also compatible with other standard Arduino Shields, providing you an even more powerful extension for your Mbed. For more information,please visit http://www.seeedstudio.com/wiki/Mbed_Shield
Getting Started
- AT Command Test
Import programMbed_Shield_GPRS_AT_Command_Test
this is a AT command test on Mbed Shield
Last commit 20 Nov 2013 by
 wei zou
#include "mbed.h"

Serial gprs(p28,p27);
Serial pc(USBTX,USBRX);

int main()
{
    char buffer[64];
    int count = 0;
    pc.baud(19200);
    gprs.baud(19200);
    while(1) {
        if(gprs.readable()) {
            while(gprs.readable()) {
                char c = gprs.getc();
                buffer[count++] = c;
                if(count == 64) break;
            }
            pc.puts(buffer);
            for(int i = 0; i < count; i++) {
                buffer[i] = NULL;
            }
            count = 0;
        }
        if(pc.readable()) {
            gprs.putc(pc.getc());
        }
    }
}
- Call up Test
Import programMbed_Shield_GPRS_Call_Up_Test
this is a test code for Mbed_Shield_GPRS_Call_Up_Test
Last commit 20 Nov 2013 by
wei zou
#include "mbed.h"

Serial gprs(p28,p27); //Hardware Serial
//Serial gprs(p9,p10);   //Software Serial
Serial pc(USBTX,USBRX);

Timer timeCnt;

int waitForResp(char *resp, int timeout)
{
    int len = strlen(resp);
    int sum=0;
    timeCnt.start();

    while(1) {
        if(gprs.readable()) {
            char c = gprs.getc();
            sum = (c==resp[sum]) ? sum+1 : 0;
            if(sum == len)break;
        }
        if(timeCnt.read() > timeout) {  // time out
            timeCnt.stop();
            timeCnt.reset();
            pc.printf("Error:time out");
            return -1;
        }
    }
    timeCnt.stop();                 // stop timer
    timeCnt.reset();                    // clear timer
    while(gprs.readable()) {      // display the other thing..
        char c = gprs.getc();
    }

    return 0;
}

int sendCmdAndWaitForResp(char *cmd, char *resp, int timeout)
{
    gprs.puts(cmd);
    return waitForResp(resp,timeout);
}

int callUp(char *number)
{
    if(0 != sendCmdAndWaitForResp("AT+COLP=1\r\n","OK",5)) {
        pc.printf("Error:COLP");
        return -1;
    }
    wait(1);
    gprs.printf("\r\nATD%s;\r\n",number);
    return 0;
}

int main()
{
    pc.baud(19200);
    gprs.baud(19200);

    for(int i = 0; i < 5; i++) {
        wait(1);
        printf("wait\n");
    }
    callUp("139****7382");
    while(1);
}
Arch GPRS
Here we introduce how to use GPRS Shield with Arch GPRS
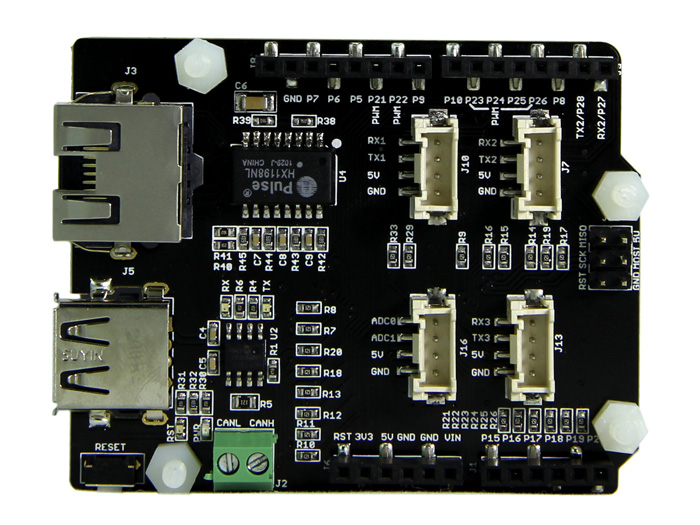
Arch GPRS Introduction
Arch GPRS is similar to Seeeduino Arch, it also use Microcontroller LPC11U24. So you can use mbed compambed C/C++ SDK, libraries and optimizing online development tools to rapidly build a prototype. Arch GPRS is also a wireless network module based on EG-10, it can achive remote data colletion function to communicate with outside world by GPRS network. Arch GPRS has standard Arduino interface and Grove connectors. It’s convenient to connect existing Shields and Grove products to Arch GPRS. You can use the solar panel to charge for battery, and own to its low-power design, so Arch GPRS can work normally in outdoor.
Getting Started
Import programARCH_GPRS_Test
seeedstudio ARCH GPRS Test for GPRS function
Last commit 21 Jan 2014 by wei zou
/*
  main.cpp
  2013 Copyright (c) Seeed Technology Inc.  All right reserved.

  Author:lawliet
  2013-11-18

  This library is free software; you can redistribute it and/or
  modify it under the terms of the GNU Lesser General Public
  License as published by the Free Software Foundation; either
  version 2.1 of the License, or (at your option) any later version.

  This library is distributed in the hope that it will be useful,
  but WITHOUT ANY WARRANTY; without even the implied warranty of
  MERCHANTABILITY or FITNESS FOR A PARTICULAR PURPOSE.  See the GNU
  Lesser General Public License for more details.

  You should have received a copy of the GNU Lesser General Public
  License along with this library; if not, write to the Free Software
  Foundation, Inc., 51 Franklin St, Fifth Floor, Boston, MA  02110-1301  USA
*/
#include "mbed.h"
#include "string.h"
#include "gprs.h"

#define TRUE    1
#define FALSE   0

#define SERIAL_DEBUG            0
#define SEND_SMS_TEST           0
#define CALL_UP_TEST            0
#define ANSWER_TEST             0
#define READ_SMS_TEST           0
#define TCP_TEST                0

#define IP_ADDRSS               "42.96.164.52"
#define PORT                    "80"

#define PINPWR          P1_2    // power on EG 10, low enable
#define PINONOFF        P1_7    // switch of EG10, low enable, low for 2s to turn on EG10
DigitalOut eg10_pwr(PINPWR);
DigitalOut eg10_on(PINONOFF);

GPRS  gprsTest(P0_19, P0_18, 115200,"139****7382");

void EG10_PowerUp(void)
{
    eg10_pwr = 1;
    eg10_on  = 1;
    wait(2);
    eg10_pwr = 0;
    eg10_on = 0;
    wait(2);
    eg10_on = 1;
    wait(2);
}

int main(void)
{

    EG10_PowerUp();
    gprsTest.init();
    wait(2);

#if CALL_UP_TEST
    gprsTest.callUp("139****7382");
#endif

#if SEND_SMS_TEST
    gprsTest.sendSMS("139****7382","hello,lawliet");
#endif

#if ANSWER_TEST || READ_SMS_TEST
    gprsTest.loop(FALSE);
#endif

#if TCP_TEST
    gprsTest.connectTCP(IP_ADDRSS,PORT);
#endif

#if SERIAL_DEBUG
    gprsTest.serialDebug(USBTX,USBRX);
#endif

    return 0;
}
GPRS Library
the GPRS library offer some easy APIs to use GPRS module.
Import library
Public Member Functions |
|
| GPRS (PinName tx, PinName rx, int baudRate, char *number) | |
|
Create
GPRS
instance.
|
|
| int | init (void) |
|
init
GPRS
module including SIM card check & signal strength & network check
|
|
| int | readBuffer (char *buffer, int count) |
|
read from
GPRS
module and save to buffer array
|
|
| void | sendCmd (char *cmd) |
|
send AT command to
GPRS
module
|
|
| int | waitForResp (char *resp, int timeout) |
|
check
GPRS
module response before timeout
|
|
| int | sendCmdAndWaitForResp (char *cmd, char *resp, int timeout) |
|
send AT command to
GPRS
module and wait for correct response
|
|
| int | checkSIMStatus (void) |
|
check SIM card' Status
|
|
| int | checkSignalStrength (void) |
|
check signal strength
|
|
| int | networkInit (void) |
|
check network is ok or not
|
|
| int | sendSMS (char *number, char *data) |
|
send text SMS
|
|
| int | readSMS (char *buffer, char *message, bool check) |
|
read SMS if get a SMS
|
|
| int | deleteSMS (int index) |
|
delete SMS message on SIM card
|
|
| int | callUp (char *number) |
|
call someone
|
|
| int | answer (void) |
|
auto answer if coming a call
|
|
| int | loop (bool check) |
|
a loop to wait for some event.
|
|
| int | connectTCP (char *ip, char *port) |
|
build TCP connect
|
|
| int | sendTCPData (char *data) |
|
send data to TCP server
|
|
| int | closeTCP (void) |
|
close TCP connection
|
|
| int | shutTCP (void) |
|
close TCP service
|
|
| void | serialDebug (PinName tx, PinName rx) |
|
used for serial debug, you can specify tx and rx pin and then communicate with
GPRS
module with common AT commands
|
|
1 comment on SeeedStudio GPRS Shield:
Please log in to post comments.
SeeedStudio GPRS Shield
this page is a brief introduction of SeeedStudio GPRS Shield
Page owner: wei zou
Created 18 Nov 2013.
Last updated 20 Nov 2013
Sir, whether this lbrary supports LoNet SIM800 too. I have bought that through Seeed studio.Looking forward to your reply Regards S.Ramasamy