Build an etherCAT slave with a Motor Shield Base Board having Arduino UNO form factor.
Dependencies: EsmacatShield X_NUCLEO_IHM01A1
HelloWorld_EASE_Motor_Example
HelloWorld_EASE_Motor_Example Application Execution
EASE uses SPI communication for reading/writing a data packet so, any Mbed Board with form factor of Arduino UNO supporting SPI can be used for EASE. This section presents the EsmacatShield library with an example application for Mbed platform.
- Login to your Mbed account
- Right click on “My Programs” -> Import Program from URL – enter https://os.mbed.com/ide/import-program//users/esmacat/code/HelloWorld_EASE_Motor_Example/
- This will add the HelloWorld_EASE_Motor_Example in your “My Programs”.
- Verify the code using the "Compile" button on the top left. The code should compile successfully.
- Download the binary generated on the Mbed base board by dragging dropping it to the USB mounted on the PC. For this step, the Mbed board should be connected to your PC with a USB cable.
- Once the binary file is successfully uploaded, press the reset button on the Mbed board, the program should automatically run.
- Once the program is uploaded on the board the, the board should be powered by VIN pin of the EASE. Unless you need the USB cable connected to the PC for Serial communication, you may remove the cable from the Mbed board. Some Mbed boards have jumpers on the board for VIN power selection. Please make sure you read the user manual of the Mbed base board to correctly connect the jumpers.
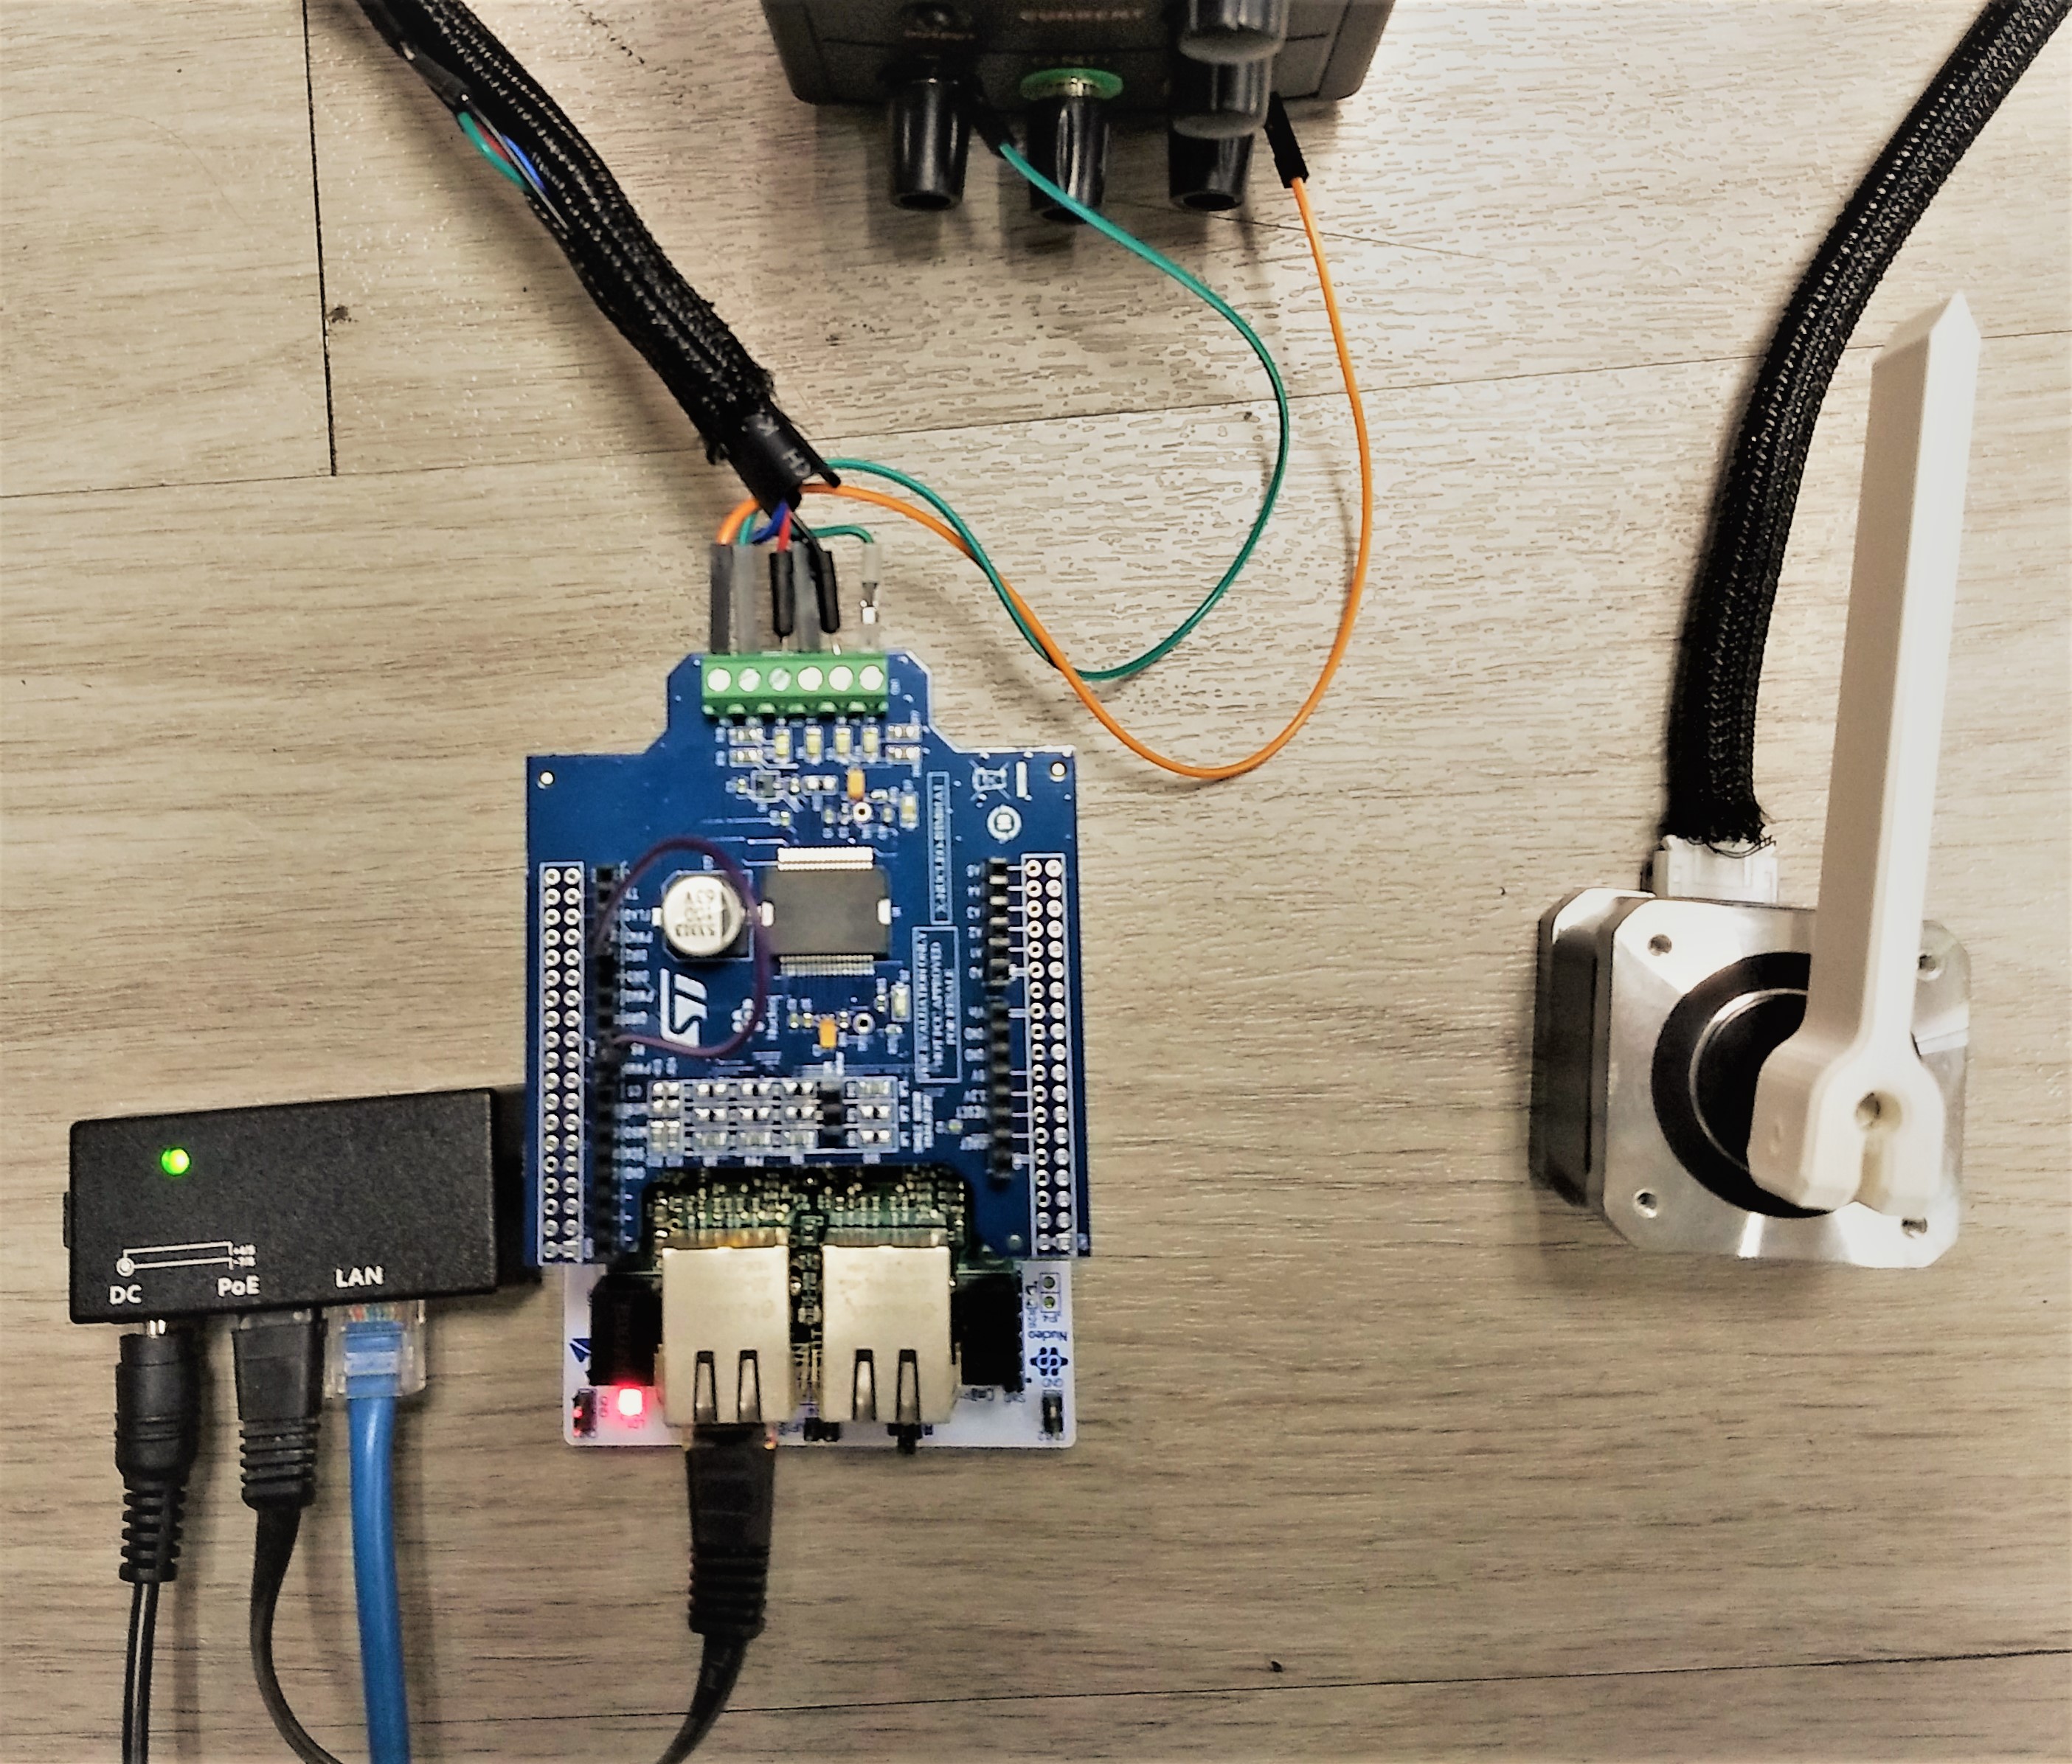
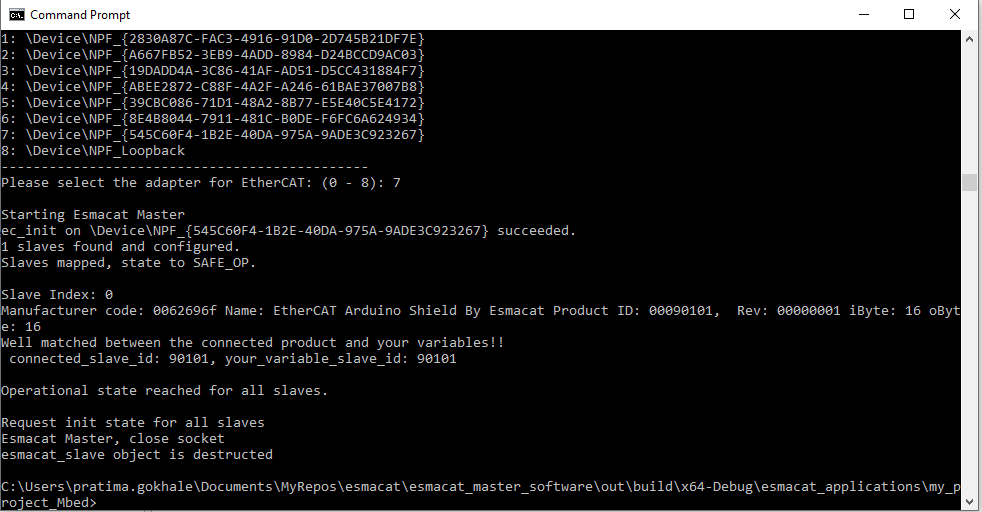
With all the hardware set-up and powered ON, and with the Esmacat Master code running on the PC. The following can be observed on the PC terminal
- The terminal text shows that one slave is connected and it displays the slave id.
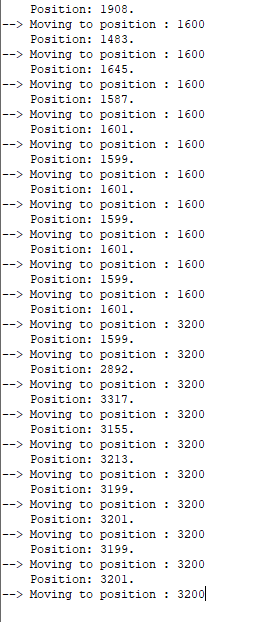
- You will observe that the motor rotates in one direction and stops at a position.
- After sometime the motor rotates in the opposite direction and stops.
- This can be observed in the following figure. The motor moves it attains a position commanded by the Master code.
HelloWorld_EASE_Motor_Example Application Code Description
- To integrate EASE code into any other Shield code, first download the example application of the other shield code.
- In this case because we are using X-NUCLEO-IHM01A1 Stepper Motor shield, download the example application of this shield.
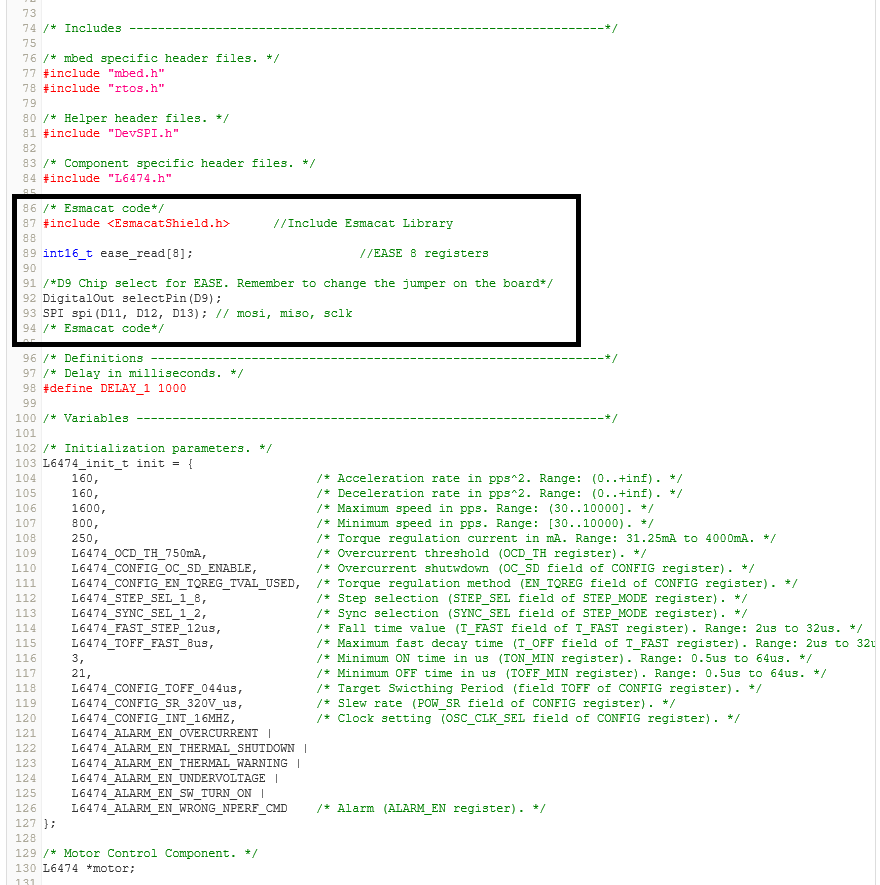
- Then modify the code to incorporate EASE code into it as shown in the figure below. Here the highlighted EASE code is added.
- It defines an array of size 8 holding 16 bit signed integer.
- D9 pin is defined as hip select for EASE.
- spi object is defined with D11, D12 and D13 pins.
- The main function is modified as below.
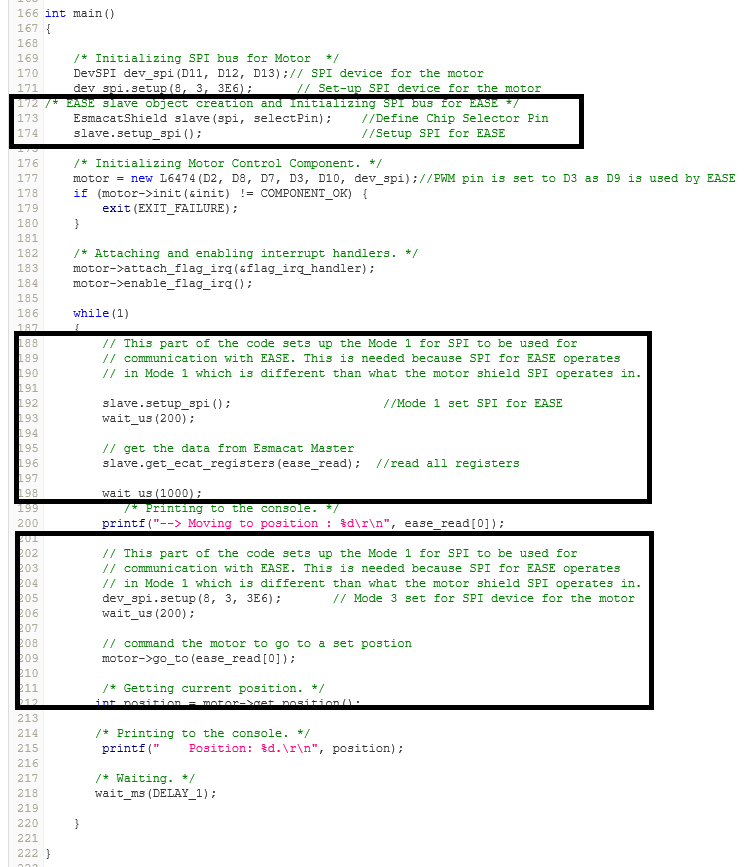
- Important points to remember
- Define EASE slave and setup spi.
- Because Motor and EASE are using same SPI channel but are operating in different modes (EASE operates in Mode 1, Motor operates in Mode 3) so it is necessary to set-up the spi every time an attempt to transfer data to EASE or Motor is made.
- Ensure that same SPI sclk frequency is used for both Motor and EASE.
- Remember to switch the jumper of EASE so that D9 is chip select.
- Make appropriate changes to the Motor shield as we are using pin D3 for PWM instead of Pin D9(default)
Esmacat master Application Code
This section talks about the writing the Master code for the Motor example application.
- Download the "Esmacat Master Software from https://www.esmacat.com/software
- The empty example project under the folder esmacat_applications\my_project could be modified for this purpose.
- Files to be modified my_app.h, my_app.cpp
my_app.h
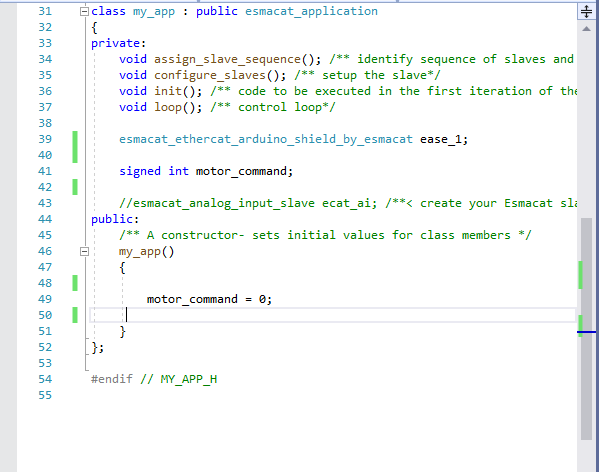
- In the header file, my_app.h, you have to include the corresponding header files for your slave in here. Since we want to use EASE, include esmacat_ethercat_arduino_shield_by_esmacat.h
- Instantiate your slave esmacat_ethercat_arduino_shield_by_esmacat as ease_1.
- If you’re introducing additional variables under the esmacat_application class, include those and initialize them within the constructor. In this example, we will use an integer variable motor_command.
my_app.cpp
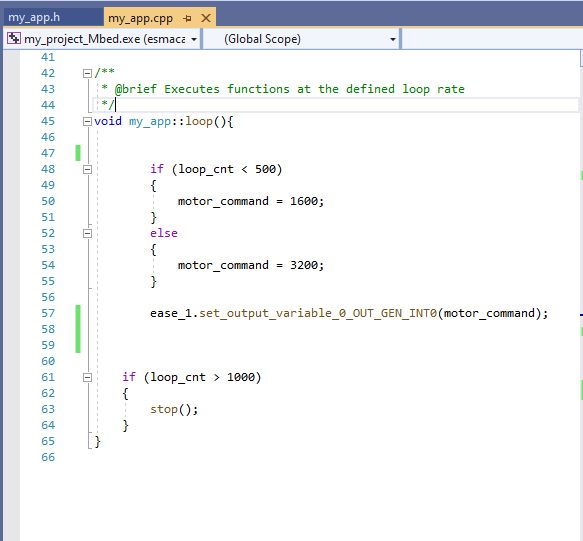
This part of the code is in my_app.cpp
- Assign the slave sequence in the communication chain and link your object instance ease_1 (created in the Header file subsection) in the function assign_slave_sequence with assign_esmacat_slave_index(&ease_1, 0); The index starts from 0. In this example, only one device has been connected. Thus, the index is 0.
- Do not change the function configure_slaves since we do not need to change any configuration of the EASE slave. If you need to change any configuration of other Esmacat slaves later, use this function.
- In the loop() function we are setting motor_command to 1600 if loop_cnt is less than 500 otherwise we are setting it to 3200.
- Then writing this motor_command to ease_1 register 0. Which would eventually be transmitted to EASE via EtherCAT.
- The loop exits after 1000 iterations.
- You do not have to change anything in the main.cpp file