Remotely Controlled Robot Over the Internet using UDP
General Description
This project aims to control a wheeled robot over a RJ45 ethernet connection or a Wifi connection using a Wifly network module. The two DC motors are driven by vnh3sp30 H-bridge drivers. A client computer would use a PHP front-end UI to send commands in UDP packets to the mbed board through the ethernet interface.
A thread was used to set up the Ethernet connection on the mbed and get an IP address. If the connection was successful, the current date and time along with the MAC and IP address assigned to the mbed will be displayed on the TextLCD screen. Next the mbed's IP address can be set as the a target IP address in the PHP user interface. This enables the client running the PHP GUI to send commands to the mbed using a UDP sockets.
The mbed will use the 4th element of a the UDP packet to determine the command to be sent to the two H-bridges that run the left and right motors. For example, Depending on whether buffer[4] is a '+' or '-', the speed of both motors is either increased or decreased by 10%, if buffer[4] is set to 'B', 'L' or 'R', the motors will be stopped, make the robot turn right, left or move in the current direction at full speed, respectively.
Interfacing with the mbed
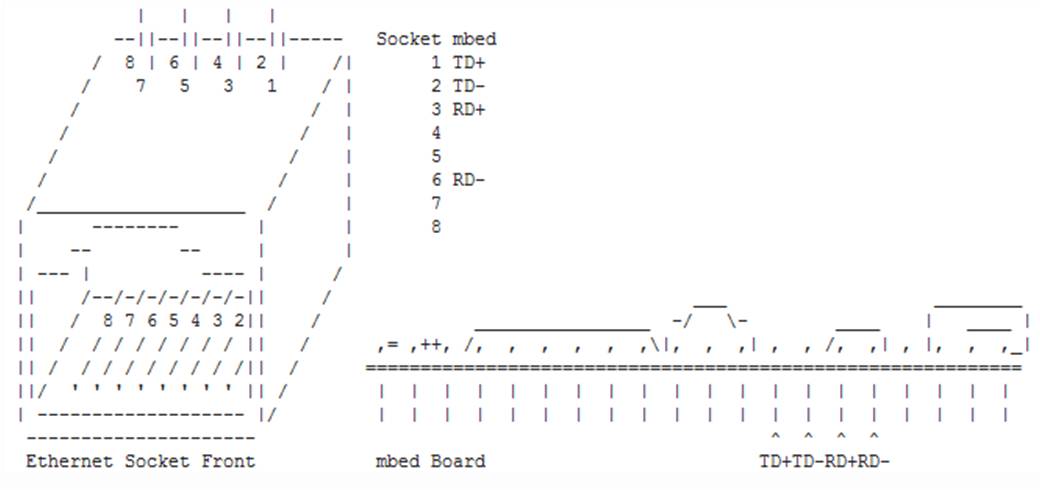
The sparkfun breakout board for the RJ45 Ethernet MDI Jack was used with the following pin mappings between the mbed and the Ethernet adapter.

| Mbed | Ethernet MDI adapter | |||
|---|---|---|---|---|
| TD+ | P1 | |||
| TD- | P2 | |||
| RD+ | P7 | |||
| RD- | P8 |


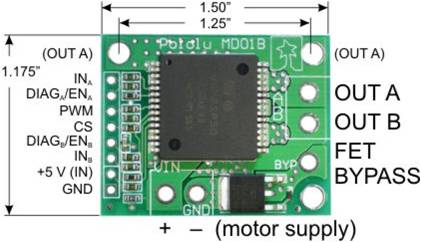
The pinout mappings for each of the two H-bridge drivers and the DC motors are as follows:
| Mbed | H-bridge | Power supply | Motor | |||||
|---|---|---|---|---|---|---|---|---|
| Vu | +5V (IN) | |||||||
| GND | GND | |||||||
| rev | IN_B | |||||||
| fwd | IN_A | |||||||
| Pull high | EN_A | |||||||
| Pull high | EN_B | |||||||
| pwm | PWM | |||||||
| + motor supply | + power supply | |||||||
| GND | - motor supply | Ground of power supply | ||||||
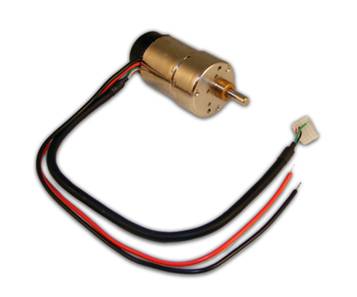
| OUT A | Motor wire 1 | |||||||
| OUT B | Motor wire 2 |
Specifically, for motor 1: p21, p7, p8 represented the pwm, fwd, rev pins on the mbed and for motor 2, p22, p5, p6; represented the pwm, fwd, rev pins on the mbed.
Finally the pinout mappings for the TextLCD screen is as follows:
| Mbed pins | GND | 5V | GND via 1k resistor | p15 | GND | p16 | p17 | p18 | p19 | p20 | ||||||||||||
|---|---|---|---|---|---|---|---|---|---|---|---|---|---|---|---|---|---|---|---|---|---|---|
| TextLCD pins | GND | VCC | VO | RS | RW | E | D4 | D5 | D6 | D7 |
Wifly RN-131G is an 802.11G networking module which we used to connect to GTother network of Georgia Tech. There are several mobile wireless applications of this module so by following this page for the correct connections and configuration, one will be able to do a lot of cool stuff with this module.
Information
Program Code
Import programRobot_Control_UDP_Ethernet
Control a robot over the internet using UDP and a Ethernet interface.
Wifly Module
We encountered numerous troubles trying to get the wifly module working on the Georgia Tech network. The best advice is to make sure the programs at the wifly cookbook page work as intended. If that does not work, turn on the debugging in /WiflyInterface/Wifly/Wifly.cpp at line 25, and look at the corresponding outputs in a terminal window, and search any issues on mbed site or Google. In our case, we were able to receive UDP packets on the mbed through the Wifly module (separate program). However, when the same exact code and libraries were incorporated into our main program, the Wifly module and/or WiflyInterface would halt after the Wifly has entered the command mode. Unfortunately, we were not able resolve the issue still, but the included coded should theoretically work. If you are able to get it working (stock or a modified version), please let me know.
Import programRobot_Control_UDP_Wifi
Control a robot over the internet using UDP and a Wifly module (WiFi).
Web Server
To run the web server on a computer, one will need to install a php server. For this project, EasyPHP was used.
Moreover, one will need to configure the firewall to allow incoming connections to the apache server on port 80, so that the web server can be accessed through any network, given the that computer's ip is known. Also, note this may pose a security risk, so don't forget to disable the firewall rule, once the server is not being used.
The following two code blocks show the code that was used to host a web-server on a computer that can send certain commands to an mbed that is listening for commands on a given ip and port.
HTML Code (index.html)
<!DOCTYPE HTML>
<html>
<meta content='width=device-width, initial-scale=1.0, maximum-scale=1.0, user-scalable=0'
name='viewport' />
<head>
<style type="text/css">
input[type=submit] {
width: 12em;
height: 6.5em;
}
</style>
<script src="http://ajax.googleapis.com/ajax/libs/jquery/1.7/jquery.js"></script>
<script src="http://malsup.github.com/jquery.form.js"></script>
<script>
// wait for the DOM to be loaded
$(document).ready(function() {
$('#mbed').ajaxForm(function() {});
});
</script>
</head>
<body>
<form id="mbed" target="_blank" action="mbed.php" method="post">
mbed IP: <input type="text" size="15" name="ip" value="192.168.0.1">
mbed Port: <input type="text" size="5" name="port" value="7"><br><br>
<input type="submit" name="straight" value="Straight">
<input type="submit" name="brake" value="Brake"> <br><br>
<input type="submit" name="increment" value="Faster"> <br><br>
<input type="submit" name="left" value="Left">
<input type="submit" name="right" value="Right"> <br><br>
<input type="submit" name="decrement" value="Slower"> <br><br>
<input type="submit" name="full_speed" value="Full Speed">
<br><br>
Led 1: <input type="text" name="led1" value="0"><br>
Led 2: <input type="text" name="led2" value="0"><br>
Led 3: <input type="text" name="led3" value="0"><br>
Led 4: <input type="text" name="led4" value="0"><br><br><br>
</form>
</body>
</html>
PHP Code (mbed.php)
<?php
$fp = fsockopen("udp://".$_POST["ip"], $_POST["port"], $errno, $errstr);
if (!$fp) {
    echo "$errstr ($errno)<br />\n";
} else {
	$buff = $_POST["led1"].$_POST["led2"].$_POST["led3"].$_POST["led4"];
	if(isset($_POST['increment'])) {
		$buff .= "+";
	}
	if(isset($_POST['decrement'])) {
		$buff .= "-";
	}
	if(isset($_POST['full_speed'])) {
		$buff .= "F";
	}
	if(isset($_POST['brake'])) {
		$buff .= "B";
	}
	if(isset($_POST['left'])) {
		$buff .= "L";
	}
	if(isset($_POST['right'])) {
		$buff .= "R";
	}
	if(isset($_POST['straight'])) {
		$buff .= "S";
	}
	fwrite($fp, $buff);
    fclose($fp);
}
?>
Please log in to post comments.
