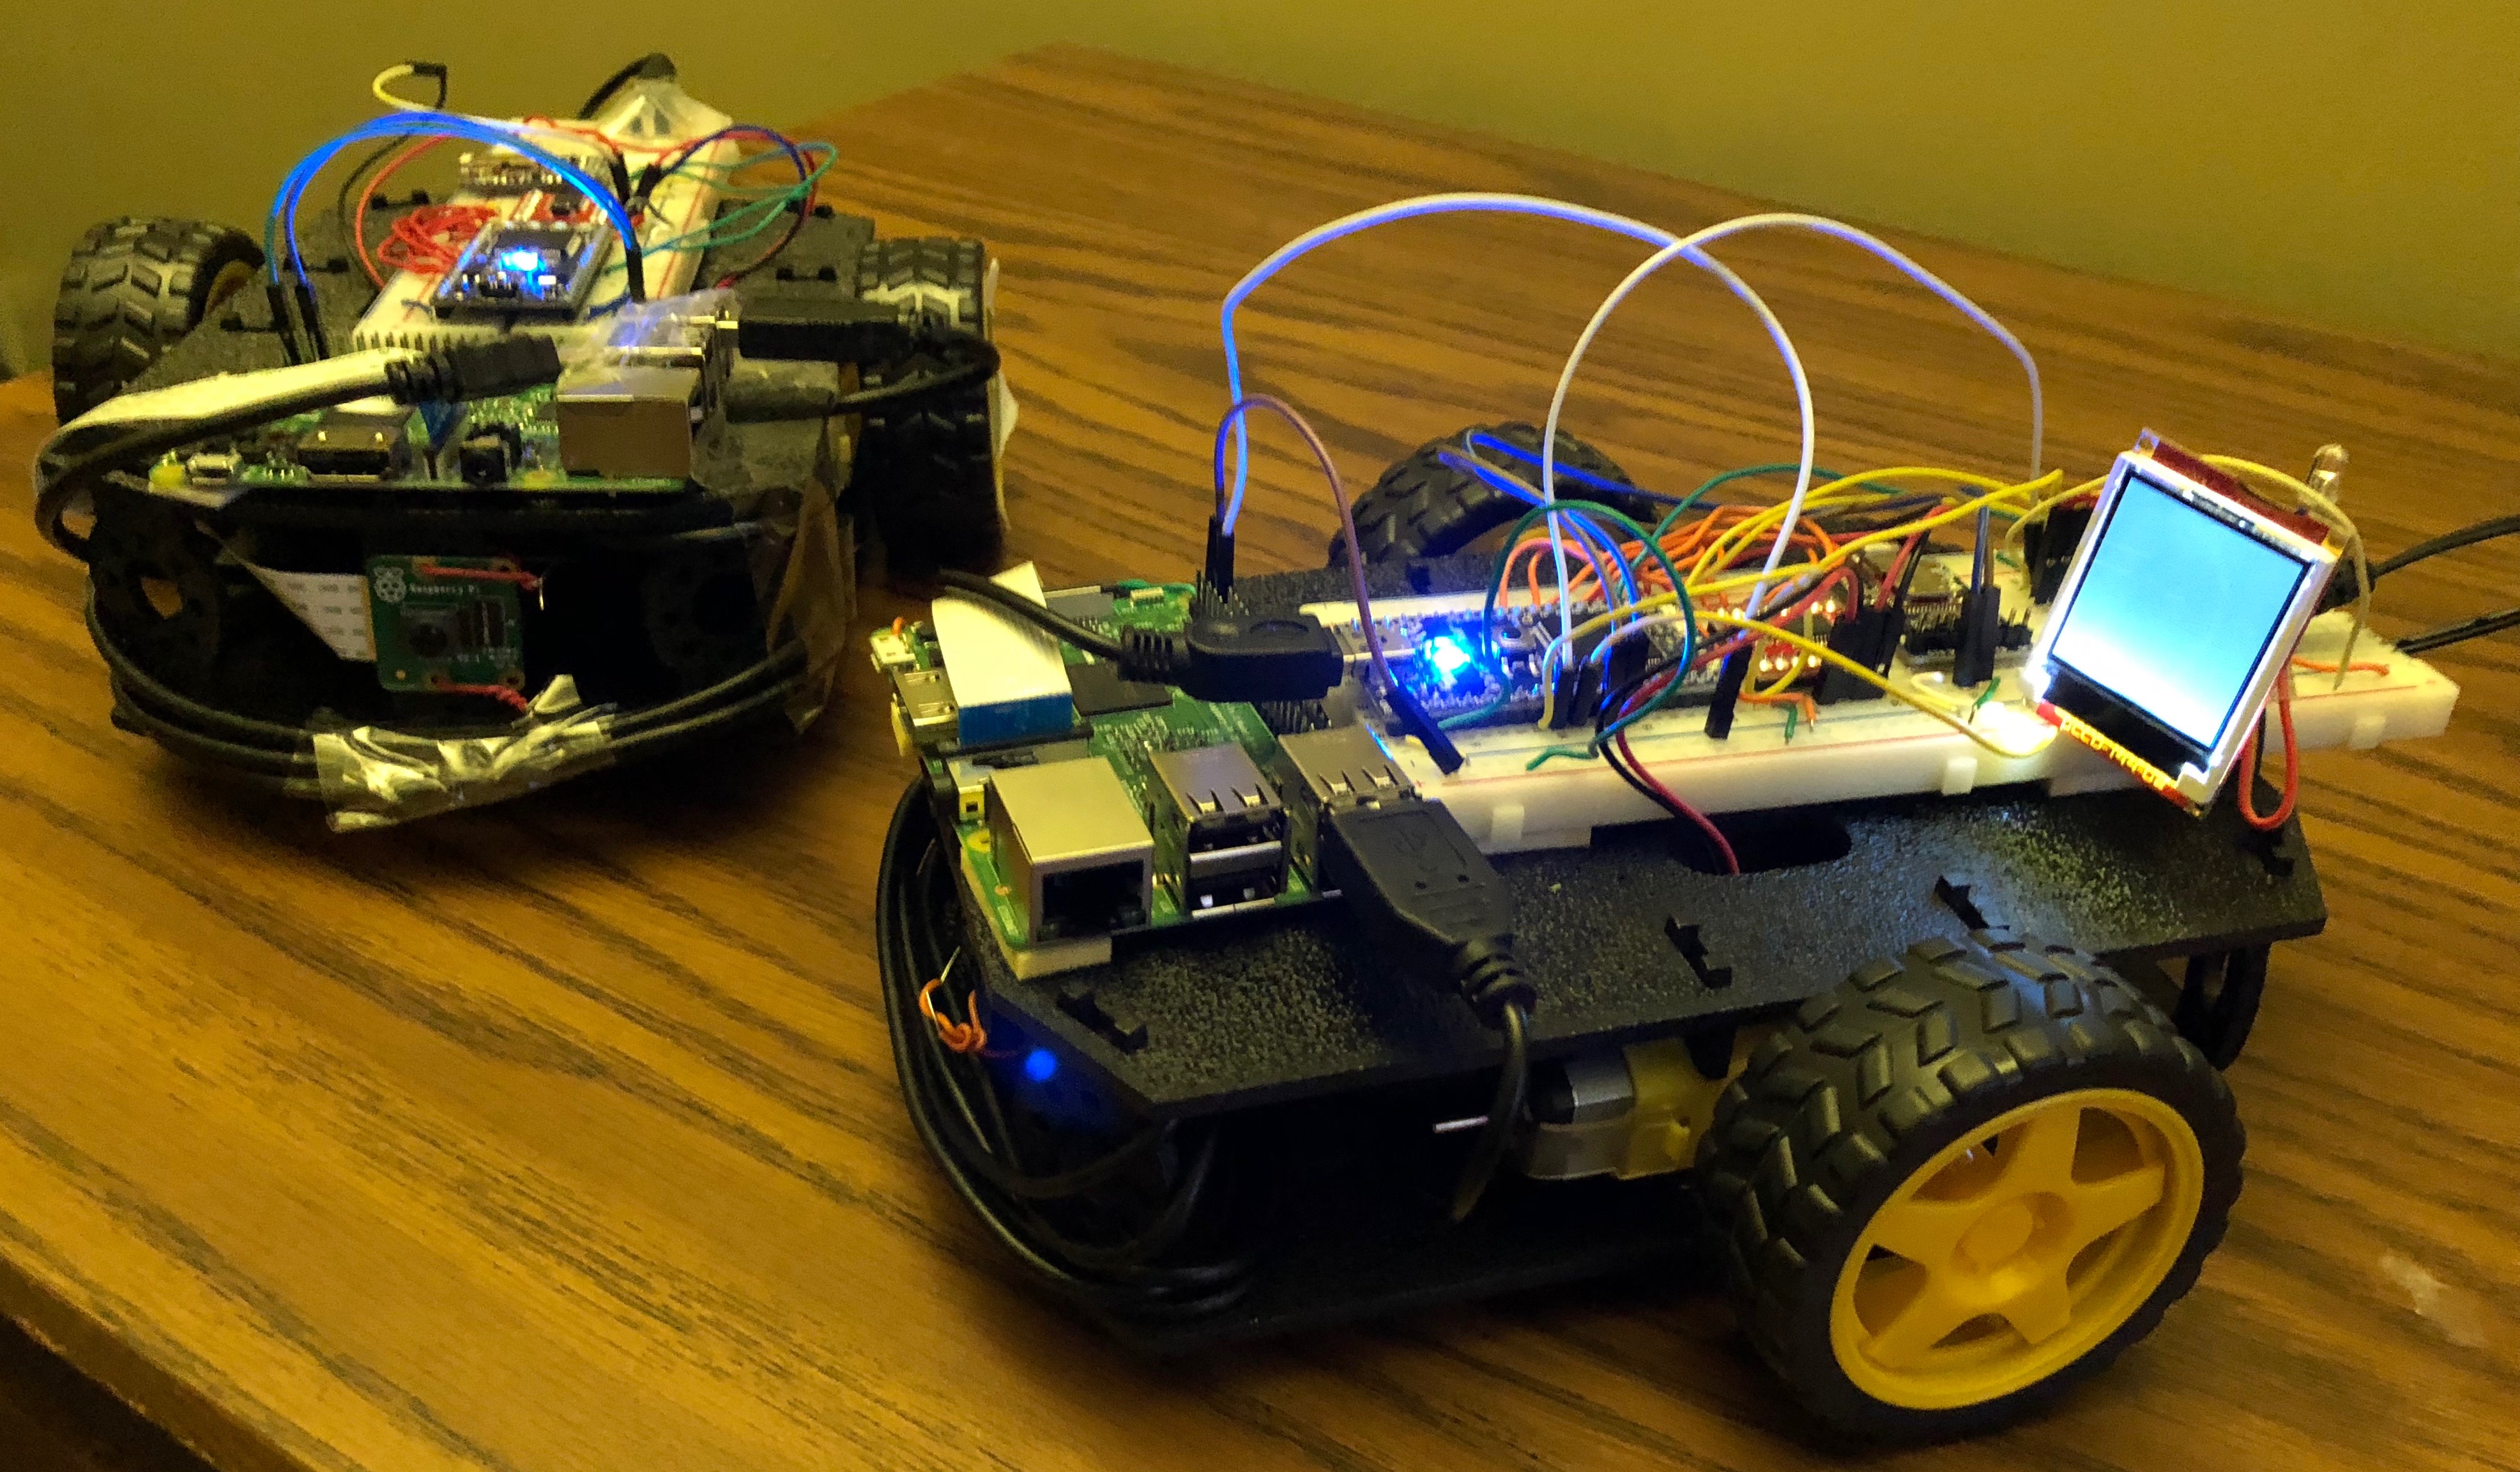
Multimodal Robot Car

Overview
The purpose of this project is to create a multi-function vehicle that allows the user to perform a variety of tasks that are defined below:
Mode 1: Bluetooth Control
When a user connects to the Multimodal Robot with the Adafruit Bluefruit mobile application, the controller (up, down, left, and right buttons) can be used as a joystick to control the robot’s direction.
Mode 2: Hide and Seek
When a user selects ‘2’ on the Bluefruit application, the robot enters Mode 2: Hide and Seek. In this mode, the robot begins to rotate in search of a specific object - for testing purposes, this is a green circle. Once this object is detected using a Pi Camera Module and OpenCV, the robot autonomously adjusts itself accordingly and moves forward towards the object. An RGB LED also flashes green to indicate that the object has been detected.
This mode can be used simultaneously with another robot that is in Mode 1. As the demo at the bottom of the page shows, the user is able to move one robot manually while the other is in Mode 2. The object detection algorithm will continue to work properly and will detect the other robot.
Components
- Mbed Microcontroller
- Raspberry Pi 3
- Raspberry Pi 3 Camera Module
- H-Bridge: TB6612FNG Breakout
- Bluetooth Module
- uLCD: uLCD-144-G2
- Sparkfun Black Robot Kit
Hardware Connections
H-Bridge
| mbed | H-Bridge | DC Motors |
|---|---|---|
| GND | GND | |
| VOUT | +3.3V | |
| VIN | VMOT (+5V) | |
| p21 | PWMB | |
| p22 | BIN2 | |
| p23 | BIN1 | |
| p24 | AIN1 | |
| p25 | AIN2 | |
| p26 | PWMA | |
| AO1 | Right Motor + | |
| AO2 | Right Motor - | |
| BO1 | Left Motor + | |
| BO2 | Left Motor - |
Bluetooth Module
| Bluetooth Module | mbed |
|---|---|
| CTS | GND |
| GND | GND |
| RX | p13 |
| TX | p14 |
| VIN | +5V |
uLCD
| uLCD | mbed |
|---|---|
| RES | p11 |
| GND | GND |
| TX | p10 |
| RX | p11 |
| +5V | +5V |
Software Setup
OpenCV 3 was installed on the Raspberry Pi according to these instructions: https://www.pyimagesearch.com/2015/10/26/how-to-install-opencv-3-on-raspbian-jessie/ . This tutorial assumes that the Raspberry Pi is running Raspbian Jessie. Additionally, LXDE is the chosen desktop environment. After this tutorial, running this snippet of code should enter the python virtual environment where the cv2 module is installed.
Entering the python cv virtual environment
$ source ~/.profile
$ workon cv
To test the installation, attempt to import the cv2 module and print the version after entering the virtual environment and ensure that a version of OpenCV is installed.
Verify installation of cv2
$ python
>>> import cv2
>>> cv2.__version__
'3.0.0'
Now ensure that a python program runs on startup in the cv virtual environment. First go to raspi-config and enable the camera peripheral. Next, run this snippet:
Autostart
sudo vim ~/.config/lxsession/LXDE/autostart
and insert this snippet at the end of the file:
/.config/lxsession/LXDE/autostart
@bash /home/pi/run_cv.sh
Now create the run_cv.sh script in the /home/pi directory with these contents:
run_cv.sh
. /home/pi/.profile
workon cv
python /home/pi/sandbox/circles.py &>/dev/null &
This will enter the python virtual environment and run python /sandbox/circles.py on boot. The &>/dev/null & backgrounds the process and discards all output from stdout and stderr.
Now create a /sandbox/circles.py with this content:
/sandbox/circles.py
import cv2
import numpy as np
import picamera
import picamera.array
import serial
import time
import struct
ser = serial.Serial("/dev/ttyACM0", timeout=1)
ser.baudrate = 9600

while ser.read(1) != 's':
	time.sleep(0.1)

cv2.namedWindow('frame',cv2.WINDOW_NORMAL)

def nothing(x):
	pass

# create trackbars for color change
hstart = 41
hend = 81
sstart = 51
send = 255
vstart = 50
vend = 225
cv2.createTrackbar('hstart','frame',hstart,180,nothing)
cv2.createTrackbar('hend','frame',hend,180,nothing)
cv2.createTrackbar('sstart','frame',sstart,255,nothing)
cv2.createTrackbar('send','frame',send,255,nothing)
cv2.createTrackbar('vstart','frame',vstart,255,nothing)
cv2.createTrackbar('vend','frame',vend,255,nothing)

with picamera.PiCamera() as camera:
	with picamera.array.PiRGBArray(camera) as stream:
		camera.resolution = (320, 240)
		while True:
			time.sleep(0.15)
			camera.capture(stream, 'bgr', use_video_port=True)
			img = stream.array
			imgcpy = img.copy()
			hsv = cv2.cvtColor(imgcpy, cv2.COLOR_BGR2HSV)

			hstart = cv2.getTrackbarPos('hstart','frame')
			hend = cv2.getTrackbarPos('hend','frame')
			sstart = cv2.getTrackbarPos('sstart','frame')
			send = cv2.getTrackbarPos('send','frame')
			vstart = cv2.getTrackbarPos('vstart','frame')
			vend = cv2.getTrackbarPos('vend','frame')

			lower_blue = np.array([hstart, sstart, vstart])
			upper_blue = np.array([hend, send, vend])
			mask = cv2.inRange(hsv,lower_blue,upper_blue)
			imgcpy = cv2.bitwise_and(imgcpy,imgcpy,mask=mask)
			gray = cv2.cvtColor(imgcpy, cv2.COLOR_BGR2GRAY)
			gray = cv2.GaussianBlur(gray,(13,13),0)
			circles = None
			circles = cv2.HoughCircles(gray, cv2.HOUGH_GRADIENT, 1, 10, param1=50, param2=15, minRadius=0, maxRadius=80)
			cexists = False
			if circles is not None:
				circles = np.uint16(np.around(circles))
				for i in circles[0,:]:
					print "Found circle at ", i
					# cv2.circle(gray, (i[0],i[1]),i[2],(0,255,0),2)
					# cv2.circle(imgcpy, (i[0],i[1]),i[2],(0,255,0),2)
					# cv2.circle(img, (i[0],i[1]),i[2],(0,255,0),2)
					ser.write('s')
					ser.write('t')
					ser.write('a')
					ser.write('r')
					ser.write('t')
					ser.write('c')
					if i[2]>53:
						ser.write(struct.pack('I',251))
					else:
						ser.write(struct.pack('I',i[1]))
					cexists = True
					break
			if cexists == False:
				ser.write('v')
				ser.write('w')
				ser.write('x')
				ser.write('y')
				ser.write('z')
				print -1
			# gray = cv2.cvtColor(gray,cv2.COLOR_GRAY2BGR)
			# both = np.concatenate((img,imgcpy,gray), axis=1)
			# height, width = both.shape[:2]
			# both = cv2.resize(both,(int(2.0*width), int(2.0*height)), interpolation = cv2.INTER_CUBIC)
			# cv2.imshow('frame', both)
			if cv2.waitKey(1) & 0xFF == ord('q'):
				break
			stream.seek(0)
			stream.truncate()

		cv2.destroyAllWindows()
This code will run the circle detection code and depends on the USB ports of the mbed and Pi being connected. It will begin once the character ‘s’ is received over serial. Only the y-coordinate of a circle is sent over (the camera is mounted rotated, but this does not matter for circle detection). To denote that a new circle is coming in, ‘startc’ precedes a new y coordinate and ‘vwxyz’ is sent when no circle is detected.
Program
Import programMultiModalRobotSM
Multimodal robot implementing: Manual control Hide and Seek
Demo
Mode 1: Bluetooth Control
Mode 2: Hide and Seek
OpenCV Tuning
The circle detection algorithm can be tuned by uncommenting commented code in circles.py and moving the trackbars. These parameters can then be set as default in the code. See the video below for a demonstration.
Final Hide and Seek Demo
Demo 1: Stationary Target
Demo 2: Moving Target
Please log in to post comments.
