Magician Robot with Bluetooth Remote Control and Hall Effect Wheel Encoders
This page describes how to use a serial Bluetooth module to communicate with a simple robot. Simple feedback control is also implemented in order to ensure that the robot moves in a straight line. This is because not all motors are equal, so one wheel usually dominates over the other.
Parts Used
Magician Robot
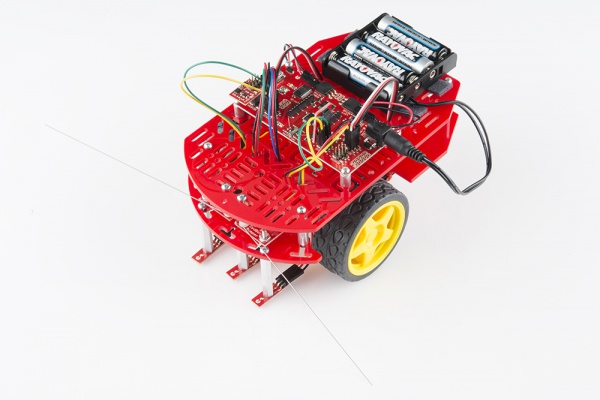
https://www.sparkfun.com/products/10825
Hall effect Encoder
https://www.sparkfun.com/products/12629
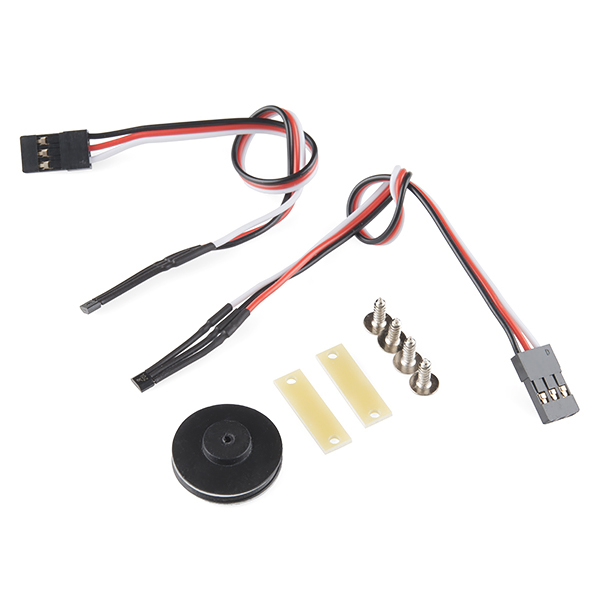
Encoder set up:
https://learn.sparkfun.com/tutorials/redbot-assembly-guide-rev-02/wheel-encoder
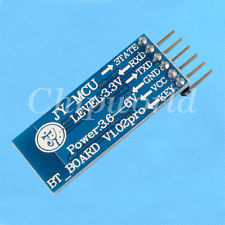
JY-MCU Serial Bluetooth Module
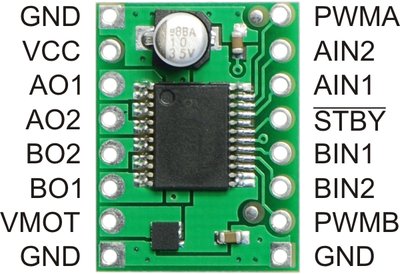
TB6612FNG Dual Motor Driver Carrier
http://www.pololu.com/product/713
Other Parts
- mbed
- Android smartphone
- MIT App Inventor
Wiring
The wiring for the mbed, motors, batteries, and H-bridge can be found at http://developer.mbed.org/users/4180_1/notebook/sparkfun-magician-robot-base-kit/
The remaining wiring is shown below:
| mbed | JY-MCU | Encoder Left | Encoder Right |
|---|---|---|---|
| p9 | Tx | ||
| p10 | Rx | ||
| p19 | Data Wire | ||
| p20 | Data Wire | ||
| Vout | Vcc | Red Wire | Red Wire |
| GND | GND | Black Wire | Black Wire |
App Development
The app was developed using MIT App Inventor. It is pretty simple to use once you get the hang of it.
Here is an image of my app layout:
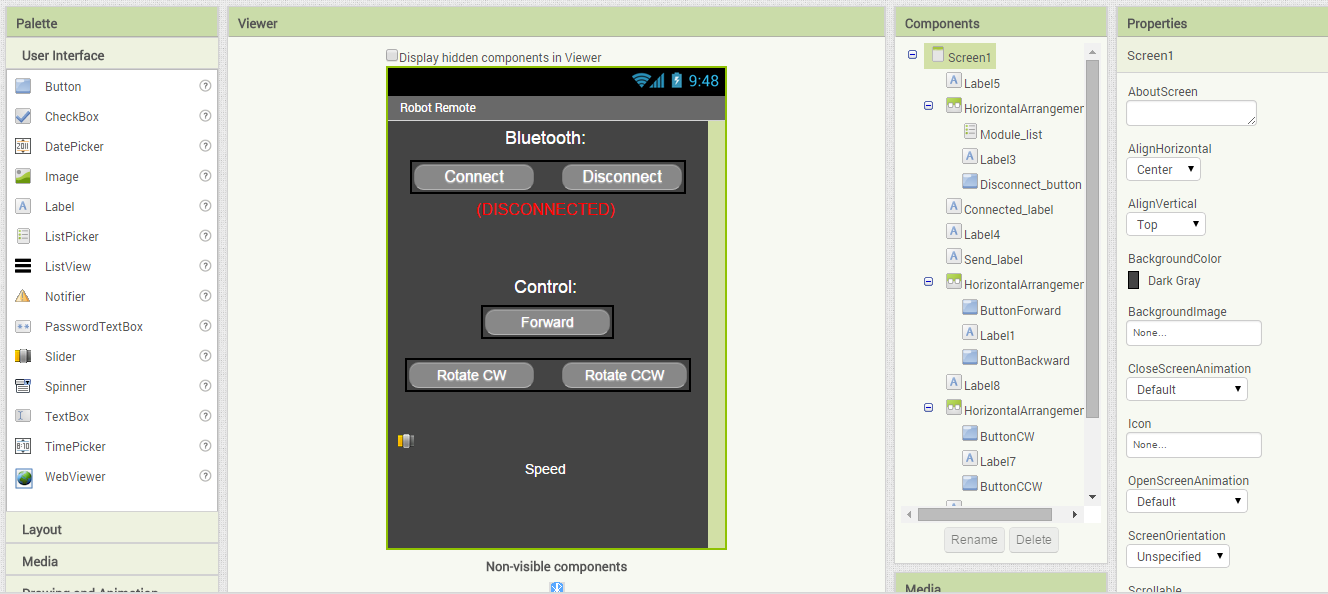
Be sure to add the Bluetooth module to the app - it is hidden from view in mine. Below are some images of the "Block" code in my app.
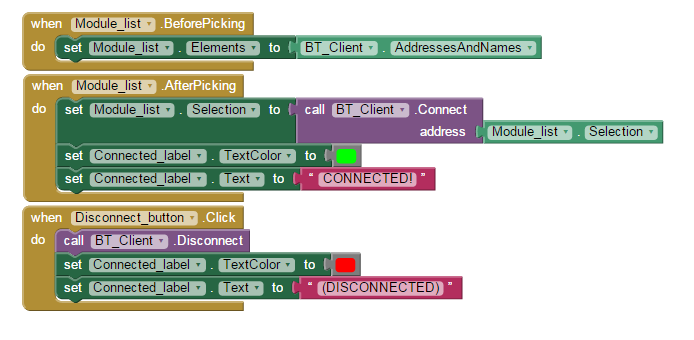
Setting up Bluetooth connection:
Setting up Buttons to send Bluetooth data:
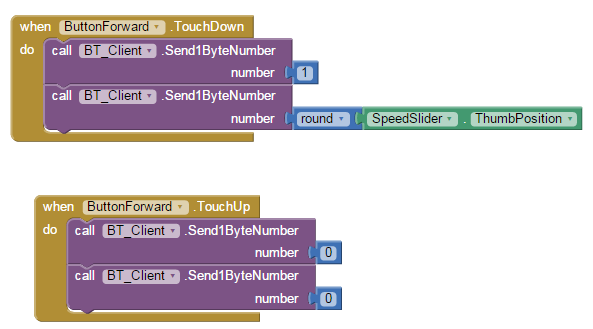
These button blocks can be copied for other instructions to be sent. The scheme is simple: when the button is pressed, the number 1 is sent over Bluetooth, followed by the speed slider setting. The first number represents an instruction call, which is interpreted by the mbed code to mean Forward. In my set up, instructions 3 and 4 represent rotations.
When the user releases the button, the instruction 0 is sent out. In my mbed code, 0 is interpreted as a stop. This means that the robot moves forward when the user is holding the button, and stops when it is released.
A lot of tweaking and customization can be done in the app development. One more thing to note is that the speed slider in my code is set to range from around 20 to around 90. This is because at motor speeds less than 20%, the robot usually doesn't have enough power to move. Also, if the speed could be set all the way to 100%, the feedback control may not be able to adjust the wheels to matching speeds.
Code
Code to make the Bluetooth remote work (without feedback control) can be found at the following link:
http://developer.mbed.org/users/Garr12100/code/Magician_Bluetooth_Remote/
In this program, the mbed reads in the Bluetooth communication data, interprets instructions, and moves the robot motors. You will likely notice that the robot veers to one direction.
Code for the full program (including feedback control):
http://developer.mbed.org/users/Garr12100/code/MagicianWithBluetoothandEncoder/
This program uses a simple proportionality feedback control to ensure that the motors move at the same speed. Every 20ms, the encoders are checked. The program assumes that the left wheel is moving at the correct speed. The difference between the encoder values represents the error for the right wheel, and it is adjusted based on this error to get to the same speed as the left wheel. You will likely notice the robot slightly adjusting direction. This is more apparent at slow speeds.
Future work that could improve this project includes the addition of a reverse button, specific target speed for both motors (as opposed to simply making one match the other), and using the encoders to measure distance traveled.
Video
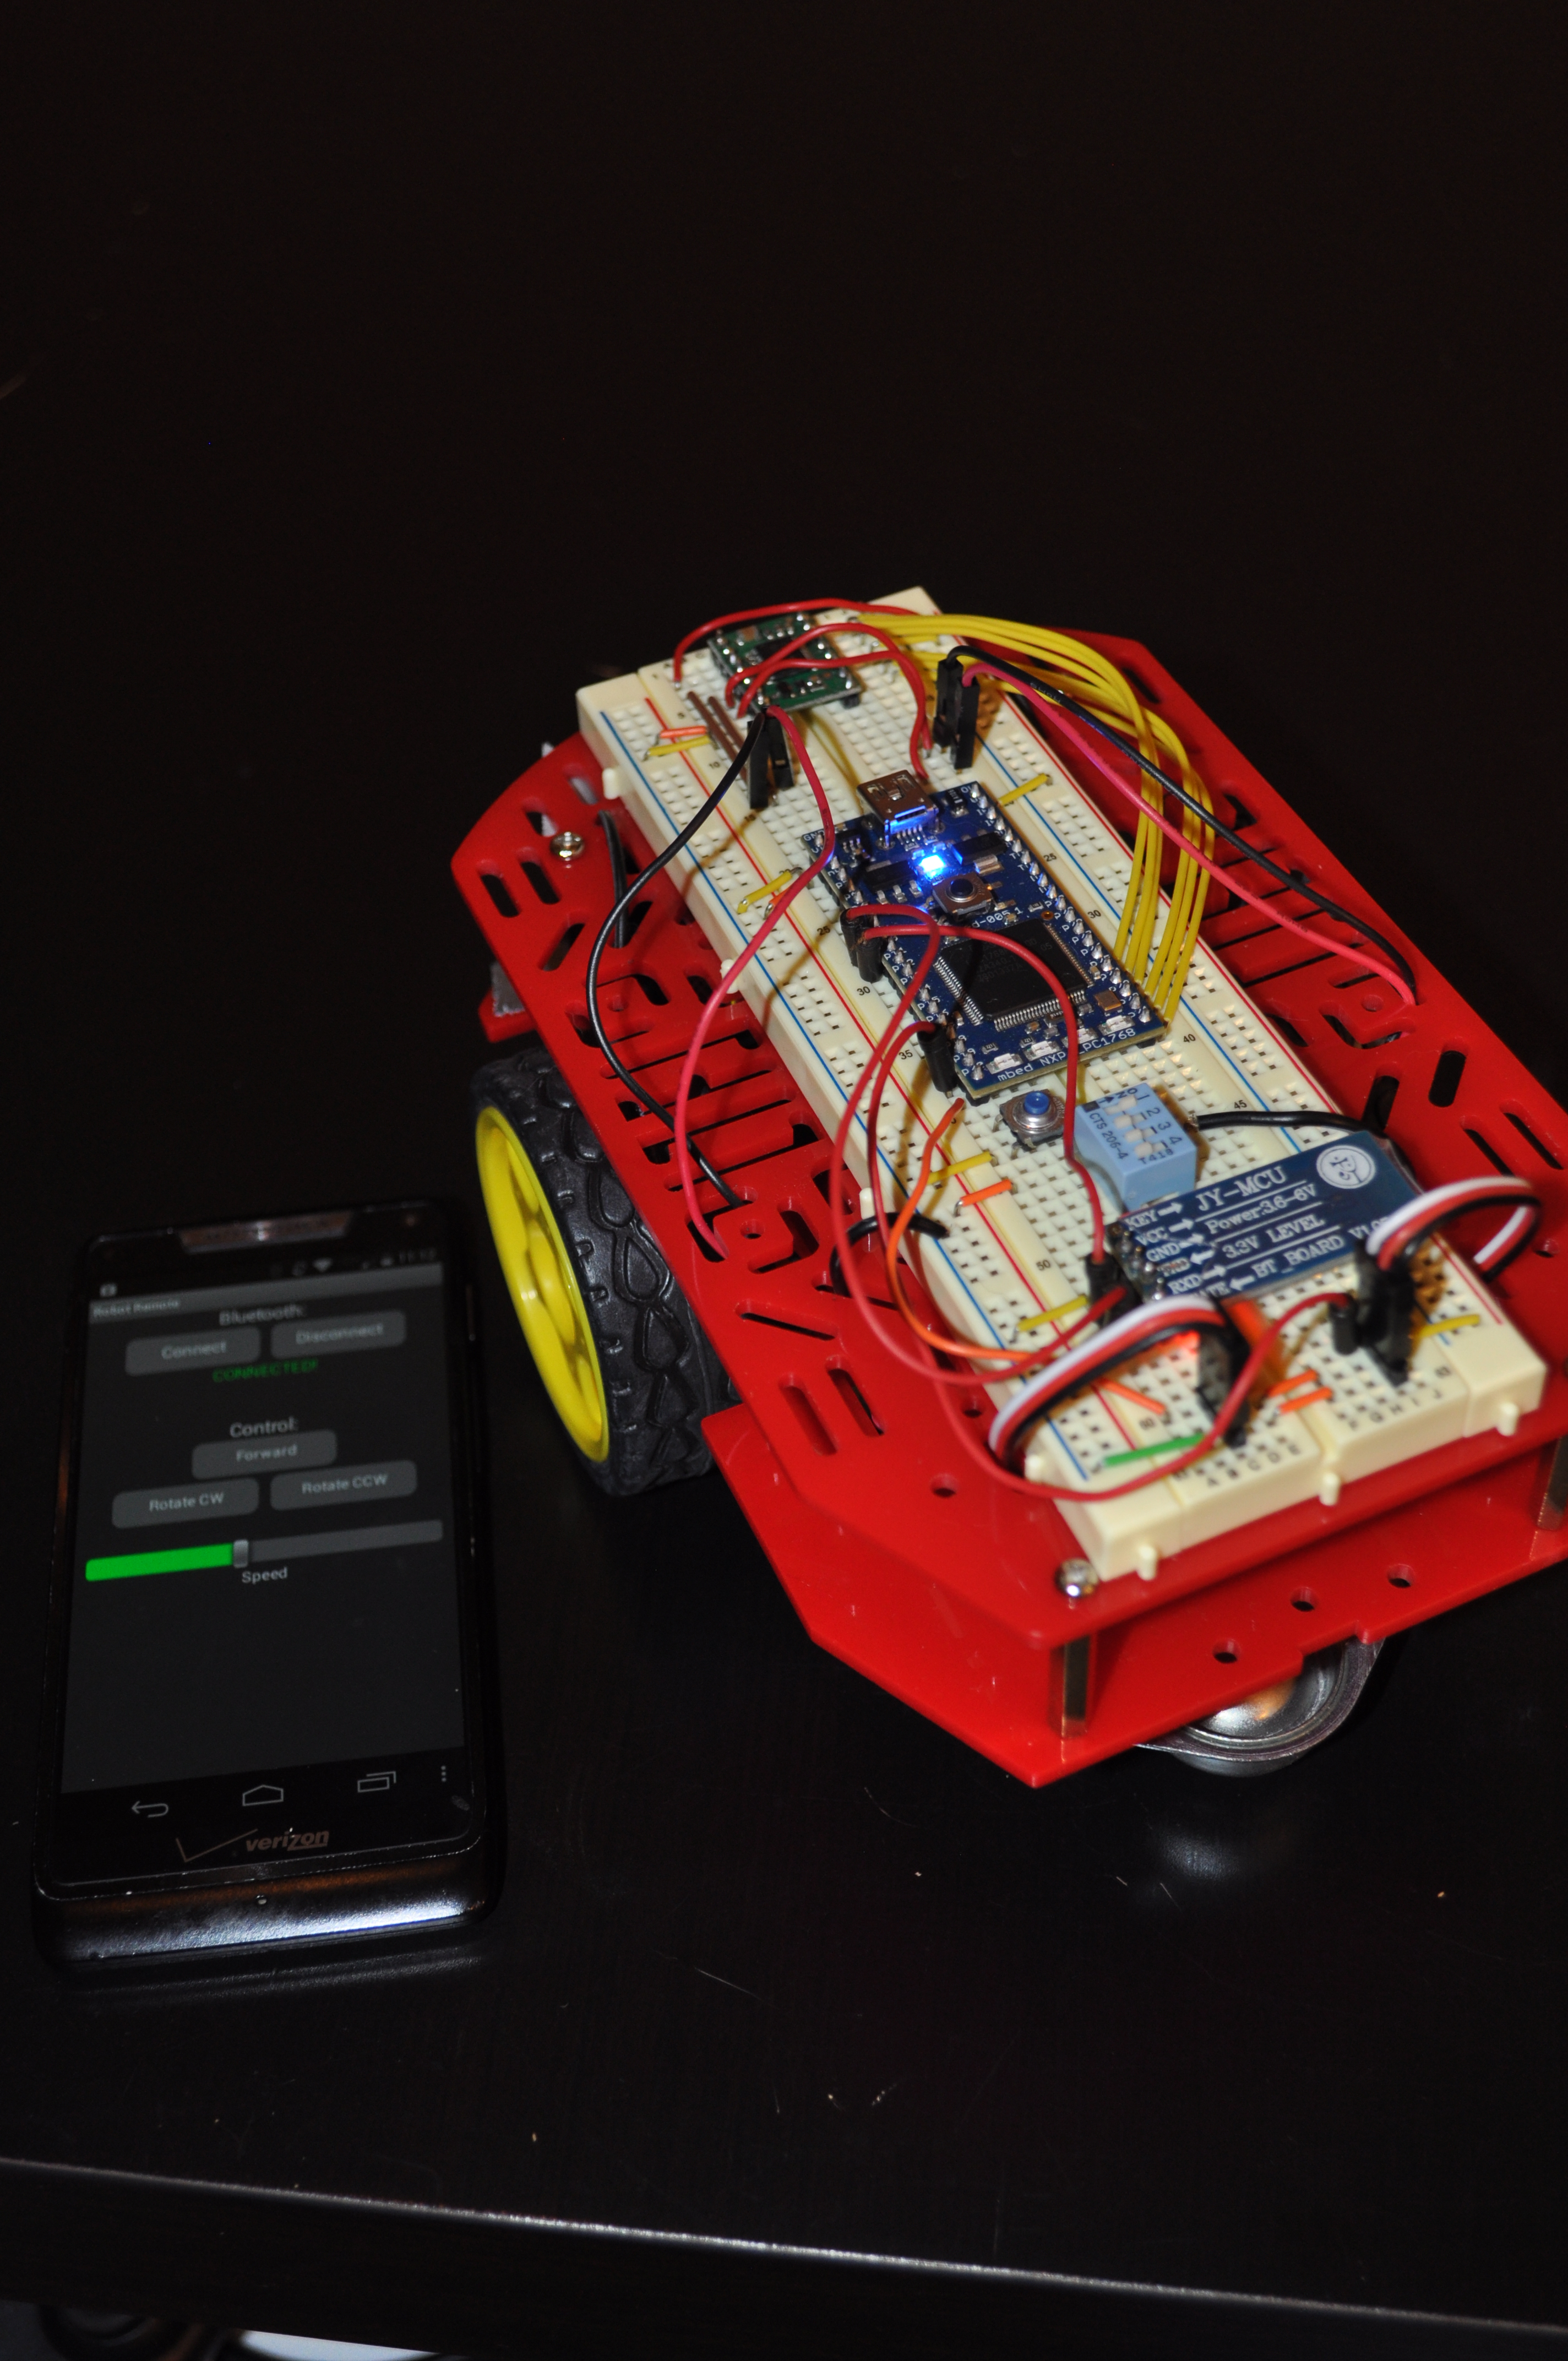
The camera had trouble focusing on the phone, but first I press the Connect button and select the Bluetooth module to pair with. The I press the Forward button and demonstrate different settings of the Speed slider.
Please log in to post comments.
