You are viewing an older revision! See the latest version
NAMote 72 wiki
Overview
This Wiki page describes how to setup a NAMote 72 platform and implementing the available test code. The NAMote 72 Platform module is intended to enable a quick and easy range test of the Semtech SX1272 LoRa device as well as test bench performance and communication tests.
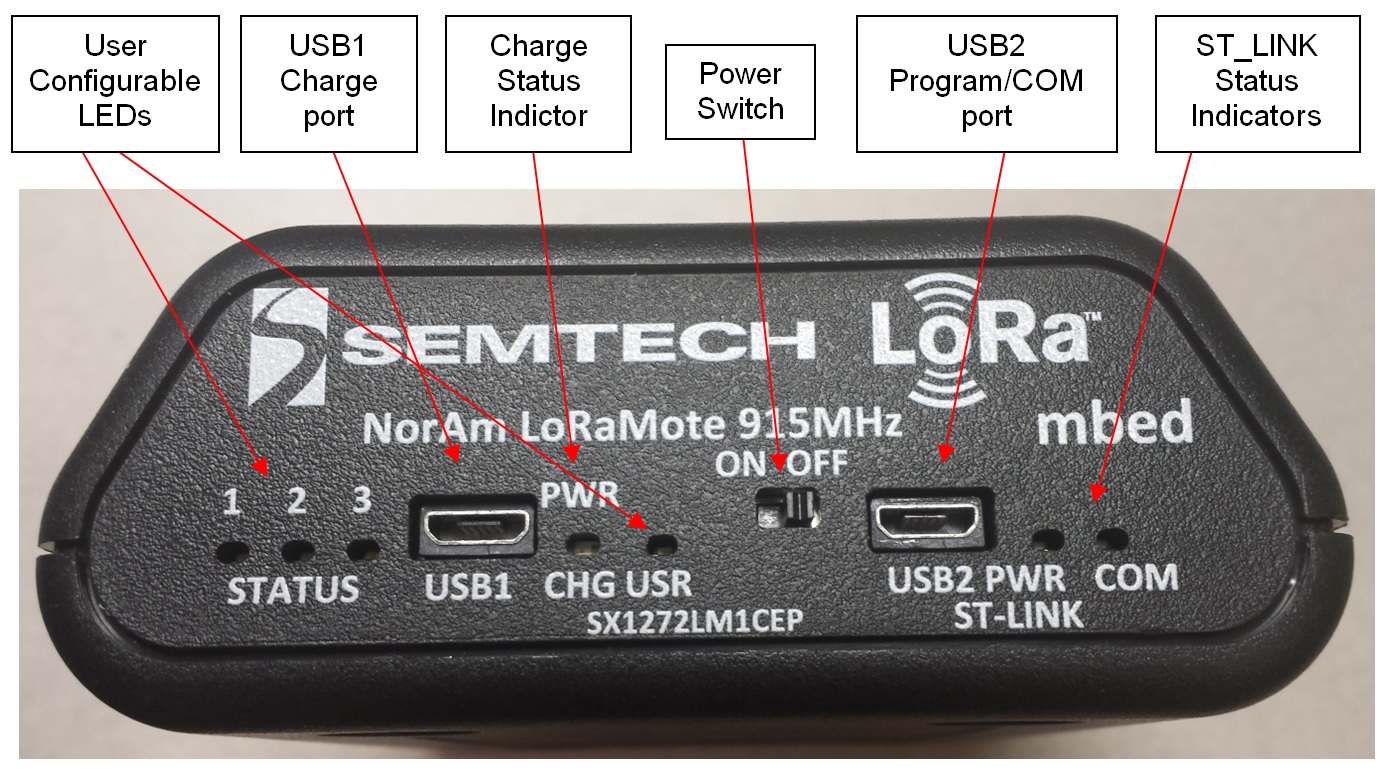
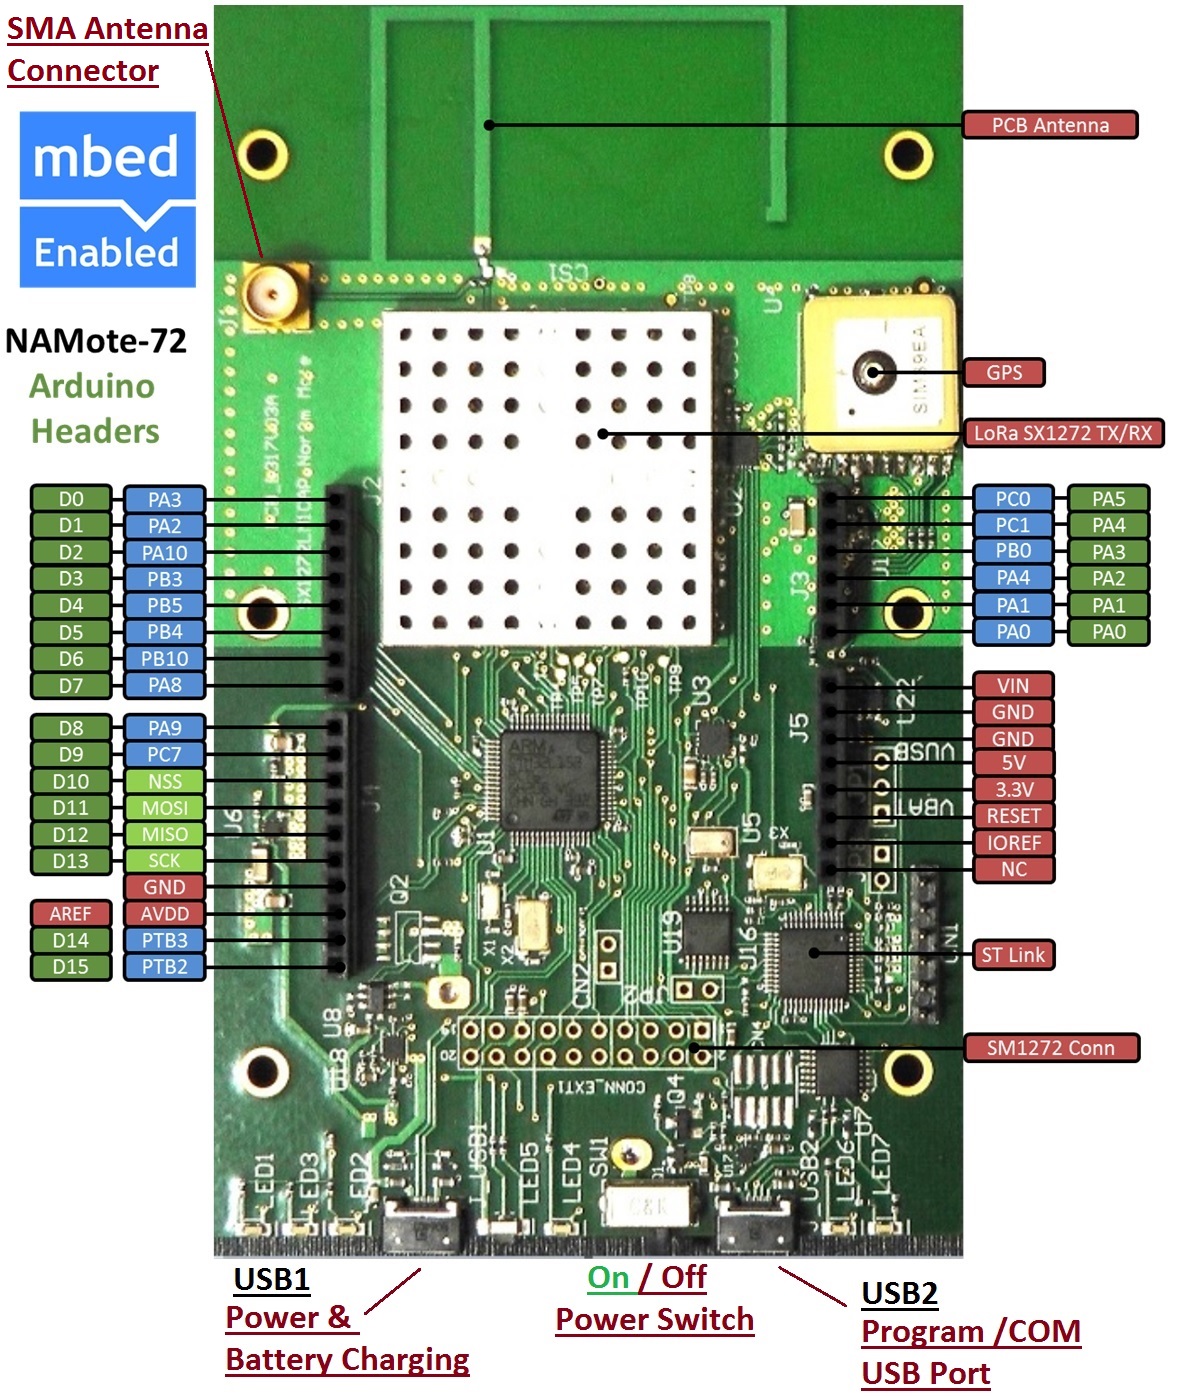
The front panel and pinout diagrams below shows the commonly used interfaces and their locations.
USB1 Charge Port - The USB1 Charger port connects to an external USB wall charger or host computer USB port. Under low battery conditions, the charger can supply up to 700mA to recharge the battery while also powering the module. This charge status indicator LED will illuminate red when the battery is charging and green when fully charged.
User Configurable LEDs - There are four LEDs provided which, under user control, can be used to provide module status. LED1 is red, LED2 is green, LED 3 is yellow and LED USR is red.
Power Switch - This switches on the battery to power the module. When this switch is in the OFF position, and a charger is connected to USB1, all charge current is directed to the battery. When a charger is connected and the switch is on, a portion of the charge current charges the battery and a portion helps power the module.
USB2 Program/COM port - This port serves two functions. When connected to the Host PC through the USB cable, a mbed mass storage device will appear on the Host PC, permitting the user to program the module. In addition, a virtual com port will also appear, enabling serial communication with user firmware. The ST-Link status indicators show programming status. Green indicates successful download.


Connecting the Platform
1. Connect the micro USB connector to the NAMote72 USB2 Input (Images above) and the other end to a PC
2. Ensure Connecton to PC and Virtual Drive Listing
Image to be entered
3. The NAMote 72 will start to run the application that is curently programmed
Programming the Platfrom
1. Import the appropriate Application Example (Test Code) into the mbed Compiler
Import programna_mote1
hardware test utility for North American Lora-Mote
2. Select NAMote 72 as the Platform and Compile Application
Image to be entered
3. Select where to store the .bin programming file (in My Downloads by Default)
4. Programming the Platform
Save the program binary file (.bin) to your mbed Virtual Disk Labeled NAMOTE72, just like you would with a normal USB disk. The Status LED will flash as the PC writes the file to the Microcontroller disk. The .bin file is now programmed into the platform.
Image to be entered
5. The microcontroller will reset after programming and the last programmed application will begin to run.
Starting Test Code Application
1. Setup Serial Terminal Monitor (HyperTerm, Putty, TeraTerm, etc.)
2. Determing the Virtual COM port that the NAMote 72 platform is using
Images to be entered
3. Setup Serial Terminal Monitor at 57600 baud and start connecton
Image to be entered
Working with Test Code Applications
1. Command Listing
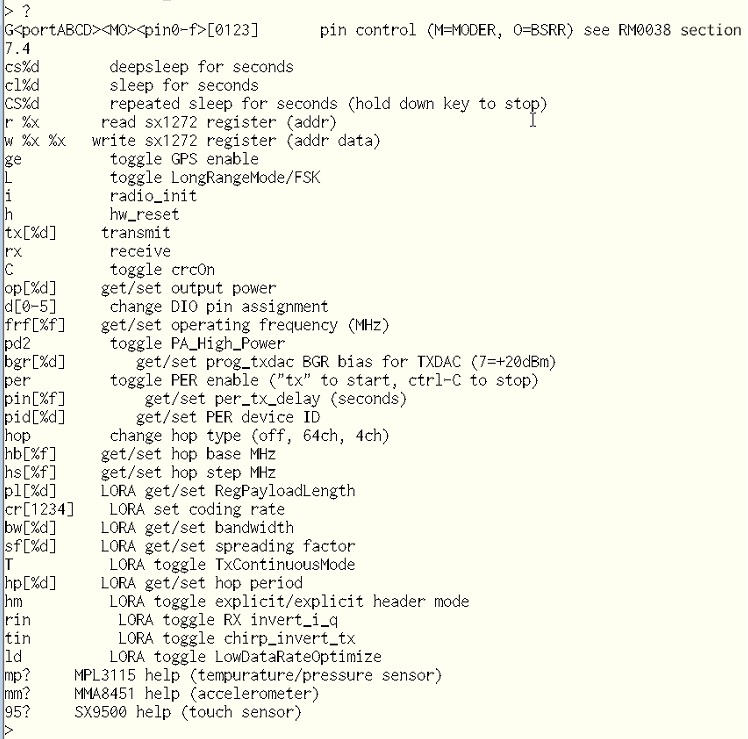
As listed below, enter ? after serial terminal monitor is running to see the full menu of NAMote 72 platform commands.
More detail to be completed explaing each command.

2. Chat Application
More details to be entered explaining the chat application
Where to Next
Follow the guide to creating your own programs using the online compiler
Schematics
Links to be entered
Data Sheets and other relevant NAMote 72 Technical Information
SX1276 Datasheet
LoRa Modem Designer's Guide
LoRa Low Energy Design Guide
LoRa Calculator: fast evaluation of link budget, time on air and energy consumption
Interface Firmware
Firmware update procedure to be entered
